
35
Digital Clock with Date using JavaScript, Html & CSS
In this article you are going to learn how to create digital clock using HTML CSS and JavaScript programming code. Earlier I showed many more types of clock designs. There are basically two types of watches, one analog and the other digital.
To create this digital clock, you must first create an HTML file. In this case I have used very little CSS programming code. So in this case, even if you do not create a separate CSS file.
The following programming code is the basic HTML and CSS structure of this watch that was originally used to design and background design this watch.
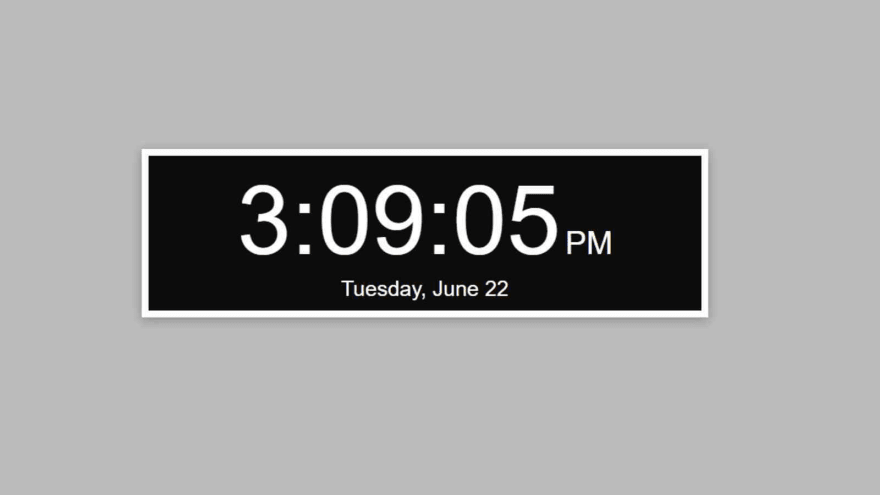
If you have seen the demo, you will understand that in this case I have used a rectangular box and put a border(border: 7px solid rgb(255, 252, 252);) around that box. Time and date can be seen in that box. Box-shadow(box-shadow: 0 2px 10px 0 rgba(0,0,0,0.16), 0 2px 10px 0 rgba(0,0,0,0.12);) has been used around this box.
<div class="time">

   </div>
body {
font-family: "Work Sans", sans-serif;
margin-top: 150px;
background: #bbbcbd;
margin-left: 70px;
}
.time {
background: rgb(12, 12, 12);
color: #fff;
text-align: center;
width: 500px;
border: 7px solid rgb(255, 252, 252);
padding: 8px;
box-shadow: 0 2px 10px 0 rgba(0,0,0,0.16), 0 2px 10px 0
rgba(0,0,0,0.12);
}
There are basically three types of options in this watch, time view, AM / PM and date view. The following HTML and CSS programming codes have helped to create and design these three options.
In this case I have set a specific front size for each. If you want, you can change the size to your liking.
<span class="hms"></span>
        <span class="ampm"></span>
        <br>
        <span class="date"></span>
.hms {
font-size: 68pt;
font-weight: 200;
}
.ampm {
font-size: 22pt;
}
.date {
font-size: 15pt;
}
So far we have only designed this digital watch, now we will implement this digital watch. You must know the basic JavaScript programming code for this. I will make arrangements to see everyone's first time and add AM / PM option with it.
If you know basic JavaScript then surely you can understand the code below.
function updateTime() {
  var dateInfo = new Date();

  /* time */
  var hr,
    _min = (dateInfo.getMinutes() < 10) ? "0" + dateInfo.getMinutes() : dateInfo.getMinutes(),
    sec = (dateInfo.getSeconds() < 10) ? "0" + dateInfo.getSeconds() : dateInfo.getSeconds(),
    ampm = (dateInfo.getHours() >= 12) ? "PM" : "AM";

  // replace 0 with 12 at midnight, subtract 12 from hour if 13–23
  if (dateInfo.getHours() == 0) {
    hr = 12;
  } else if (dateInfo.getHours() > 12) {
    hr = dateInfo.getHours() - 12;
  } else {
    hr = dateInfo.getHours();
  }
// Add to time format

  var currentTime = hr + ":" + _min + ":" + sec;


  // AM/ PM options

  document.getElementsByClassName("hms")[0].innerHTML = currentTime;
  document.getElementsByClassName("ampm")[0].innerHTML = ampm;


/*  Add Date options */


// print time and date once, then update them every second
updateTime();
setInterval(function() {
  updateTime()
}, 1000);
Above we have added JavaScript code for this in time. This time we will implement the date as you saw in the demo above. In this case we have added the date, month, etc.
/* date */
  var dow = [
      "Sunday",
      "Monday",
      "Tuesday",
      "Wednesday",
      "Thursday",
      "Friday",
      "Saturday"
    ],
    month = [
      "January",
      "February",
      "March",
      "April",
      "May",
      "June",
      "July",
      "August",
      "September",
      "October",
      "November",
      "December"
    ],
    day = dateInfo.getDate();

  // store date
  var currentDate = dow[dateInfo.getDay()] + ", " + month[dateInfo.getMonth()] + " " + day;

  document.getElementsByClassName("date")[0].innerHTML = currentDate;
};
Hope you learned from this tutorial how I made this digital watch. If you have any difficulty in understanding, of course you can comment. I have made many more designs like this, you can follow the designs if you want. You must let us know how you like this design by commenting.
You can visit my blog for more tutorials like this.
https://www.foolishdeveloper.com/
35