39
Build a Link Shortener with Cloudflare Workers
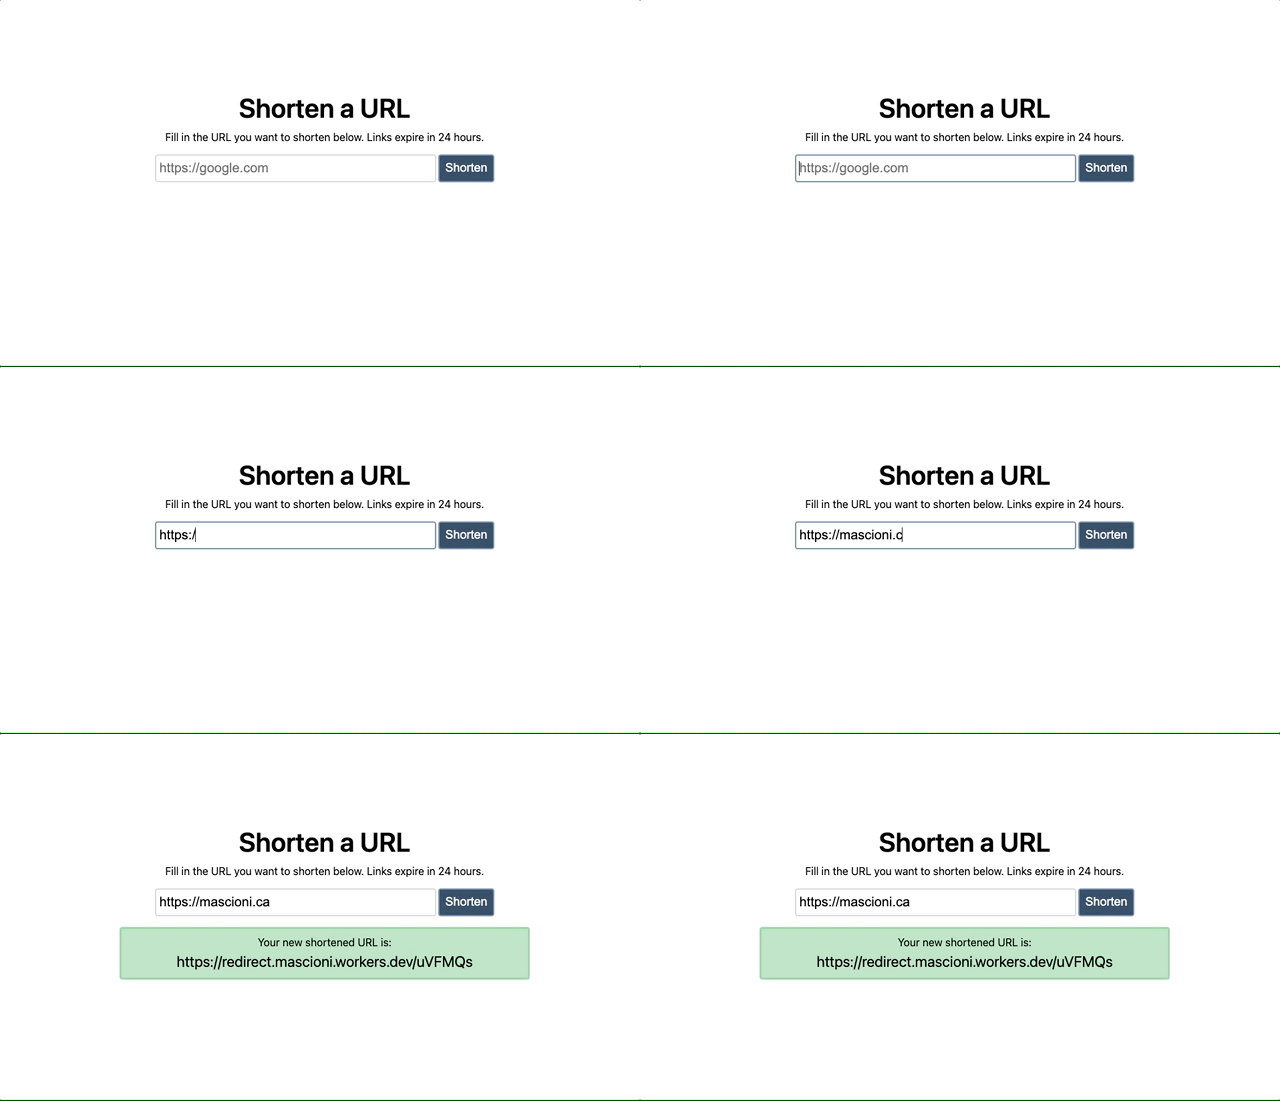
Workers run on Cloudflare's Edge Network and are incredibly fast, with a very generous free tier. In this 4-part tutorial series, we'll build one to power a link shortener that looks something like this:

The finished product is also available on GitHub if you want to dive in and use the code for your own projects! For this project, we'll be using JavaScript, but Workers support other languages too (e.g Rust)
- A Cloudflare account. The project we're building should fall within the Workers Free plan.
- Wrangler (the CLI for working with Workers) installed: e.g with NPM,
npm i @cloudflare/wrangler -g: see install instructions
Our link shortener has two main pieces that we'll build out:
- A back-end that should be able to take a "long" URL, generate a "short" one, and return the shortened URL. It should also be able to return a redirect to the correct long URL, given a short URL.
- A front-end to interact with the link-shortening back-end.
For (1), we can create a Worker to listen for HTTP requests and route accordingly:
-
POST /links: Generate a new short URL from a long one, returning a shortslugto access it at -
GET /:slug: Looks for a long URL with thisslug, and redirects to it if it exists
In an application like this, the Redis in-memory database may be an awesome choice, as we could store the slugs as keys and quickly access a long URL by slug. One huge benefit with Cloudflare Workers is that a key-value store, Workers KV is built in and easily accessible from the Worker function. We'll be using Workers KV here.
For (2), our Worker can also serve static assets, and we'll store our HTML/CSS files using Workers KV too via Workers Sites. For fun, the front-end will use Vue too. More on this soon!
Ensure you've installed Wrangler as described above. Afterwards, run
wrangler loginand you'll be prompted to sign-in to your Cloudflare account.-
Generate a new project using a JavaScript template, since that's what we'll be using for this tutorial:
wrangler generate <project-name>
https://github.com/cloudflare/worker-template
This will create a new folder at
<project-name>. Open upwrangler.tomlin that folder, and setaccount_idto the account ID the Wrangler CLI returns. Also, settype = webpackinstead ofjavascript, to package some dependencies we'll be installing.
Your Worker's code is in index.js:
addEventListener('fetch', event => {
  event.respondWith(handleRequest(event.request))
})
/**
 * Respond with hello worker text
 * @param {Request} request
 */
async function handleRequest(request) {
  return new Response('Hello worker!', {
    headers: { 'content-type': 'text/plain' },
  })
}
What's happening here? When an HTTP request hits Cloudflare's edge network, and there's a Worker mapped to the route that got accessed, a FetchEvent object will get passed to the fetch event listener. The FetchEvent object has a respondWith method that lets us return a response right away. The Worker uses this to return a Response object with the Hello worker! text. For other things you can do with the FetchEvent object, check out the FetchEvent lifecycle docs.
Run wrangler dev from your project directory. Behind the scenes, this creates a tunnel between your machine and the edge server that handles your requests.
You should get a URL to try sending a request to:
💁  watching "./"
👂  Listening on http://127.0.0.1:8787
Make a request to that URL. You should see Hello worker! returned. If all is working so far, it's time to dive into building the back-end!
39
