
24
How To Set Jenkins Pipeline Environment Variables?
Jenkins is an open-source and extensible continuous integration and continuous deployment server. It is used to automate the process of continuous integration and continuous deployment(CI/CD). The importance of monitoring remote jobs and interacting with team members for stable code is immense; Jenkins takes care of all these requirements and allows a smooth integration via plugins, pipelines, and Jenkins environment variables.
If you are amongst the typical Jenkins users who want to add to their knowledge about CI and CD, some fundamental concepts must be learned. In this article, we will learn about the critical concept of Jenkins pipeline environment variables. We will also view and install the Lambatest Jenkins plugin and use the in-build variables from the Jenkins environment variables list.
So, let’s get started!
While writing the script for a Jenkins pipeline, some dynamic values are to be injected and used. These are especially useful to avoid hardcoding every value into the pipeline. For this dynamic integration, Jenkins set environment variables.
Jenkins environment variable is a global variable, exposed via env variable and used in Jenkins pipelines and anywhere into Jenkinsfile. Any value stored as the environment variable in the env variable is of string type.
The Jenkins pipeline environment variables facilitate the benefits like :
In the Jenkins pipeline, there are a lot of helpful environment variables that can be accessed and maintained during build execution; some of the most useful ones are :
To ease building the pipeline, Jenkins has provided us with a Jenkins environment variables list. This list contains some of the most used variables. Let’s start by browsing through the list of environment variables.
Jenkins exposes the crucial characteristics of components using environment variables. Thus, a set of these variables are already defined by Jenkins. This includes information about the job and the specific build that is running. Some of the most commonly used variables are :
| Variable Name | Description | Example |
|---|---|---|
| JOB_NAME | Provides the name of the job in Jenkins | envvars |
| JOB_URL | Gives the URL to the job in the Jenkins UI | http://localhost:8082/job/envvars/ |
| BUILD_NUMBER | Prints the build number in Jenkins console output | 5,6, etc. |
| BUILD_TAG | Gives a unique tag for a specific job name and build number | envvars-build-8 |
The Jenkins environment variables list can be viewed using two different ways.
The environment variables can be viewed on an HTML page. You have to open the page on your Jenkins controller server. The steps to view the jenkins environment variables list are :
${YOUR_JENKINS_HOST}/env-vars.html. http://localhost:8080/).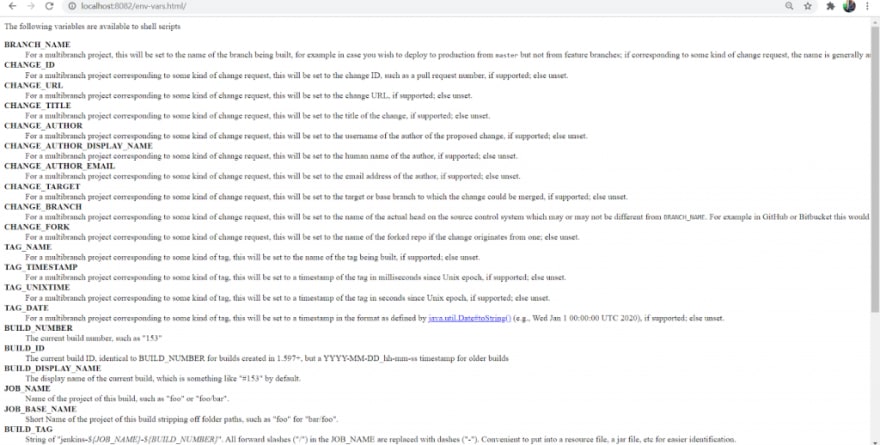
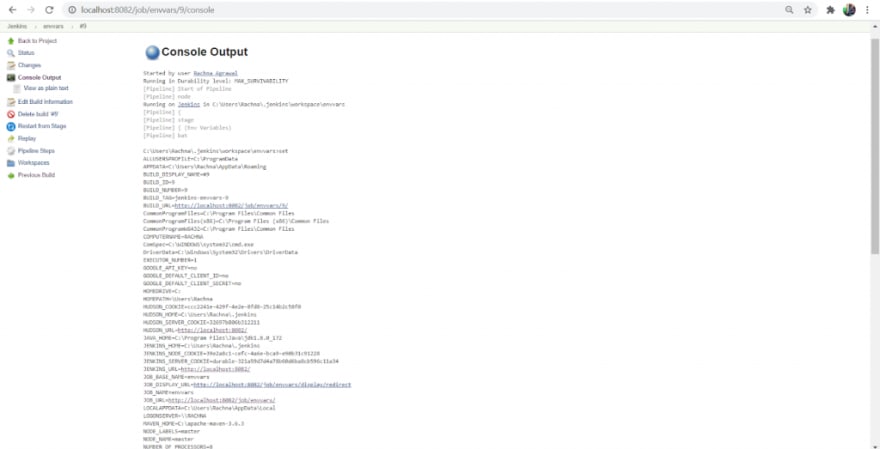
You can also list all the environment variables by writing the shell command in the groovy script of the Jenkins pipeline. The steps to do the same are :
pipeline{
    agent any

    stages{
        stage("Env Variables"){
            steps{
                bat ‘set’
            }
        }
    }
}
In this section, we will see how you can read your Jenkins environment variables list. Let’s take it one step at a time-
pipeline{
agent any
stages{
stage("Env Build Number"){
steps{
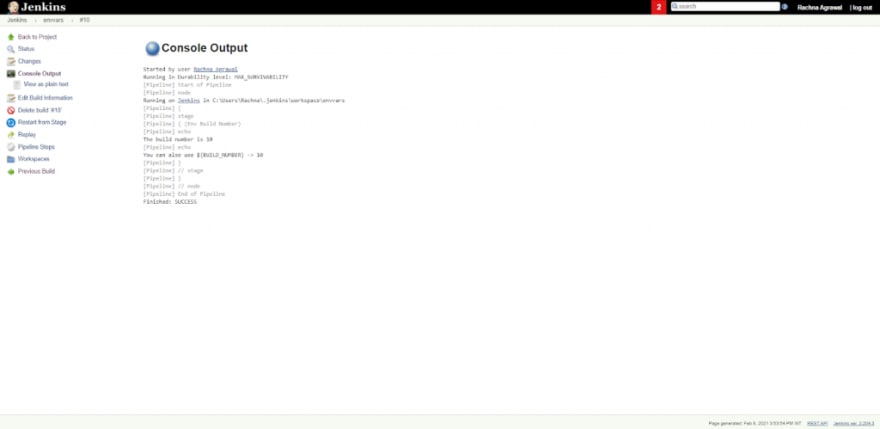
echo "The build number is ${env.BUILD_NUMBER}"
echo "You can also use \${BUILD_NUMBER} -> ${BUILD_NUMBER}"
}
}
}
}
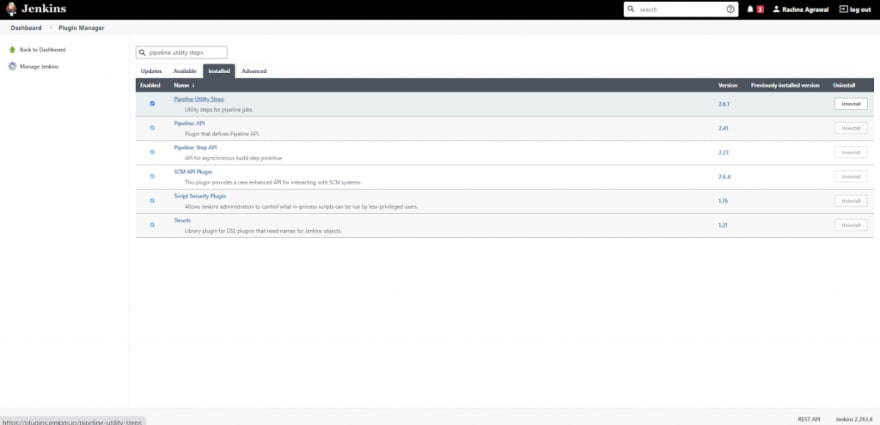
Jenkins environment variables are set both globally as well as locally. Global environment variables can be set via the UI of Jenkins, and local environment variables are set according to the pipeline, being declarative or scripted. The Jenkins pipeline environment variables can also be read from a properties file. For this, we use the Pipeline Utility Steps plugin. You can also inject the variables during the build startup via the EnvInject plugin.
Thus, different ways to set Jenkins environment variables are :
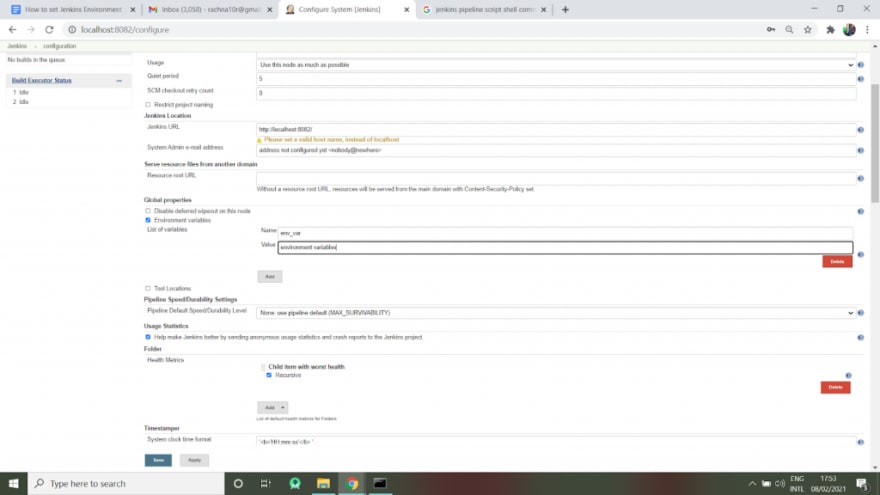
Global environment variables are the variables that can be used in any and every Pipeline or Job built on Jenkins. The global variables are set via the Jenkins console and via the groovy script of a pipeline. The ways to set these global environment variables are:


import hudson.EnvVars;
import hudson.slaves.EnvironmentVariablesNodeProperty;
import hudson.slaves.NodeProperty;
import hudson.slaves.NodePropertyDescriptor;
import hudson.util.DescribableList;
import jenkins.model.Jenkins;
public createGlobalEnvironmentVariables(String key, String value){

       Jenkins instance = Jenkins.getInstance();

       DescribableList<NodeProperty<?>, NodePropertyDescriptor> globalNodeProperties = instance.getGlobalNodeProperties();
       List<EnvironmentVariablesNodeProperty> envVarsNodePropertyList = globalNodeProperties.getAll(EnvironmentVariablesNodeProperty.class);

       EnvironmentVariablesNodeProperty newEnvVarsNodeProperty = null;
       EnvVars envVars = null;

       if ( envVarsNodePropertyList == null || envVarsNodePropertyList.size() == 0 ) {
           newEnvVarsNodeProperty = new hudson.slaves.EnvironmentVariablesNodeProperty();
           globalNodeProperties.add(newEnvVarsNodeProperty);
           envVars = newEnvVarsNodeProperty.getEnvVars();
       } else {
           envVars = envVarsNodePropertyList.get(0).getEnvVars();
       }
       envVars.put(key, value)
       instance.save()
}
createGlobalEnvironmentVariables('Var1','Dummy')
In java, createGlobalEnvironmentVariables() method is used to create new global environment variables. Here, the environment variable named, “Var1” is created having the value “Dummy”.


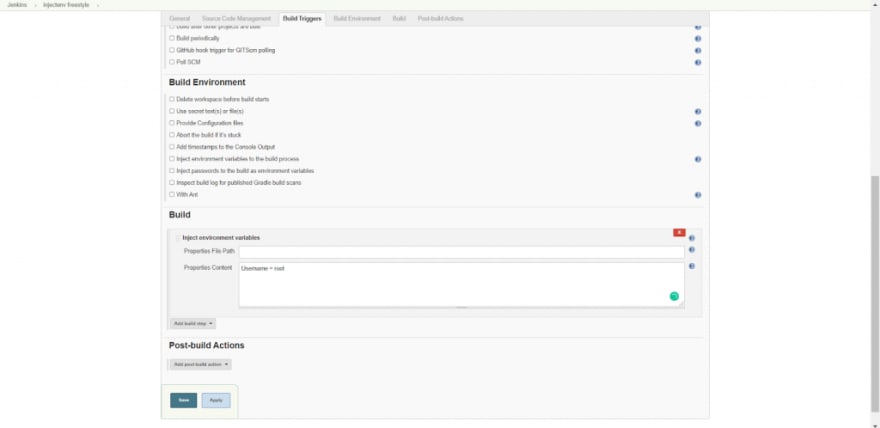
Username = root
Access_Token = ***************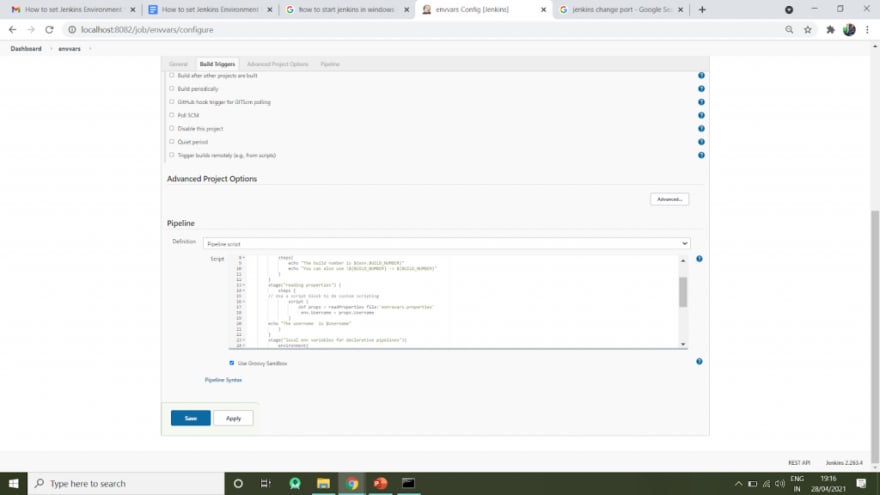
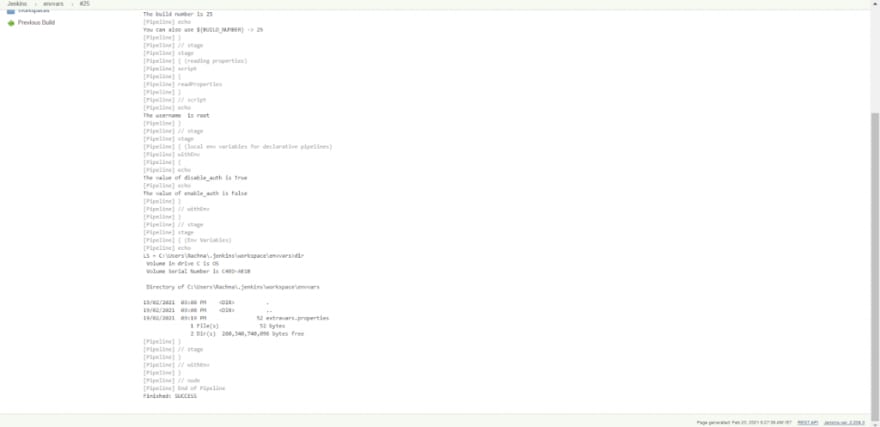
stage(“reading properties from properties file”) {
    steps {
        // Use a script block to do custom scripting
        script {
            def props = readProperties file: 'extravars.properties'
            env.Username = props.Username
        }
        echo "The username  is $Username"
    }
}
The local environment variables are the variables explicitly defined for a particular job in Jenkins. These are defined according to the pipeline and its type. There are declarative pipelines as well as scripted pipelines. Declarative pipelines break down the stages into individual stages that can contain multiple steps; Scripted pipelines, on the other hand, use groovy code and references within the stages without any extra efforts. Because of this difference, the code for creating local environment variables is different for the two types of pipelines.
environment {
       DISABLE_AUTH = 'true'
}pipeline {
agent any
environment {
DISABLE_AUTH = 'true' //can be used in whole pipeline
}
stages {
stage(“Build”) {
steps {
echo env.DISABLE_AUTH
}
}
}
}pipeline {
agent any
environment {
DISABLE_AUTH = 'true'
}
stages {
stage(“Build”) {
environment {
ENABLE_AUTH = ‘false’ //can be used in this stage only
}
steps {
echo env.DISABLE_AUTH
echo env.ENABLE_AUTH
}
}
}
}
node{
   stage('Build') {
       withEnv(["DISABLE_AUTH=true"]) {
         echo env.DISABLE_AUTH   }
   }
 }
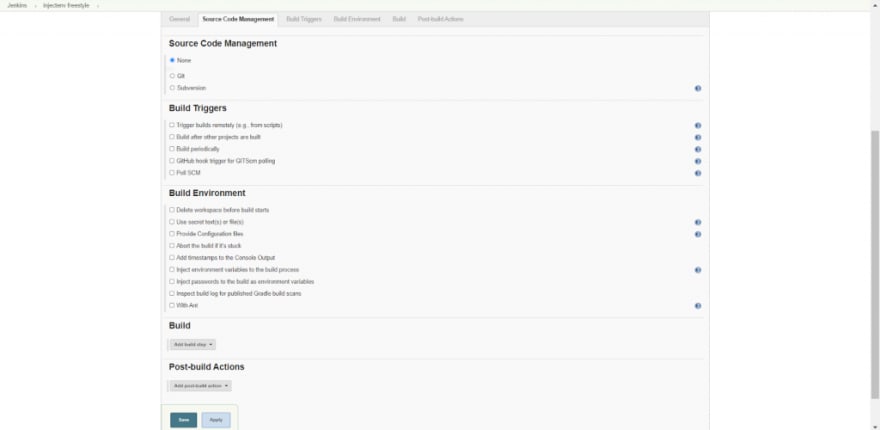
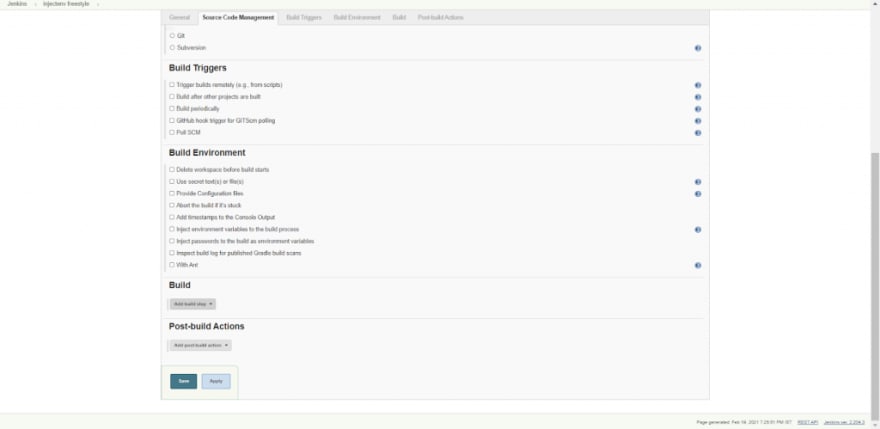
Injecting Jenkins environment variables can be done with the help of a plugin. This plugin is the EnvInject plugin. You can install the EnvInject plugin and inject the environment variables during the build startup. This makes it possible to set up a custom environment for all Jenkins jobs. This plugin is used massively in the freestyle projects of Jenkins. The steps that demonstrate the usage of the EnvInject plugin are:


You can capture the output of a shell command or batch command as a Jenkins environment variable and use it in later stages of the pipeline. For that you need to use the exact given syntax – bat(script: ‘cmd’, returnStdout:true). This is to force the bat command to return the output to be captured and stored in an environment variable. The steps to store the output into a Jenkins environment variable are:
pipeline {
    agent any

    stages {
        stage("capturing output in Environment Variables") {
            steps {
                script {
                    env.LS = bat(script:'dir', returnStdout: true).trim()
                   // if you access environment variable in the batch command
                    echo $LS
                }
            }
        }
    }
As the installation of a plugin is facilitated, new environment variables are added to the jenkins environment variables list. Here, we will install the LambdaTest Jenkins plugin and view the environment variables added by this plugin.
LambdaTest Jenkins plugin helps in pacing up your automated cross browser testing cycles. This easily automates your Selenium test scripts by connecting the Jenkins instance to the LambdaTest Selenium Grid. LambdaTest offers you an expansive library of 2000+ browser and browser versions so as to achieve higher test coverage while performing automation testing using the Selenium suite. You can view the steps to install the LambdaTest Jenkins plugin by clicking here. Some new environment variables added due to the LambdaTest Jenkins plugin are:


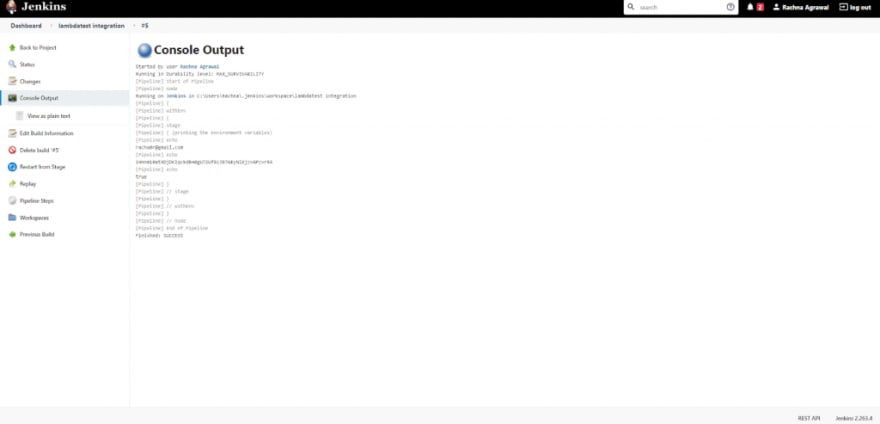
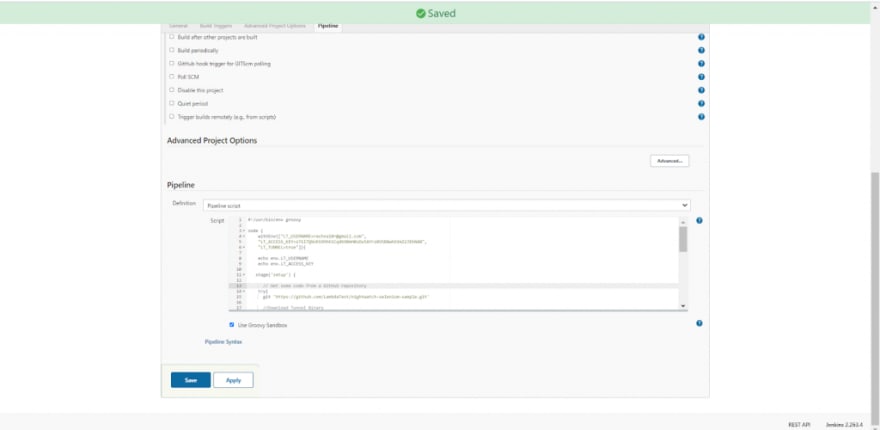
When set in the Jenkins pipeline, these environment variables provide the required information for the LambdaTest integration with Jenkins. The groovy script to set these environment variables in a pipeline is :
pipeline{
agent any
environment{
LT_USERNAME='racha10r@gmail.com'
LT_ACCESS_KEY='iHnnmi0atXDjDKIqckdBH0gU72Uf8zJb76EyNlXjzvGPzvr54'
LT_TUNNEL=true
}
stages{
stage('printing the environment variables'){
steps{
echo env.LT_USERNAME
echo env.LT_ACCESS_KEY
echo env.LT_TUNNEL
}
}
}
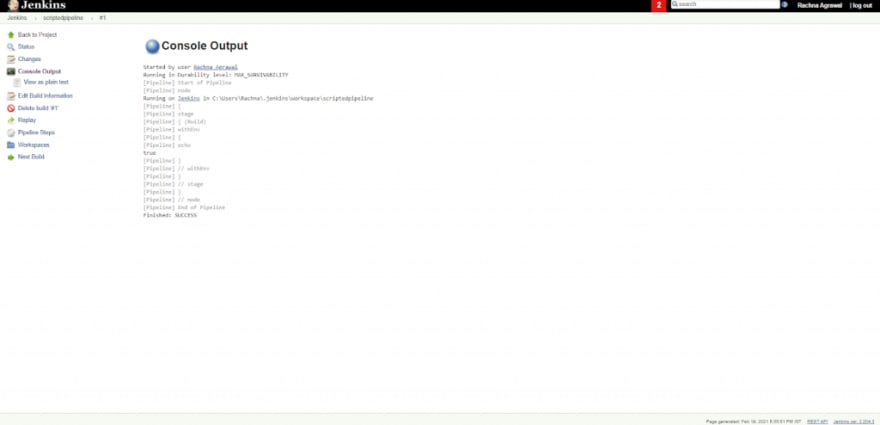
}This is a simple groovy script to just set and print the environment variables in the build's console output. The Console Output looks like this:
Before we jump off to learn about the practical usage of Jenkins environment variables, let us understand the pre-requisites for the plugin.
Pre-requisites:

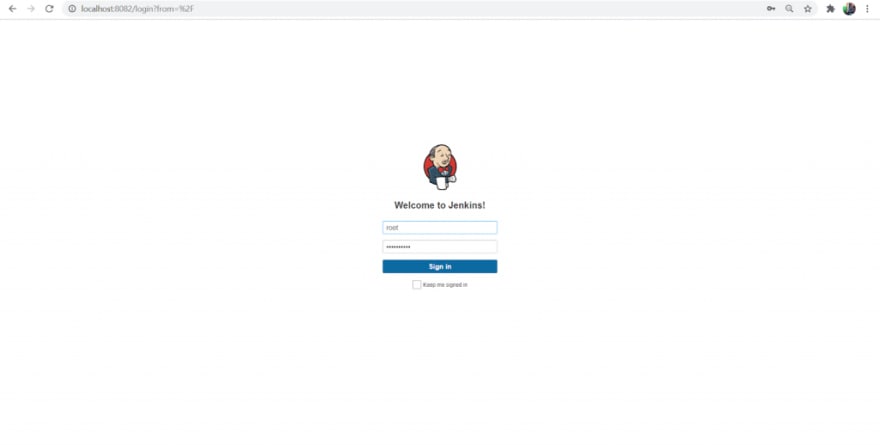
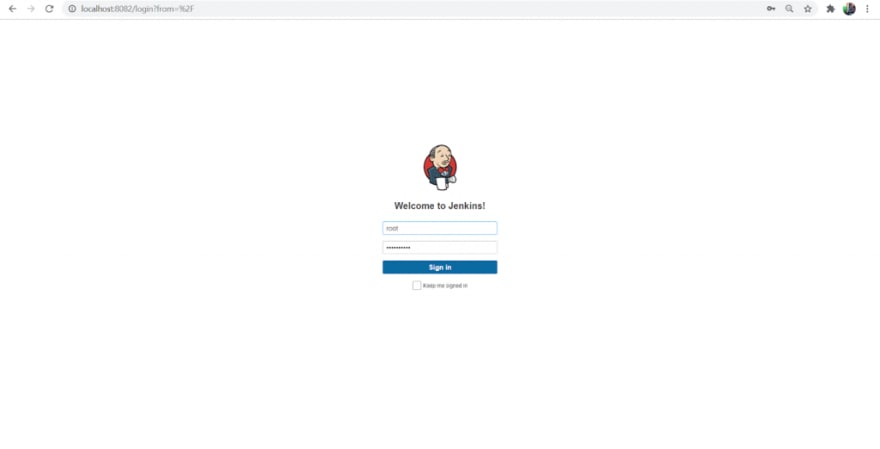
http://localhost:8082/ and Login to the Jenkins Server.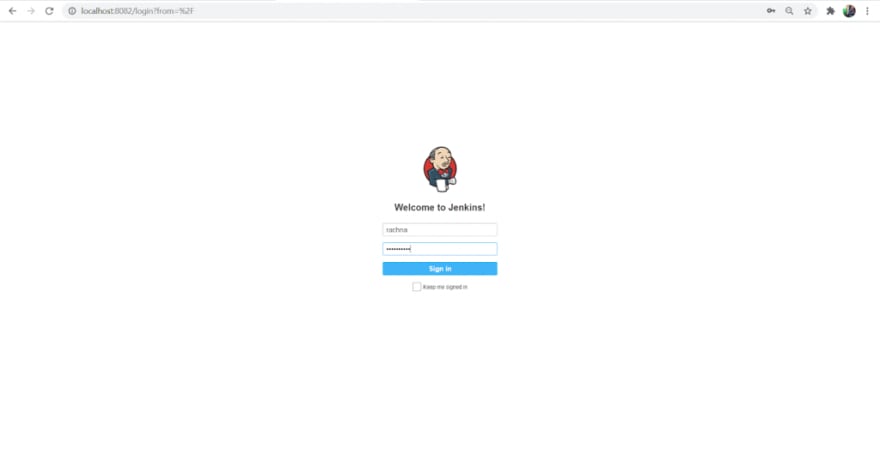
- Providing the Environment by LambdaTest Environment Variables: By the withEnv construct you will set the environment with variables, LT_USERNAME, LT_ACCESS_KEY, LT_TUNNEL. These variables will then be used in our whole pipeline.
- Setup Stage: In the setup stage, you will clone the git repository and download the binary file(LT_Windows.zip) required to create an ssh connection through a Tunnel. You will then unzip the zip file and Activate the tunnel by command “LT --user ${LT_USERNAME} --key ${LT_ACCESS_KEY}”.
- Build Stage: After the activation of Tunnel, you will install the required dependencies by commands, npm install and npm install nightwatch.
- Test Stage: In the test stage, we will run the tests with the help of Nightwatch. Here the command used is a batch command : bat 'node_modules/.bin/nightwatch -e chrome tests'. Through this command we are also providing the environment in which the Tests should be run(the environments can be chrome, ie, edge, firefox etc.. LambdaTest eases the process of testing in various environments by providing us to choose the environment as per the need.)

#!/usr/bin/env groovy

node {
    // Sets the environment variables from LambdaTest for testing
    withEnv(["LT_USERNAME=rachna10r@gmail.com",
    "LT_ACCESS_KEY=z71l7Q9ohS9HhKiCqd690mH0sDu5AYrz8VSB0whO3mZ2JEkNAN",
    "LT_TUNNEL=true"]){

    // Just printing the above set environment variables
    echo env.LT_USERNAME
    echo env.LT_ACCESS_KEY

   stage('setup') {

      // Get some code from a GitHub repository
    try{
      git 'https://github.com/LambdaTest/nightwatch-selenium-sample.git'

      //Download Tunnel Binary
     bat 'wget "https://downloads.lambdatest.com/tunnel/v3/windows/64bit/LT_Windows.zip"'

     //Required if unzip is not installed
      bat 'unzip -o LT_Windows.zip'

      //Starting Tunnel Process
     'LT --user ${LT_USERNAME} --key ${LT_ACCESS_KEY}'
         }
    catch (err){
      echo err
        }
   }
   stage('build') {
      // Installing Dependencies
      bat 'npm install'
      bat 'npm install nightwatch'
    }

   stage('test') {
          try{
        // Running the nightwatch tests with environment set as Chrome
          bat 'node_modules/.bin/nightwatch -e chrome tests'
          }
          catch (err){
          echo err
          }
   }
   stage('end') {
    // Printing the success message
     echo "Success"
     }
 }
}


https://accounts.lambdatest.com/login


Thus, this way, you can use the LambdaTest Integration with Jenkins for easeful testing. You can also create a freestyle project where after installation of the LambdaTest plugin, the environment variables, LambdaTest credentials etc., can be set manually through a user-friendly UI.
Jenkins has a lot of potential in it. With the integration of various plugins and configuration of different platforms like LambdaTest integration with Jenkins; It provides different environments to create a build and facilitates various applications of continuous integration and continuous deployment.
However, setting up the environment variables is a crucial step in every use case provided by Jenkins. These variables maintain a lot of information required for a successful setup. These are accessed and injected in freestyle projects and pipelines to fulfil essential requirements of the build process and the test process. With Jenkins, we aim to create a robust product or software with excellent test resistance and performance. Thus, ensure that the required Jenkins environment variables are set and can be accessed wherever and whenever necessary.
Also, don't forget to leave your comments, and if you have any query or question, shoot up to the LambdaTest community and get it resolved.
Till then, Happy Testing!
24