
30
How to Deploy a Python Flask App on Heroku Using Docker
Hello!
Today I will demonstrate how to deploy a containerized Python Flask application to Heroku using Docker.
This tutorial is separated into four parts:
Today I will demonstrate how to deploy a containerized Python Flask application to Heroku using Docker.
This tutorial is separated into four parts:
We will be creating a "Hello World!" application to maintain simplicity.
The file structure by the end of this tutorial will look like:
The file structure by the end of this tutorial will look like:
├───FlaskApp
  └───app.py           # Our main application
  └───main.py          # Used by gunicorn to run the app
  └───requirements.txt # The packages we will be using
  └───Dockerfile       # Used to create the Docker container
  └───Procfile         # Used to deploy the container to Heroku
To start out, create an empty directory using:
$ sudo mkdir FlaskAppAnd
cd into the directory using:$ cd FlaskAppCreate two files called
In requirements.txt, insert the line:
app.py and requirements.txt.In requirements.txt, insert the line:
flask==2.0.1
gunicorn==20.1.0
Then, to install the required packages, run:
$ pip install -r requirements.txtThen open up
app.py in your favorite code editor and add the following code:#Import the flask module
from flask import Flask
app = Flask(__name__)
@app.route('/')
def hello_world():
statement = 'Hello World!'
return statement
#Calls the run method, runs the app on port 5000
app.run(host='0.0.0.0', port='5000')Next, create a file called
main.py and add the following code:from app import app
# Gets the app from app.py and runs it
app.run()Then run the program using:
$ gunicorn --bind 0.0.0.0:5000 main:appAnd you should get an output that looks like:
[2021-06-25 10:33:51 -0400] [1607] [INFO] Starting gunicorn 20.1.0
[2021-06-25 10:33:51 -0400] [1607] [INFO] Listening at: http://0.0.0.0:5000 (1607)
[2021-06-25 10:33:51 -0400] [1607] [INFO] Using worker: sync
[2021-06-25 10:33:51 -0400] [1609] [INFO] Booting worker with pid: 1609
After accessing the URL that was provided upon executing at

http://yourip:5000, the page should look something like:Now that your Python Application is up and running, let's go over how to containerize it using Docker.
In your
FlaskApp directory, create a file with no file extension called Dockerfile and add the following:#Create a ubuntu base image with python 3 installed.
FROM python:3.8
#Set the working directory
WORKDIR /
#copy all the files
COPY . .
#Install the dependencies
RUN apt-get -y update
RUN apt-get update && apt-get install -y python3 python3-pip
RUN pip3 install -r requirements.txt
#Expose the required port
EXPOSE 5000
#Run the command
CMD gunicorn main:appAfter this, build the Docker image by running:
$ docker build -t flask-app .And then run it using:
$ docker run flask-appAnd you should get the same output as if you were running it normally:
2021-06-25T15:08:47.958205+00:00 app[web.1]: [2021-06-25 15:08:47 +0000] [5] [INFO] Starting gunicorn 20.1.0
2021-06-25T15:08:47.958983+00:00 app[web.1]: [2021-06-25 15:08:47 +0000] [5] [INFO] Listening at: http://0.0.0.0:5000 (5)
2021-06-25T15:08:47.958983+00:00 app[web.1]: [2021-06-25 15:08:47 +0000] [5] [INFO] Using worker: sync
2021-06-25T15:08:47.962897+00:00 app[web.1]: [2021-06-25 15:08:47 +0000] [7] [INFO] Booting worker with pid: 7
And you should get the expected output at the given IP address at
Congratulations! You have successfully created a Flask application and containerized it using Docker!
Now we will go over how to deploy this container to Heroku using their container registry.
http://yourip:5000:Congratulations! You have successfully created a Flask application and containerized it using Docker!
Now we will go over how to deploy this container to Heroku using their container registry.
Given that the Heroku CLI is installed as stated in the prerequisites, run:
$ heroku loginAnd you will be prompted to enter your Heroku credentials.
Once logged in, create an application by running:
Once logged in, create an application by running:
$ heroku create <your_app_name>Next, login to the Heroku container registry by running:
$ heroku container:loginWhich should produce:
Login SucceededIn your
FlaskApp directory, create a file with no extension called Procfile and add:web: gunicorn main:app 0.0.0.0:$PORTAfter that, in our
app.py file, we need to add/modify the following lines marked with arrows:# Import OS to get the port environment variable from the Procfile
import os # <-----
# Import the flask module
from flask import Flask
# Create a Flask constructor. It takes name of the current module as the argument
app = Flask(__name__)
@app.route('/')
def hello_world():
statement = 'Hello World!'
return statement
# Create the main driver function
port = int(os.environ.get("PORT", 5000)) # <-----
app.run(host='0.0.0.0', port=port) # <-----After editing the file, we must push the container to Heroku using:
$ heroku container:push web --app <your_app_name>After your app's container builds, release it to Heroku using:
$ heroku container:release web --app <your_app_name>Which will produce the following:
Releasing images web to <your_app_name>... doneOnce it is released, you can access the logs of your new container using:
$ heroku logs --tail --app <your_app_name>And you should see something along the lines of:
2021-06-25T15:08:45.662062+00:00 heroku[web.1]: Starting process with command `/bin/sh -c gunicorn\ main:app`
2021-06-25T15:08:47.958205+00:00 app[web.1]: [2021-06-25 15:08:47 +0000] [5] [INFO] Starting gunicorn 20.1.0
2021-06-25T15:08:47.958983+00:00 app[web.1]: [2021-06-25 15:08:47 +0000] [5] [INFO] Listening at: http://0.0.0.0:34683 (5)
2021-06-25T15:08:47.958983+00:00 app[web.1]: [2021-06-25 15:08:47 +0000] [5] [INFO] Using worker: sync
2021-06-25T15:08:47.962897+00:00 app[web.1]: [2021-06-25 15:08:47 +0000] [7] [INFO] Booting worker with pid: 7
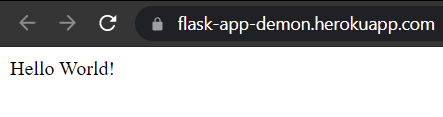
2021-06-25T15:08:48.409823+00:00 heroku[web.1]: State changed from starting to upAnd you should now be able to access your application through your new app's URL with the expected output of:
Congratulations! This tutorial has taught you how to create a Python Flask application, containerize it, and then deploy it to Heroku.
30