
16
My top 5 favourite React Hook libraries
I have been in contact with React for nearly 10 months and my opinion is that React hooks not only make code cleaner but also improves readability and reduces the amount of the code. For juniors like me who don’t have much experience, getting started is not difficult.
If you haven’t used hooks yet, you should try and add them to your project, because it can really make your programming simple and interesting.
In this blog, I would like to share 5 React hook libraries with you which I tried in some projects.
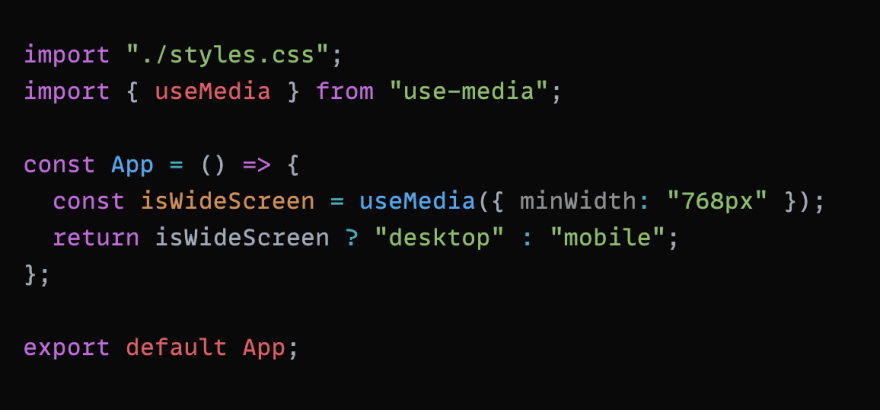
This hook provides a simple way to track CSS media queries and it plays a vital role in responsive websites, it is helpful for rendering different components at different viewports.
For example, you might have a hamburger icon which you want to show with a dropdown list field only on smaller screens, but hide them on larger screens. useMedia provides a quick solution to help solve this problem.
Code example:
Code example:
No one likes to create and recreate complex forms with validation, including React developers.
React-hook-form is a hook about forms:
“Performant, flexible and extensible forms with easy-to-use validation”
With its simpler syntax, speed, less re-rendering, and better maintainability, it started to reach the top in GitHub.
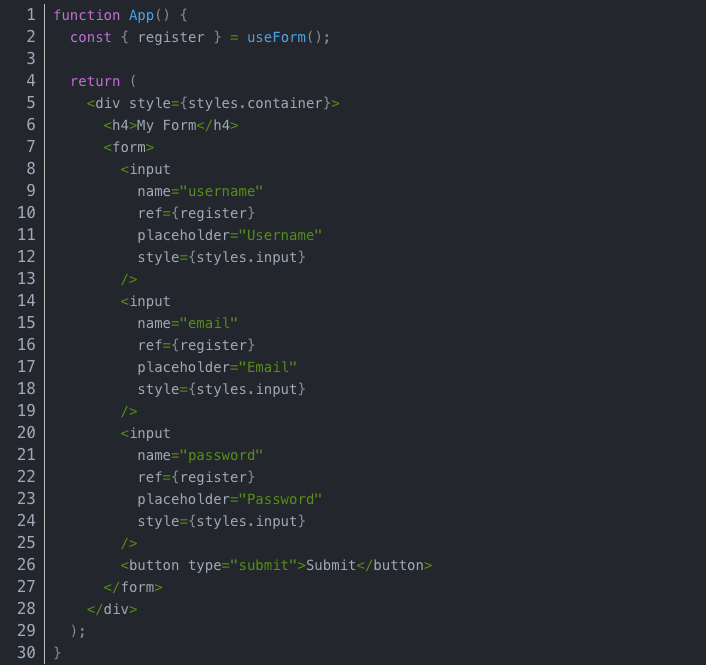
To use react-hook-form, we only need to call the useForm hook, when we do this, we will get an object from which we will deconstruct the register property.
Register is a function, it will accept the input value entered by the user and verify it, it will also pass each value to a function, which will be called when the form is submitted, so we need to connect it to each input as a ref.
In order for register to work properly, we need to provide an appropriate “name” attribute for each input. For example, for user name input, its name is “username”, the reason for this is that when we submit the form, we will get all the input values on a single object.
Code Example:
Code Example:
In order to handle submitting the form and receiving input data, we will add an onSubmit to the form element and connect it to the local function of the same name.
From useForm, we will get a function named handleSubmit, we wrap it around onSubmit as a higher-order function, the handleSubmit function will be responsible for collecting all the data entered into each input, and we will receive an object named data in onSubmit.
Code Example:
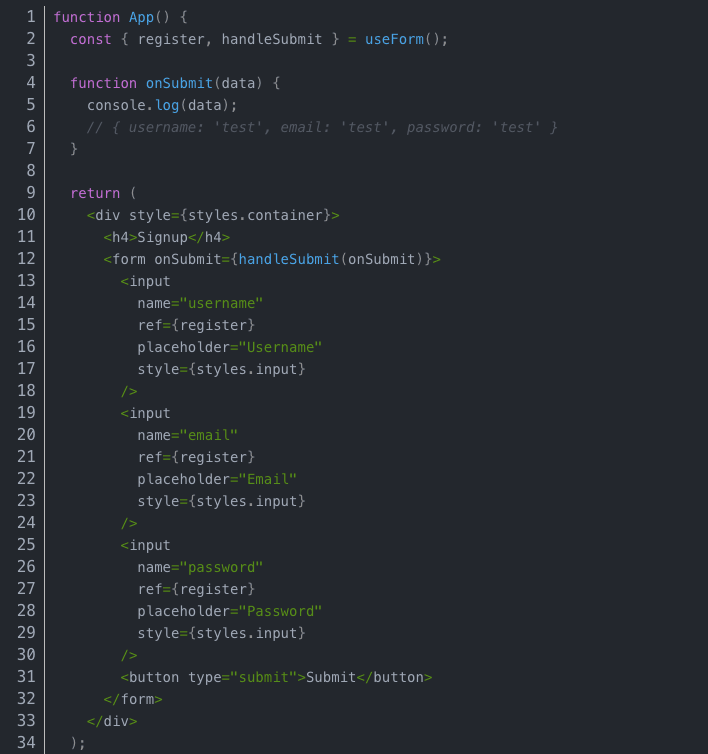
With console.log(data), we can see what we entered in each input of the same attribute.
Code Example:
With console.log(data), we can see what we entered in each input of the same attribute.
To validating the form and adding constraints for each input value, we only need to pass the information to the register function.
The first attribute is required. By default, it is set to false, but we can set it trueto ensure that the form is not submitted when the form is not filled out.
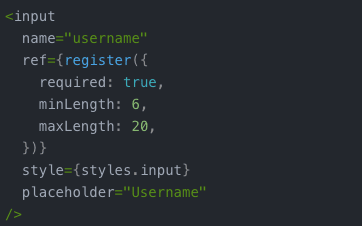
To apply this verification, username value is required, we can set the value length greater than 6 characters but less than 24 characters.
To apply this verification, username value is required, we can set the value length greater than 6 characters but less than 24 characters.
If we use number for this input (assuming this input is about the age of a person), we will use the attributes min and max instead of minLength and maxLength.
The most eye-catching hooks provided are:
Its name speaks for itself:
useHistory will get the method of application history data.
Code Example:
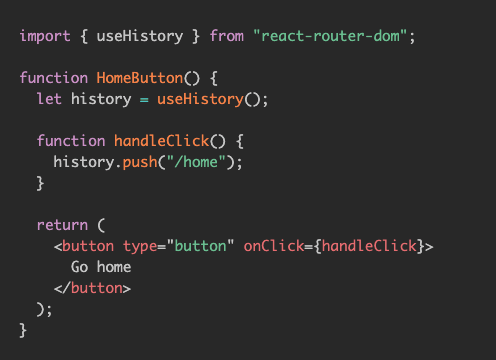
Click on the button, page will be navigated to “home” page.
Code Example:
Click on the button, page will be navigated to “home” page.
useLocation will return an object representing the current URL.
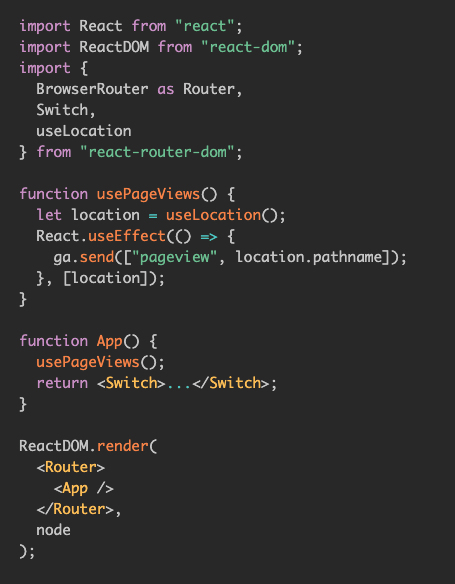
Trigger a new “page view” event whenever a new page loads.
Trigger a new “page view” event whenever a new page loads.
UseParams will return the object of the key-value pairs of the URL parameters of the current route.
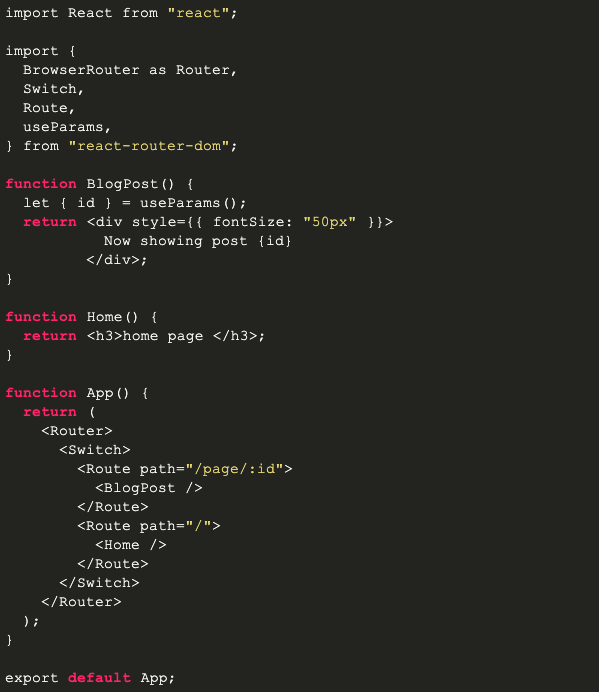
In this way, with “: id” you can access the parameters of the current route’s URL.
In this way, with “: id” you can access the parameters of the current route’s URL.
useRouteMatch will try to match the current URL with the given URL, which can be a string or an object with different options.
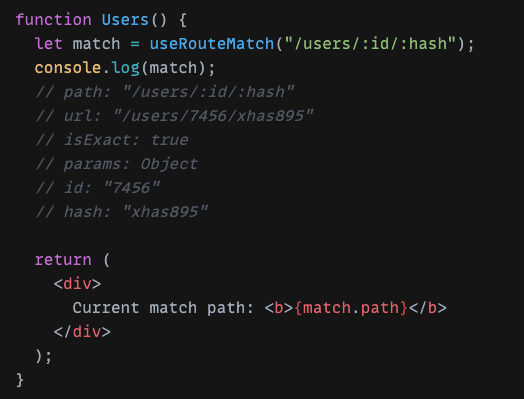
“match” is an object which contains current path, url…
“match” is an object which contains current path, url…
The most eye-catching hooks provided are:
useSelector allows you to extract data from the Redux store state, using a selector function, may return any value as a result, not just an object.
useDispatch returns a reference to the dispatch function from the Redux store. You may use it to dispatch actions as needed.
useStore returns a reference to the same Redux store that was passed into the component.
My personal opinion is, the documentation is good but a bit complicated, to start using it, you still have to read the documentation, 🧩 until now I’m only in the elementary stage.
The examples above is just my personal suggestion. I have added a link below each hook title where you can directly refer to the original site, if you find anything that can be improved or corrected, please contact me.
Thank you very much for reading!
16