
28
How I made a mini filter app with Vanilla JavaScript
I have been doing the JavaScript30 from Wes Bos and one of the challenges is to change CSS Variables using JS.
I found the challenge so interesting that I decided to try myself and create a mini-filter image app by using the same concept that he used on the challenge.
Also, I decided to go further and made functionality to display an uploaded image and then change it with the filters available.
I found the challenge so interesting that I decided to try myself and create a mini-filter image app by using the same concept that he used on the challenge.
Also, I decided to go further and made functionality to display an uploaded image and then change it with the filters available.
First of all, I sketched what I wanted to look like in the end to help me trace a path.

Having the sketch done I created an HTML file with elements I wanted. As you can see I write a div container with 3 divs inside:
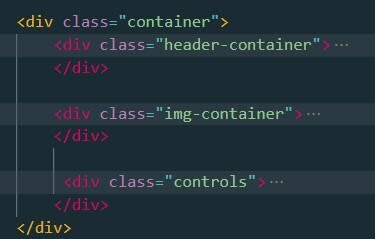
Let's focus first on how to display an uploaded image. So let's take a look at the two first containers.

Inside header-container I created a div called upload-img that contains label and input elements.
The input has some attributes :
The input has some attributes :
On the div img-container I added an img HTML tag without a source attribute but an id named "output" that will retrieve the image source from javaScript.
It's time to do JavaScript code to display the image in HTML element img :
It's time to do JavaScript code to display the image in HTML element img :

The first thing I did was to get the element input from the DOM and stored it in a variable named fileUpload.
Further, I added an event listener with event change and a function called loadFile.
Inside the loadFile function, I get the element img from DOM and store it in a variable called img ( you could call it an image or something else. I decided to call the same name as the tag).
After that, I created a source URL for that variable img that by using URL.createObjectURL(), a static method that creates a string containing URL representing the specific file inside the parameters that, in this case, is the selected file or files of the input:
e.target is the input type="file"
files[0] represents the file or the files that were selected
files[0] represents the file or the files that were selected
This part is Done!
Inside the third container controls let's just focus on the construction of the input element.
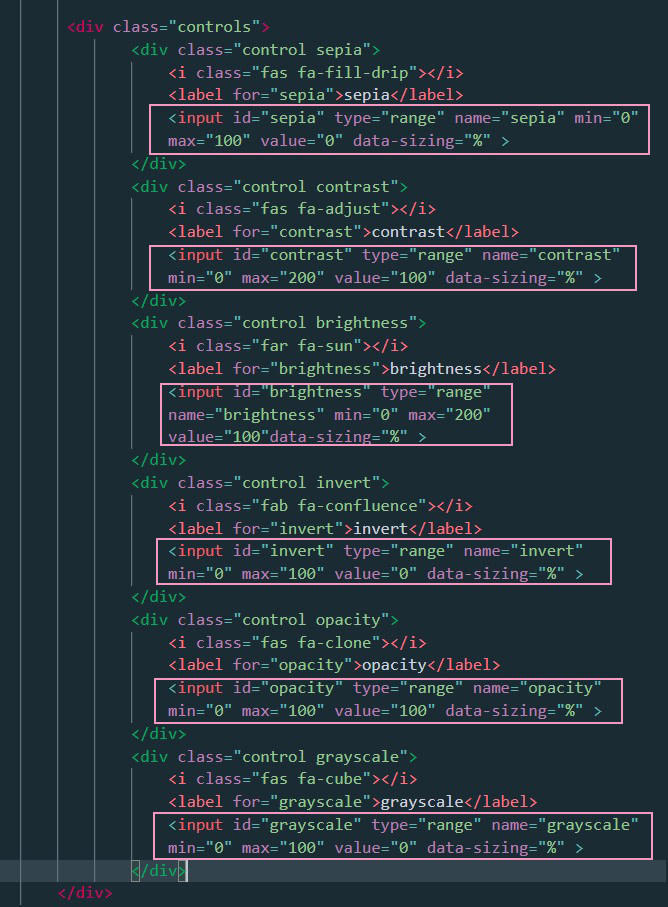
As you can see in the image there are a couple of Attributes important that I added. let's talk about each one:
As you can see in the image there are a couple of Attributes important that I added. let's talk about each one:
Let's take a look at CSS file :
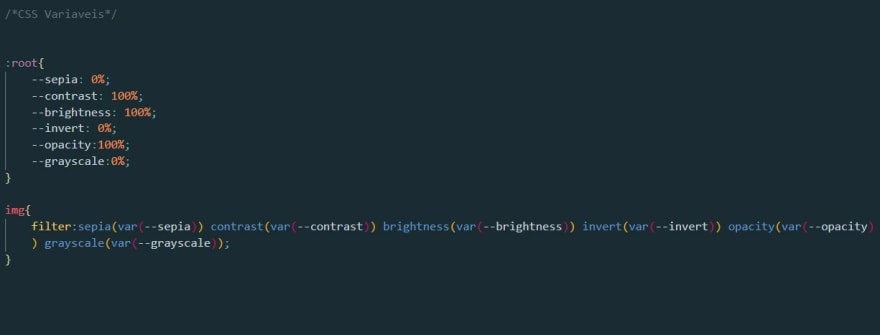
Here I created CSS variables in the : root pseudo-class and added those named variables in the img element.
Here I created CSS variables in the : root pseudo-class and added those named variables in the img element.
Now its time to code in JavaScript:
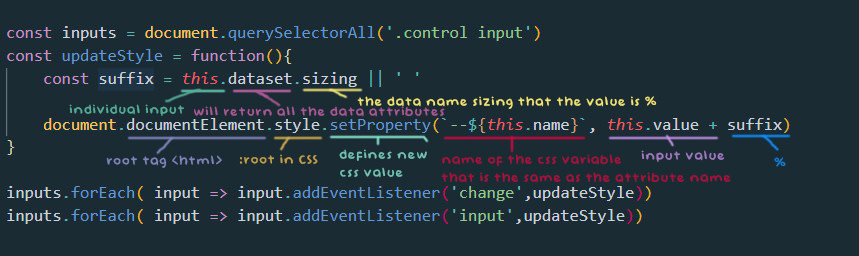
First of all, I stored in a variable all the inputs(plural).
Then I wanted to make an event listener for each input(individual) with change and input event.
So I did a forEach loop at the 'inputs' variable to get each input and add the event listener.
Then I wanted to make an event listener for each input(individual) with change and input event.
So I did a forEach loop at the 'inputs' variable to get each input and add the event listener.
Why did I want to use two events and not just the first one change?
Because the change event only updates the result when the movement ended, and I wanted also to show changes in the image while I move the input range.
Because the change event only updates the result when the movement ended, and I wanted also to show changes in the image while I move the input range.
In the updateStyle function first, I made a variable called suffix that stores the value '%' of data-sizing or if there are none stores an empty string ' '.
After that, I set a new property value for the root element that takes the value of the input.
After that, I set a new property value for the root element that takes the value of the input.
That is it!
28