
40
2 ways to overcome deployment problems with React on Netlify
In the last 6 months, I deployed a bunch of projects on Netlify, mostly React. It was super easy, none of my deployments ever failed. But I struggled a lot getting my last two projects deployed on Netlify, and I didn't know why. The error was
Treating warnings as errors because process.env.CI = true.
Even if I am still not 100% sure why the deployment failed after following the same steps as usual, I found two solutions to handle the failure and finally got my two projects online.
When you are already familiar with how to deploy your site, you can skip the following part.
After creating an account, the profile's overview is shown. Click on the button

Step1: You can now choose from 3 different git provider: GitHub, GitLab and Bitbucket. After clicking your preferred provider, you will be directed to your repository list.

Step 2: Scroll throw your repositories or use the search bar to choose the repo you'd like to deploy by clicking it. You will now be directed to the settings for your site.

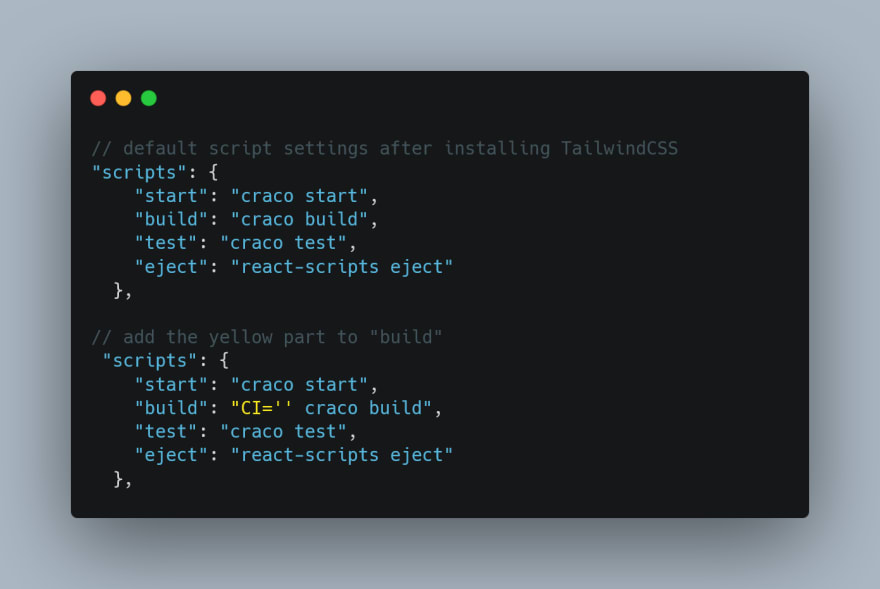
Step 3: The owner of this project and the branch is already set. In the basic build settings add
![]()
Step 4: When the last line of Netlify in the Build Complete section will show

Step 5: While deploying your project, Netlify chooses a random URL name that can be easily changed to the name you want. To do so, open settings and go to: General - Site details -Site information. Click on the
New site from git which directs you to the deployment page. (There is also the possibility to deploy your site using the command line, which will not be explained in this article).Step1: You can now choose from 3 different git provider: GitHub, GitLab and Bitbucket. After clicking your preferred provider, you will be directed to your repository list.
Step 2: Scroll throw your repositories or use the search bar to choose the repo you'd like to deploy by clicking it. You will now be directed to the settings for your site.
Step 3: The owner of this project and the branch is already set. In the basic build settings add
npm run build in the Build command field and build in the Publish directory field. When pressing the Deploy site button, Netlify starts to deploy your site. This could take a few minutes.Step 4: When the last line of Netlify in the Build Complete section will show
Finished processing build request in ...m...s, your project is fully and successfully build.Step 5: While deploying your project, Netlify chooses a random URL name that can be easily changed to the name you want. To do so, open settings and go to: General - Site details -Site information. Click on the
Change site name button, change the name and save it.Step 6: Now, everything is set up and you can click on the link of your project in the header of
Settings for yourname to check out your deployed project.Even if I work mostly with React and TailwindCSS, I suddenly failed to deploy two of my projects following the steps above. The error I got was as follows:

After a lot of googling, I found these two solutions which worked for me (I used a different solution on each project):
In Netlify open "Site details" - Build & deploy - Environment - Environment variables - edit variables and set Key to
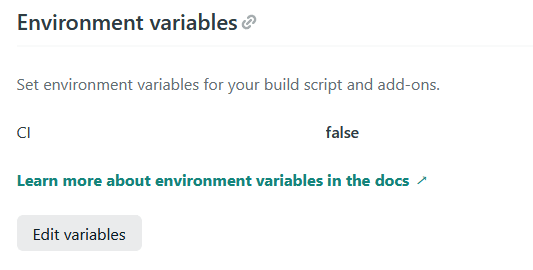
CI and value to false. This would be it. I hope you find these tips helpful and that it will work out for you. If you found other solutions feel free to post them in the comments below.

Thanks for your reading and time. I really appreciate it!
40