13
Easy Deployment to Heroku - step by step (Node & Vue app)
Disclaimer: this post is just a mere reflection of my personal experience while building and deploying a web-application using the MEVN (MongoDB, Express.js, Vue.js, Node.js) stack.
This article is not a "best practice" or anything like this- this is just one of the possibly many ways to achieve the same goal- a working, deployed webapp.
I am really curious about your thoughts- please leave a comment below after reading it.
Okay, so...
Initially I created a project with two completely separate applications in it- one Vue and one Node app. My project structure looked like this:
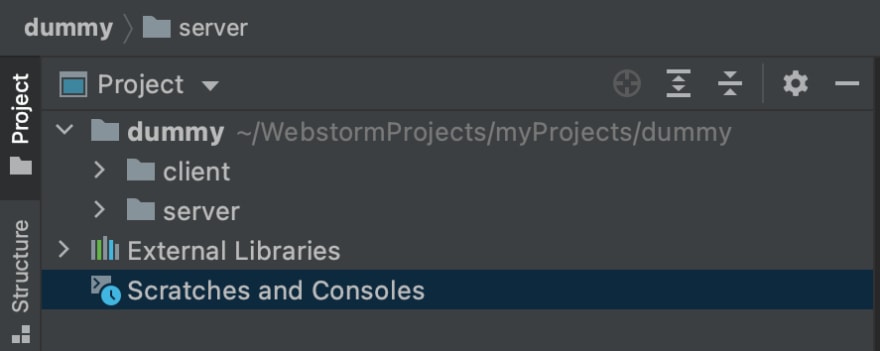
Both apps were running on different ports and I just proxied http calls from client to server via vue.config.js.
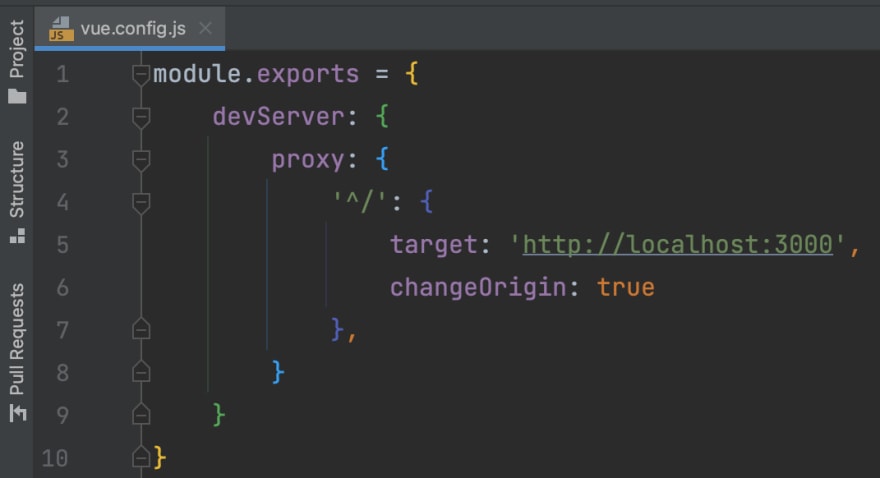
It was working well in the development phase however I had difficulties when I tried to make a production build.
To cut a long story short- Heroku does not like a project structure like this. Heroku needs to have a package.json file in the root, so I had to restructure my app like this (I placed my Vue app inside the Node app):
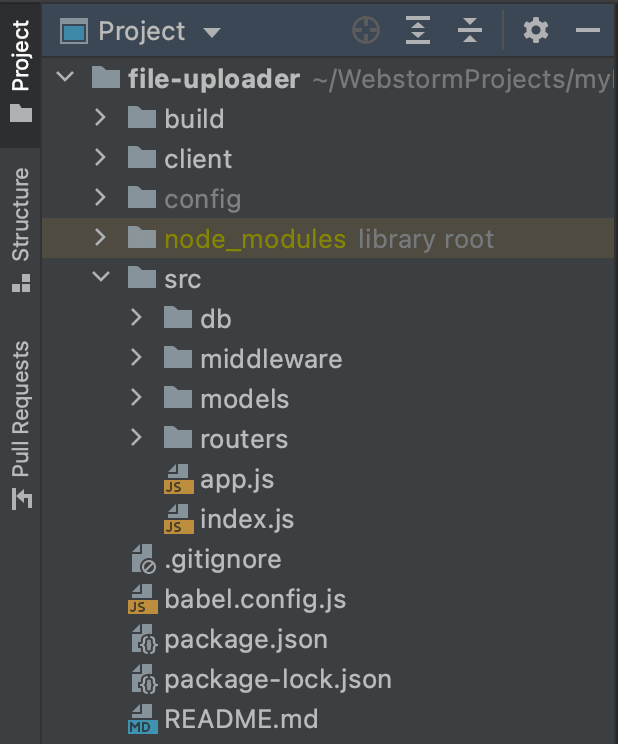
Firstly, I created the dist folder of client, by running the npm run build command (creates the production build of your Vue.js app) and then copied over the content of dist dir. to a freshly created dir. at server-side: build directory.
Note: you don't have to do this, you can just generate the dist folder basically anywhere you just have to be able to point at it in app.js of Node app.
I did it this way for better code-readibility.
After that, I modified my app.js of Node app with a single line (serving up Vue app as static content) at line 11:
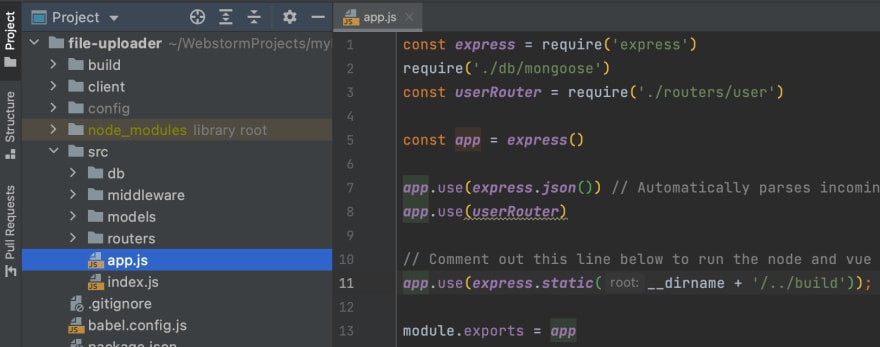
At this point it is really easy to check if Heroku will accept your creation or not.
Modify your "start" script by allowing it to utilise your environment variables listed in a .env file in your project like this:
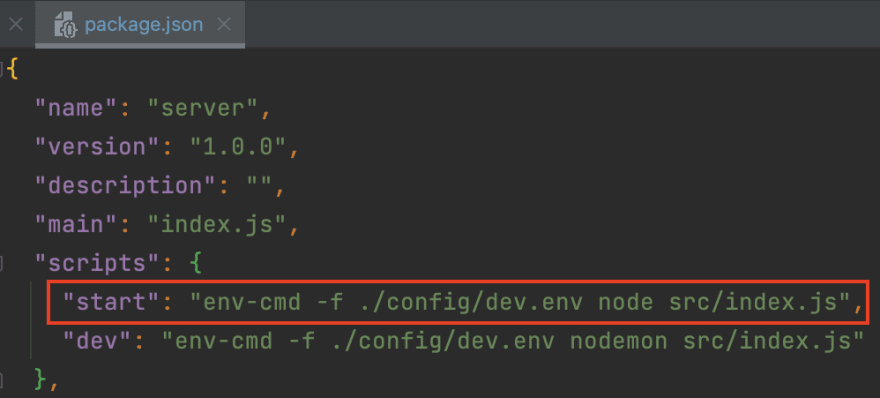
Now running npm run start in root should start your Node app which serves up your Vue.js app meaning that by visiting http://localhost/NODE_PORT domain, you should be able interact with your application.
After the successful test, don't forget to reformat your "start" script (Heroku will try to run that) like this:
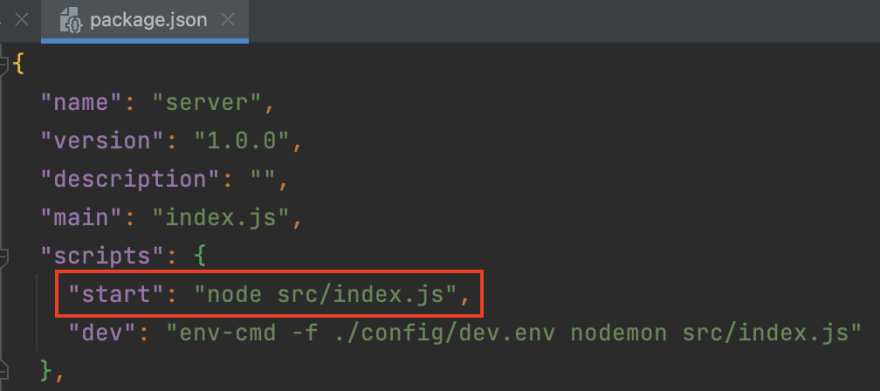
Next step is to check if you have any dependency which is saved as a dev dependency but should be stored as regular dependency.
If it's all good and everything hums together, don't forget to push your code to GitHub and you are basically ready for Heroku deployment.
Install heroku (https://devcenter.heroku.com/articles/heroku-cli), log in and issue the heroku create PROJECTNAME command.
Now you should add your environment variables with the heroku config:set key=value command.
Note: On UNIX/LINUX environment you might have to add the value in single quotes if it has any single characters.
Don't forget, you don't have to add PORT as an env. var., Heroku will take care of that.
With the heroku config command you can double-check if you have all the env. variables needed.
When it's all good, issue order 66...ehmm I mean command git push heroku main and it's all done.
If your app crashes and won't start, issue the heroku logs --tail command- heroku logs are super-useful, I was able to successfully troubleshoot when I had to based on the logs.
Thats it- let me know if I missed out something important.
Happy deploy! ✨
13
