24
13 Amazing React Libraries You Should Try in 2021
There are literally 100s of great React libraries to choose from, but which libraries do you need most for your React projects?
In this article, we’re going to break down 13 libraries worth adding to your React projects in five essential categories.
Each of them will cover virtually every major tool you need, plus we’ll cover what are the best ones to choose in 2021 and beyond.
Let’s dive right in!
Want the ultimate guide to become a 6-figure React developer? Check out The React Bootcamp.
If you want to create a React project, you probably reach for a tool like Create-React-App.
While Create-React-App remains an amazing tool and allows you to create a React project by running a single command, there is a new competitor to it that you should know about called Vite.
Create-React-App uses Webpack under the hood to build our React code for development. But build tools have emerged that compete with Webpack in speed.
Vite is one such build tool that uses a faster bundler called esbuild. In short, it makes use of the browser’s native ES modules to make for a quicker development experience.
How much faster is Vite? See for yourself!
Here’s a quick comparison of starting up a Vite project (right) versus a Create-React-App project (left).
Vite is many times faster than Create-React-App when running React in development.
If you’re annoyed at times with how long Create-React-App can take to start up, definitely check out Vite.
On top of that, I’d highly recommend the tool Create-Next-App.
This allows us to create a next JS project very rapidly. And yes, Next.js is a framework, but it is a React framework that needs drastically fewer dependencies. In fact, it just needs the dependencies React, React DOM, and Next.
Be sure to check out Vite and Create Next App when creating your next React project.
When it comes to basically any React application, we have to manage some server state.
This means we’re fetching data from an external server (like an API) and we’re bringing that data into our app, which is then combined it with the local state that we have across our app’s components.
Many React developers, no matter their skill level, can have a hard time figuring out how to manage server state with their local state. Most developers resort to a library like Redux as a solution.
In the past year, a couple of libraries have emerged that make it very easy to manage server state within our React components. These are React Query and SWR.
They help us with fetching data by giving us some very helpful custom hooks. But what is most important about them is that they have their own internal cache.
This built-in cache allows us to very easily integrate external data with our app. We assign each query to a custom key. To read or update any data we have fetched, we just need to reference that key!
Here is a simple example of how you can use React Query. We are fetching post data from an API, whose value we assign to the custom key “posts”.

In addition to improve our state management, fetching data is so much easier. They include a lot of great tools that allow us to do things like refetch queries, create paginated queries, infinite queries, and much more.
In short, if you’re fetching data in your React application across multiple components, definitely use one of these newer data fetching libraries.
If you’re looking for the most in-depth and sophisticated data fetching library, use React Query. SWR is a great choice as well, albeit with a slightly smaller list of tools.
When it comes to managing global app state, Redux has always been the go-to choice.
It has helped React developers separate state values into one shared object value, which can be read and updated in any component in our application.
Redux, however, comes with some conceptual baggage. To properly setup Redux and manage our state, we must understand and write separate actions, reducers and selectors.
There are some new competitors to Redux that seek to give us virtually all of the benefits of the library with none of the difficulty. These are the libraries Zustand and Jotai.
They’re both very similar, and what’s powerful about them is that they were created with a hooks-first approach to working with state. This means that once you create your store, you can read any of its value by calling it as a hook.
Here’s a quick example of how to create and use a Zustand store as a hook to create a simple counter application.

Zustand and Jotai make state management simpler due to the fact that you do not need to separate your store into actions, reducers, and selectors.
If you want to update state, write a function in your store to do so and use it in your component. If you want to select a slice of your state, use your store as hook and grab the property of the state object you want. It’s that simple!
Plus, you do not need any additional libraries to perform async operations (unlike Redux, which require Redux Thunk or Redux Saga).
Finally, you do not need to wrap your entire component tree with a context provider, so there is basically no setup required, other than creating your store and using it in your components.
In short, if you’re having trouble with understanding Redux or want more freedom in your state management, check out Zustand or Jotai.
React was made to create impressive user interfaces. As a result, we need libraries that help us achieve that end.
There are tons of component libraries that give us customized well designed, components right out of the box. However, with all of this diversity which ones do you pick?
If you want to be able to build apps that look great and are equally functional, you can check out extensive, well-maintained libraries like Ant Design , Material UI , and Chakra UI.
All of these libraries have a ton of components and even dedicated icon libraries. But arguably what is most important about them is that they have an intuitive syntax that allows us to build attractive components more easily.
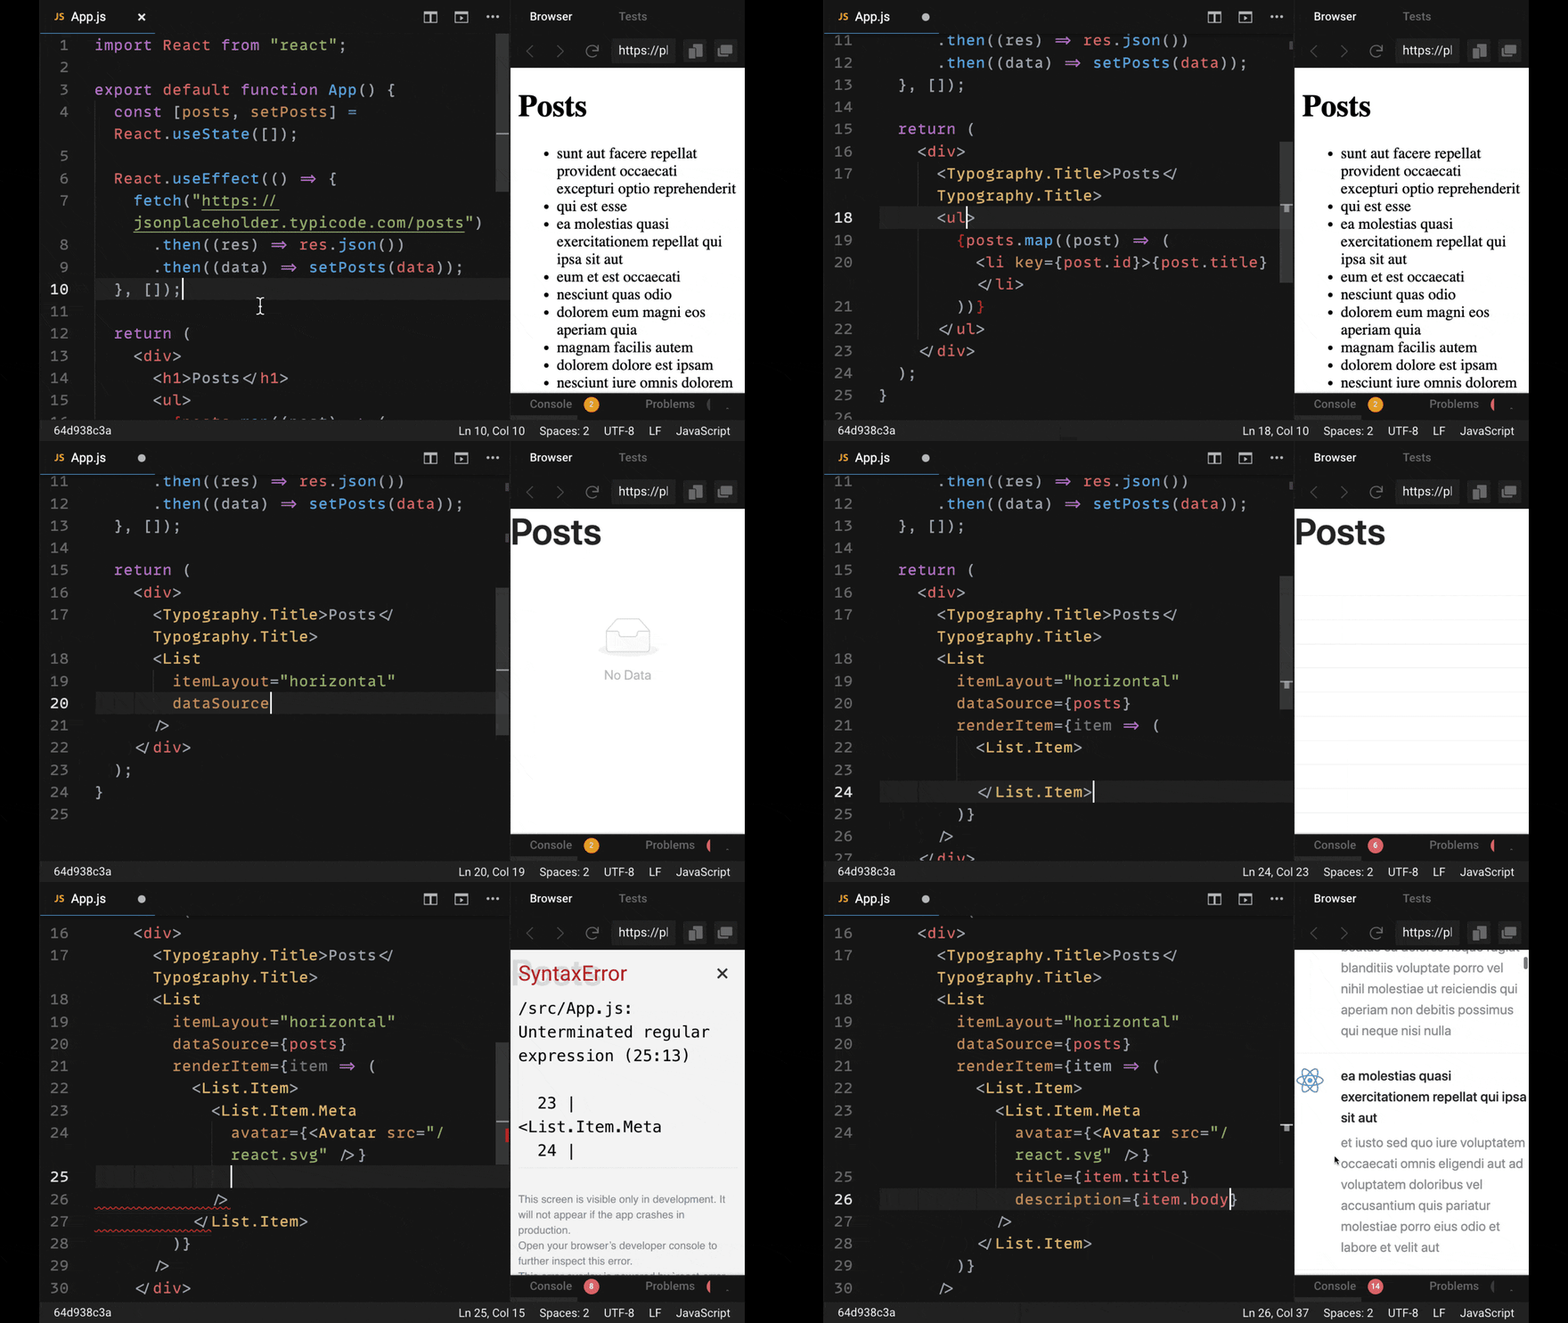
Here is a quick example of building a simple UI with Ant Design.

Most developers pick component libraries for their appearance and what components they feature, but the best libraries also include additional tools that make our apps for functional.
Here is one such custom hook (
useClipboard) from Chakra UI that allows us to copy text to our users’ clipboard.
I’ve selected these because not only do I find them to be visually appealing but they also have a great deal of components that will suit virtually every use case you have.
The worst thing to happen is when you have a component library once you are midway into building your app is realizing it doesn’t have all the tools that you need.
Check out the component libraries Ant Design , Material UI or Chakra UI for your next project. Or use a CSS-in-JS library like Emotion or Styled Components if you are interested in writing styles by hand.
Every React application you build will probably have a form. Needless to say,building forms are a pain!
Not only do you have to create the form itself, but you also have to add tricky things like input validation and error handling.
The best form libraries you can use in 2021 are React Hook Form and Formik.
With the help of their built-in hooks, they make it incredibly easy to build reusable, functional forms. Even forms that have complex conditions, such as fields which are dependent upon one another or that require asynchronous validation.
It worth noting that Formik has changed in that we no longer need to use the traditional render props pattern that it previously utilized.
With Formic you can use a custom hook from the Formik package called
useFormik which allows us to build our forms with the help of a custom hook of the same name.Here’s a basic form made with
useFormik.import React from 'react';
import { useFormik } from 'formik';
const SignupForm = () => {
const formik = useFormik({
initialValues: {
username: '',
email: '',
},
onSubmit: values => {
alert(JSON.stringify(values, null, 2));
},
});
return (
<form onSubmit={formik.handleSubmit}>
<label htmlFor="name">Username</label>
<input
id="username"
name="username"
type="text"
onChange={formik.handleChange}
value={formik.values.username}
/>
<label htmlFor="email">Email Address</label>
<input
id="email"
name="email"
type="email"
onChange={formik.handleChange}
value={formik.values.email}
/>
<button type="submit">Submit</button>
</form>
);
};It’s worth noting that the only thing that you might need on top of these libraries is a validation library.
Both Formik and React Hook Form are meant to integrate with validation libraries very easily such as the library Yup. How to do so is laid out very easily in their documentation.
The React Bootcamp takes everything you should know about learning React and bundles it into one comprehensive package, including videos, cheatsheets, plus special bonuses.
Gain the insider information 100s of developers have already used to become a React pro, find their dream job, and take control of their future:

Click here to be notified when it opens
24
