
47
Make a Discord bot in just 30 lines of code.
Hey everyone 👋🏻, today we are going to make a discord bot 🤖 which will send gifs according to the user in just 30 lines of code!
The way this bot will work is, if you write
.gif happy then the bot will send a random happy gif.What are we going to use to build this mini-project:
- Discord.js
- DOTENV
- node-fetch
Okay so let's get started 🎉!!

(the blue button on top-right corner) .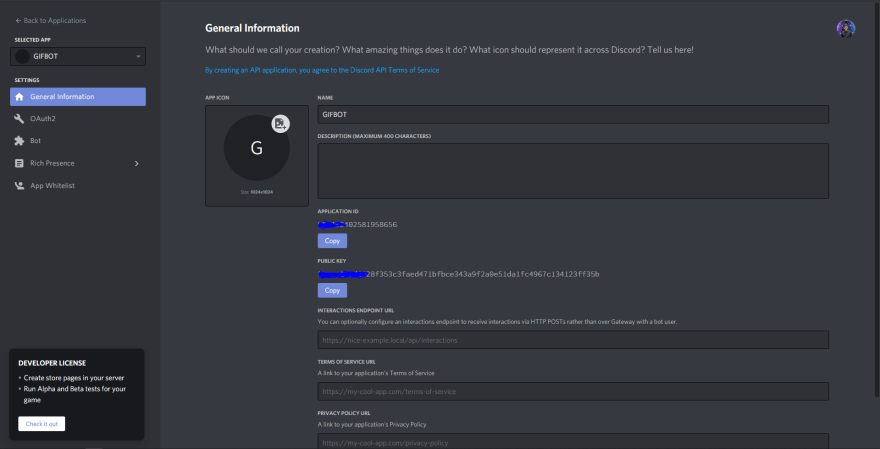
Add Bot on the right hand side, and after this step you will have a screen like this 👇🏻.
bot 👇🏻.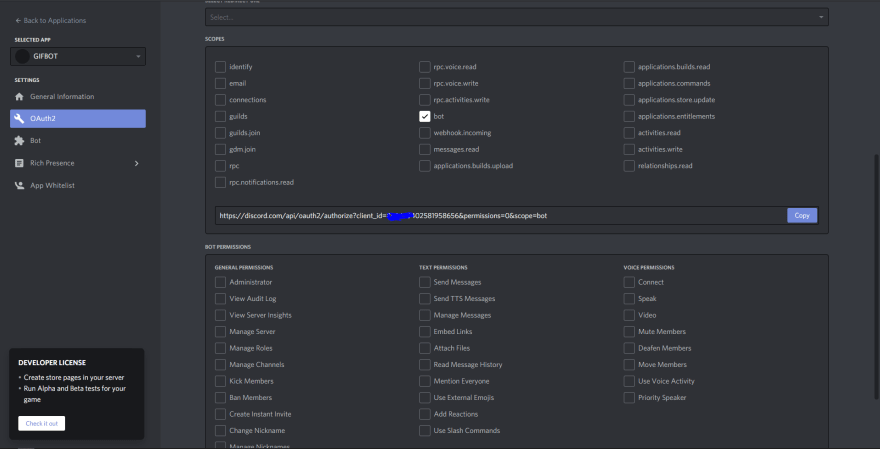
Now we just have to code it!
Before explaining the code, let me explain you the folder structure 👇🏻.
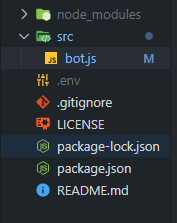
src in which we have a main file called bot.js in which we are going to code our bot.package-lock.json, package.json and node_modules respectively, they are basically of node packages and their information..env file but we will discuss about it later in this blog.- discord.js (
npm i discord.js) - dotenv (
npm i dotenv) - node-fetch (
npm i node-fetch)

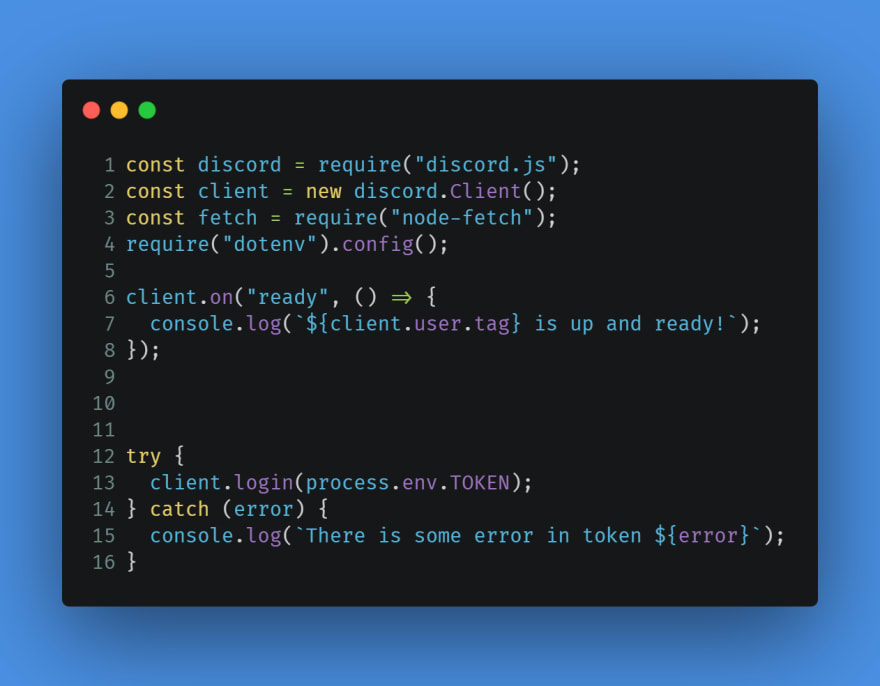
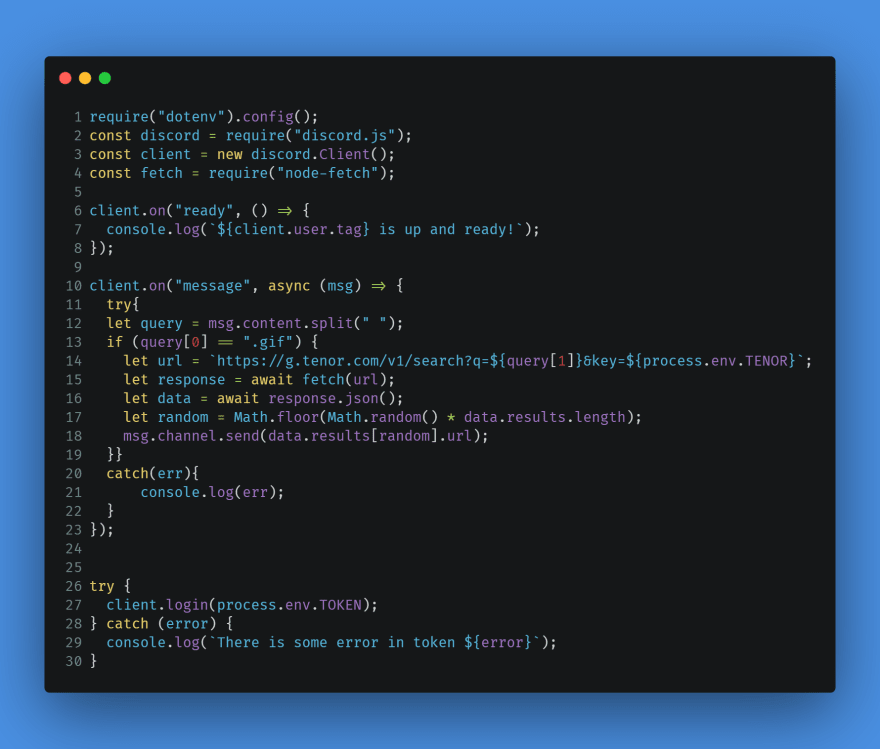
As you can see ☝🏻, there are only 30 lines of code! How amazing it that?
Your own discord bot 🤖 in just 30 lines of code!
Okay so the first and the third line of code are the import statements which can also be written as :
import discord from 'discord.js;'The second line of code is basically us initializing the client/user, which in this case will be our bot and the users themselves .
and the fourth line is importing the env package and configuring it, so basically
.env files stores all your secrets, like your discord bot's token or your API Key, these things will not be uploaded on GitHub using the git ignore file.Okay so in JavaScript there is this thing called
addEventListner which helps us to react to certain events, like if a user clicks on something or double-tap on something a particular function should run.In the same way here in discord.js
addEventListner is more or less replaced by .on function.All of the
.on functions are called in regards to the client so we have to write client.on('event', callBackFunction).On line number 6 you can see that I have written a function which is

This basically means that, whenever the user is ready and logged in the console should log
<Name of the Bot> is up and ready! and name of the bot is fetched by this inbuilt property known as .user.tag , which is to be called in regards to the client .Now we have to make our bot login to the server. And for that we have another inbuilt method/function called
.login .So we can write :
client.login(process.env.TOKEN)Now you might wonder what is this
So let me show what is stored inside
process.env.TOKEN, this is the way we call variables from our .env file.So let me show what is stored inside
.env file.
Here in this file, we have to put our bot token inside a pair of single or double quotes and our tenor API key (you can generate it from here)
For example if you want to call the
tenor api key inside your bot.js file, you just have to write process.env.TENOR.And you can make a
try-catch block around the client.login() function, so if any error occurs, we can catch it and show it on the console. 
Let's code the main functionality of the bot now.
Now all the code discussed below will be in the reference to 👇🏻 this image.

Now let's understand the above code step-by-step:
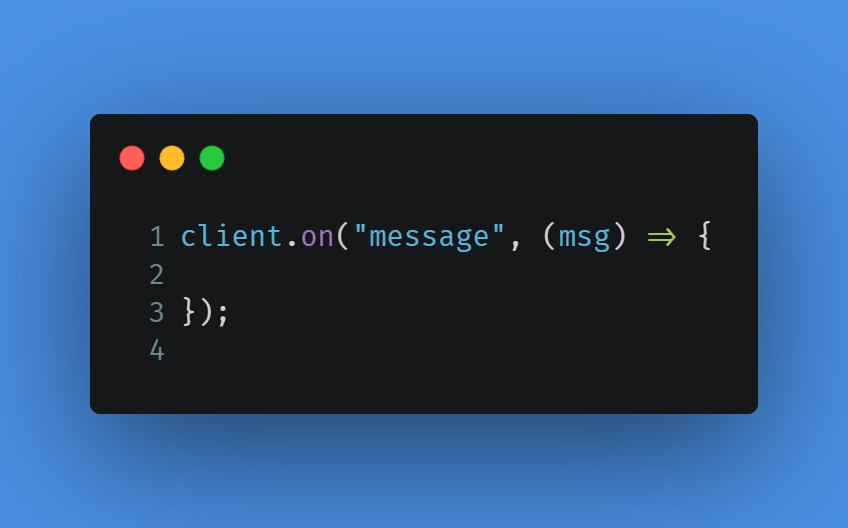
- Here the parameter
msgwill contain the message which user has sent.
.gif.
- Just to be a little safe, I am going to write the main functionality inside a
try-catchblock. 
-
msg.contenthelps us to fetch the content inside the msg. In leman's term, it is like.innerTextin JavaScript. - Here when the user will write
.gifthe code inside theifstatement will be executed.
- Now if a user writes
.gif batmanthen this will be considered as a string and a problem arises here, which is how do we separate the bot command and the user's query. - We do that by an inbuilt function called
.split(), which will help us to separate the whole string into two different values stored in an array, for example: if I write.gif batmanthen.split()will make an array :['.gif', 'batman']. - Let's see it's code.
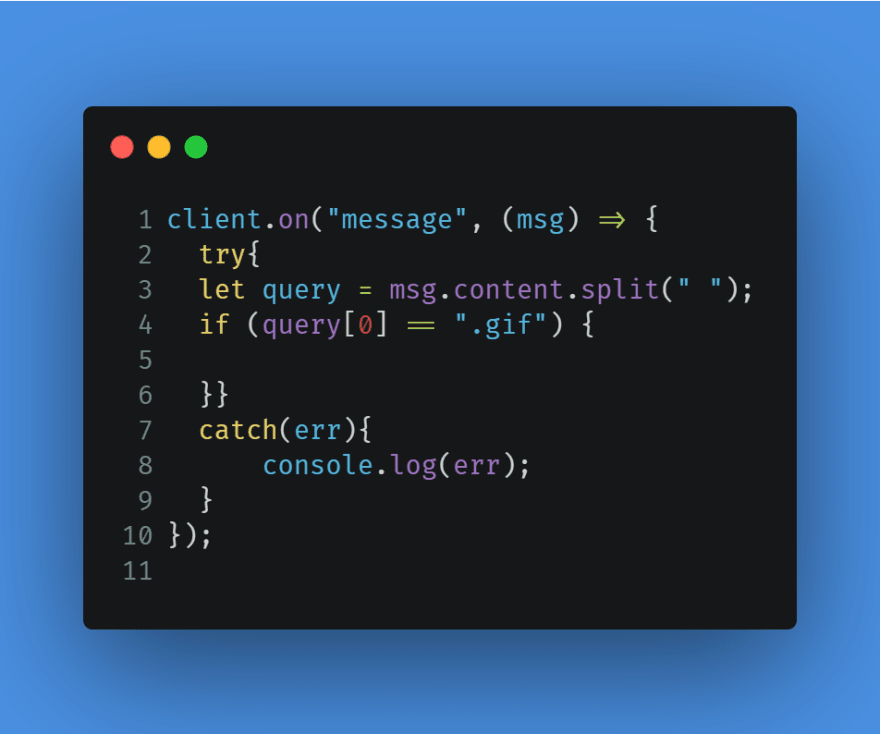
- We are going to compare the
first index of querywhich will be.gifto the string .gif.
- I am using node-fetch to fetch the API.
- The base of the API is
-
https://g.tenor.com/v1/search?q=USERQUERY&key=API-KEY
-
- And in order to take query from the user and give the key as your API Key we have to make this URL dynamic.
- We can do that by using template literals.
https://g.tenor.com/v1/search?q=${query[1]}&key=${process.env.TENOR}- And now the code looks like this.
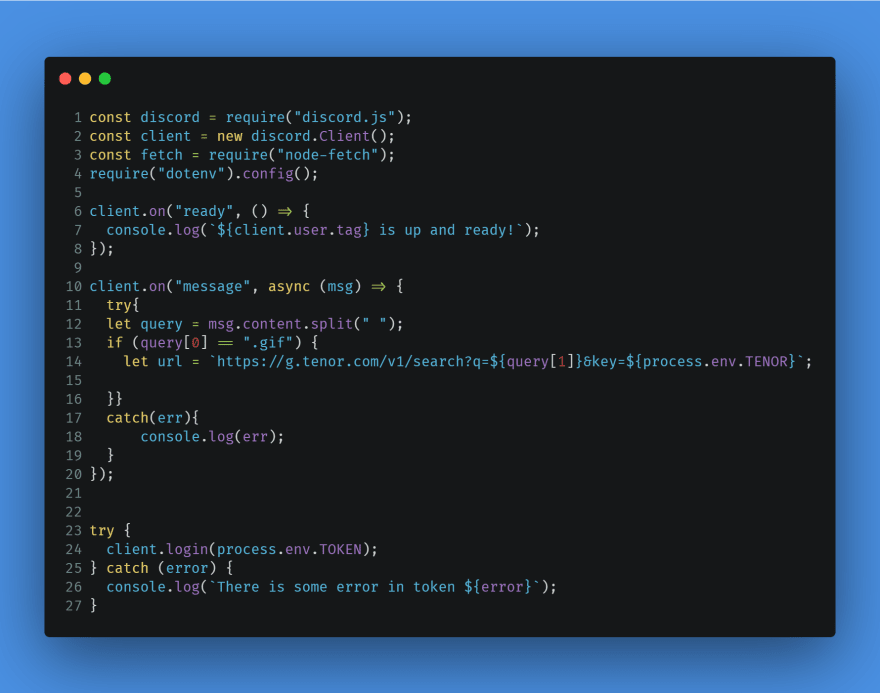
- And the query has to be the second value (First Index) in the array.
- Let's fetch the API now.
- We just have to put
asyncin front of the callback function as you can see in the above image on line number 10. -
asyncwill make your function, asynchronous and then we will useawaitto wait for the response from the API. 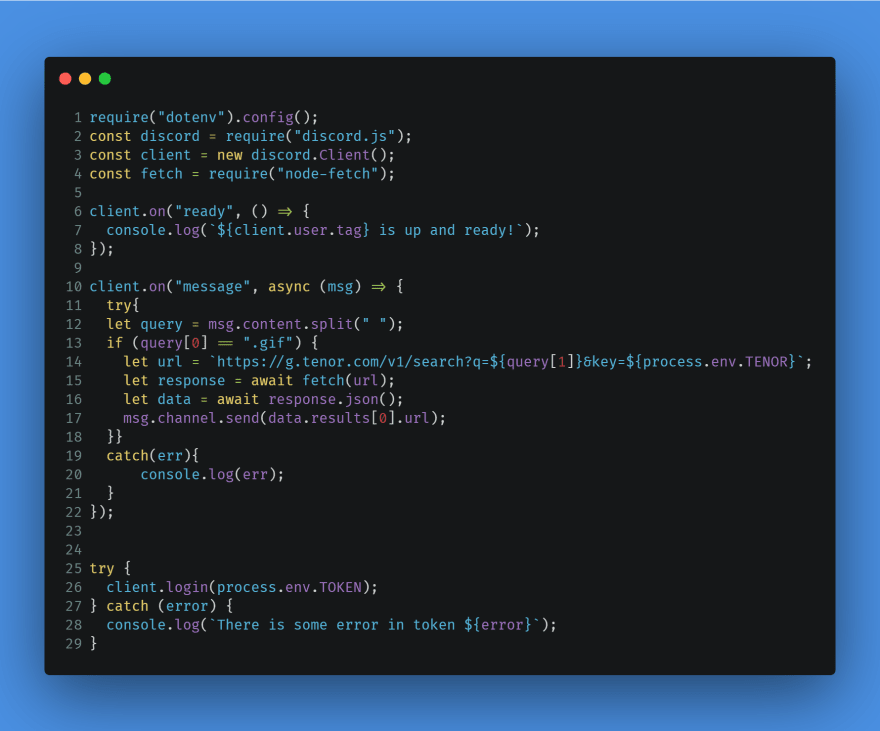
- Now here we will have a problem, which is we will only receive one GIF every time.
- Now the API will return 20 GIFs and we have to pick a random one (on line 17).
- So to do this, we will make a random variable which will choose one GIF.
- Now the final code looks like 👇🏻
- We just have to put
- Just open the terminal, change the directory to the home directory and inside
srcfolder, then writenode bot.js.
Thank you for reading the whole blog 🎉!! If you liked it do share it with your developer friends and feel free to comment and give suggestions.
47