
22
How to build a Email Newsletter Subscriber in Django?
An email newsletter is an email that is sent out on a regular basis (e.g. weekly or monthly) to certain users. As you’ll probably know by looking at your inboxes, email newsletters are a popular medium for businesses. Stats says that 85% of B2B marketers send email newsletters as part of their content marketing strategy.
In this article we will build our own email newsletter subscriber using Django and AJAX.
Requirements: Basics of Django and AJAX. You can refer to this article if you wanna learn how to use AJAX in Django.
index.html
This is the HTML file which will contain the UI. As you may have noticed, we will use bootstrap 4 components and some custom CSS. PS: Make sure to include csrf_token in the form :)
{% load static %}
<!doctype html>
<html lang="en">
<head>
    <meta charset="utf-8">
    <meta name="viewport" content="width=device-width, initial-scale=1, shrink-to-fit=no">
    <link rel="stylesheet" href="https://stackpath.bootstrapcdn.com/bootstrap/4.5.2/css/bootstrap.min.css"
        integrity="sha384-JcKb8q3iqJ61gNV9KGb8thSsNjpSL0n8PARn9HuZOnIxN0hoP+VmmDGMN5t9UJ0Z" crossorigin="anonymous">
    <link rel="stylesheet" href="https://stackpath.bootstrapcdn.com/font-awesome/4.7.0/css/font-awesome.min.css"
        crossorigin="anonymous">
    <title>Newsletter Subscribtion Example</title>
    <link rel="stylesheet" href="{% static 'assets/app.css' %}">
</head>
<body>
    <div class="col-lg-6 col-md-6" style="margin: 100px auto; display: block;">
        <form enctype="multipart/form-data" method="POST" action="" style="text-align: center;">
            {% csrf_token %}
            <div class="form-group">
                <label>Subscribe to our Newsletter.</label>
                <input type="email" class="form-control" id="userEmail" placeholder="Enter email" required>
                <small style="font-weight: 600;color: red;" class="error"></small>
                <input type="text" class="form-control mt-2" id="userName" placeholder="Enter name" required>
                <small style="font-weight: 600;color: green;" class="success"></small>
            </div>
            <input type="submit" value="Subscribe" id="submit" class="btn">
        </form>
    </div>
    <script src="https://ajax.googleapis.com/ajax/libs/jquery/3.3.1/jquery.min.js"></script>
    <script src="{% static 'assets/app.js' %}"></script>
</body>
</html>
app.css
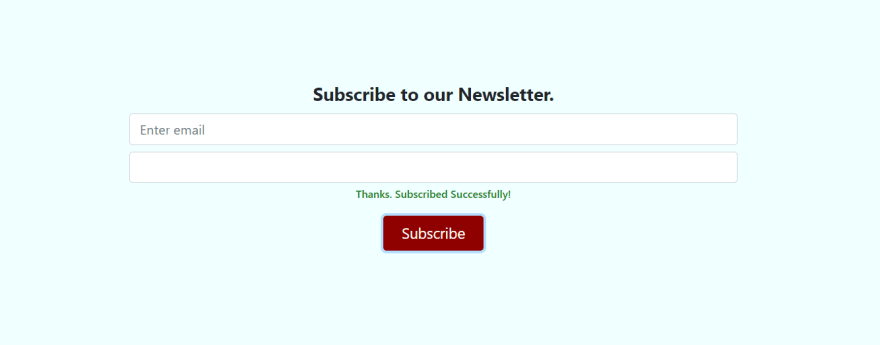
Let's add some of our own CSS to make our UI more aligned.
label {
    font-size: 22px;
    font-weight: bold;
}

.btn {
    padding: 7px 21px;
    background-color: rgb(143, 1, 1);
    color: white;
    font-size: 18px;
}

body {
    background-color: azure;
}
This is how our UI will appear.

app.js
We will retrieve the values that are entered by user in input box and check if the email entered by user is valid or already exists in our database.
We will retrieve the values that are entered by user in input box and check if the email entered by user is valid or already exists in our database.
We will use AJAX request to validate the email as soon as user enters the email by binding a change event on email input box. If the email and name of the user are valid we will add it to our database using another AJAX request.
const validateEmail = function(email) {
    var formData = new FormData();
    formData.append('email', email)
    $.ajaxSetup({
        headers: {
            "X-CSRFToken": document.querySelector('[name=csrfmiddlewaretoken]').value,
        }
    });
    $.ajax({
        url: '/validate/',
        type: 'POST',
        dataType: 'json',
        cache: false,
        processData: false,
        contentType: false,
        data: formData,
        error: function (xhr) {
            console.error(xhr.statusText);
        },
        success: function (res) {
            $('.error').text(res.msg);
        }
    });
};

const subscribeUser = function(email, name) {
    var formData = new FormData();
    formData.append('email', email);
    formData.append('name', name);
    $.ajaxSetup({
        headers: {
            "X-CSRFToken": document.querySelector('[name=csrfmiddlewaretoken]').value,
        }
    });
    $.ajax({
        url: '/newsletter/',
        type: 'POST',
        dataType: 'json',
        cache: false,
        processData: false,
        contentType: false,
        data: formData,
        error: function (xhr) {
            console.error(xhr.statusText);
        },
        success: function (res) {
            $('.success').text(res.msg);
            $('#userEmail').val(' ');
            $('#userName').val(' ');
        }
    });
};

(function ($) {
    $('#submit').on('click', () => {
        event.preventDefault();
        const userEmail = $('#userEmail').val();
        const userName = $('#userName').val();
        if (userEmail && userName) {
            subscribeUser(userEmail, userName);
        }
    });

    $('#userEmail').on('change', (event) => {
        event.preventDefault();
        const email = event.target.value;
        validateEmail(email);
    });
})(jQuery);
With this we are done with the front end. Now let's build a model and a server to try this code.
urls.py
The url where the request will be made
from django.urls import path
from . import views

urlpatterns = [
    path('newsletter/', views.index, name='index'),
    path('validate/', views.validate_email, name='validate_email'),
]
views.py
The request made to the server are handled by function defined in views.py. When we get a POST request, we retrieve the data and add them to the database.
We will also send a confirmation mail to the user using Google's SMTP server. If you want to know how it works, you can check this article.
from django.shortcuts import render
from django.http import JsonResponse
import re
from .models import SubscribedUsers
from django.core.mail import send_mail
from django.conf import settings

def index(request):
    if request.method == 'POST':
        post_data = request.POST.copy()
        email = post_data.get("email", None)
        name = post_data.get("name", None)
        subscribedUsers = SubscribedUsers()
        subscribedUsers.email = email
        subscribedUsers.name = name
        subscribedUsers.save()
        # send a confirmation mail
        subject = 'NewsLetter Subscription'
        message = 'Hello ' + name + ', Thanks for subscribing us. You will get notification of latest articles posted on our website. Please do not reply on this email.'
        email_from = settings.EMAIL_HOST_USER
        recipient_list = [email, ]
        send_mail(subject, message, email_from, recipient_list)
        res = JsonResponse({'msg': 'Thanks. Subscribed Successfully!'})
        return res
    return render(request, 'index.html')

def validate_email(request):
    email = request.POST.get("email", None)
    if email is None:
        res = JsonResponse({'msg': 'Email is required.'})
    elif SubscribedUsers.objects.get(email = email):
        res = JsonResponse({'msg': 'Email Address already exists'})
    elif not re.match(r"^\w+([-+.']\w+)*@\w+([-.]\w+)*\.\w+([-.]\w+)*$", email):
        res = JsonResponse({'msg': 'Invalid Email Address'})
    else:
        res = JsonResponse({'msg': ''})
    return res
models.py
We cannot store data until we have a model. Let's create one.
from django.db import models

class SubscribedUsers(models.Model):
    email = models.CharField(unique=True, max_length=50)
    name = models.CharField(max_length=50)
Run these commands in the terminal to migrate your model
python manage.py makemigrations
python manage.py  migrate
Now we are all set to test our application. Go to your browser, run the serving URL and test your app.
This are few snapshots of the output.


With this we have build a way for users to subscribe to our website. All the users who fill these detail and hit the subscribe button will be added into our database. The next step for will be sending a mail to all the users that we have in our database for any article we want. That's it for this article. Thanks for reading.
You can also connect with me on Twitter for any discussion.
Adios!
22