
67
Part 1: Setup Snowpack
Hi! I'm Marcus.
This is my first article in my Front End series.
Each article will be written to read in 5 mins per purpose itself. I'll make a video for more understanding if possible.
This is my first article in my Front End series.
Each article will be written to read in 5 mins per purpose itself. I'll make a video for more understanding if possible.
Table of contents:
Today I'll guide you on how to create a
snowpack template project.
Or create in terminal
mkdir frontendThis command will create an empty folder, which contains our source code.
cd frontend
npm init -yThis command will create a
package.json file which contains dependencies, command, ..etc.
npm i snowpack -DWith flag
After installed done we need to adjust
-D it means we only need this dependency in the development environment.After installed done we need to adjust
scripts in package.json.
"scripts": {
    "snowpack": "snowpack",
    "start": "snowpack dev"
}
npm run snowpack inittouch index.htmlFor now, our source code should be looked like this

npm run start
Then open your browser to show the result

Tada! Ok you can stop
dev server by Ctrl + C or terminate that process on terminalnpm i react react-domThen we need adjust source code structure a little bit
mkdir src
mkdir public
Move
index.html to public directorymv index.html public/
Create
index.jsx file inside src 
Edit
index.html
and
snowpack.config.js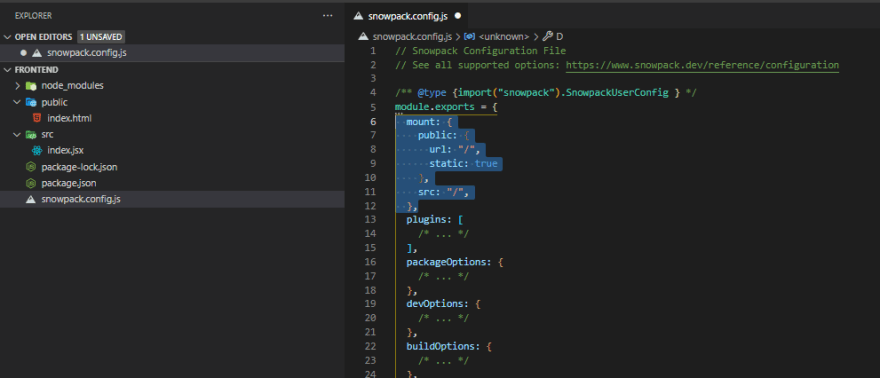
mount: {
    public: {
        url: "/",
        static: true
    },
    src: "/"
}
OK! Let's serve the app again.
npm run start
Thanks for your reading, see you in next article
Part 2: Installing TypeScript and Setting Up Development
Part 2: Installing TypeScript and Setting Up Development
67