53
Creating A Swipeable Card In React Native (part 1/3)

I have a previous post on my profile describing how I created a Tinder Style swiping component. Since then, I have learned more about React Native's Gesture Handler and Animated API's and in this post I will describe how we can create an even better Tinder-like swiping app. This will be a multi part series and this tutorial will assume you have basic familiarity with the Animated and Gesture Handler APIs.
To make our app look like Tinder, we want our cards to be able to move up and down as well as rotate. Also, when the user moves their card, we want to show the next card behind it. Lastly, when the user completes a swipe the next card should be interactable while the swiped card animates off screen. That way our app will feel fluid and users can rapid fire swipes to their hearts content.
In this tutorial I will show how we can achieve the first goal, getting our cards to move in all directions and rotate with the swipe.
To begin with, I've created a basic app with minimal styling. The app renders some example data inside a PanGestureHandler component.
import { StatusBar } from 'expo-status-bar';
import { SafeAreaView } from 'react-native-safe-area-context';
import React, {useState} from 'react';
import { StyleSheet, Text, View, Image, Animated } from 'react-native';
import {PanGestureHandler} from 'react-native-gesture-handler';

const profiles = [
  {
    name:"John Doe",
    age:27,
    likes:["Hockey","Hiking"],
    pic:"https://i.picsum.photos/id/875/400/700.jpg?hmac=lRCTTEqKWD92eBmpH4wlQzMAlimbfZlquoOe63Mnk0g"
  },
  {
    name:"Alexis Texas",
    age:22,
    likes:["Parties","Bananas"],
    pic:"https://i.picsum.photos/id/657/400/700.jpg?hmac=4lzNCpLyxL1P5xiJN4wFe9sqVK0DgL5OSuHIcESjIVs"
  },
  {
    name:"Jane Smith",
    age:35,
    likes:["Netflix","Wine"],
    pic:"https://i.picsum.photos/id/47/400/700.jpg?hmac=TQCJf6PQAtKGOEKHlgf3xN-JusmYrre3czFnX3AWf5M"
  }
]

let index = 0

export default function App() {
  const [profile,setProfile] = useState(profiles[0])

  return (
    <SafeAreaView style={styles.container}>
      <View style={styles.cardContainer}>
        <PanGestureHandler>
          <Animated.View style={[styles.card]}>
            <Image source={{uri: profile.pic}} style={{height:"80%",width:"100%"}}></Image>
            <View style={{flex:1,alignContent:'center',justifyContent:'center'}}>
              <Text style={{fontSize:20,fontWeight:"700"}}>{profile.name}</Text>
              <Text>Age: {profile.age}</Text>
              <Text>Likes: {profile.likes.join(', ')}</Text>
            </View>
          </Animated.View>
        </PanGestureHandler>
      </View>
      <StatusBar style="auto" />
    </SafeAreaView>
  );
}

const styles = StyleSheet.create({
  container: {
    flex: 1,
    margin:10,
    backgroundColor: '#fff',
    alignItems: 'center',
    justifyContent: 'center',
  },
  cardContainer:{
    flex:1,
    width:"100%",
    alignItems: 'center',
    justifyContent: 'center'
  },
  card:{
    backgroundColor: "rgb(230,230,230)",
    width:"100%",
    height:"100%",
    borderRadius: 5,
    position:'absolute',
    borderWidth:1.5,
    borderColor:'black',
    alignItems: 'center',
    justifyContent: 'center'
  }
});
With the code how it is now, the card is not moveable. To get our card to move around we'll create two Animated Values, TranslateX and TranslateY, and pass them to a transform style property in our Animated View inside our PanGestureHandler.
export default function App() {
  const [profile,setProfile] = useState(profiles[0])
  const translateX = new Animated.Value(0)
const translateY = new Animated.Value(0)<Animated.View style={[styles.card],{transform:[{translateX},{translateY}]>
<Image source={{uri: profile.pic}} style={{height:"80%",width:"100%"}}></Image>
<View style={{flex:1,alignContent:'center',justifyContent:'center'}}>
<Text style={{fontSize:20,fontWeight:"700"}}>{profile.name}</Text>
<Text>Age: {profile.age}</Text>
<Text>Likes: {profile.likes.join(', ')}</Text>
</View>
</Animated.View>Now to get the values to track the movement of the user's finger we'll pass an Animated Event to the onGestureEvent prop for our PanGestureHandler. The Animated Event will update the values of translateX and translateY to the values of the nativeEvents translationX and translationY. In this case, since we are using the PanGestureHandler, the nativeEvent is panning, so translationX and translationY are the values of the movement of the user's finger in the X and Y axes.
const handlePan = Animated.event(
    [{nativeEvent:{translationX:translateX,translationY:translateY}}],{useNativeDriver:true}
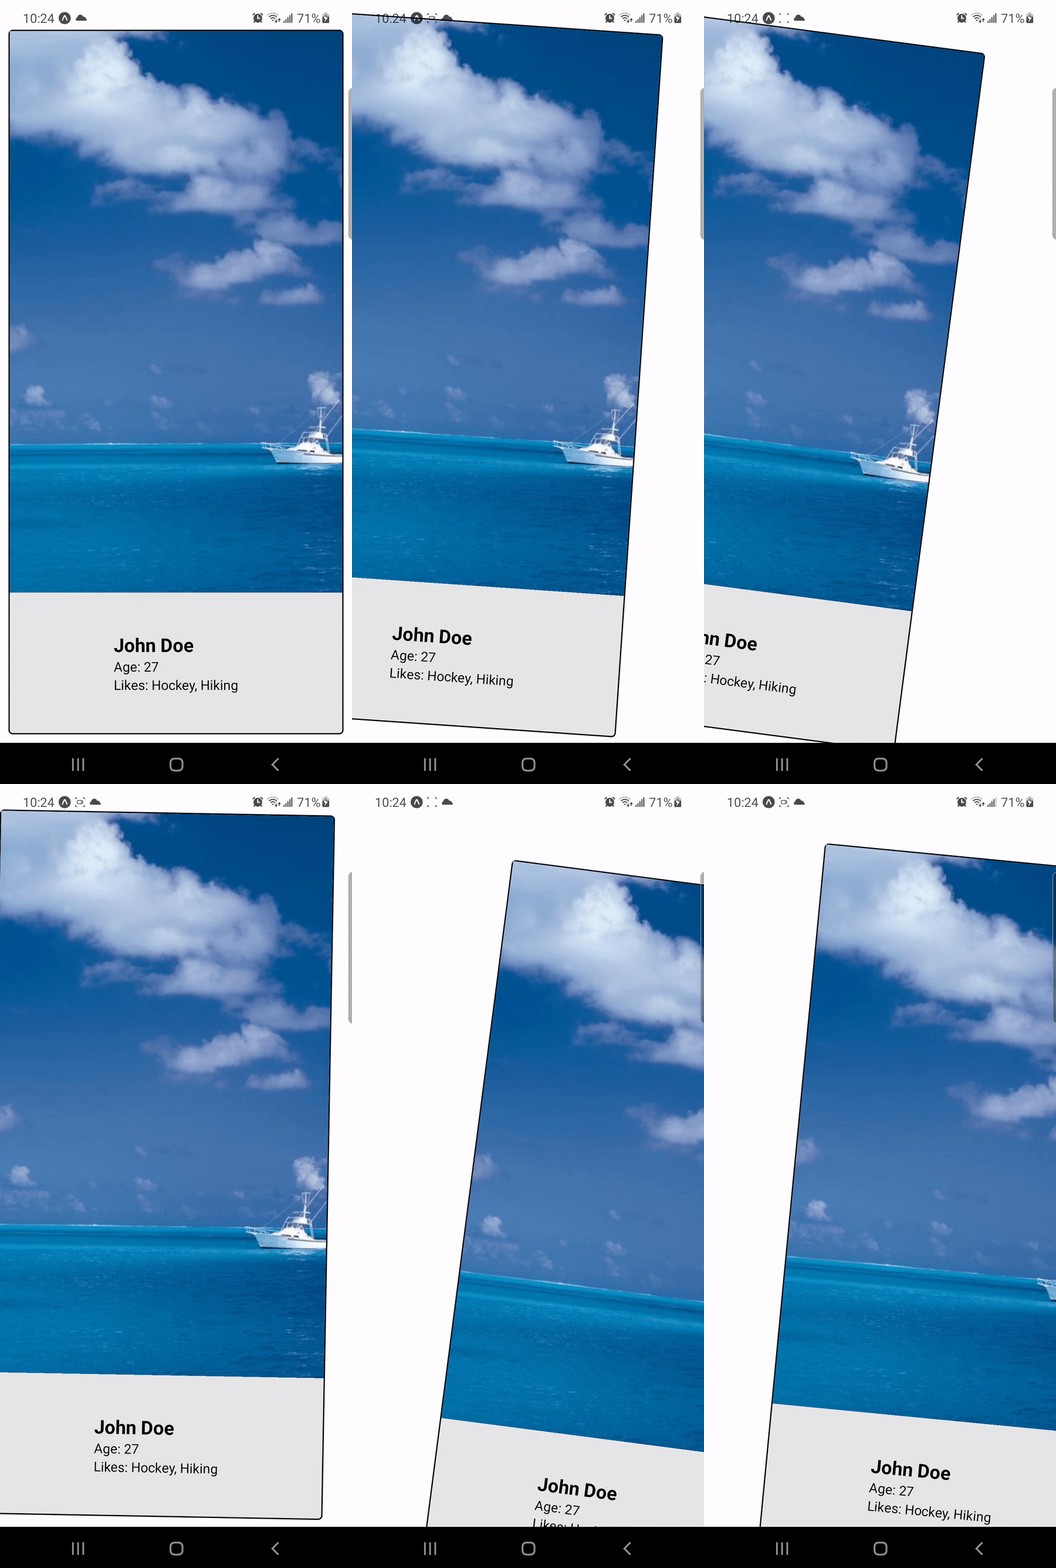
)<PanGestureHandler onGestureEvent={handlePan}>Now our card moves around with the users finger.
Next, lets handle rotation. For the rotation, we want our card to rotate differently depending on if they are touching the top of the card or the bottom of the card. To track where they touch we will create another Animated Value named 'y' and pass it to our event handler.
const y = new Animated.Value(0)

  const handlePan = Animated.event(
    [{nativeEvent:{translationX:translateX,translationY:translateY,y}}],{useNativeDriver:true}
)
Then, we can use the interpolate method to get a value that returns 1 or -1 depending on if the user is touching the top or bottom of the window. To get the window Height I imported 'Dimensions' from React Native.
Import {Dimensions} from 'react-native';
const y = new Animated.Value(0)
const windowHeight = Dimensions.get('window').height
const TopOrBottom = y.interpolate({inputRange:[0,windowHeight/2-1,windowHeight/2],outputRange:[1,1,-1],extrapolate:'clamp'})
Finally, we will make another Aniamted Value named 'rotate' that will use the values of TopOrBottom and translateX to determine the degrees that our view will rotate by.
const rotate = Animated.multiply(translateX,TopOrBottom).interpolate({
    inputRange:[-500,500],
    outputRange:[`-30deg`,`30deg`],
    extrapolate:'clamp'
})
And we'll pass this to the transform prop in our Animated View
<Animated.View style={[styles.card, {transform:[{translateX},{translateY},{rotate}]}]}>And at last, our view rotates in the direction that our user swipes and changes direction based on whether they swipe from the bottom or top of the window.
In the next part, I will discuss how we can add animations, make it so that the next profile card shows up behind the current profile and add functionality so that when a user swipes far enough the next card is set to the front.
53
