
18
React UI for Python Scripts on Node.JS
If you are familiar with node.js, you know that it is
and python has great scientific computing libraries [NumPy,Pandas,etc] that make it the go to choice for academics, data scientists, deep learning engineers, etc.
Some time ago, I wanted to explore computer vision, something that I had been really fascinated for quite a while.
So I started learning CV and wrote a python script that would take an image and remove color channels to make it look like as if a color filter had been applied to it.
It was super cool and I wanted to make a fun little website/webUI out of it so I could share it to the rest of the world.
Being a self-taught MERN Stack Developer, I started to research upon how one could combine python and javascript.
A Week or Two Later, I Did It.
And this blog is a documentation of how I solved this challenge.
I have also including here, the full code I used to deploy my application to Heroku
Live Deployment: https://color-filter.netlify.app
Source Code: https://github.com/LucidMach/ColorFilter
Live Deployment: https://color-filter.netlify.app
Source Code: https://github.com/LucidMach/ColorFilter
The Projecct has 4 phases

We begin by first extracting an image from the webcam, we can use plain HTML5's
navigator.getUserMedia API but there's an react package that simplifies the whole process.yarn add react-webcamwe can use
getScreenshot({width: 1920, height: 1080}) to take a 1080p snapshot of the user.Now that we have a snapshot (as a base64 string), we've to send it to the server
Any browser can only run javascript on the client, so we've to run python on the server
we make a post request
axios.post(url, { image: imageSrc, color: selectedColor })I also send the selected color, as I need it for the application that I'm building
By default the server(bodyParser middleware) limits the size of data it can get(post) to 1MB and pictures are usually way big
Unless you used an image optimizer like I did in a previous project
Let's Push the Limits
app.use(bodyParser.json({ limit: "5mb" }));Also we need to extract the image from the base64 string
Example base64 PNG String
data:image/png;base64,iVBORw0KGgoAAAANSUhEUgAAAKsAAADVCAMAAAAfHvCaAAAAGFBMVEVYActual base64 Image
iVBORw0KGgoAAAANSUhEUgAAAKsAAADVCAMAAAAfHvCaAAAAGFBMVEVYconst base64Image = req.body.image.split(";base64,").pop();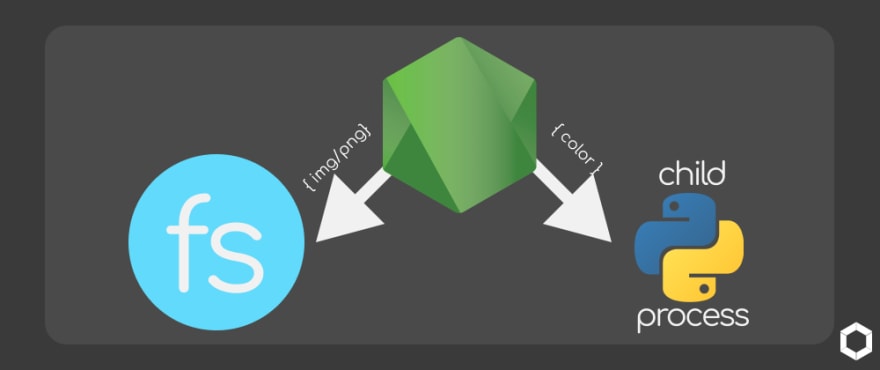
If you've ever passed parameters(argv) to a python script / built a CLI tool, what we're going to be doing is very similar
Before that let's save the image temporarily cuz we can't pass images as argv(script parameter)
const fs = require("fs");

fs.writeFileSync("input/image.png", base64Image, { encoding: "base64" });
Now, we spawn a python child process
we do this my representing terminal commands to an array
we do this my representing terminal commands to an array
const { spawn } = require("child_process");

const py = spawn("python", ["color-filter.py", body.color]);
Every python script probabily sends data back to the terminal/console
To read py console log, we create a callback function
var data2send

py.stdout.on("data", (data) => {
    data2send = data.toString();
});

console.log(data2send);
If you're interested you can check out the source-code on github
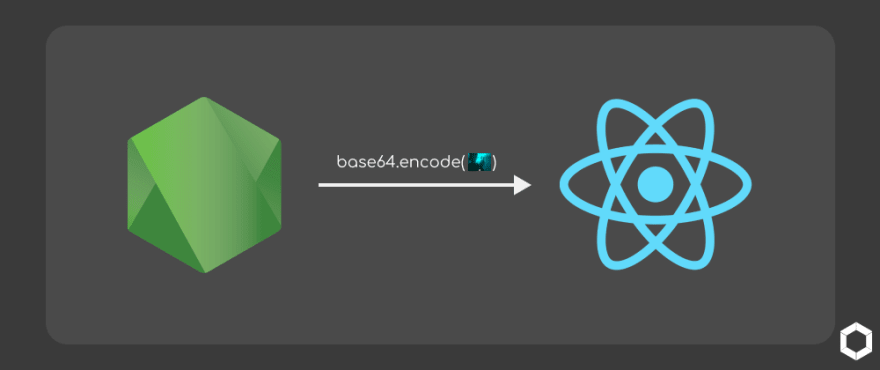
now when the py child process terminates we need to encode the image back to base64 and send back a response
we can do that by latching a callback to when the child process ends
py.on("close", () => {
  // Adding Heading and converting image to base64
  const image = `data:image/png;base64,${fs.readFileSync("output/image.png", {
    encoding: "base64",
  })}`;

  // sending image to client
    res.json({ image });
});This most important part of any project
It no longer only "works on your machine"

The process is basically the exact same as you deploy vanilla node apps + config for python childprocess
Standard Deploy Node to Heroku
Heroku Node App Deployment Docs
Add Python Packages
In the JavaScript World we have a package.json which tells every node instance all the packages required to run
We make something similar for python called
requirements.txt to replicate that behavior.It would look sorta like a
.gitignore file// requirements.txt
numpy
cv2
matplotlibwhen Heroku notices the
requirements.txt file it runs pip install -r requirements.txt, hence installing all the required packages// terminal
// This command will set your default buildpack to Node.js
heroku buildpacks:set heroku/nodejs
// This command will set it up so that the Heroku Python buildpack will run first
heroku buildpacks:add --index 1 heroku/pythonIf You ❤️ This Blog Post
Be Sure To Drop a DM on Twitter
Be Sure To Drop a DM on Twitter
✌️,
LucidMach
LucidMach
18