
24
Developing for the web with Flask; creating a web application.
Hey there, In this tutorial i will be showing you how to develop your first fullstack web-app project with flask-python.
In this tutorial or rather a documentation of how i did it, buckle up dev, and may the ride begin!
In this tutorial or rather a documentation of how i did it, buckle up dev, and may the ride begin!
Now setup up your project structure.
launch your code editor and create a directory in it.
launch your code editor and create a directory in it.
mkdir blogger && cd bloggermkdir app && cd app
touch app.py routes.py models.py
mkdir templates static
blogger and create the following files
touch blog.py config.py
all is set and your project structure should be looking like this:-
blogger/
|-app/
     |-templates #html files directory
     |-static #css& images directory
     |-__init__.py
     |-routes.py #site navigation capability
     |-models.py #db logic goes here
|-blog.py # main apprunning module
|-config.py

#tip: identation shows file location, eg; templates is in app dir
When working with external libraries it is good to run your project in a virtual environment, go ahead and install virtualenv via the terminal
pip install virtualenv
#create a virtual environment
virtualenv bloggerenv
# you can name your env any name
# activating
# windows
cd bloggerenv/Scripts/activate
# linux
source bloggerenv/bin/activate

#deactivating the env
deactivateWe use the PIP to install the required libraries
(bloggerenv) $pip install Flask
# this are the underlying packages to start a project
open the init.py in app directory type this:
#__init__.py
from flask import Flask
app = Flask(__name__) #flask object instance

from app import routesroutes module, to be created laterOpen the routes.py file and we create the first route and test if everything is working.
from app import app

@app.route('/')
@app.route('/index')
def index():
  return "Hello, World!"
The first line imports the application instance.
This is a view function, what it does it returns the string Hello World, to the browser when the app is run.
The two first lines
This is a view function, what it does it returns the string Hello World, to the browser when the app is run.
The two first lines
@app.route are called decorators, they create urls for the web-app.Head over to the blog.py file and create the app running logic.
#blog.py
from app import app

if __name__ == '__main__:
    app.run()
With this our app is done and can be previewed in the browser.But before running Flask needs to be told how to import it, through the
FLASK_APP environment.(bloggerenv) $ export FLASK_APP=blog.pyIf you are using a windows OS use the keyword
You can run your app in the terminal now:
set instead of export.You can run your app in the terminal now:
(bloggerenv) $ flask run
 * Serving Flask app 'blog.py' (lazy loading)
 * Environment: production
   WARNING: This is a development server. Do not use it in a production deployment.
   Use a production WSGI server instead.
 * Debug mode: off
 * Running on http://127.0.0.1:5000/ (Press CTRL+C to quit)
Copy the url

Voila! app running and good.
http://127.0.0.1:5000/ in the browser.Voila! app running and good.
In this section i'll show how to work with templates to generate more elaborate web pages with more complex structures.
We are going to use Jinja2, it is a templating engine for
flask.
We are going to store the template/html files in the templates folder.
Create an
We are going to use Jinja2, it is a templating engine for
flask.
We are going to store the template/html files in the templates folder.
Create an
index.html file and open it.app/
|-templates/
|-index.htmlI want the homepage to display a custom welcome message to the user
In the routes file create a python dictionary that holds our mock user:
In the routes file create a python dictionary that holds our mock user:
from flask import render_template
from app import app

@app.route('/')
@app.route('/index')
def index():
    user = {'username' : 'Developer'}
    return render_template('index.html', title='Home', user=user)
Here we import the
Then we create mock data as a python dictionary for a user, this will change henceforth as we include a database.
render_template function from the flask module. It handles html rendering in pythonThen we create mock data as a python dictionary for a user, this will change henceforth as we include a database.
Let's code the
index.html file:-<!doctype html>
<html>
<head>
<title>{{ title }} - blogger</title>
</head>
<body>
<h1>Hello, {{ user.username }}!</h1>
</body>
</html>When we run this version of the app, we get a nice preview with the username printed out.
 substitutes
substitutes {{ ... }} blocks with corresponding values, given by the arguments provided in the render_template() call.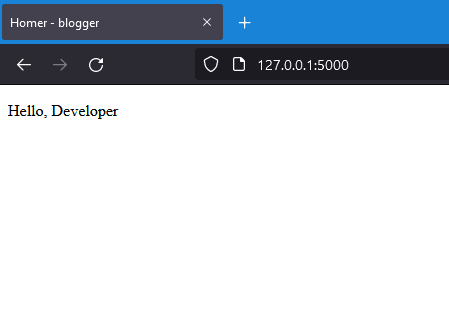
Jinja2 supports control statements given inside
Add a conditional statement to the
Put this block in the
{%..%}Add a conditional statement to the
index.html that will print the documents title when provided in the render_template() call and prints out a default title if None is provided.Put this block in the
<head> section:{% if title %}
<title>{{ title }}</title>
{% else %}
<title>App | blogger</title>
{% endif %}And yes jinja2 also supports looping, what did you expect!😂
lets add a mock data in our
lets add a mock data in our
routes.py file for postsfrom flask import render_template
from app import app
@app.route('/')
@app.route('/index')
def index():
user = {'username' : 'Developer'}
posts =[
{
'author': {'username': 'Guido'},
'body': 'I designed python language'
},
{
'author': {'username': 'Jack'},
'body': 'Blue is a cool color'
}
]
return render_template('index.html', title='Homer', user=user, posts=posts)posts with nested dictionaries, where each element is a dictionary that has author & body fields.Now head on to
index.html and handle the rendering of posts in the browser, posts can be of any number and we need to tell the temlate how to render them all, for that case we use a for loop.<!DOCTYPE html>
<html lang="en">
<head>
<meta charset="UTF-8">
<meta http-equiv="X-UA-Compatible" content="IE=edge">
<meta name="viewport" content="width=device-width, initial-scale=1.0">
<title>{{ title }} - blogger</title>
</head>
<body>
{% if user.username %}
<p>Hello, {{ user.username }}</p>
{% else %}
<p>Hello, World!</p>
{% endif %}
<h2>My posts!</h2>
{% for post in posts %}
<b>{{ post.author.username }}</b>
<p>{{ post.body }}</p>
{% endfor %}
</body>
</html>Give this new version a try and voila!!🤯🤯

When the structure of the app gets bigger and bigger we need to separate some preferences, for example, when linking css files or having a navbar in our website, its needed anyway.😊 we ought to do it in a separate template file.
We call this template inheritance:-
We call this template inheritance:-
base.html in the templates directory.
<!-- base.html -->
<!DOCTYPE html>
<html lang="en">
<head>
    <meta charset="UTF-8">
    <meta http-equiv="X-UA-Compatible" content="IE=edge">
    <meta name="viewport" content="width=device-width, initial-scale=1.0">
    <link rel="stylesheet" href="{{ url_for('static', filename='style.css') }}">
    {% block title %}
        <title>Document</title>
    {% endblock %}
</head>
<body>
    {% block content %}

    {% endblock %}
</body>
</html>
With this we can now simplify our
to inherit a template file we use the
index.html file:-to inherit a template file we use the
{% extends %} tag, at the top of the child template.{% extends 'base.html' %}
{% block title %}
{% if user.username %}
<title>{{ title }}- blogger</title>
{% else %}
<p>Blogger</p>
{% endif %}
{% endblock %}
{% block content %}
<h2>My posts!</h2>
{% for post in posts %}
<b>{{ post.author.username }}</b>
<p>{{ post.body }}</p>
{% endfor %}
{% endblock %}Template inheritance allows us to have the same look in every page without duplication.
Hence enabling us to be 'DRY'.
If you go and run this the results will be the same as above.
Hence enabling us to be 'DRY'.
If you go and run this the results will be the same as above.
As the application growsn it will require more functionality and features; like web forms, etc.
In this chapter I'll show you how to create web forms to take user input via the browser.
We use an extension called Flask-WTF, it is a wrapper found in the package WTForms, that integrates well with Flask.
We use an extension called Flask-WTF, it is a wrapper found in the package WTForms, that integrates well with Flask.
(bloggerenv) $ pip install flask-wtfFor tutorial purposes I am going to create just a simple form.
But before that, I am going to set some configuration variables, for separation of concerns i am going to define my app configs in the
I'll use a class to store any config variables and new configuration variables can be added here.
But before that, I am going to set some configuration variables, for separation of concerns i am going to define my app configs in the
config.py module in the top most directory.I'll use a class to store any config variables and new configuration variables can be added here.
# config.py
import os

class Config(object):
    SECRET_KEY = os.environ.get('SECRET_KEY') or 'you-will-never-guess'
the
The value of the secret key is set as an expression with two terms, joined by the or operator. The first term looks for the value of an environment variable, also called
For now the app is small and doesn't require much security, i'll just use the hardcoded string, but when deploying it needs to be replaced with a unique key, can be generated in the python shell using the
SECRET_KEY configuration variable is an important config in most flask apps, it is used by the Flask-WTF to protect web forms against the Cross Site Request Forgery(CSRF) attack.The value of the secret key is set as an expression with two terms, joined by the or operator. The first term looks for the value of an environment variable, also called
SECRET_KEY. The second term, is just a hardcoded string. For now the app is small and doesn't require much security, i'll just use the hardcoded string, but when deploying it needs to be replaced with a unique key, can be generated in the python shell using the
urandom module>>>from os import urandom
>>>urandom(20)
b'\x1d\x00\x08\x8b \xd8\xae\xe9....Now that i have the config set up, i have to tell Flask to read and apply it. This can be done right after the flask app instance in the
__init__.py using the app.config.from_object() method:.from flask import Flask
from config import Config
app = Flask(__name__)
app.config.from_object(Config)
from app import routesCreating the first form, once again having the separation of concerns in mind, in the
The Flask-WTF extension uses Python classes to represent web forms. A form class simply defines the fields of the form as class variables.
app directory create a file forms.pyThe Flask-WTF extension uses Python classes to represent web forms. A form class simply defines the fields of the form as class variables.
#app/forms.py
from flask_wtf import FlaskForm
from wtforms import StringField, TextAreaField, SubmitField
from wtforms.validators import DataRequired

class PostForm(FlaskForm):
    username = StringField('User name', validators=[DataRequired()])
    post = TextAreaField('Post', validators=[DataRequired()])
submit = SubmitField('Submit')validators field is used to attach validation behaviors to form fields.
-The DataRequired validator checks that a field is not submitted empty.Next is to add the form to a HTML template, so it gets rendered to the web page.
The
The
LoginForm class knows how to render itself as HTML, this makes the next part fairly simple.new_post.html in app/template/new_post.html
N/B:For uniformity inherit the base.html template inside the new template.
{% extends 'base.html' %}
{% block title %}
    {% if title %}
        <title>{{ title }}- blogger</title>
    {% else %}
        <p>Blogger</p>
    {% endif %}
{% endblock %}
{% block content %}
    <form action="" method="POST" novalidate>
        {{ form.hidden_tag() }}
        <p>
            {{ form.username.label }} <br>
            {{ form.username(size=32) }}
        </p>
        <p>
            {{ form.post.label }} <br>
            {{ form.post(size=120) }}
        </p>
        <p>
            {{ form.submit() }}
        </p>
    </form>
{% endblock %}
This template expects a form object be instantiated in the
PostForm class to be given as an argument.Which is referenced as form, the argument will be sent by the post view function.<form> element is used as the container for the web form.action attribute tells the browser the url to use when the form data is submitted. when set to an empty string the form is submitted to the current URL in the browser.novalidate tells the browser not to validate the forms as that is the work of Flask application running in the server.form.hidden_tag() template argument generates a hidden field that includes a token that is used to protect the form against CSRF attacks.{{ form.<field_name>.label }} replaces the label element, and the {{ form.<field_name>() }} goes where the form field is needed.
Read more on the jinja2 documentation.In order to render the Form to the web page a route functionality is needed, In the routes.py module add the following view function at the end.
#....

# route to the post form
@app.route('/post')
def post():
    form = PostForm()
return render_template('new_post.html', title='Add post', form=form)PostForm class from forms.py, instantiated an object form = PostForm() from it and sent the object down to the template form=form.form=form parses the form object to the template form, it is what's required to render the form fields.When you run the app and navigate to
http://127.0.0.1:5000/post a html form is displayed. But when you try to submit it a method not allowed is thrown. I'll fix that in a minute.
Next I'm going to create the navigation links inside the
base.html file.<!-- .... -->
<body>
<div>
<b>Blogger:</b>
<a href="{{ url_for('index') }}">Home</a>
<a href="{{ url_for('post') }}">Add Post</a>
</div>
<hr>
<!-- .... -->Add the above block just below the
body tag, when the app is run we get a simple navbar at the top. That actually works 😉.url_for() function from Flask. which generates URLs using iternal mapping of urls to view functions.Read ahead and practice working with forms.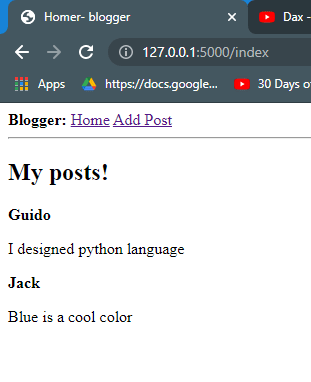
Remember when you tried running the app and an error came shouting, that was because the
To fix it we add the
The new updated route should look like this
post view function didn't understand what to do.To fix it we add the
methods=['POST', 'GET'] in the route decorator.The new updated route should look like this
# route to the post form
from flask import Flask, redirect, flash
@app.route('/post', methods=['POST', 'GET'])
def post():
    form = PostForm()
    if form.validate_on_submit():
        print(f"Hey, {form.username.data}! Your post '{form.post.data}'  was successfully submitted! ")
        return redirect('/index')
return render_template('new_post.html', title='Add post', form=form)if statement to validate the form data in the view function.validated_on_submit() runs validation of a form, Call validate only if the form is submitted. This is a shortcut for form.is_submitted() and form.validate().print() function to print a custom message in the terminal, later I will be using the Flask flash() function to flash messages in the web page.redirect: this function redirects to a specified url.flash: it flashes a message to the web page after an action has been carried. Flask doesn't support databases natively, it isn't opinionated in this field, so it gives you the freedom to choose across a variety of database options that best fits your application.
Databases can be separated into two, those that follow relational models and those that do not. referred as NoSQL dbs.
We are going to use Flask-sqlalchemy, an extension that provides a Flask-friendly wrapper to the popular SQLAlchemy package, SQLAlchemy is an ORMObject Relational Mapper.
An ORM allows applications to manage databases using high level entities such as classes, objects & methods instead of tables and SQL. The work of an ORM is to convert high-level operations into database commands.
Installing flask-sqlalchemy run this in the terminal.
An ORM allows applications to manage databases using high level entities such as classes, objects & methods instead of tables and SQL. The work of an ORM is to convert high-level operations into database commands.
Installing flask-sqlalchemy run this in the terminal.
(blogger) $ pip install flask-sqlalchemyAs the application continues to grow, it might need changes or updates, also the database needs be updated. This is done through migrations and the flask extension that handles this is :
This extension is a Flask wrapper for Alembic a flask database migration framework for SQLAlchemy. Install the extension;
Flask-migrate.This extension is a Flask wrapper for Alembic a flask database migration framework for SQLAlchemy. Install the extension;
(blogger) $ pip install flask-migrateIn the development phase I will be using SQLite database. It saves each database file on disk.
When the app reaches production, I will use a database server: PostgreSQL or MySQL.
Two configurations are required in the
When the app reaches production, I will use a database server: PostgreSQL or MySQL.
Two configurations are required in the
config.py module:import os
basedir = os.path.abspath(os.path.dirname(__file__))
class Config(object):
SECRET_KEY = os.environ.get('SECRET_KEY') or 'you-will-never-guess'
SQLALCHEMY_DATABASE_URI = os.environ.get('DATABASE_URL') or 'sqlite:///' + os.path.join(basedir, 'app.db')
SQLALCHEMY_TRACK_MODIFICATIONS = FalseThe Flask extension gets the location of the apps database from the
SQLALCHEMY_DATABASE_URI configuration variable.SECRET_KEY variable fallback, I also provide a fallback value if the config variable doesn't define the database url.SQLALCHEMY_TRACK_MODIFICATIONS configuration if set to False disables a Flask-SQLAlchemy feature that sends a signal to the application every time a change is about to be made to the database. The database is represented in the application by a database instance. This is done in the
app/__init__.py file.from flask import Flask
from config import Config
from flask_sqlalchemy import SQLAlchemy
from flask_migrate import Migrate
app = Flask(__name__)
app.config.from_object(Config) #configuration
db = SQLAlchemy(app) #database instance
migrate = Migrate(app, db)
from app import routes, modelsmodels , This module defines the structure of the database.Data stored in the database will be represented by a collection of classes, usually known as database models. The ORM layer will handle the translastions required for mapping objects created from this classes to the correct rows in the database tables.
Let's create a database model, create a new file
Let's create a database model, create a new file
app/models.pyfrom app import db
class Post(db.Model):
id = db.Column(db.Integer, primary_key=True)
username = db.Column(db.String(32), index=True, unique=True)
post = db.Column(db.String(120), index=True)
def __repr__(self):
return(f"<User>: {self.username}, <Post>: {self.post}")id field is usually in all models, and is used as the primary key. Each user is assigned a new id and is stored in this field.username & post field are defined as strings(in database is known as VARCHAR) and their maximum lengths specified.db.Column class, whih takes field type as arguments.__repr__ tells python how to print objects of this class. It is useful for debugging.
Open python in a terminal try to assign some data to our class objects.
(blogger) $ python
>>> from app import db
>>> from app.models import Post
>>> p = Post(username="John", post="Hello, World!")
>>> p
<User>: John, <Post>: Hello, World!
>>>
The model created above defines the initial database structure or schema of this application.
When the app continues to grow, we need to handle the changes such as adding new things, modifying or removing items.
To apply the migrations to a database, these migration scripts are executed in the sequence they were created.
The flask db sub-command is added by flask-migrate to manage everything related to database migrations.
To create a migration repository :
(blogger) $ flask db init
Creating directory E:\code\projects\blogger\migrations ...  done
Creating directory E:\code\projects\blogger\migrations\versions ...  done
Generating E:\code\projects\blogger\migrations\alembic.ini ...  done
Generating E:\code\projects\blogger\migrations\env.py ...  done
Generating E:\code\projects\blogger\migrations\README ...  done
Generating E:\code\projects\blogger\migrations\script.py.mako ...  done
Please edit configuration/connection/logging settings in 'E:\\code\\projects\\blogger\\migrations\\alembic.ini' before proceeding.
The
Now we need to create our fist database migration.
flask command relies on the FLASK_APP environment variable, after a successful run a new migrations directory is added.Now we need to create our fist database migration.
(blogger) $ flask db migrate -m 'posts table'
INFO  [alembic.runtime.migration] Context impl SQLiteImpl.
INFO  [alembic.runtime.migration] Will assume non-transactional DDL.
INFO  [alembic.autogenerate.compare] Detected added table 'post'
INFO  [alembic.autogenerate.compare] Detected added index 'ix_post_post' on '['post']'
INFO  [alembic.autogenerate.compare] Detected added index 'ix_post_username' on '['username']'
Generating E:\code\projects\blogger\migrations\versions\549b927398fe_posts_table.py ...  done
After running this, no change has been made to the database it just generates a migration script. Now we need to make changes to the database, To do that we use a
flask sub-command flask db upgrade in the python shell context.$ flask db upgrade
INFO [alembic.runtime.migration] Context impl SQLiteImpl.
INFO [alembic.runtime.migration] Will assume non-transactional DDL.
INFO [alembic.runtime.migration] Running upgrade -> 549b927398fe, posts tableAt this point you can play with the database a little, Let's try to add the previous post to the database.
db changes are done in a database session context.db.session.add(p), p is the object created for the corresponding database table.db.session.commit().
(blogger) $ python
>>> from app import db
>>> from app.models import Post
>>> p = Post(username="John", post="Hello, World!")
>>> p
<User>: John, <Post>: Hello, World!
>>> db.session.add(p)
>>> db.session.commit()
>>> Post.query.all()
[<User>: Ariana, <Post>: Testing 2, <User>: John, <Post>: Hello, World!]
>>>models module.Post.query.all() answers queries and returns all posts in the database.When a user types their data in the forms, and hits submit button the form data needs to be written in the database.
To do that I shall add the db session commands in the view function
Your new changed
To do that I shall add the db session commands in the view function
/post.Your new changed
app/routes.py should look like this.# route to the post form
@app.route('/post', methods=['POST', 'GET'])
def post():
form = PostForm()
if form.validate_on_submit():
add = Post(username=form.username.data, post=form.post.data)
db.session.add(add)
db.session.commit()
flash(f"Hey, {form.username.data}! Your post '{form.post.data}' was successfully submitted! ")
return redirect('/index')
return render_template('new_post.html', title='Add post', form=form)Now when a user enters data in the web forms and hits submit the data gets written to the database, we can view the data in a browser.
This part is rather simple, I just need to create a template that renders the posts in the database I will just use a
for loop to loop through the available posts in the database.Head over to the IDE and create a new template file, name it whatever you prefer.
app/templates/all_posts.html{% extends 'base.html' %}
{% block title %}
{% if title %}
<title>{{ title }}- blogger</title>
{% else %}
<p>Blogger</p>
{% endif %}
{% endblock %}
{% block content %}
<h2>Published Posts.</h2>
{% for post in posts %}
<b>{{ post.username }}</b>
<p>{{ post.post }}</p>
{% endfor %}
{% endblock %}When you run the application and navigate to
http://127.0.0.1:5000/view all our posts are displayed in the web-page.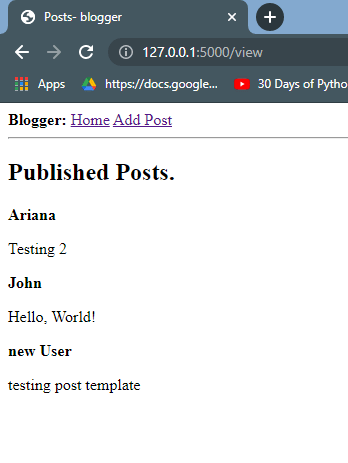
Now we can head and add a nav link for viewing all our posts, this is will be added in the
base.html file:<a href="{{ url_for('view') }}">Posts</a>Add this line of code in the div inside the
base template file. Preview the app in the browser and a new a navbar link has been added.In this article I took you through working with flask to create a minimal web application that takes user input via a web form and saves it in a database and retrieves it and displays it in a web-page.
style.css inside the app/static directory
body {
    background-color: #7fffd4;
}
When I add a the background color property the web page color changed, I shall write more on this in another article.
Thank you for taking your time to go through this article, Any feedback, advice or help is appreciated. Drop me a comment for any issue with running the code or improvement suggestions ;-)
In the next article i'll cover on deploying this flask app to heroku.
References: [https://blog.miguelgrinberg.com/post/the-flask-mega-tutorial-part-i-hello-world]
References: [https://blog.miguelgrinberg.com/post/the-flask-mega-tutorial-part-i-hello-world]
The whole code is available on Github, go ahead and star the repo or clone it for your practice.
Thank you @grayhat
and Lux Tech Academy.
Be cool and Keep coding! mic drop...dev out
24