
29
Building a Dot Matrix Animator
Whenever I start learning a new skill, I like to come up with a project I can use to apply the skill, test my knowledge, and push myself to find areas where I need to improve. As helpful as tutorials and walkthroughs are, I find that I always get the most experience when I can struggle through a project I start from scratch and apply the knowledge I've learned without explicit instructions. I decided to write this blog about my first Ruby project because I really enjoyed this project and think the results are pretty cool! I won't get into the details about the code here, but it is all available on my GitHub!
The idea I came up with was to write a program that creates a dot matrix animation based on input images. Here were my goals for the project:
- Each image acts as a keyframe in the animation
For the purpose of having a set of images to start with, I made some simple, bitonal, vector images of my initials. I will be using these three images as the keyframes for my test animation.

Before writing the code, I wanted to come up with a plan so I could determine which tools I should implement. Here's what I came up with:
- Reduce the image size down to the dot matrix size so one pixel is represented by one dot (processing a full-size image would take longer, use more memory, and provide no benefit)
- For each pixel in the image, determine the size a dot would need to be to represent a close approximation of the shade/tint
- Render a dot for each pixel with a size based on the pixel's color
To accomplish this project, I knew I would need some way to process the input images. Resizing the images was the easy bit. The more complex (and more important) task was to find the best way to relate a pixel's color in the source image to a dot's size in final animation. I felt that the relative luminance as described in this W3 accessibility document was a logical property to use in this case, and can be easily calculated with a color's RGB components. After determining what tasks I needed to fulfill, I determined that the RMagick library would be a good choice for this project.
Since I already decided to use RMagick to process the images, it makes sense to continue using it to generate a new GIF file for the animation as well. Luckily most of the process is pretty straightforward:
ImageList class (a class defined in the RMagick library) to hold each frame of the animation-
Create an instance of the
Imageclass (also from RMagick) - Provide a background color
- For each pixel/dot:
- Draw a circle in the corresponding location with a radius determined by the relative luminance
-
Add the
Imageinstance to theImageList -
Provide a duration for how long the
Imagejust added should last (this allows us to pause longer on a keyframe compared to the transitional/animation frames)
ImageList instance to a .gif fileThe more challenging piece is the transition between keyframes. To do this, I decided to write a method that would generate a new, weighted average image between two keyframes. As time progresses, the weight will shift towards the end keyframe to allow me to interpolate and generate a frame at any point in time. This new image can then be processed just like the keyframes. Below is an image demonstrating what I need to accomplish:

With any of these transitional images a new frame can be processed to create a frame of the dot matrix animation.
With a library selected and a plan set, I had to determine how to actually write the program. Leaning more towards an object-oriented approach, I decided I wanted to use three classes:
Animation class that holds most of the information/logic for the animation as a wholeFrame class that holds the data for a single image in the animationDot class that holds the information for a single dot/pixel in an imageWhen the program is initiated, it creates an instance of the
Animation class. It then resizes all of the input images down to the desired dot matrix size and adds them to an array in the Animation instance. The next step is to create Frame instances for each keyframe and all the transitional frames. Then each pixel of each Frame is used to instantiate a Dot, which is then used to render the animation. This is a bit of a simplification, but the source code is available on my repository on GitHub for those who want to dive a little deeper!I wanted to provide a command-line interface for the user that was easy to use, and I also wanted to provide the flexibility with the options used to render the animation. After looking around online I found that Thor was a good tool to utilize. It allowed me to easily create a number of options that make this program much more versatile. An example below shows how a user can select which folder the source images are in, as well as what the background and foreground colors should be:
bin/run render_gif --subfolder=demo --bg_color=black --fg_color=redThere are more options than that as well, and a default value is provided for each one. There is also a separate Ruby file that holds all the defaults to make it easy for a user to set their own preferences.
I'm really proud of the results! I was able to get the program to do exactly what I was looking for, and I enjoy seeing the animation. For the first example, here are three images I used as keyframes: one image for each of my initials.
After using these images in the script, here is the animation I got:

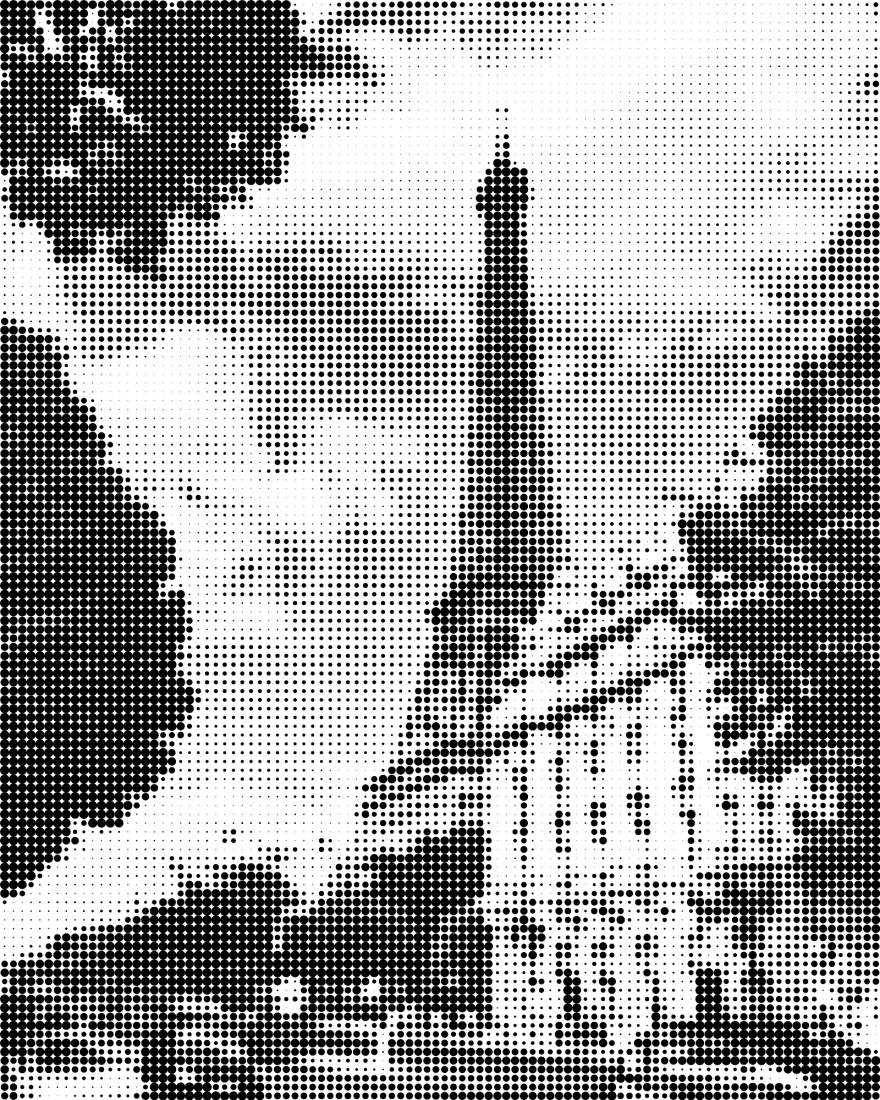
Awesome! After seeing the results for a very simple bitonal image, I wanted to see how it looked for more complex examples. I decided to generate a static dot matrix with a width of 100 pixels for these examples. I used this black & white photo of the Eiffel Tower by Lisa BR on Unsplash and ran my script to see some nice results:
I also tried it out on this photo of a dog and a pumpkin by Nathan Guzman on Unsplash and saw similarly promising results:

Obviously a lot of detail was lost since the original pictures were almost 2000 pixels in width each and were being reduced to 100 pixels (also all color is removed), but all things considered I think the results are great! The pumpkin next to the dog may not be recognizeable at this resolution and with the absense of color, but other than that both images still retain enough detail to be made sense of.
Here's a few things I'd like to add in the future:
I hope you found this project as interesting as I did! I had a lot of fun making it and feel a lot more comfortable with Ruby's syntax after going through it. Thanks for reading!
29