29
Create a Discord Bot in Minutes with Python
Written by Lior Ben David.
If there's any platform that's become the darling of online communities, it's Discord. Its intuitive UX, vibrant communities, and diverse feature set have allowed it to grow rapidly over the 6 years.
Among developers at least, a lot of the love for Discord comes from its high programmability. In this tutorial, we are going to be making a simple Discord Bot with Python that you can add to your servers.
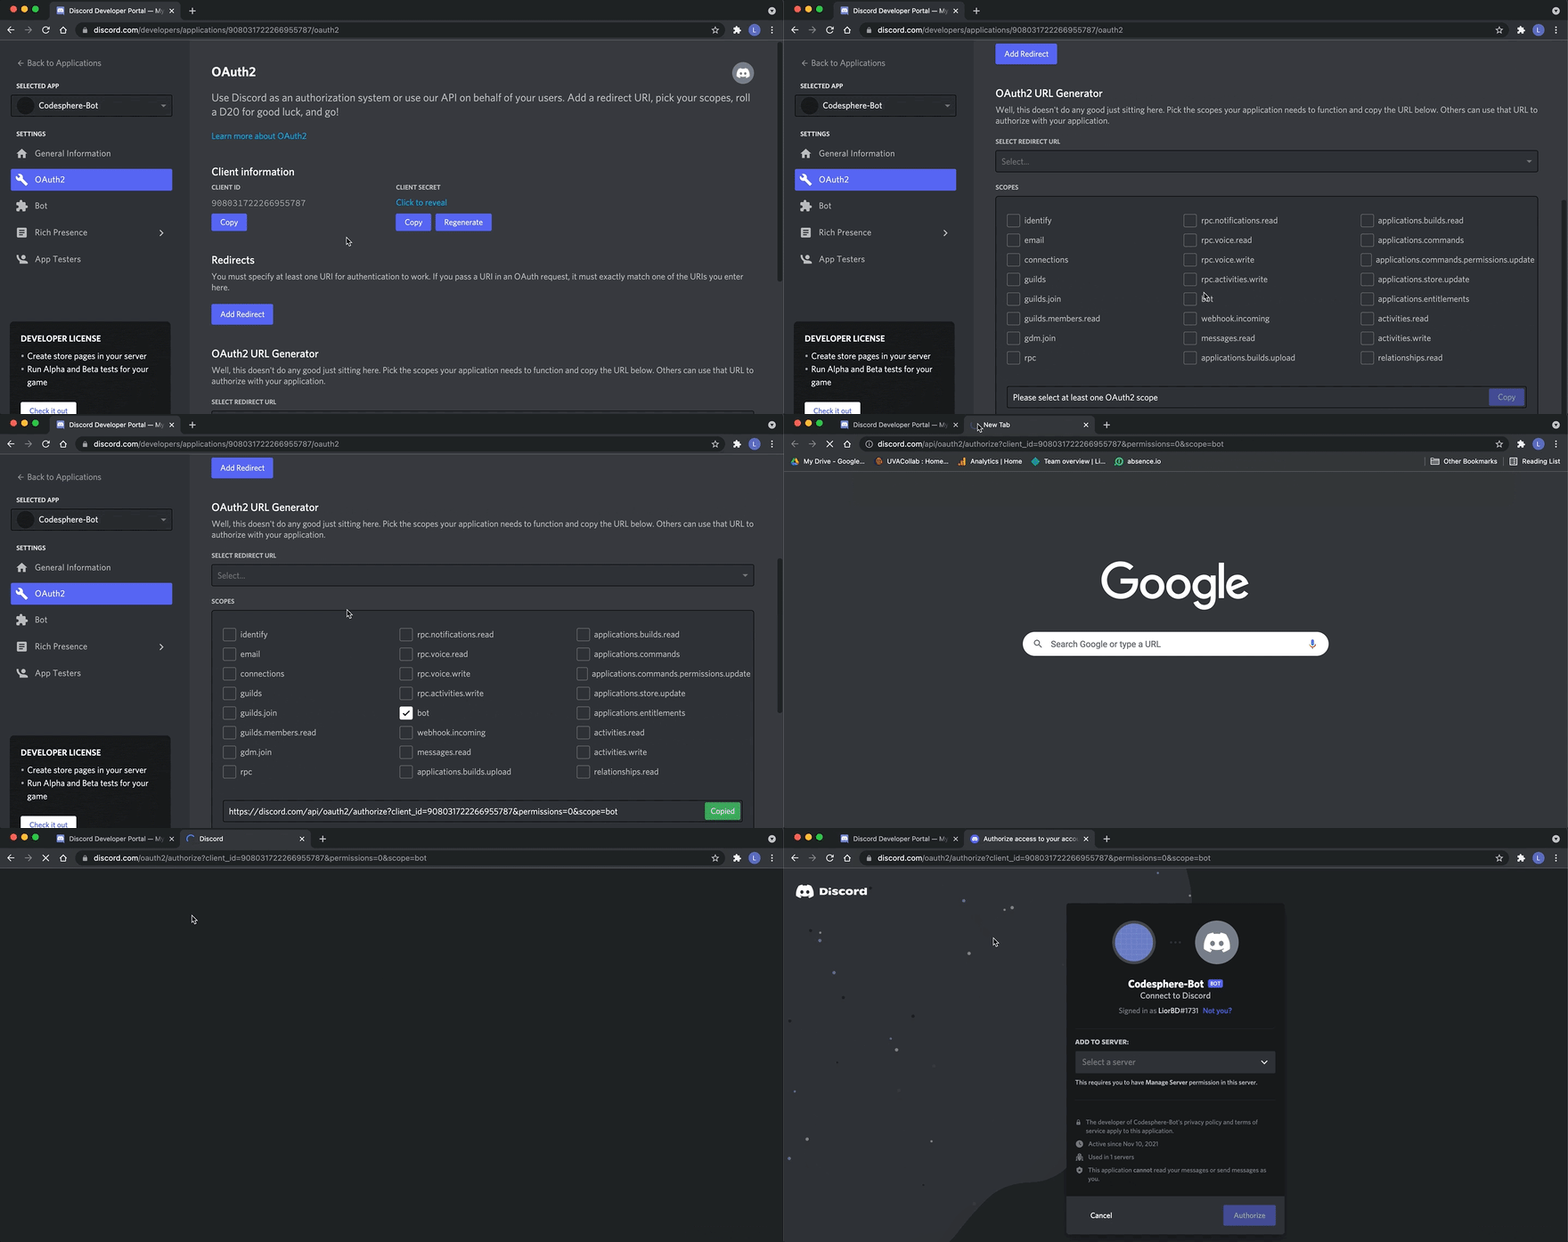
To get started, first head to
And Create a New Application
From there, head to the "Bot" tab and create a new bot.
Finally, to add our bot to a server, go to the oAuth2 tab, scroll down to scopes, check bot and visit the generated URL.
Finally, to add our bot to a server, go to the oAuth2 tab, scroll down to scopes, check bot and visit the generated URL.

You can then select the server you want to add the bot to and you should see it on your server under offline users

That's all we need to do from the Discord side!
Now let's code our bot.
First, install discord.py with:
First, install discord.py with:
pip install discordAnd create a new file called
main.pyWe can then authenticate our discord like so:
This file contains hidden or bidirectional Unicode text that may be interpreted or compiled differently than what appears below. To review, open the file in an editor that reveals hidden Unicode characters.
Learn more about bidirectional Unicode characters
| from discord.ext import commands | |
| TOKEN = "FIND YOUR TOKEN IN THE BOT TAB IN DISCORD DEVELOPER PORTAL" | |
| # Initialize Bot and Denote The Command Prefix | |
| bot = commands.Bot(command_prefix="!") | |
| # Runs when Bot Succesfully Connects | |
| @bot.event | |
| async def on_ready(): | |
| print(f'{bot.user} succesfully logged in!') | |
| bot.run(TOKEN) |
You can find your authentication token in the Bot Tab in your developer portal
Now let's read and respond to messages that people send in channels
This file contains hidden or bidirectional Unicode text that may be interpreted or compiled differently than what appears below. To review, open the file in an editor that reveals hidden Unicode characters.
Learn more about bidirectional Unicode characters
| from discord.ext import commands | |
| TOKEN = "INSERT-TOKEN" | |
| bot = commands.Bot(command_prefix="!") | |
| @bot.event | |
| async def on_ready(): | |
| print(f'{bot.user} succesfully logged in!') | |
| @bot.event | |
| async def on_message(message): | |
| # Make sure the Bot doesn't respond to it's own messages | |
| if message.author == bot.user: | |
| return | |
| if message.content == 'hello': | |
| await message.channel.send(f'Hi {message.author}') | |
| if message.content == 'bye': | |
| await message.channel.send(f'Goodbye {message.author}') | |
| await bot.process_commands(message) | |
| bot.run(TOKEN) |
We need to include the bot.process_commands at the end in order to make sure the bot also checks if the message is a valid command.
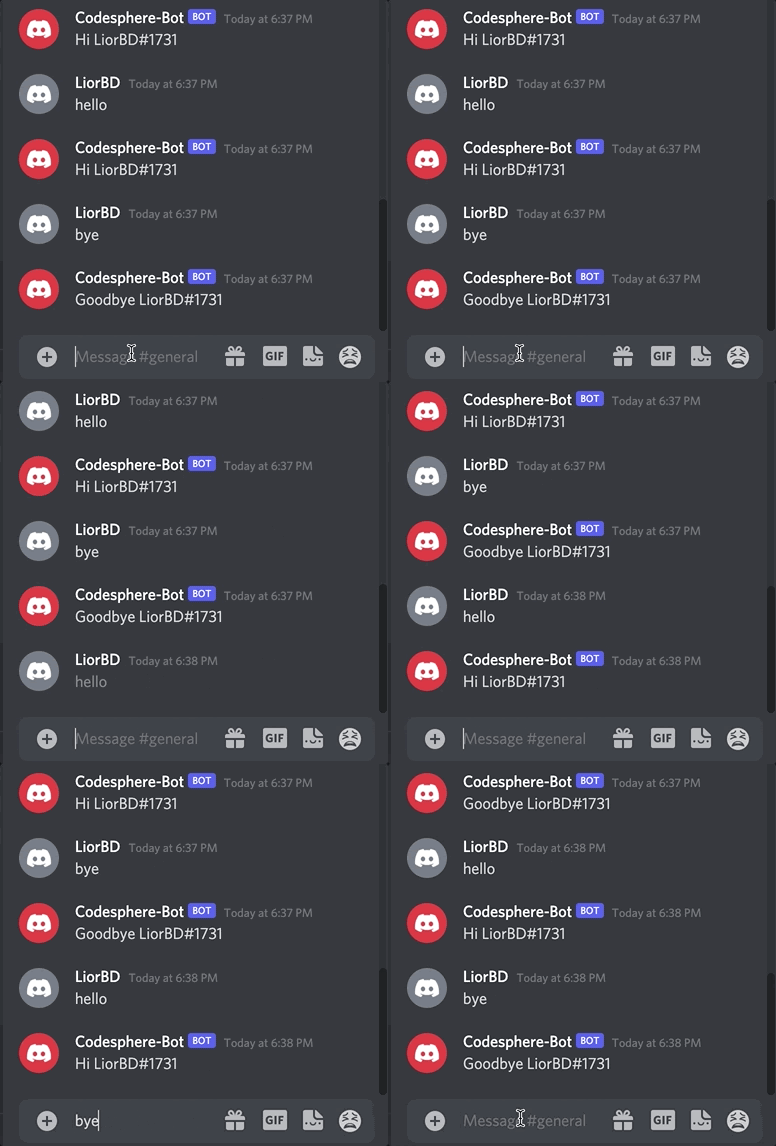
And here you can see it working:

Now let's add commands. Commands are just responses that are specifically invoked. We designated at the beginning that each command has to start with '!', which will act as the "Alexa" to start listening for a command.
We are going to add two commands, one that returns the square of a number, and one that tells us the scrabble points for a specific word.
This file contains hidden or bidirectional Unicode text that may be interpreted or compiled differently than what appears below. To review, open the file in an editor that reveals hidden Unicode characters.
Learn more about bidirectional Unicode characters
| from discord.ext import commands | |
| TOKEN = "INSERT TOKEN" | |
| bot = commands.Bot(command_prefix="!") | |
| @bot.event | |
| async def on_ready(): | |
| print(f'{bot.user} succesfully logged in!') | |
| @bot.event | |
| async def on_message(message): | |
| if message.author == bot.user: | |
| return | |
| if message.content == 'hello': | |
| await message.channel.send(f'Hi {message.author}') | |
| if message.content == 'bye': | |
| await message.channel.send(f'Goodbye {message.author}') | |
| await bot.process_commands(message) | |
| # Start each command with the @bot.command decorater | |
| @bot.command() | |
| async def square(ctx, arg): # The name of the function is the name of the command | |
| print(arg) # this is the text that follows the command | |
| await ctx.send(int(arg) ** 2) # ctx.send sends text in chat | |
| @bot.command() | |
| async def scrabblepoints(ctx, arg): | |
| # Key for point values of each letter | |
| score = {"a": 1, "c": 3, "b": 3, "e": 1, "d": 2, "g": 2, | |
| "f": 4, "i": 1, "h": 4, "k": 5, "j": 8, "m": 3, | |
| "l": 1, "o": 1, "n": 1, "q": 10, "p": 3, "s": 1, | |
| "r": 1, "u": 1, "t": 1, "w": 4, "v": 4, "y": 4, | |
| "x": 8, "z": 10} | |
| points = 0 | |
| # Sum the points for each letter | |
| for c in arg: | |
| points += score[c] | |
| await ctx.send(points) | |
| bot.run(TOKEN) |
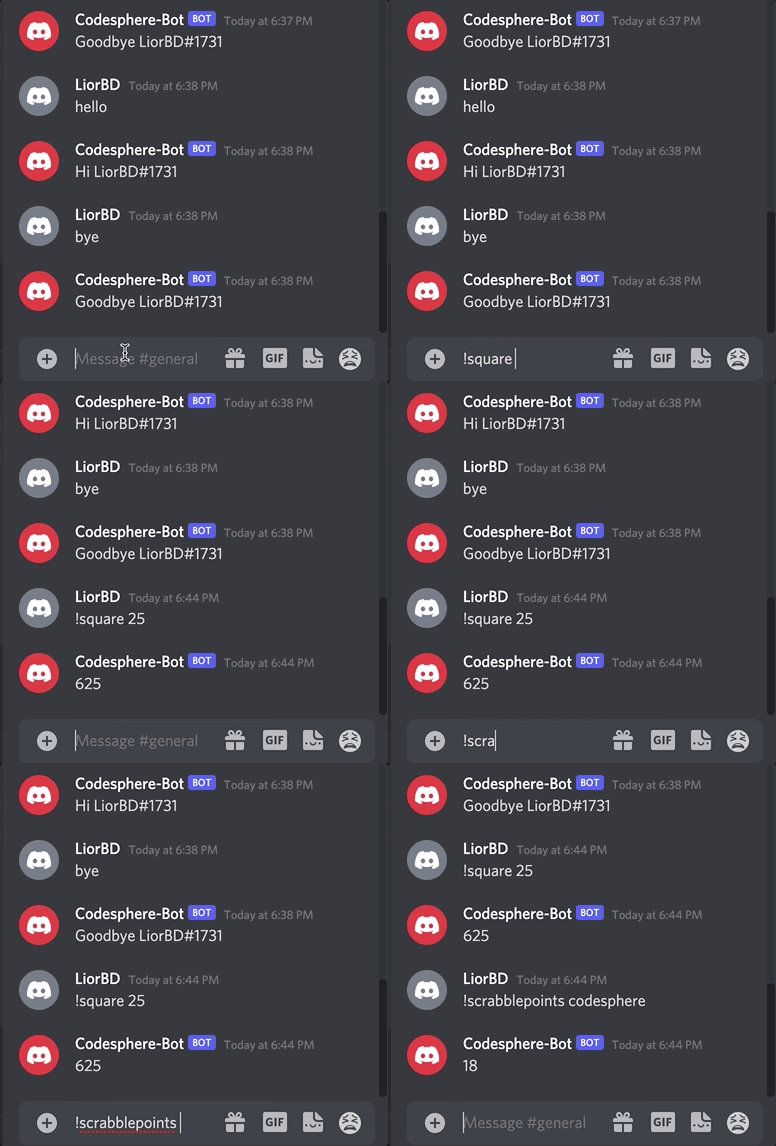
And here we can see it working!

Now, of course, you're not going to want to be running your script from your local machine 24/7. That's why it's crucial to deploy your script in the cloud.
If you want to skip the whole cumbersome cloud setup process, try out Codesphere. On Codesphere, you can just import your project and run it from a virtual machine as if it was being deployed locally.
It only takes minutes to deploy!
So what are you going to build? Let us know down below!
29
