24
How to get better and easier state management with Redux Toolkit
State management is a necessary part of almost every React project and the idea of "how it needs to be done" has changed over the years. In this article you will learn how to use the new
Redux Toolkit, what problems it solves and when it can be useful for your projects.As always I provide a demo project that uses the things we will see here, feel free to try it and check out the source code.
Simple demo project of a shop displaying
Pokemon Trading Card Game cards with prices and the option to add them to a cart to proceed to checkout.The demo aims to demonstrate how Redux's
RTK Query is used to fetch data from a third party API and how the Redux Toolkit handles client state for the cart logic.Don't worry if you are not used to Next.js, TS or ChakraUI, I have not used any advanced feature and the code will be explained in detail, but if you want to know more about these tools you can check my other articles:
Within the React ecosystem there are multiple state management options and every now and then there is a new trend that dominates all the guides and projects and there really isn't such a bad option, the problem here is that one size doesn't fit all.
I'm going to talk about my experience, but I'm sure you may face a different way on this and I'd love to hear how it went for you. If you want to go straight to how the
Redux Toolkit works and avoid all the historical stuff, skip this section 😁.In the beginning React handled state without the help of any third party library, inside
class components, which at that time was the only component type that had state, we defined a state and mutated it through setState.class Clock extends React.Component {
constructor(props) {
super(props);
this.state = { date: new Date() };
}
componentDidMount() {
this.timerID = setInterval(() => this.tick(), 1000);
}
componentWillUnmount() {
clearInterval(this.timerID);
}
tick() {
this.setState({ date: new Date() });
}
render() {
return (
<div>
<h1>Hello, world!</h1>
<h2>It is {this.state.date.toLocaleTimeString()}.</h2>
</div>
);
}
}
ReactDOM.render(<Clock />, document.getElementById("root"));Problems like trying to mutate state directly, which happened a LOT, or losing data from nested objects were common errors at the time.
Another big concern at the time was
prop drilling, back then there was no Context and you were forced to go through the tree every state you needed, that's why the idea of having a global state and plugging it in where you needed it became so popular, but that's just the next point.It is very likely that when you first take a look at React, Redux was the option of choice at the time.

Many articles and guides talked about React with Redux as the perfect combination and the benefits of having the state decoupled and centralised. At one point it even seemed that if you used React, you had to use Redux.
Global state was such a big thing that every piece of data, every button state, UI change and so on ended up in the Redux store, no more props drilling was needed.
The problem to start with was that not all projects took enough advantage of using Redux and not everything had to be in a central store and a lot of boilerplate code was needed, especially when you need to get asynchronous data, and most of our projects ended up with code like this:
import * as actionTypes from '../actions/actionsTypes';

const initialState = {
    orders: [],
    loading: false,
    purchased: false
};

const reducer = (state = initialState, action) => {
    switch (action.type) {
        case actionTypes.PURCHASE_INIT:
            return {
                ...state,
                purchased: false
            };
        case actionTypes.PURCHASE_START:
            return {
                ...state,
                loading: true
            };
        case actionTypes.PURCHASE_SUCCESS:
            const newOrder = {
                ...action.orderData,
                id: action.orderId
            };

            return {
                ...state,
                loading: false,
                orders: state.orders.concat(newOrder),
                purchased: true
            };
        case actionTypes.PURCHASE_FAIL:
            return {
                ...state,
                loading: false
            };
        case actionTypes.FETCH_ORDERS_START:
            return {
                ...state,
                loading: true
            };
        case actionTypes.FETCH_ORDERS_SUCCESS:
            return {
                ...state,
                loading: false,
                orders: action.orders
            };
        case actionTypes.FETCH_ORDERS_FAIL:
            return {
                ...state,
                loading: false
            };
        default:
            return state;
    }
};

export default reducer;
And also define what each action did:
const purchaseSuccess = (id, orderData) => {
    return {
        type: actionTypes.PURCHASE_SUCCESS,
        orderId: id,
        orderData
    };
};

const purchaseFail = error => {
    return {
        type: actionTypes.PURCHASE_FAIL,
        error
    };
};

const purchaseStart = () => {
    return {
        type: actionTypes.PURCHASE_START
    };
};
In addition, components must be connected and mapped in this way:
const Orders = () => {
    // ...
}

const mapStateToProps = state => {
    return {
        orders: state.order.orders,
        loading: state.order.loading
    };
};

const mapDispatchToProps = dispatch => {
    return {
        onFetchOrders: () => dispatch(actions.fetchOrders())
    };
};

export default connect(
    mapStateToProps,
    mapDispatchToProps
)(Orders);
In short, this was a lot of code, and was often overkill for small and medium-sized applications, but to be honest, in many cases it was more a misunderstanding or perhaps a dogmatic way of how and when to use Redux, than Redux's fault.
With version 16.8 we got hooks and
useState, useContext ,useEffect and the less used but no less effective useReducer came to save the day.Thus began the rise of the "you don't need Redux at all".

Personally I jumped on that boat right away, the promise was that I didn't have to install multiple packages, no more boilerplate code, and
useState can be used multiple times so I don't fall into complex nested objects, useContext eliminates props drilling so.... everything was nice and shiny but... Some things I noticed after a few happy projects:
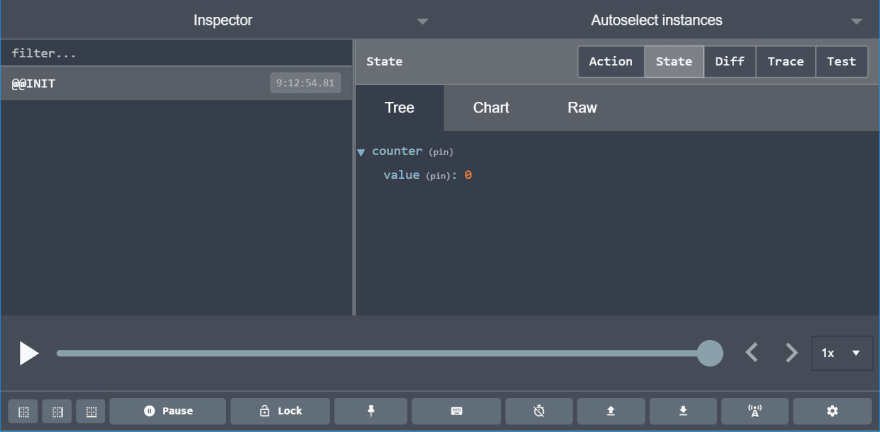
Redux Dev Tools was and still is a blast.
But I must admit that for small and medium projects, it was faster (in development time I mean) and more convenient because as I said before, not every kind of project needed Redux in the first place.
Again, if I'm honest this wasn't React's fault either, the problem was going all in on one solution instead of using each piece where it fits best.
React Hooks was a big deal and Redux introduced his own Hooks some time later.
The problem of having to write the common pattern for asynchronous actions with states for
START, SUCCESS and ERROR was still there but at least the connection and mapping was easier:mapStateToProps was replaced by useSelector.const { video: currentVideo } = useSelector(
(state: AppState) => state.CurrentVideo
);And the
mapDispatchToProps was replaced by a combination of useDispatch and the functions directly:const dispatch = useDispatch();
dispatch(fetchVideoWithExtraInfo(page));The main benefits of this approach besides being less boilerplate code, is easy to understand because with
connect the component "magically" got new props, but with useSelector and useDispatch it is clear where that data comes from and why you have access to it.In short, it was an improvement but the problem with the middleware for asynchronous actions was still there. And in my case that boilerplate code was the big reason not to give it a chance.
Then react-query came along and for me it was like magic.

I discovered react-query because I was using react-table and it was from the same author Tanner Linsley, I encourage you to try his stack because it works like a charm and will save you a lot of time.
const { isLoading, error, data } = useQuery('repoData', () =>
     fetch('https://api.github.com/repos/tannerlinsley/react-query').then(res =>
       res.json()
     )
   )
With the above code, you instantly have something very similar to the reducers in Redux where you put those
START, SUCCESS and ERROR but with almost 0 config and no boilerplate code. In this case data will contain the data fetched from the API, already cached and merged with the updates, and the other params will tell you the status directly.Anywhere in your code if you did something to that source, like mutate the data, if it is properly bound, the binding was done by the
repoData query key in this case, it will work. You have a component that fetches all your products and you have different components to create, update or delete them? No problem, all queries are connected by the query key.
As an example, it's much more available in react-query, like in this code from a Pokedex project:
const {
    status,
    data,
    error,
    isFetching,
    isFetchingMore,
    fetchMore,
    canFetchMore
  } = useInfiniteQuery('fetchPokemons', fetchPokemons, {
    initialData: [initialPokemonList],
    getFetchMore: lastGroup => lastGroup?.next
  });
Things like automatic fetching when the browser loses and regains focus or when a certain time elapses, caching the data and at the end of the day, synchronising and updating the server state was a lot of work already done for you and easily configurable but with a solid initial setup. It's worth mentioning that react-query also has development tools.
As I said before, this time it was not possible to bet all your money on this library because it handles only server state, you still need something for client state.
In the projects where I used this library, the challenge was more to have a solid architecture defined to avoid wild queries and mutations throughout the whole project and to have that effect we were talking about before that new people don't easily understand what the data flow was like.
At this point, I was using react-query in combination with React Hooks, but I thought that Redux, which had some great development tools and a good idea of global state could be a good ally if react-query handled the one element I don't tolerate in Redux, the boilerplate for asynchronous data.
When I decided to write a guide about that,
Redux Toolkit appeared and I felt like someone read my mind and I started tinkering with it.If you have read the previous section you can already guess this point, but let's dive into the most important thing, or one of the most important things at least, when choosing a library for your project, knowing what problems it will solve:
RTK Query is a package included in the Toolkit that will introduce more or less the same magic as react-query and all that boilerplate code will be MUCH reduced.So Redux Toolkit is an abstraction and opinionated version of the common Redux that tries to standardise the way we manage state with Redux.
Also for TypeScript users, Redux Toolkit has been built with TS in mind, as we will see in the examples typing will be much easier than with previous versions of Redux but also many types will be provided automatically.
So if you are using previous versions of Redux there is no need to worry about staying on those versions, they work and will continue to work, there are no breaking changes here.
I would say that if after reading the following examples you realise that the decisions go in the same direction you were planning, your application will be simplified or become easy to maintain and scale maybe the refactoring will be worth it for you.
If you are using only React's built-in tools or other libraries, read the next section, which will be applicable to any version of Redux.
Normally we tend to simplify and use the size of the app as a delimiter for when to use Redux or for example React Hooks only, it is true that Redux is more necessary when the code base is larger but in fact it will come in handy especially in apps that:
Remember that having a need for state management does not mean you have to use Redux.
Assuming you are already in a React-based project, you need to install
Redux Toolkit and React-Redux.npm install @reduxjs/toolkit react-reduxAnd now, you're ready to go!
Let's start with what every project will need to properly set up Redux Toolkit, a store:
// app/store.ts

import { configureStore } from '@reduxjs/toolkit'

export const store = configureStore({
  reducer: {}
})

export type AppDispatch = typeof store.dispatch
export type RootState = ReturnType<typeof store.getState>
We created a store, but in fact,
configureStore also has the Redux Dev Tools enabled, which in previous versions you needed to put in some "weird" code to enable it. Also reducer will do the job of the old combine reducers.The last two lines are for TS users, with that when you add more reducers, it will automatically infer the type and you can get information and type check when using/consuming/dispatching the store so, if your buddies implement more state logic, you don't need to go into the reducers to check how to use it, TS will cover you with a nice IntellIsense.
Now let's connect Redux and React:
// pages/_app.tsx

import { AppProps } from 'next/app'
import { Provider } from 'react-redux'

import { store } from 'app/store'

import 'styles/globals.css'

function MyApp({ Component, pageProps }: AppProps) {
  return (
    <Provider store={store}>
        <Component {...pageProps} />
    </Provider>
  )
}

export default MyApp
As I'm using
NextJS I'm going to add the same example in React:// src/index.tsx
import React from 'react'
import ReactDOM from 'react-dom'
import { Provider } from 'react-redux'
import App from './App'
import store from './app/store'
import './index.css'
ReactDOM.render(
<Provider store={store}>
<App />
</Provider>,
document.getElementById('root')
)And with that we've done our setup!
For TS users there is one more step in this setup, yes, I know what JS users will be thinking right now, see, TS needs more steps, I don't want that! I can promise that this will pay off when we use Redux in our components.
So, React-Redux has hooks, the problem is that the generic versions of
useSelector and useDispatch don't know the types and capabilities of our application, but we can create custom versions that do:// app/hooks.ts
import { TypedUseSelectorHook, useDispatch, useSelector } from 'react-redux'
import { RootState, AppDispatch } from 'app/store'
export const useAppDispatch = () => useDispatch<AppDispatch>()
export const useAppSelector: TypedUseSelectorHook<RootState> = useSelectorLater on in our components we will use these custom versions that are fully aware of the types we are handling in our application instead of the generic versions provided by
react-redux. As you can see, we are providing the types we created earlier in the store file.We are going to create our first
slice, in previous versions of Redux at this point you will create a reducer and actions for your desired feature, which in this case will be the Cart of our Pokemon TCG shop that will contain the different cards that we place in the cart to buy them later in a purchase process.In Redux Toolkit we will create a
slice that will contain all the logic and data of a portion of our Redux state, in this case the portion referring to the cart:// features/Cart/cart-slice.ts
import { createSlice, PayloadAction } from '@reduxjs/toolkit'
import { IPokemonCard } from 'components/Card'
export interface IStoredPokemonCard extends IPokemonCard {
uuid: string
}
interface CartState {
cards: IStoredPokemonCard[]
}
const initialState: CartState = {
cards: [],
}
const cartSlice = createSlice({
name: 'cart',
initialState,
reducers: {
addItem(state, action: PayloadAction<IStoredPokemonCard>) {
const pokemonCard = action.payload
state.cards.push(pokemonCard)
},
removeItem(state, action: PayloadAction<string>) {
const pokemonCardUUID = action.payload
const cards = state.cards.filter(({ uuid }) => uuid !== pokemonCardUUID)
state.cards = cards
},
},
})
export const { addItem, removeItem } = cartSlice.actions
export default cartSlice.reducerLet's analyse what happens:
createSlice is our main function to create the slice.PayloadAction is a TS type to check what is coming from the component.initialState will be the initial state of this slice when it is created, in this case, an empty array of Pokemon cards.name which, as we will see later, will be used to name different things as well as being the unique identifier of the slice.reducers will contain the update logic for our part of the shop, in this case how we handle adding new cards to the cart, and removing them.cartSlice.actions is what we were putting in the actions file so far, but with createSlice they are created automatically.It is also worth mentioning that in the different reducers we are not returning anything and we are writing code that seems to be directly mutating the state, in previous versions of Redux we would have written something like this:
reducers: {
    addItem(state, action: PayloadAction<IStoredPokemonCard>) {
      const pokemonCard = action.payload

            return {
                ...state,
                cards: [...state.cards, pokemonCard]
            }
    },
    removeItem(state, action: PayloadAction<string>) {
      const pokemonCardUUID = action.payload

      return {
                ...state,
                cards: state.cards.filter(({ uuid }) => uuid !== pokemonCardUUID)
            }
    },
  },
And that's right, that's how you should write immutable code, but Redux Toolkit uses under the hood the library Immer which will handle the changes and take care of the immutability for you.
Now update the store to contain our shiny new slice:
// app/store.ts

import { configureStore } from '@reduxjs/toolkit'

import cartReducer from 'features/cart/cart-slice'

export const store = configureStore({
  reducer: {
        cart: cartReducer,
    }
})

export type AppDispatch = typeof store.dispatch
export type RootState = ReturnType<typeof store.getState>So far we have a
store set up and we have already made a slice that contains the logic and data for our cart function, let's use what we have so far to make the Cart.As it is a long component, I will put an example, you can see the complete code in the example project
// features/cart/Cart.tsx

// import { useDispatch, useSelector } from 'react-redux'
import { useAppDispatch, useAppSelector } from 'app/hooks'
import Card from 'components/Card'
import { removeItem } from './cart-slice'

export default function Cart() {
  const { cards } = useAppSelector((state) => state.cart)
  const dispatch = useAppDispatch()

  const totalPrice = cards
    .reduce((acc, card) => acc + card.cardmarket.prices.averageSellPrice, 0)
    .toFixed(2)

  return (
    <div>
      <div>Total Price: {totalPrice}</div>
      {cards?.map((card) => (
        <Card
          flavor="item"
          key={card.uuid}
          {...card}
          onRemove={() => dispatch(removeItem(card.uuid!))}
        />
      ))}
    </div>
  )
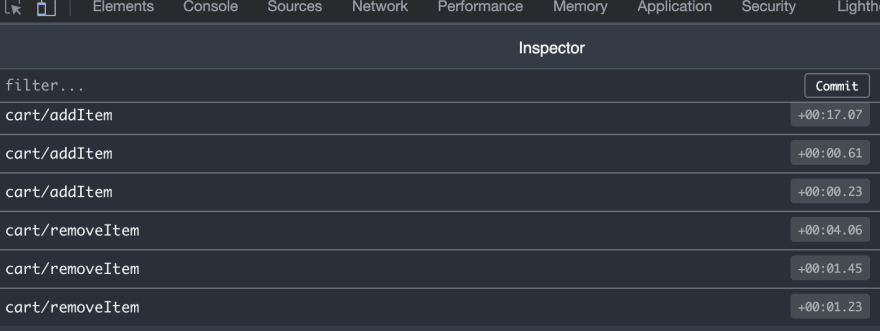
}useAppDispatch and useAppSelector instead of the generic react-redux versions, this is for TS users only.cards from the state.cart.removeItem action.If you inspect what happens with React Dev Tools you will see that the
name of the slice is also used for the different actions created automatically:
This completes a basic example of how to manage client state with Redux.
We need to get the Pokemon cards from the API, so this is the perfect time to explain how to use
RTK Query and what improvements this tool, which is part of Redux Toolkit, brings.We don't need to install anything else because RTK Query is inside Redux Toolkit, to use it:
import { createApi } from '@reduxjs/toolkit/query/react'Let's see this in action while fetching the Pokemon TCG API:
// features/pokemonTCGAPI/pokemon-tcg-api-slice.ts

import { createApi, fetchBaseQuery } from '@reduxjs/toolkit/query/react'

import { ORDER_BY } from './OrderBy'
import { IResponse } from './types'

interface IQueryParams {
  name?: string
  page?: number
  pageSize?: number
  orderBy?: string
}

export const apiSlice = createApi({
  reducerPath: 'pokemon-tcg-api',
  baseQuery: fetchBaseQuery({
    baseUrl: 'https://api.pokemontcg.io/v2',
  }),
  endpoints(builder) {
    return {
      fetchCards: builder.query<IResponse, IQueryParams | void>({
        query({
          name = '',
          page = 1,
          pageSize = 20,
          orderBy = ORDER_BY.SET_RELEASE_DATE,
        }: IQueryParams) {
          const queryName = name ? `&q=name:${name}` : ''
          return `/cards?page=${page}&pageSize=${pageSize}&orderBy=${orderBy}${queryName}`
        },
      }),
    }
  },
})

export const { useFetchCardsQuery } = apiSlice
Take a look at what's inside
createApi:reducerPath will be the name of where we store the data in the store, and will be used for a few more things we'll see later.baseQuery specifies how to get the data, in this case fetchBaseQuery is already built into RTK Query and is a wrapper around fetch, we also specify a baseUrl which will be used in the different queries.endpoints object will return an object with the different endpoints available, RTK Query will auto-generate the hooks for those endpoints as you see in the last line for useFetchCardsQuery.In this case, there is only one endpoint to get the
fetchCards which will call https://api.pokemontcg.io/v2/cards with a bunch of parameters to perform the search.Under the hood RTK Query has generated for us the reducer, the actions and everything we need to set it up and use it, this would be the equivalent of adding
thunk in an earlier version of Redux and you'll see how much simpler it is now.First we need to add a new reducer and configure the
middleware:// app/store.ts
import { configureStore } from '@reduxjs/toolkit'
import cartReducer from 'features/cart/cart-slice'
import { apiSlice } from 'features/pokemonTCGAPI/pokemon-tcg-api-slice'
export const store = configureStore({
reducer: {
cart: cartReducer,
[apiSlice.reducerPath]: apiSlice.reducer,
},
middleware: (getDefaultMiddleware) => {
return getDefaultMiddleware().concat(apiSlice.middleware)
},
})
export type AppDispatch = typeof store.dispatch
export type RootState = ReturnType<typeof store.getState>apiSlice of our newly created slice.reducerPath we name the reducer and as I said before, the reducer is provided automatically.And that's it, now it's time to see RTK Query in action right in our code, I'm going to put a small example but you can check the full code:
// pages/index.tsx

import { useState } from 'react'

import { useFetchCardsQuery } from 'features/pokemonTCGAPI/pokemon-tcg-api-slice'
import { ORDER_BY } from 'features/pokemonTCGAPI/OrderBy'

export default function Home() {
  const [inputName, setInputName] = useState('')
  const [name, setName] = useState('')
  const [page, setPage] = useState(1)
  const [pageSize, setPageSize] = useState(20)
  const [orderBy, setOrderBy] = useState(ORDER_BY.AVERAGE_SELL_PRICE)

  const { data, isFetching, isLoading, isError } = useFetchCardsQuery({
    name,
    page,
    pageSize,
    orderBy,
  })

  if (isFetching || isLoading) return <div>Loading...</div>

  if (isError) return <div>Error</div>

  return (
    <div>
      {data &&
        data.data.map((card) => {
          return <div key={card.id}>{card.name}</div>
        })}
    </div>
  )
}
As you can see, we use the
useFetchCardsQuery that we generated earlier and return:data which will have the response from the API call.isFetching and isLoading will be our old friend LOADING action.isError will be the ERROR action.The query will be called automatically when the component is mounted, if you don't want that behaviour, in the
pokemon-tcg-api-slice you can also export a function called useLazyFetchCardsQuery that will be called when you call the trigger method.const { data, isFetching, isLoading, isError, trigger } = useLazyFetchCardsQuery({
name,
page,
pageSize,
orderBy,
})Along with the query, we pass a bunch of parameters that if at some point they change, the query will trigger again and will be stored in the cache.
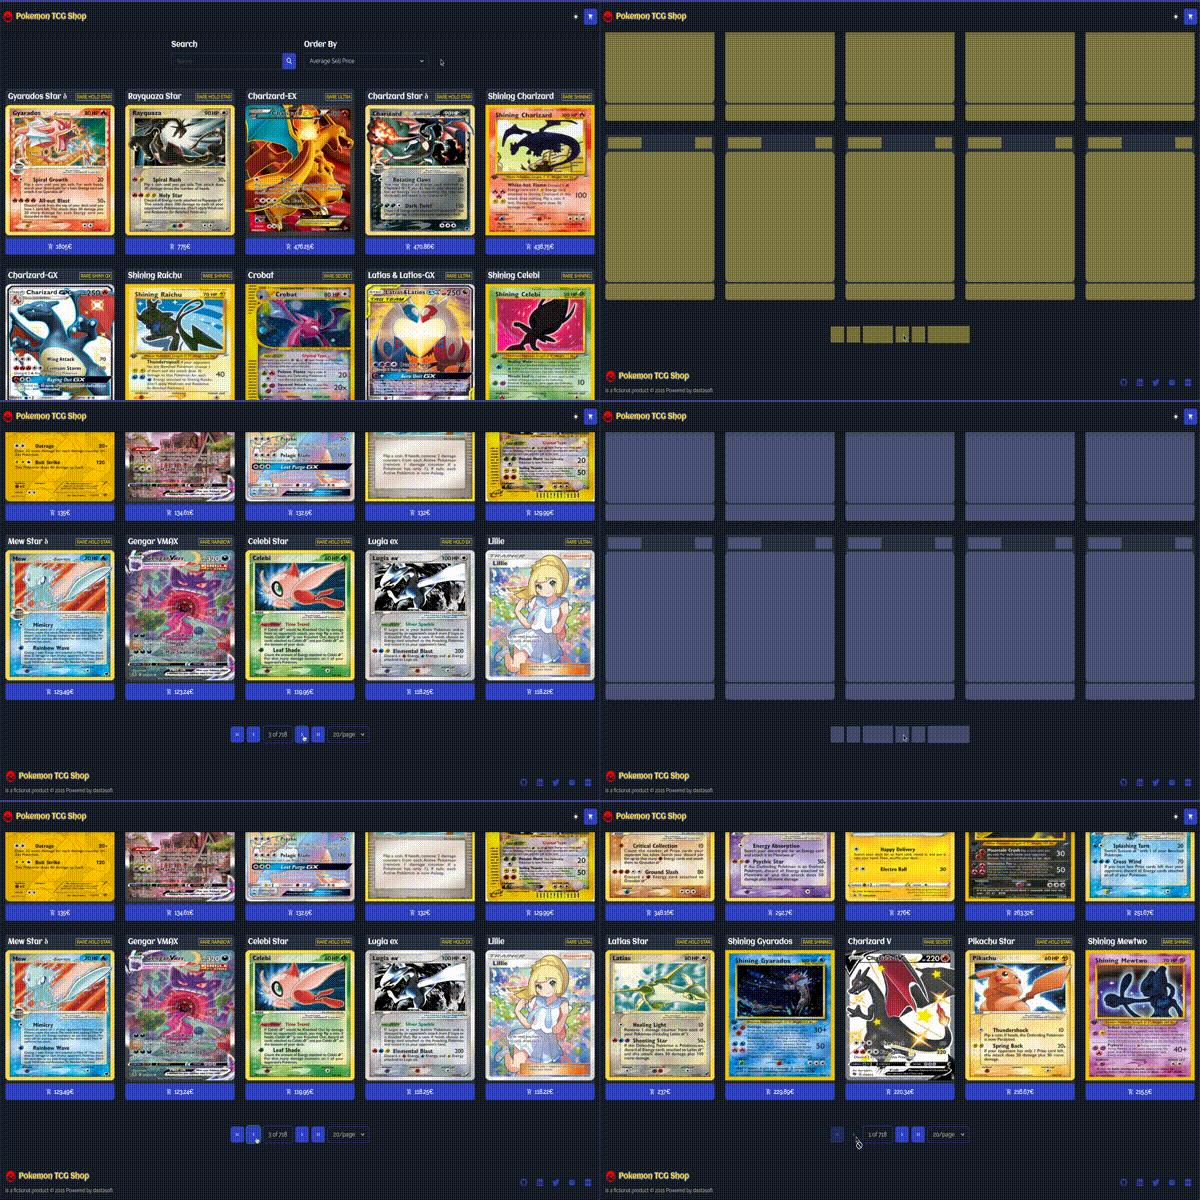
An easy way to check the benefits of caching, is to try paging backwards, you will notice that the results are not fetched again and so the load time is almost 0.

If you, like me, at some point jumped ship from Redux to try other things, now is the perfect time to give it a try again. I still maintain a few projects with
react-query + React Hooks and I'm happy with that solution, but I think most of my concerns about using Redux are gone. In case you are jumping into React and/or state management I think it would be better to build small projects purely with React Hooks first and experiment with what problems you will encounter to better appreciate things like
Redux Toolkit or react-query.24
