
33
Implementing Micro Frontends using .NET Blazor WASM
Below is a question from StackOverflow emphasizing the need for this article.
We are in the process of building a Blazor.Net5 server application alongside a number of existing web projects (Blazor, Angular, html etc). We would like the Blazor application to be the only application the users go to and access the other sites from it.
I wanted to create a Blazor…
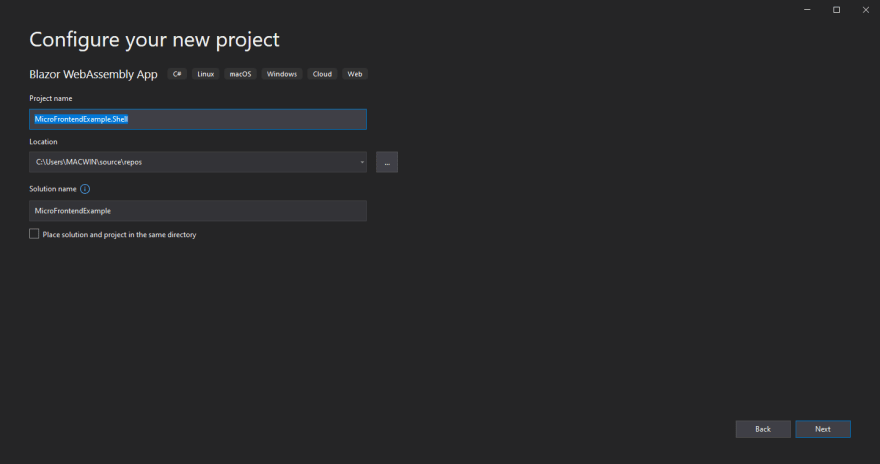
Let's begin where every project begins!
MicroFrontendsExample.MicroFrontendsExample.Shell.
Note that this particular project will serve as our app shell.MicroFrontendsExample.Please note that for this guide, I'll stick to using Visual Studio for the project set up.
With our container app/app shell ready, let's begin adding the individual micro frontends.
Let's start with first adding micro frontends based on other JS frameworks. We'll start with React.js due its popularity. Also, we'll be making use of one major feature of Blazor - JavaScript Interoperability (JsInterOp).
To do this, let's add a new Class Library.

On the next screen,
ReactMicroFrontend in our case) and click 'Next'Voila! That was easy, right?
Now, onto the good stuff - Setting up the React Micro Frontend. Yay!🙏🏽
Since we're working with Blazor, it basically means that we won't be making use of any
I know you're wondering "so where will React's entry point be?" Hold your horses!😀 "do not be afraid", I've got you 😎.
HTML - only .razor. I know you're wondering "so where will React's entry point be?" Hold your horses!😀 "do not be afraid", I've got you 😎.
We only need one Blazor component here which will call React's bundled file(s). Don't worry, you'll get what I mean along the line. 😉
Firstly, let's add the
ReactMicroFrontend as a Project Reference to the main Blazor App. This will enable the container app or app shell recognize our class library as a part of itself (in layman's terms).Do this by:
MicroFrontendsExample.Shell) Add > Project Reference. ReactMicroFrontend in our case). With that being done, let's go ahead and do some more configurations.
Before we can run the Micro Frontend Application, we need to install
Right-click on the class library, select
Microsoft.AspNetCore.Components.Web NuGet package into the Class Library.Right-click on the class library, select
open in terminal. In the opened terminal, enter:dotnet add package Microsoft.AspNetCore.Components.Web --version 5.0.12After that, right click on the class library/project, and select
Edit Project File.In the file, add the following modifications:
<!-- add ".Razor" to the Sdk attibute of the <Project> tag, just like below -->
<Project Sdk="Microsoft.NET.Sdk.Razor">
    ...

    <!-- Add the block below  -->
    <ItemGroup>
        <SupportedPlatform Include="browser" />
    </ItemGroup>
    <!--  -->

    ...
</Project>Let's have a look at how our Class library looks like so far.
From the Solutions Explorer, this is what it looks like:

Now that we've seen how it looks like, let's start with some modifications to make it react friendly.
Setting up a folder structure for your micro frontend is solely dependent on the preferences of the team involved (choice of architecture/principle).
To begin with, let's do some easy stuff! Creating a couple of files and folders.
Class1.cs file. App.razor) and the _Imports.razor file.wwwroot. wwwroot folder, create another folder called dist.src folder.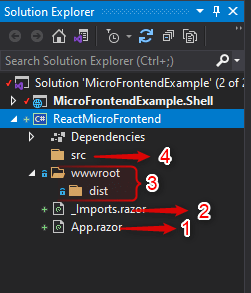
The App.razor file is the entry point of the React Application. It is through this file that the react application is loaded onto the blazor wasm framework.
The _imports.razor file contains any namespace we'd want available throughout the scope of the Class Library.
The ‘wwwroot’ folder contains a ‘dist’ folder where the bundled react app is placed after the react app is built with ‘npm run build’.
The ‘src’ folder is where the react application/codebase resides.
In following parts of this series about Micro Frontends in .NET Blazor WASM, I'll delve deeper into the setting up of React.js in the new Class Library we created.
Stay Tuned! Cheers!!!
33