31
Raspberry Pico: The Complete SDK Overview (Native C/C++, Arduino, MicroPython, CircuitPython)
The Raspberry Pico, or shorthand Pico, is a new microcontroller from the Raspberry Pi foundation. When released early 2021, two frameworks were offered: native C/C++ SDK, and a MicroPython port. About half a year later, two additions became stable: The Arduino framework, a wrapper of the C-SDK in which you work with Arduino commands, and CircuitPython, another embedded version of Python. This article is a comprehensive summary of all available frameworks. You will learn about installation, features, supporting editors and see a blinking LED example for each framework.
This article originally appeared at my blog.
The native C/C++ SDK is the original release developed and maintained by the Raspberry Pi foundation.
Installation and usage is covered in the official documentation (PDF). Proper setup can be difficult: You can apply the steps mentioned in the guide, or when you use a Linux OS, use the official one-liner that completely setups the complex toolchain.
There is no standard editor, but the official documentation explain how to customize Visual Studio Code with extensions that support CMake and debugging. For a concrete project setup, I shamelessly self-promote my own getting started kit: pico-project-bootstrap.
Your IDE might look as follows.

The latest release v1.20 has exiting features: Better support for Free RTOS, the real-time Linux system, several update for working with DMA, clocks and mutexes, and even new hardware boards, like the new Pimoroni Pico LiPo, is supported.
The classical blinking LED example looks as follows:
/*
* ---------------------------------------
* Copyright (c) Sebastian Günther 2021  |
*                                       |
* devcon@admantium.com                  |
*                                       |
* SPDX-License-Identifier: BSD-3-Clause |
* ---------------------------------------
*/
#include <stdio.h>
#include <stdbool.h>
#include "pico/stdlib.h"

int LED_BUILTIN = 25;

void blink() {
  gpio_put(LED_BUILTIN, 1);
  sleep_ms(750);

  gpio_put(LED_BUILTIN, 0);
  sleep_ms(1050);
}

int main() {
  stdio_init_all();

  gpio_init(LED_BUILTIN);
  gpio_set_dir(LED_BUILTIN, GPIO_OUT);

  puts("Hello World\n");

  while (true) {
    puts(".");
    blink();
  }
}Arduino, a name that identifies a family of microcontrollers as well as an IDE, is widely used and known in IOT and robotics project. Arduino boards are typically programmed with C, where the default framework has abstractions for pins, serial input/output, servos etc. Since the release v1.20, you can program your Rasperry Pico with the Arduino framework. This means that the C-SDK functions are wrapped, you use the typical Arduino commands instead.
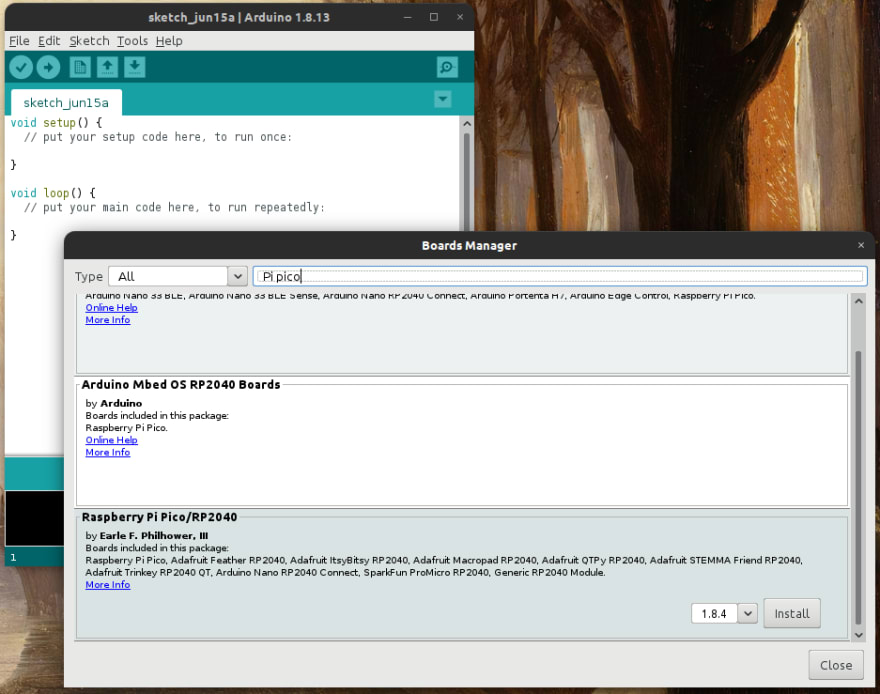
There are two options to get this working. First, if you are coming from the Arduino world, you can add the Rasperry Pico as a board to your Arduino IDE. Add the Pico Arduino repository to your board manager according to the installation manual. Then, select the appropriate board and you are ready to program.

Alternatively, you can use the VS Code PlattformIO extension - a microcontroller addon that supports various types of hardware - and the WizIO extension. Read my article the simple startup with PlattformIO for this setup, and then choose the framework type Arduino.

Why would you use this framework? If you are familiar with Arduino, you might have a better, more familiar start with programming the Arduino, and can just jump into the development. Furthermore, the Arduino framework has matured for 10 years, and therefore provides a huge set of libraries for connecting and controlling hardware: stepper and servo motors, displays, sensors. The Pico Arduino Frameworks documentation states that you can use the servo class for controlling motors, and SPI and I2C are fully supported - as many sensor libraries are based on these protocols, they should work with the Arduino port as well.
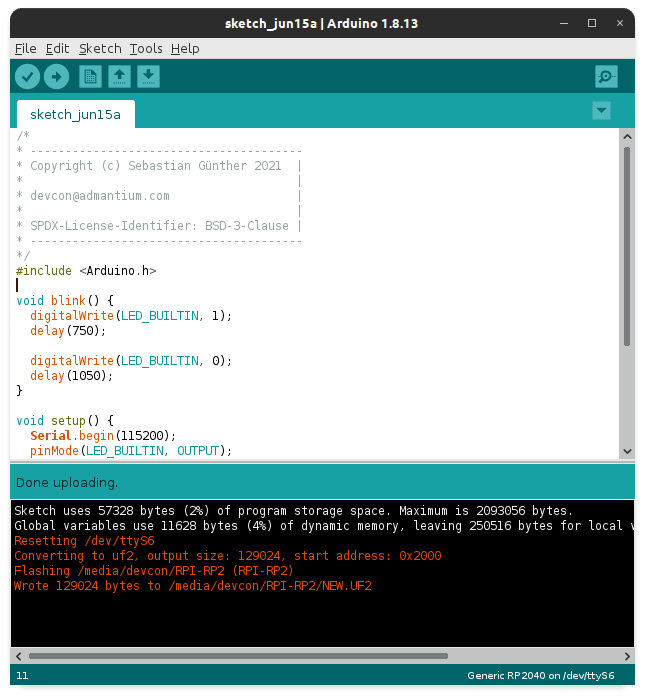
In this framework, your blinking LED example would look like this:
/*
* ---------------------------------------
* Copyright (c) Sebastian Günther 2021  |
*                                       |
* devcon@admantium.com                  |
*                                       |
* SPDX-License-Identifier: BSD-3-Clause |
* ---------------------------------------
*/
#include <Arduino.h>

int LED_BUILTIN = 25;

void blink() {
  digitalWrite(LED_BUILTIN, 1);
  delay(750);

  digitalWrite(LED_BUILTIN, 0);
  delay(1050);
}

void setup() {
  Serial.begin(115200);
  pinMode(LED_BUILTIN, OUTPUT);
}

void loop() {
  Serial.write("Hello World\n");

  while (true) {
    Serial.write(".");
    blink();
  }
}
Upload the sketch and run it.

MicroPython is a port of Python3 specifically targeted at microcontrollers. Python is a powerful scripting language with which you can write short and concise programs.
Setup on the Raspberry Pico couldn't be simpler: Grab the official UF2 file from the Raspberry Foundation, or download latest releases from the official MicroPython project page. Then, just connect your Raspberry Pico in mass storage mode, drop the UF2 file, and after a reset, you can connect to your Pico via serial. Because Python is an interpreted language, it means you can just write code over the serial connection and run it immediately.
The officially recommended IDE for MicroPython is Thonny. Thonny is deliberately simple. In the text editor area, you can write Python code, then store it on your computer or directly on the Raspberry Pico. Storing on the Pico means: Either in the root or lib folder on the Pico, you can save any scripts, allowing you more complex projects with different files. And if you save a script called main.py directly in the root directory, this will be executed as your Pico’s program. Alternatively, you can open a serial connection to the Pico and implement a program interactively.

The compact MicroPython reference shows how feasible simple scripts are: With only 4 lines of code, you can program interrupts, control servo motors, or set a well-defined PWM. MicroPython also supports SPI, I2C and even CAN bus. However, the official Raspberry Pico documentation explicitly lists which functions work.
With MicroPython, the blinking LED example is:
#
# ---------------------------------------
# Copyright (c) Sebastian Günther 2021  |
#                                       |
# devcon@admantium.com                  |
#                                       |
# SPDX-License-Identifier: BSD-3-Clause |
# ---------------------------------------
#
from machine import Pin
from utime import sleep

led = Pin(25, Pin.OUT)

while True:
  led.toggle()
sleep(1)This Python variant is a branch developed by the Adafruit company. They produce a wide range of microcontrollers and early on invested in a scripting language instead of mainstream C that is used on Arduino based boards. These days, ports of CircuitPython run on different microcontrollers as well - including the Raspberry Pico.
To get started, you apply similar steps as with MicroPython: Download the UF2 file from the official CurcuitPython project page, connected the Pico in mass storage mode and drop the UF2 file.
The official IDE is Mu. Its layout is similar to the Thonny IDE: A code editor on the top, and a terminal at the bottom that runs the interactive python console once the Pico is connected. File handling and interactive development work similar. Mu has additional features: An interactive debugger with an inspector module to peak into variables etc. at runtime, and a plotter, a graphical tools that translates printed numbers to graphs.

CircuitPython offer similar library functions to connect to other sensors and hardware via SPI or I2C. Core libraries differ in name and functionality, so be sure to read the Adafruit getting started guide. And in addition, it comes bundled with modules, akin to libraries, that provide out-of-the box support for several sensors, including displays, LED stripes, gamepads and even audio - see the complete list.
The blinking LED example with MicroPython looks as follows.
#
# ---------------------------------------
# Copyright (c) Sebastian Günther 2021  |
#                                       |
# devcon@admantium.com                  |
#                                       |
# SPDX-License-Identifier: BSD-3-Clause |
# ---------------------------------------
#
import board
import digitalio
from time import sleep

led = digitalio.DigitalInOut(board.LED)
led.direction = digitalio.Direction.OUTPUT

while True:
    led.value = True
    sleep(1)
    led.value = False
sleep(1)The Raspberry Pico is a versatile microcontroller that can be programmed with four different frameworks - impressive for a product that's released about 6 months ago! This article presented these frameworks: The native C/C++ SDK, Arduino framework, MicroPython and CircuitPython. For each, you learned about its installation, IDE support, language features, and saw a blinking LED example. Now which framework will you use in your next project?
31
