30
Card on File with React Native
In this tutorial, we’ll show you how to accept payments in a React Native application using Square’s In-App Payments SDK and React Native plugin. I’ll also show you how to safely store customer card details so that they don’t have to be manually re-entered or re-swiped for future transactions.
In payment industry terms, this capability is known as Card on File, or CoF for short. For frequent transactions, e.g. ordering a Lyft or a Lime, having a card stored makes for a much snappier, lower-friction in-app user experience. Entering card details every time would be very tedious.
As a security-minded developer, I know you might be wondering: Is it safe to store a user’s credit card details? Is this even legal?
If you use Square, the answer is yes. Using the Square In-App Payments (IAP) SDK means that your application and database don’t actually come into contact with the real card details. Instead, your application interacts with something called a nonce.
A nonce is an encrypted payment token that can be exchanged with the Square API to process a payment. A card nonce represents a credit card and all the details the user typed in. The nonce is used to store cards and capture payments without compromising the user’s privacy or security. It’s just one of the key concepts of processing payments with Square that we’ll cover today.
In this tutorial, you’ll download and run a React Native application that processes payments using Square’s In-App Payments SDK and React Native plugin, including Card on File transactions.
No prior knowledge of React Native or Square is required, but you will need a Square account. You will need to be familiar with NPM, git and the command line.
A Square account will allow you to take payments and get your own API keys that you’ll use in this tutorial. Thankfully, this is easy. If you already have an active Square account, you can skip this step.
Use this link to sign up for a free account (pay only transaction fees):
Tip: During signup you can choose to order a magstripe reader, which you can use to take payments in person using the Square Reader SDK.
Finally, before continuing with the rest of the tutorial, your Square account will need to be enabled for payment processing, which means that you’ll need to provide information about the account’s owner. Visit squareup.com/activate to enable it. If you’d prefer not to make actual card charges, your Square account comes with a sandbox that you can use instead. If you go the sandbox route, you’ll need to use the sandbox Application ID and Location ID instead in the examples below.
Once you have an active Square account, you’ll need to create a new developer application in order to get your IDs and credentials.
Open the dashboard to create a new app:
Tip: You’ll need to login with your Square account if you’re not logged in already.
Click on the “New Application” button. On the next screen, enter the name "In-App Payments SDK Quick Start" or something similar.
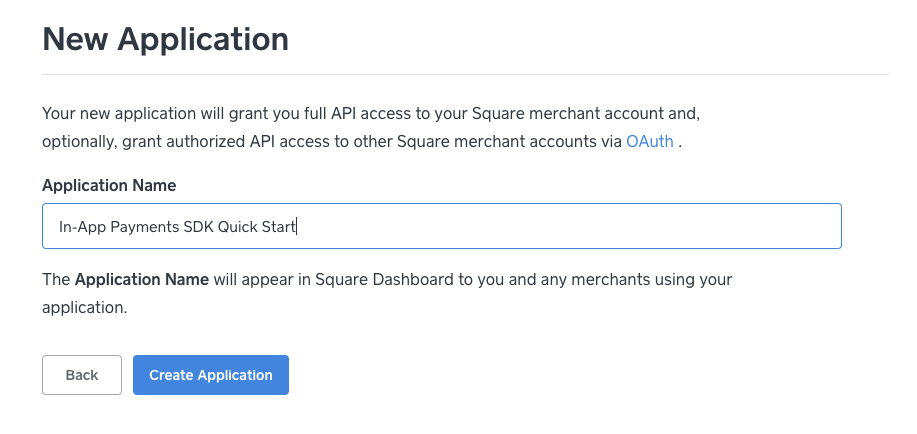
Next, click on the "In-App Payments SDK Quick Start" app to bring up your new Square Application’s settings page.
Open the Credentials page and copy down your Application ID and your Personal Access Token under ACCESS_TOKEN.
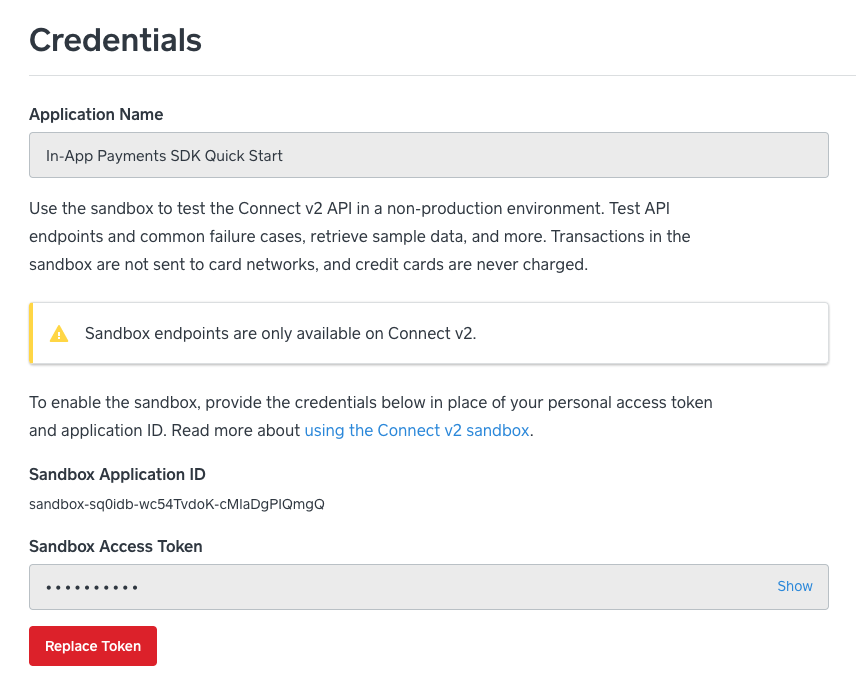
Next, open the Locations page and copy down the ID for a location that accepts card payments.
Keep your Application ID, Personal Access Token, and Location ID handy. You’ll need them later.
Using the Square In-App Payments SDK requires that you have a backend that the client device connects to and where the final payment processing step takes place. For the purposes of this tutorial, we’ve created an example backend we can use called the In-App Payments Server Quickstart.
The easiest way to deploy it is with cloud hosting provider Heroku, using a Deploy to Heroku button you’ll find in the GitHub README. All of the steps you’ll need to get it up and running are here:
Once you click the Deploy to Heroku button and signup or login to Heroku, you’ll be taken to a screen that looks like this.
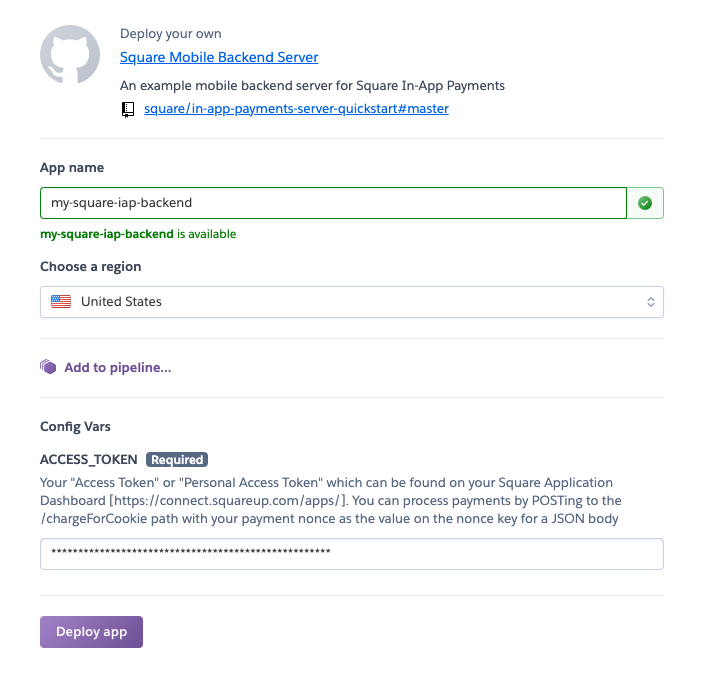
Give the app a unique name and set the ACCESS_TOKEN value on the Heroku configuration page to the value from the previous step. Then click “Deploy app”.
Tip: Note down the URL of your Heroku app, you’ll need it later. The format is https://.herokuapp.com.
Next, we need to install React Native and its dependencies, which include XCode (for iOS) and/or Android Studio in order to run the application on a simulator.
Tip: Only one of XCode or Android Studio is required to complete this tutorial and instructions are provided for both.
To set up React Native, I recommend following the guide in the React Native documentation.
Here are a few tips to help you get through it quickly:
- Choose “React Native CLI Quickstart” and not “Expo CLI Quickstart”
- Choose the right Development and Target OS (Android/iOS)
- Complete the whole guide, including creating and running a new application - this will make sure your setup is working
- See the Troubleshooting page if you encounter any issues
Once you’re done, you should have XCode and/or Android Simulator working, as well as the react-native NPM package installed.
The Square IAP React Native plugin has a few build requirements of its own, which you’ll want to verify against your installation. If you’ve just done a fresh install with the latest versions, you should be OK. But if not, this list will tell you what you need to upgrade before continuing.
Android
- Android minSdkVersion is API 21 (Lollipop, 5.0) or higher.
- Android Target SDK version: API 28 (Android 9).
- Android Gradle Plugin: 3.0.0 or greater.
iOS
- Xcode version: 9.1 or greater.
- iOS Base SDK: 11.0 or greater.
- Deployment target: iOS 11.0 or greater.
If you’re targeting Android, one more step is required to successfully simulate the app. You’ll need to create an Android virtual device based on the Android 9 version of the Android SDK.
- In the Android Studio welcome screen, click “Configure”
- Click “AVD Manager”
- Click “Create Virtual Device”
- Choose any common hardware and click “Next”
- Click “Download” next to “Oreo” on the System Image screen
- Once that’s done, click “Next” and finish the wizard
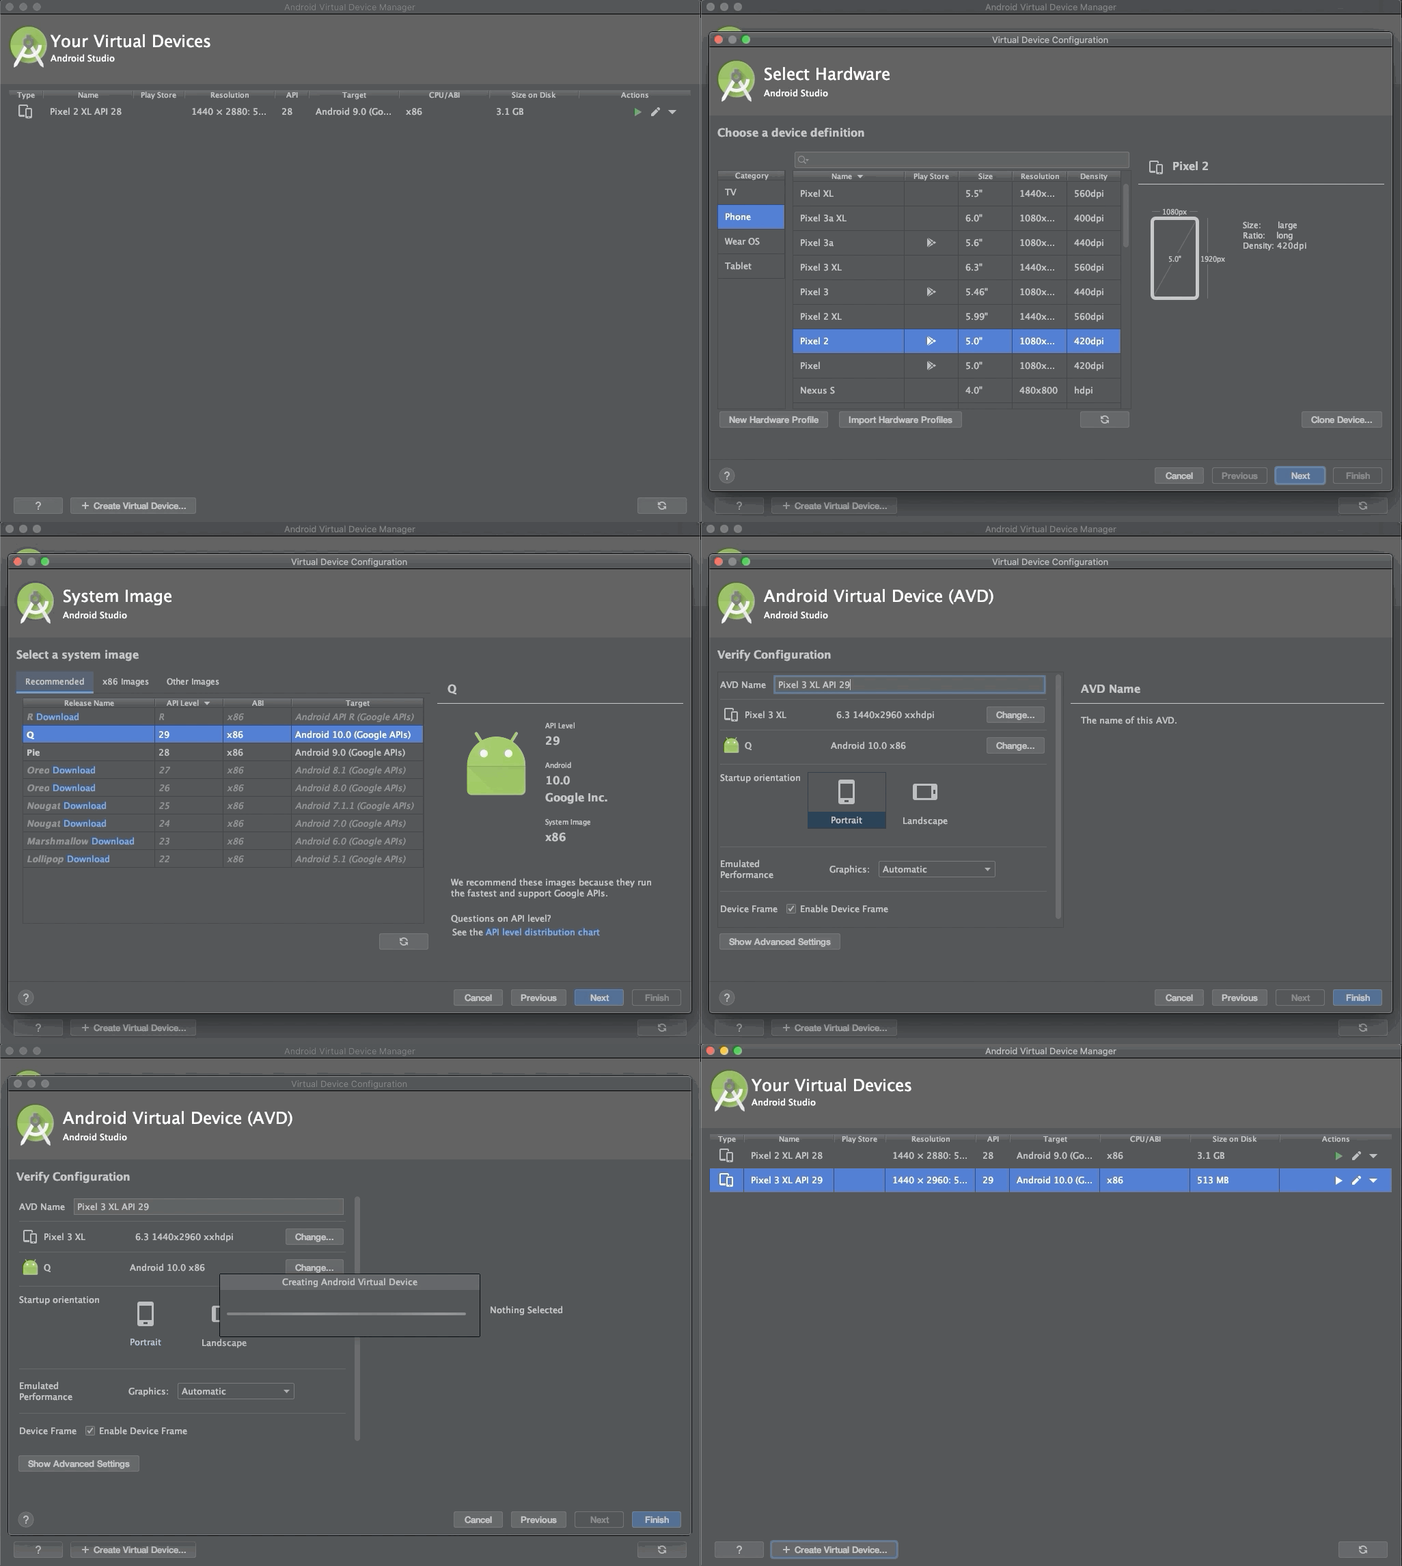
Pick this device to launch as the Android Simulator in the steps below.
So far we’ve installed and configured our dependencies. Now we can move on to installing the React Native plugin and working with the example codebase.
In a nutshell, the React Native plugin provides a convenient set of interfaces to the native code running inside the Square In-App Payments SDK. To learn more about the background of the React Native plugin, check out this announcement blog post.
For the next step, we will clone the GitHub repository that the plugin lives in: square/in-app-payments-react-native-plugin.
git clone git@github.com:square/in-app-payments-react-native-pluginAfter the clone is complete, change directories into the app.
cd in-app-payments-react-native-pluginInside of this repository, there is a React Native application that lives in the react-native-in-app-payments-quickstart folder. This is the quickstart application we’ll use for the rest of the tutorial.
Change directories into the application directory:
cd react-native-in-app-payments-quickstartNext, install dependencies with Yarn.
yarnThe quickstart app allows the user to purchase a "Super Cookie" for $1 that grants special powers (due to the high sugar amount, of course).
Before we can fire up the app (and our blood sugar level), we need to configure it with the Square Application ID we provisioned above.
Configuration variables in the quickstart app are stored in the file app/Constants.js (view on GitHub).
const SQUARE_APP_ID = 'REPLACE_ME';
// Make sure to remove trailing `/` since the CHARGE_SERVER_URL puts it
const CHARGE_SERVER_HOST = 'REPLACE_ME';
const CHARGE_SERVER_URL = `${CHARGE_SERVER_HOST}/chargeForCookie`;
const GOOGLE_PAY_LOCATION_ID = 'REPLACE_ME';
const APPLE_PAY_MERCHANT_ID = 'REPLACE_ME';
// constants require for card on file transactions
const CREATE_CUSTOMER_CARD_SERVER_URL = `${CHARGE_SERVER_HOST}/createCustomerCard`;
const CHARGE_CUSTOMER_CARD_SERVER_URL = `${CHARGE_SERVER_HOST}/chargeCustomerCard`;
const CUSTOMER_ID = 'REPLACE_ME';
module.exports = {
  SQUARE_APP_ID,
  CHARGE_SERVER_HOST,
  CHARGE_SERVER_URL,
  GOOGLE_PAY_LOCATION_ID,
  APPLE_PAY_MERCHANT_ID,
  CUSTOMER_ID,
  CREATE_CUSTOMER_CARD_SERVER_URL,
  CHARGE_CUSTOMER_CARD_SERVER_URL,
};
Open the file. On line 16, replace REPLACE_ME with the Application ID value from above.
On line 18, replace CHANGE_SERVER_HOST with the URL for your Heroku backend. Include the https:// but don’t include the trailing slash.
On line 20, replace REPLACE_ME with the Location ID value from above for the Google Pay Location ID.
The last thing we need to do before we use the app is to create a customer using the CreateCustomer endpoint of the Customers API. Storing cards on file requires a customer record to attach them to.
In your terminal, run this command, first substituting with the value from the ACCESS_TOKEN you noted down below.
curl --request POST https://connect.squareup.com/v2/customers \
         --header "Content-Type: application/json" \
         --header "Authorization: Bearer <REPLACE ME>" \
         --header "Accept: application/json" \
         --data '{ "idempotency_key": <RANDOM_STRING>, "given_name": "Lauren Nobel" }'
If successful, you should see details returned that represents our new customer:
{
       "customer":{
          "id":"RPRANDHZ9RV4B77TPNGF5D5WDR",
          "created_at":"2019-06-14T15:32:50.412Z",
          "updated_at":"2019-06-14T15:32:50Z",
          "given_name":"Lauren Nobel",
          "preferences":{
             "email_unsubscribed":false
          },
          "creation_source":"THIRD_PARTY"
       }
    }
The customer.id field from the JSON is what we’ll need to eventually store a card on file for this customer from the app.
In app/Constants.js, the file from above, set the value of the CUSTOMER_ID constant to the customer.id field above.
const CUSTOMER_ID = “REPLACE_ME”From the quickstart app’s perspective this will now be the Square customer who’s using it.
You’re now ready to run the app for the first time. Before we start the app, we need to launch the iOS simulator. This comes with XCode and gives us a virtual device that looks and acts like an iPhone or iPad.
The simulator should live in your Applications folder and simply be called Simulator or Simulator.app. Once you open the app, a virtual device you have configured should boot up automatically.
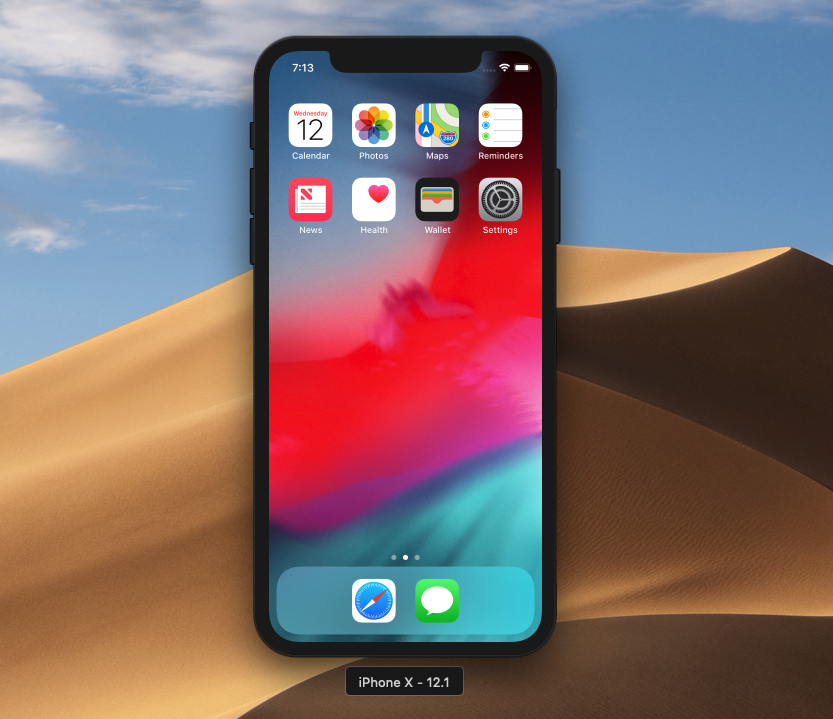
Now, we’re ready to use the react-native command to run our device on the simulator. Enter this command in your terminal and hit enter:
react-native run-iosIf it’s your first time running, you’ll see a lot of output and the process will take a little while. Don’t worry, that’s normal. Ultimately, you should see the message ** BUILD SUCCEEDED ** and the process will exit cleanly.
Once that’s all complete, you should see our Super Cookie application loaded onto the virtual phone.
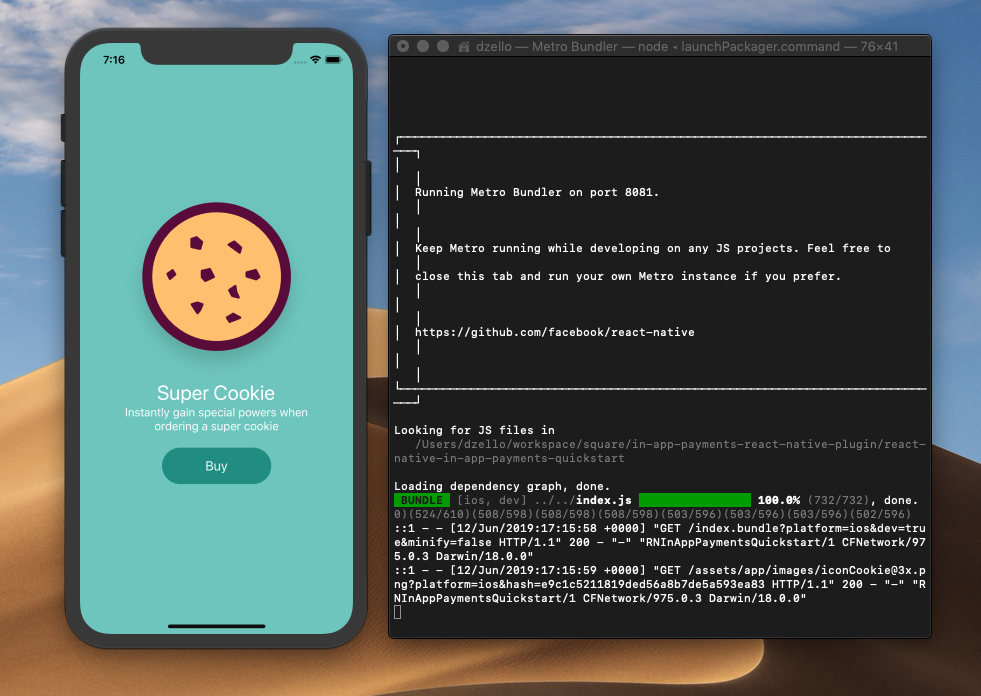
You might also have noticed that a new terminal window opened. This window is running the Metro Bundler, a bundler created specifically for React Native that supports fast reloads and can handle thousands of modules at a time.
The first step is to launch an AVD - Android Virtual Device - from the Android Studio. This virtual device will run our React Native application.
- Open Android Studio
- On the welcome screen, click “Configure”
- Click “AVD Manager”
- In the modal that opens, find the device running API 27 that we created above.
- Click on the green Play button in the “Actions” column to launch the device.
- Click the power button on the top right next to the virtual device to boot it.
In a minute or two, you should reach the Home screen of the Android device.

With the simulator running, we can now launch our React Native application, which will attach itself to and run on the virtual device. Type this in your project directory and hit enter:
react-native run-androidIf it’s your first time running the app, it make take some time to install dependencies. That’s normal. Once you see BUILD SUCCESSFUL and a clean process exit, the Super Cookie app should be running on the Android virtual device.
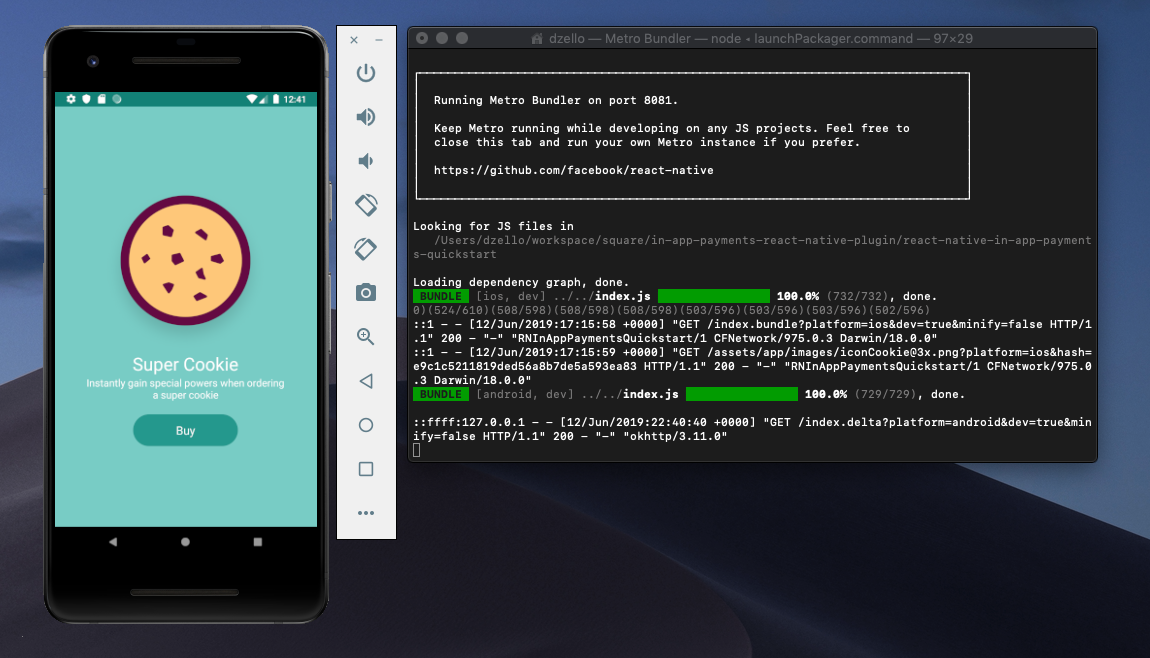
Now since we’ve done all of this hard work installing dependencies and configuring our environment, let’s reward ourselves with a cookie. And not just any cookie - a Super Cookie 🍪 .
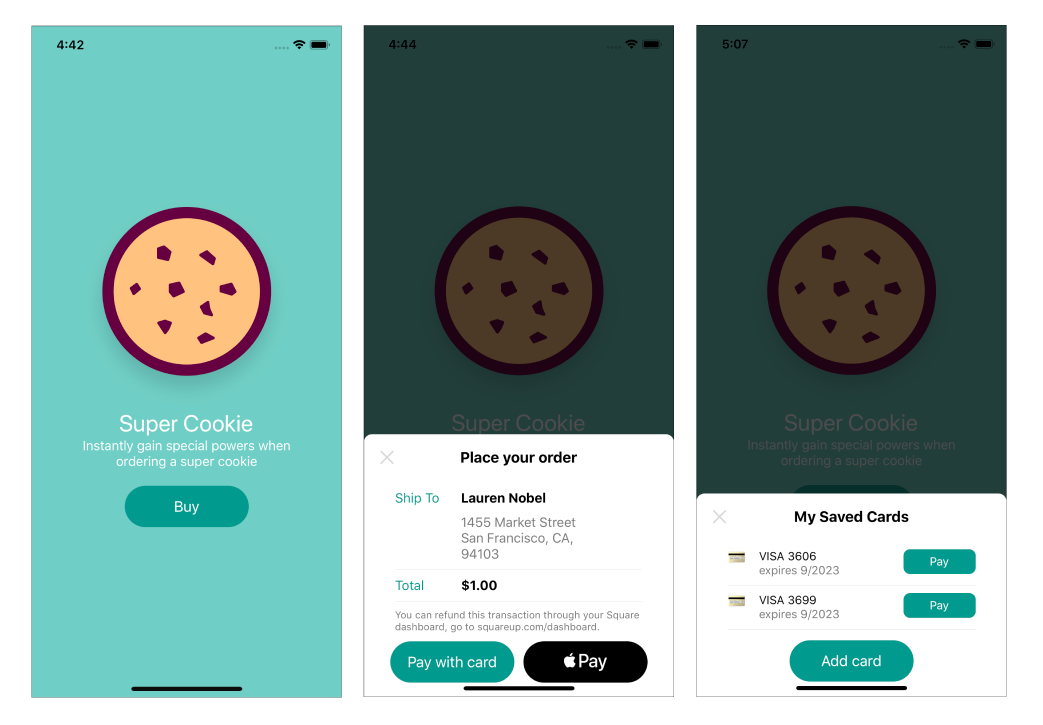
On either the running iOS or Android simulator app, click the green “Buy” button. This brings up a “Place your order” modal that contains example customer details, a price, and buttons that let the user choose how they want to pay: with a credit or with a digital wallet like Apple Pay or Google Pay.
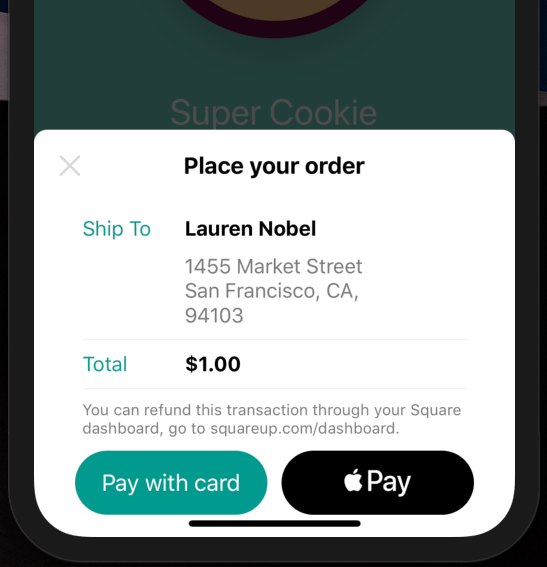
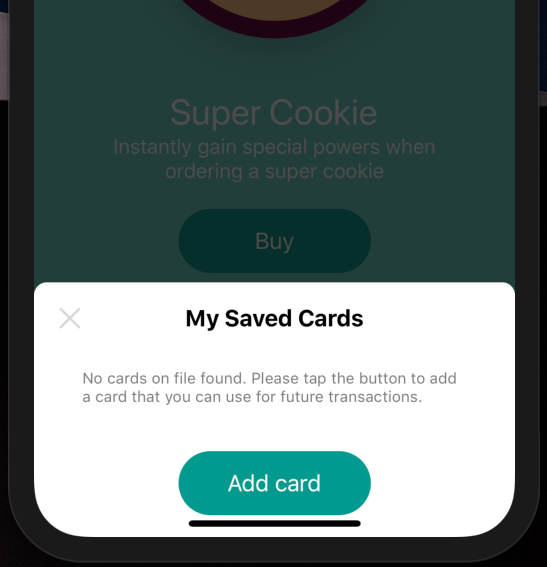
We’re going to pay with a stored credit card, so click ‘Pay with card’. We don’t have any cards on file yet for this customer, so you’ll see a message and an ‘Add card’ button.
Next, enter the details of a valid credit card and click ‘Save 🍪’.
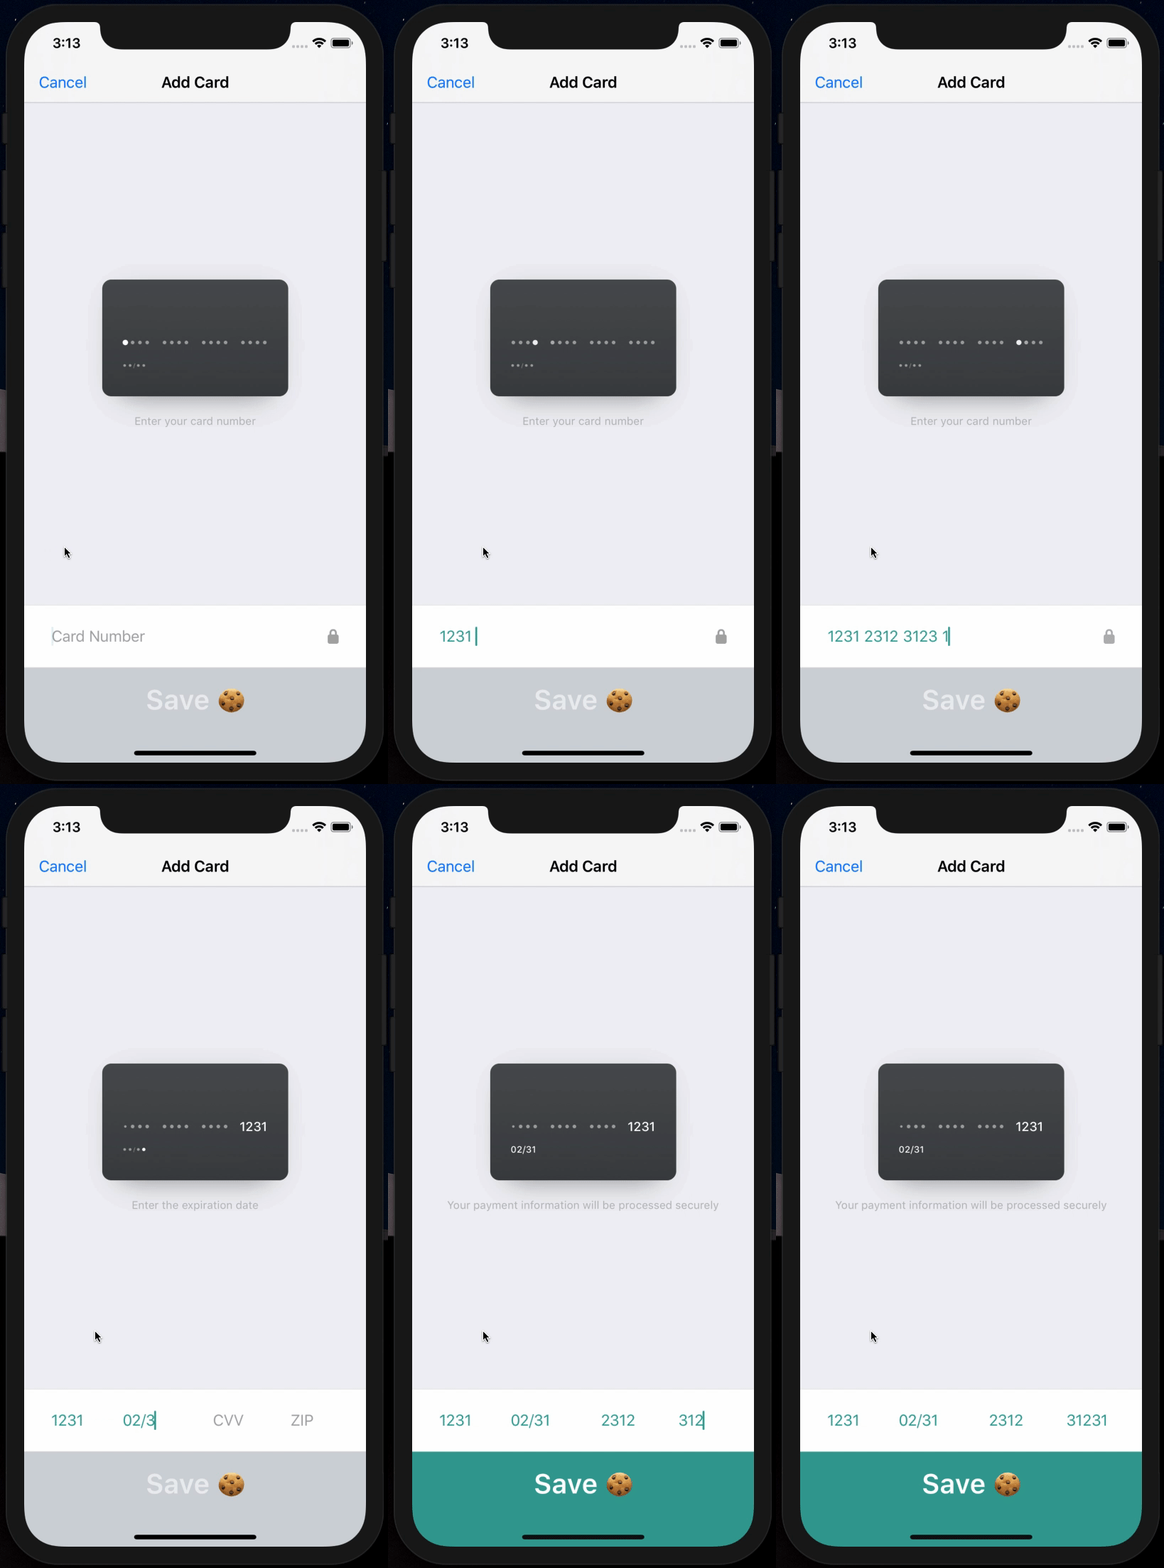
If you entered a valid card, you’ll see a confirmation alert message. Otherwise you will see an error about what was invalid. When confirmed, the card will be attached to the record of the customer you created earlier.
What happens behind the scenes?
- The Square IAP SDK generates a nonce that represents the credit card.
- Our React Native application sends the nonce to our backend service running on Heroku.
- The backend service calls the CreateCustomerCard endpoint of the Square API, passing the customer_id (from above) and the card nonce.
- The information returned from the Square API is stored in our React app’s state so the card type, expiration date and last 4 digits can be shown later.
Tip: See the Save Cards on File Cookbook to learn more about this flow.
Important: Always ask for explicit permission before saving customer contact information or cards on file. This is required by Square.
Assuming you successfully saved a card, you should now be able to see it on the previous UI. You can identify the card by its type, expiration date and by the last 4 digits of the account number.
Note: The full card number cannot be shown because it was not returned from the CreateCustomerCard endpoint for privacy and security purposes.
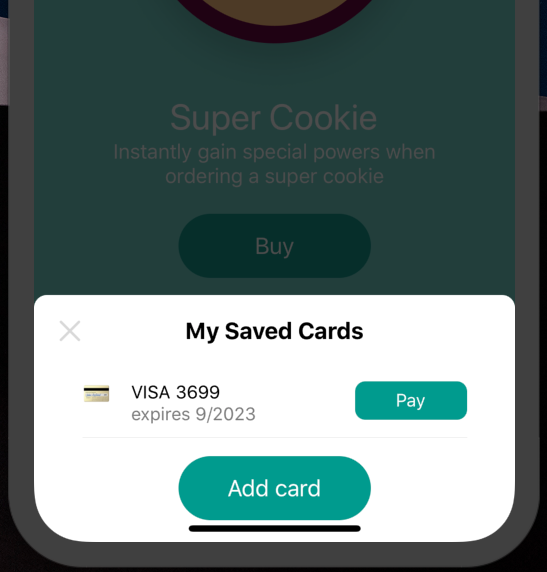
Click the “Pay” button and then “Purchase” to confirm that you want to buy a Super Cookie for $1.
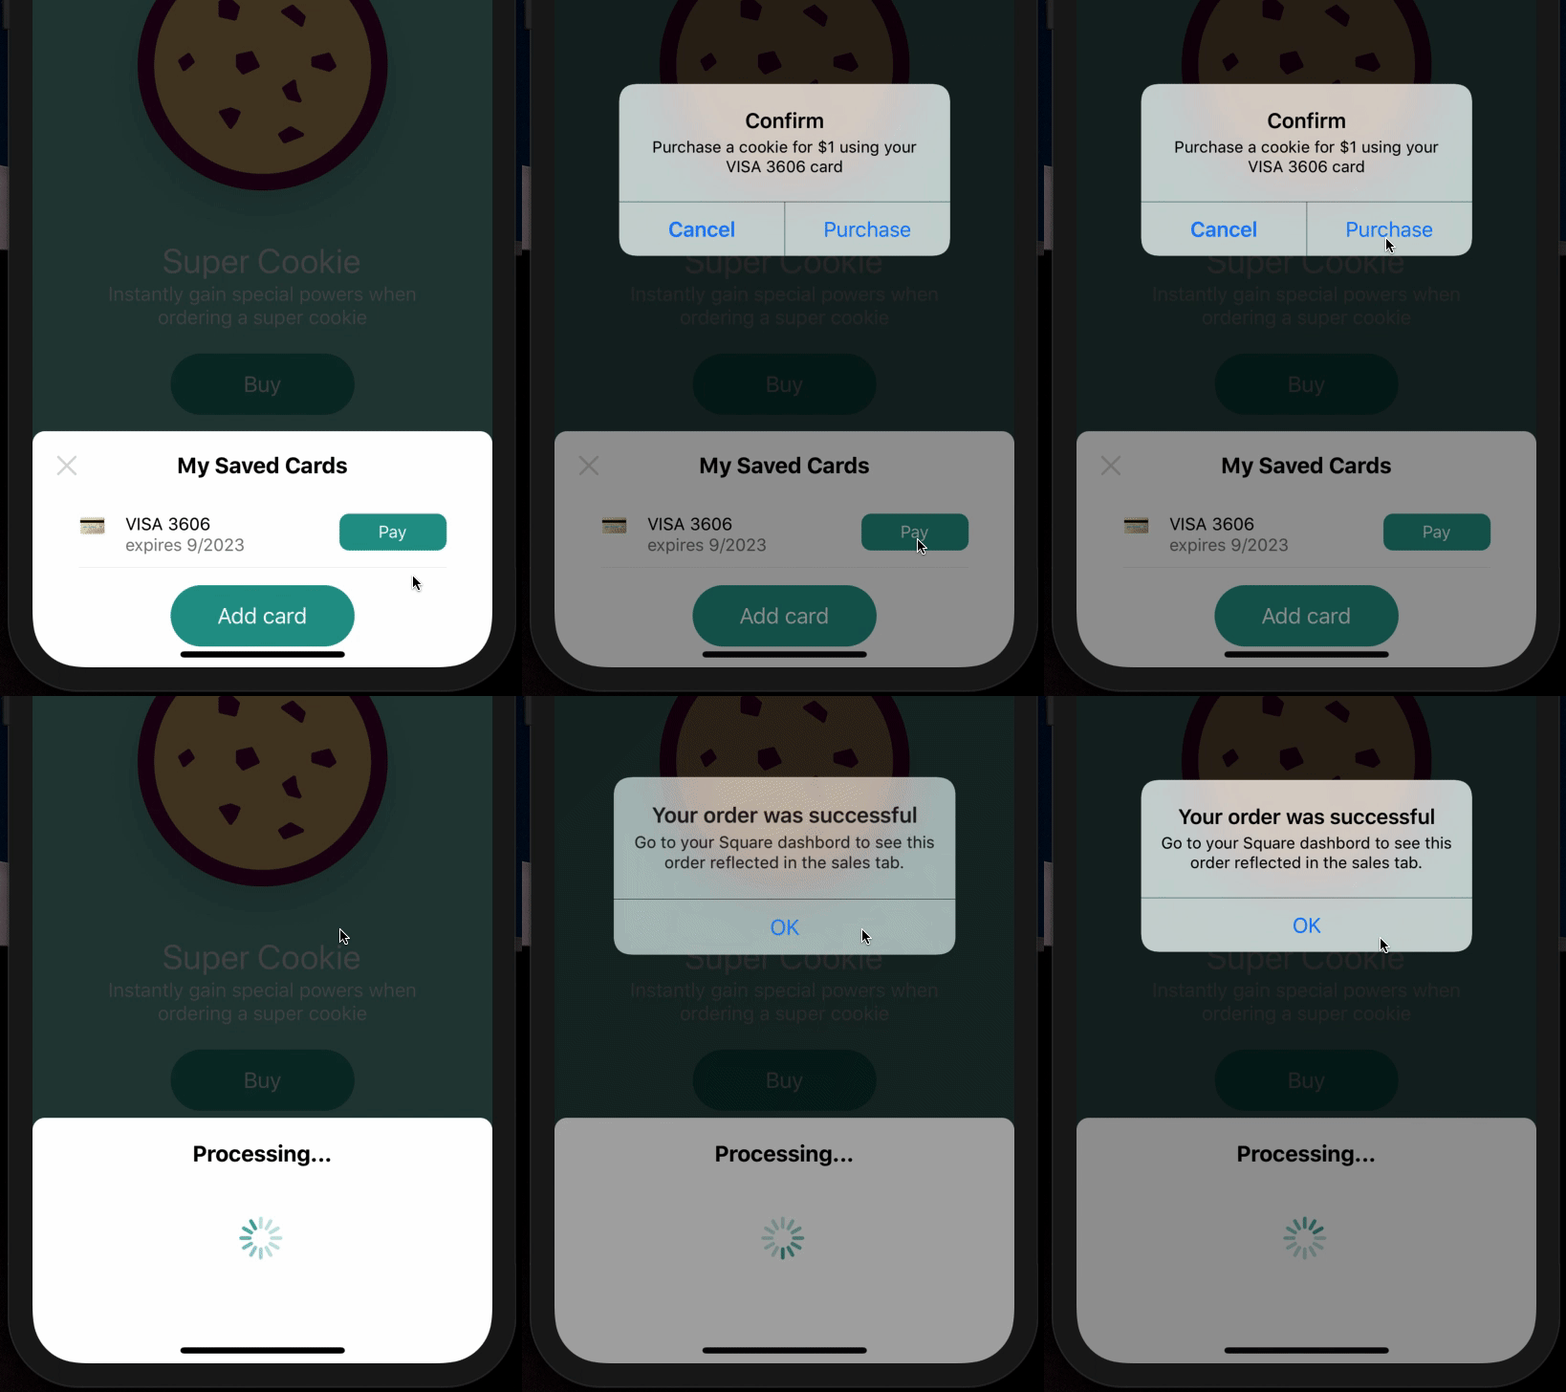
Warning: Unless you're using the sandbox, this will charge your card and incur a transaction fee of $0.33, only $0.67 will be deposited into your linked account.
What happens behind the scenes?
- The app sends the customer ID and chosen card on file ID from the previous step to the backend service.
- The backend service creates a Payments API Payment request with the provided fields.
- The Square Payments API Charge endpoint processes the request and returns a Payment object that represents the captured payment, or an error message explaining what went wrong.
Now that the two payments have been processed, they will show up on your Square Dashboard. Visit the dashboard to confirm.
Now that you’ve seen how the flow works, let’s take a quick look at the code in the Super Cookie React Native application and see what’s happening.
It will first help to understand all of the different layers of the stack.
On the device:
- Super Cookie React Native Application
- React Native Plugin for In-App Payments
- Square In-App Payments SDK
Server-side:
- In-App Payments Server Quickstart (on Heroku)
- Square API
All of the custom code used in this tutorial lives inside either the Super Cookie application or IAP Server Quickstart. The Square IAP SDK and React Native Plugin for IAP are officially maintained packages from Square.
The Super Cookie quickstart application has one main level component called HomeScreen.js. This component decides what is rendered based on the state of the application.
When the user first clicks ‘Buy’, a modal dialog appears from the bottom of the screen. The contents of the modal dialog change as the user walks through the flow. There are 3 views, backed by one component each:
-
OrderModal: Shows transaction details and buttons for payment methods -
CardsOnFileModal: Shows list of cards on file and a button to add a card -
PendingModal: Shows an activity indicator when a transaction is being processed
The code for these components is in the app/components folder of the quickstart application repository. The main job of these components is to build markup for the interface, apply CSS, and trigger events when certain areas of the screen are touched.
Interaction with the React Native plugin and underlying native SDKs is set up in the HomeScreen component.
Up at the top of the files, we can see these interfaces being imported.
import {
  SQIPCardEntry,
  SQIPApplePay,
  SQIPCore,
  SQIPGooglePay,
} from 'react-native-square-in-app-payments';
SQIPCore is used to send your Square application ID down to the native layer.
The startCardEntryFlow() method of SQIPCardEntry is used to show the dialog for capturing credit card details. This dialog is created by the underlying native SDK so its fast and smooth. The method accepts 3 parameters - a configuration object, a success function, and a cancel function. The success function is passed a nonce that represents the card that the user entered, which can then be used to create a transaction or store a card on file.
The setIOSCardEntryTheme() is used to customize the look and feel of the dialog, and that’s how we added the 🍪 emoji to the “Save” button at the dialog. The completeCardEntry() method closes the dialog.
See the React Native plugin’s technical reference for a full list of interfaces, features and customizations that your application can take advantage of.
In this tutorial, we’ve shown how to take a Card on File payment within a React Native application, using the Square In-App Payments SDK and the React Native Plugin for In-App Payments SDK.
Even if you’re not selling super cookies, the instructions and example code here should help you integrate Square into your React Native application to create a great user experience for whatever you’re selling.
Once you’re ready to do that, your next step will be to read the Getting Started with the React Native Plugin for In-App Payments SDK guide on GitHub, which shows you step-by-step how to add the plugin to an existing React Native app. Square Developer Evangelist Richard Moot has even created a video to walk you through it step-by-step.
If you want to keep up to date with the rest of our guides and tutorials, be sure to follow our blog & our Twitter account, and sign up for our forums.
Thanks for reading!
30
