
72
Building a carousel from scratch using Vue.js
Instead of going through a complex third-party library docs, I tried to figure out how to build a "multi-card" carousel from scratch.

For the final code, check my GitHub repo.
If you want to see a real-world example, I used the logic of this approach (inspired by a Thin Tran's tutorial) in one of my recent projects: sprout.luvejo.me.
This is the underling structure of the demo above:

But let's see how it actually works:

Though in this .gif every step has an animated transition, this is just to make it easier to visualize all 4 steps:
.inner wrapper..inner back to its original position.In the actual implementation, only step #1 will be animated. The others will happen instantly. This is what give us the impression of an infinite/continuous navigation loop. Can't you see it? Stick with me 😉
Let's start with this basic component:
This is exactly the structure from section 1. The
.carousel container is the frame within which the cards will move.Explanation:
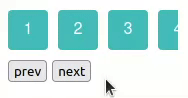
overflow: hidden; will allow us to crop those elements that go outside of .carousel.inline-block elements (or inline-flex, in our case) from wrapping once the parent space has been filled. See white-space.Expected result:

Explanation:
$refs property let you access your template refs. scrollWith give us the width of an element, even if it's partially hidden due to overflow..inner element every time the "next" or "prev" buttons are pressed. Having this, you don't even need to specify the width of your .card elements (as long as they're all the same size)..inner wrapper, manipulating its transform property.transform is the property we want to animate.Expected result:
Explanation:
afterTransition() takes a callback as an argument that's going to be executed after a transition in .inner occurs.Array.prototype.shift() method take the first element out of the array and returns it.Array.prototype.push() method inserts an element to the end of the array.listener(). It will call our actual callback and then remove itself when executed.I encourage you to implement the
prev() method. Hint: check this MDN entry on Array operations.Explanation:
.inner's position after shifting the cards[] array, counteracting the additional translation caused by the latter.transition to none so the reset happens instantly.Expected result:

At this point, our carousel just works. But there are a few bugs:
next() too often results in non-transitioned navigation. Same for prev().We need to find a way to disable those methods during the CSS transitions. We'll be using a data property
transitioning to track this state.next(), when we call prev() the previous card doesn't slide-in. It just appears instantly.If you watched carefully, our current implementation still differs from the structure proposed at the beginning of this tutorial. In the former the
.inner's left side and the .carousel's left side aligns. In the latter the .inner's left side starts outside the .carousel's boundaries: the difference is the space that occupies a single card.So let's keep our
.inner always translated one step to the left.Explanation:
moveRight() or moveLeft() we are reseting all the transform values for .inner. Therefore it becomes necessary to add that additional translateX(-${this.step}), which is the position we want all other transformations occur from.And that's it. What a trip, huh? 😅 No wonder why this is a common question in technical interviews. But now you know how to ―or another way to― build your own "multi-card" carousel.
Again, here is the full code. I hope you found it useful, and feel free to share your thoughts/improvements in the comments.
Thanks for reading!

72