61
Mask or no mask? With Twilio Video, machine learning, and JavaScript
As the number of positive COVID-19 cases rises everywhere, mask-wearing is coming back in vogue. Read on to learn how to build an app to detect whether or not someone is wearing a mask in a Twilio Video call with ml5.js.
ml5.js is a JavaScript library that lets developers use machine learning (ML) algorithms and models in the browser. It's built on top of TensorFlow.js which does most of the low-level ML tasks, including:
- using pre-trained models to detect human poses, generate text, style an image with another image, compose music, detect pitches or common English language word relationships
- and more, including image recognition! Image recognition contains two popular tasks: classification and regression. This post uses ml5.js to explore the classification problem of image recognition: given an input of an image (in this case, someone wearing or not wearing a mask), the machine classifies the category (mask or no mask) of the image. This isn’t limited to mask-wearing: you could train the model to detect other things as well, like if someone is wearing a hat or holding a banana.
This project uses the pre-trained model MobileNet to recognize the content of certain images as well as Feature Extractor, which, utilizing the last layer of a neural network, maps the image content to the new classes/categories (ie. a person wearing a mask or not).
With Feature Extractor, developers don’t need to care much about how the model should be trained, or how the hyperparameters should be adjusted, etc: this is Transfer Learning, which ml5 makes easy for us.
To build the ml5.js app detecting mask usage in a Twilio Programmable Video application, we will need:
- A Twilio account - sign up for a free one here and receive an extra $10 if you upgrade through this link
- A Twilio Account SID, which can be found in your Twilio Console
- A Twilio API Key SID and API Key Secret: generate them here
- The Twilio CLI Before continuing, you’ll need a working Twilio Video app. To get started, download this repo and follow the README instructions to get started.

Make a file in the assets folder in your Twilio Video app called train.html and paste in the following code:
<!DOCTYPE html>
<html>
  <head>
    <meta charset="utf-8">
    <meta http-equiv="X-UA-Compatible">
    <meta name="viewport" content="width=device-width, initial-scale=1">
    <script src="https://unpkg.com/ml5@0.6.1/dist/ml5.min.js"></script>
    <title>Twilio Video Mask ||
    No-Mask Training</title>
  </head>

  <body>
    <h2>
        Train model to detect mask-wearing: Are you wearing a mask?: <span id="result">N/A</span> (<span id="confidence">N/A</span>)
      </h2>
    <div id="room-controls">
      <video  id="video" autoplay muted="true" width="320"
          height="240"></video>
    </div>
    <p>
      <em>Add pics to train the model!</em>
    </p>
    <p>
      <button id="noMaskButton">Add >= 20 no-mask images</button> - No-mask: <span id="numNoMaskImages">0</span> images
    </p>
    <p>
        <button id="maskButton">Add >= 20 mask images</button> - Mask: <span id="numMaskImages">0</span> images
    </p>
    <p>
        <button id="train">Train</button> <span id="loss"></span>
    </p>
    <p>
        <button id="predict">See the model in action once training is done</button>
    </p>
    <p>
        <button id = "save">Save model to Assets folder</button>
    </p>
    <p>
        <a href="video.html"><button id="goToVideo">Go to video call to use the mask detection in</button></a>
    </p>

    <script src="//media.twiliocdn.com/sdk/js/video/releases/2.3.0/twilio-video.min.js"></script>
    <script src="https://unpkg.com/axios@0.19.0/dist/axios.min.js"></script>
    <script src="train.js"></script>
  </body>
</html>
This code first imports the ml5.js library (version 0.6.1 for now). Then, in the <body>, it adds an h2 heading with the text "Are you wearing a mask?", a result span displaying "yes" or "no" to answer that question, and a confidence span showing the model's confidence level of "yes, there is a mask" or "no, there is not a mask."
Then the video element is used to both train new data and also predict whether or not a mask is being worn.
The buttons with IDs noMaskButton and maskButton will add new image data to the model while the train button trains the model and the predict button begins running the model on the video feed to predict if a mask is detected.
If you like the results of the model, you can save the model to the assets folder by clicking the button that says Save model to Assets folders.
Next, let’s add JavaScript to connect the DOM elements. Create a new file assets/train.js and add the following code to declare variables and access the DOM elements:
const video = document.getElementById("video");
const resSpan = document.getElementById('result');
const conf = document.getElementById('confidence');
const saveModelButton = document.getElementById('save');
const noMaskButton = document.getElementById('noMaskButton');
const maskButton = document.getElementById('maskButton');
const amountOfLabel1Images = document.getElementById('numNoMaskImages');
const amountOfLabel2Images = document.getElementById('numMaskImages');
const predictButton = document.getElementById('predict');
const featureExtractor = ml5.featureExtractor('MobileNet');
const classifier = featureExtractor.classification(video);

let localStream, totalLoss;

navigator.mediaDevices.getUserMedia({video: true, audio: true})
  .then(vid => {
    video.srcObject = vid;
    localStream = vid;
  });

//buttons for when you need to build the model
//no mask
noMaskButton.onclick = () => {
  classifier.addImage('no');
  amountOfLabel1Images.innerText = Number(amountOfLabel1Images.innerText) + 1;
};

maskButton.onclick = () => { //mask
  classifier.addImage('yes');
  amountOfLabel2Images.innerText = Number(amountOfLabel2Images.innerText) + 1;
};

train.onclick = () => {
  classifier.train((lossValue) => {
    if (lossValue) {
      totalLoss = lossValue;
      loss.innerHTML = `Loss: ${totalLoss}`;
    } else {
      loss.innerHTML = `Done Training! Final Loss: ${totalLoss}`;
    }
  });
};

const resultsFunc = (err, res) => {
  if (err) {
    console.error(err);
  } else if (res && res[0]) {
    resSpan.innerText = res[0].label;
    conf.innerText = res[0].confidence;
    classifier.classify(resultsFunc); // recall the classify function again
    //console.dir(classifier);
  }
}

predictButton.onclick = () => {
  classifier.classify(resultsFunc);
};

saveModelButton.onclick = () => {
  featureExtractor.save();
};
This code defines the video element source as the computer video camera and makes a featureExtractor object from the MobileNet model. The code calls the classification() method on the featureExtractor object, setting the input source of the classifier object as the video element. This means that whatever appears on the camera acts as the input to classifier.
After adding your images, click the button that says Train. This button trains the model with the images added above. Once training begins, the DOM displays the lossValue in the loss span. The lower that value is, the greater the accuracy. Eventually, it decreases closer and closer to zero and the training process is finished when lossValue becomes null.

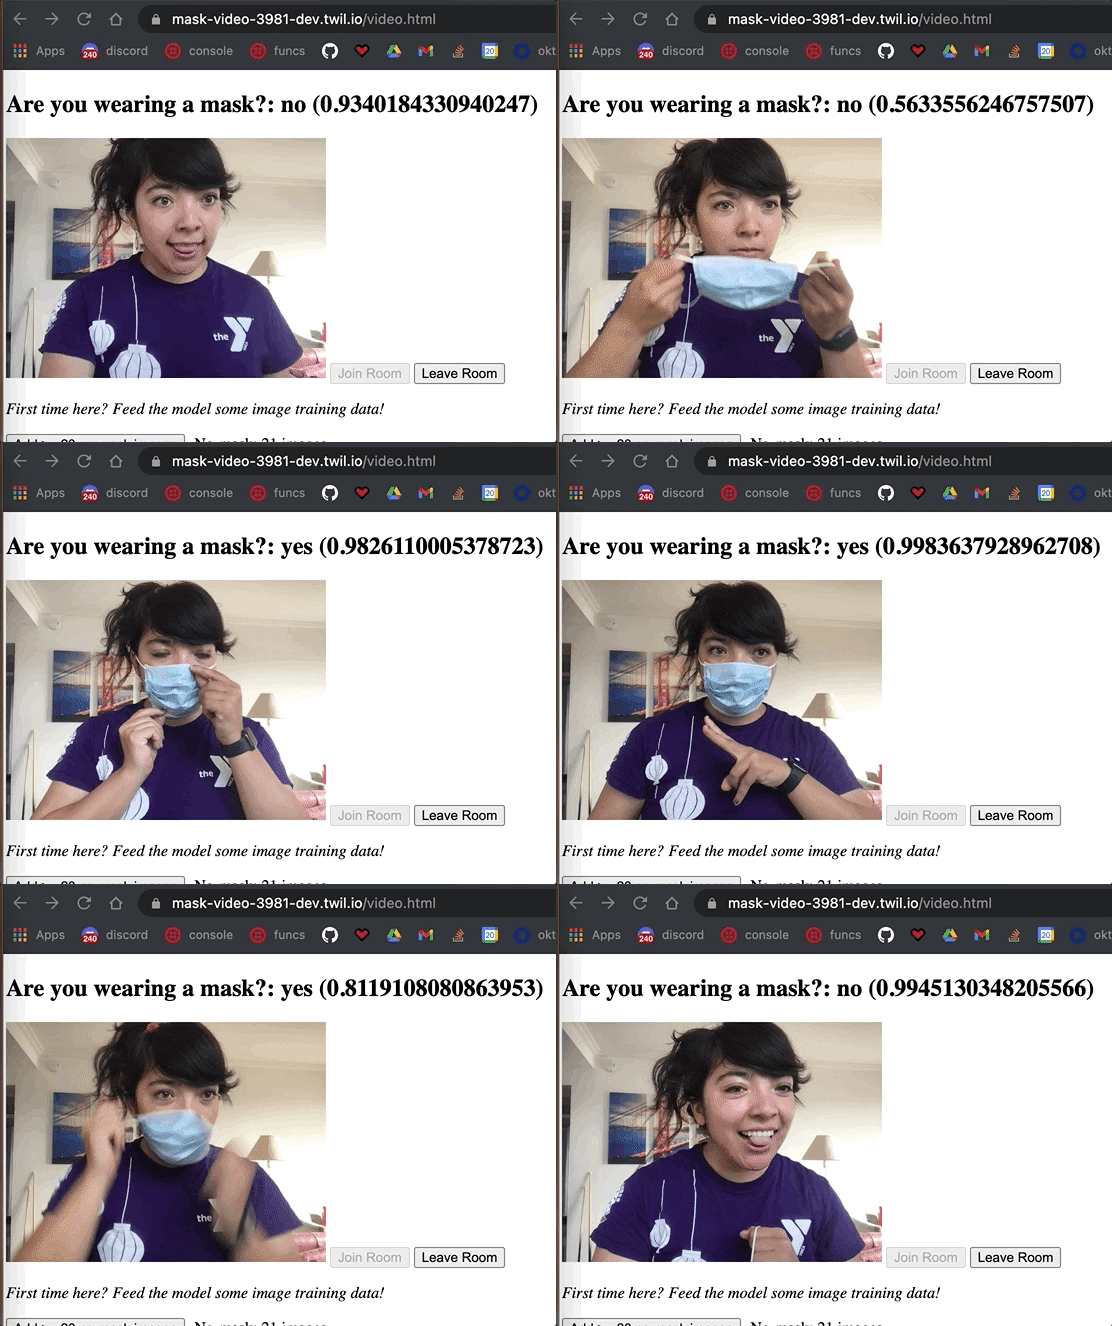
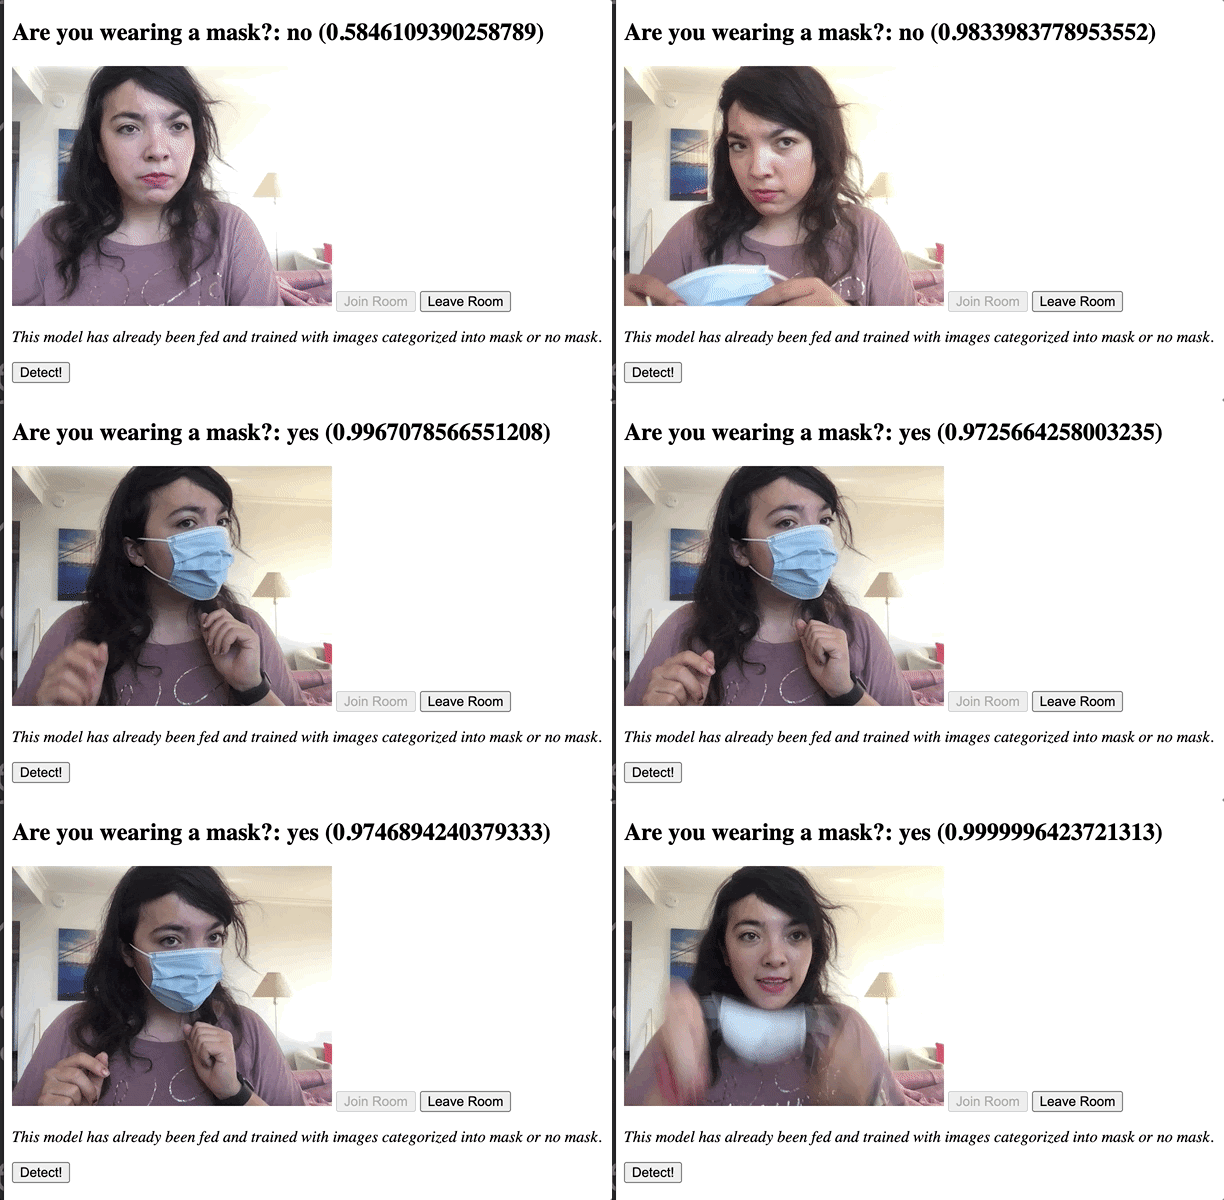
After the training is complete, , click the button that says See the model in action once training is done. Test out your new model by taking your mask on and off in front of your webcam. The model will return a yes or no label in addition to the confidence level of the classification to reflect how confident the model is in that label. The closer to the number is to 1, the more sure it is.
The classification() method is called over and over in the background, so that model is constantly predicting if someone is wearing a mask or not.
If the model is not very accurate, try adding more images to the model. Otherwise, you can save the model by clicking the save button which calls featureExtractor.save() to save the model.
Be sure to save it to the assets folder (which the Twilio Serverless Toolkit automatically generates) so the model can be accessed by others, including our Twilio video app (ready-made from this blog post on building a Twilio video app quickly with JavaScript and the Twilio CLI.)
Our model has been built, now we have to use it! Replace the contents of assets/video.html with the following code which imports ml5, adds a new h2 and some spans to reflect the "no" and "yes" mask labels and confidence levels, and a button to detect mask-wearing.
<!DOCTYPE html>
<html>
  <head>
    <meta charset="utf-8">
    <meta http-equiv="X-UA-Compatible">
    <meta name="viewport" content="width=device-width, initial-scale=1">
    <script src="https://unpkg.com/ml5@0.6.1/dist/ml5.min.js"></script>
    <title>Twilio Video Mask ||
    No-Mask Demo</title>
</head>
  <body>
    <h2>
        Are you wearing a mask?: <span id="result">N/A</span> (<span id="confidence">N/A</span>)
      </h2>
    <div id="room-controls">
      <video id="video" autoplay muted="true" width="320"
          height="240"></video>
      <button id="button-join">Join Room</button>
      <button id="button-leave" disabled>Leave Room</button>
    </div>
      <p>
          <em>This model has already been fed and trained with images categorized into mask or no mask.</em>
        </p>
      <p>
        <button id="predict">Detect!</button>
      </p>

  <script src="//media.twiliocdn.com/sdk/js/video/releases/2.3.0/twilio-video.min.js"></script>
  <script src="https://unpkg.com/axios@0.19.0/dist/axios.min.js"></script>
  <script src="index.js"></script>
  </body>
</html>
You’ll also need to edit the assets/index.js file.
In assets/index.js, edit line 4 to say const ROOM_NAME = 'mask';. Then beneath the video variable, add the following variables which you should recognize from train.js:
const resSpan = document.getElementById('result');
const conf = document.getElementById('confidence');
const predictButton = document.getElementById('predict');
let classifier = null;
let featureExtractor = ml5.featureExtractor('MobileNet');
Once someone joins a Twilio Video room, we load the model with:
joinRoomButton.onclick = () => {
        featureExtractor.load('model.json');
Look for the following two lines at the bottom of the joinRoomButton click handler that say:
joinRoomButton.disabled = true;
leaveRoomButton.disabled = false;
Beneath these lines, still inside the click handler, add the following code (which should also look pretty familiar from train.js):
classifier = featureExtractor.classification(video);
const resultsFunc = (err, res) => {
    if (err) {
        console.error(err);
    }
    else if (res && res[0]) {
        resSpan.innerText = res[0].label;
        conf.innerText = res[0].confidence;
        classifier.classify(resultsFunc); // recall the classify function again
    }
}
predictButton.onclick = () => {
    classifier.classify(resultsFunc);
};
Save your file, deploy the file and new application, and head back to your browser. Visit the deployed https://YOUR-TWILIO-DOMAIN/video.html page. From there you can detect mask usage with the model you trained on the train.html page in a Twilio video application!
The complete code can be found on GitHub, which includes two models I trained to detect masks which you could use.
Twilio's Serverless Toolkit makes it possible to deploy web apps quickly, including video chat applications. You can train a ml5.js model to detect other things like if you are wearing a hat or holding a banana. I tried training a model to detect if a mask was being worn correctly or if it was showing my nose, and the detection was not as accurate--it most likely needed a lot more training data.
Let me know online what you're building with Serverless or Video, and check out related posts like Pose Detection with TensorFlow and Twilio Video.
- Twitter: @lizziepika
- GitHub: elizabethsiegle
- Email: lsiegle@twilio.com
- Livestreams: twitch.tv/lizziepikachu
61


