18
Using Two-Dimensional Arrays to Build a Walkable Game Map (in React!)
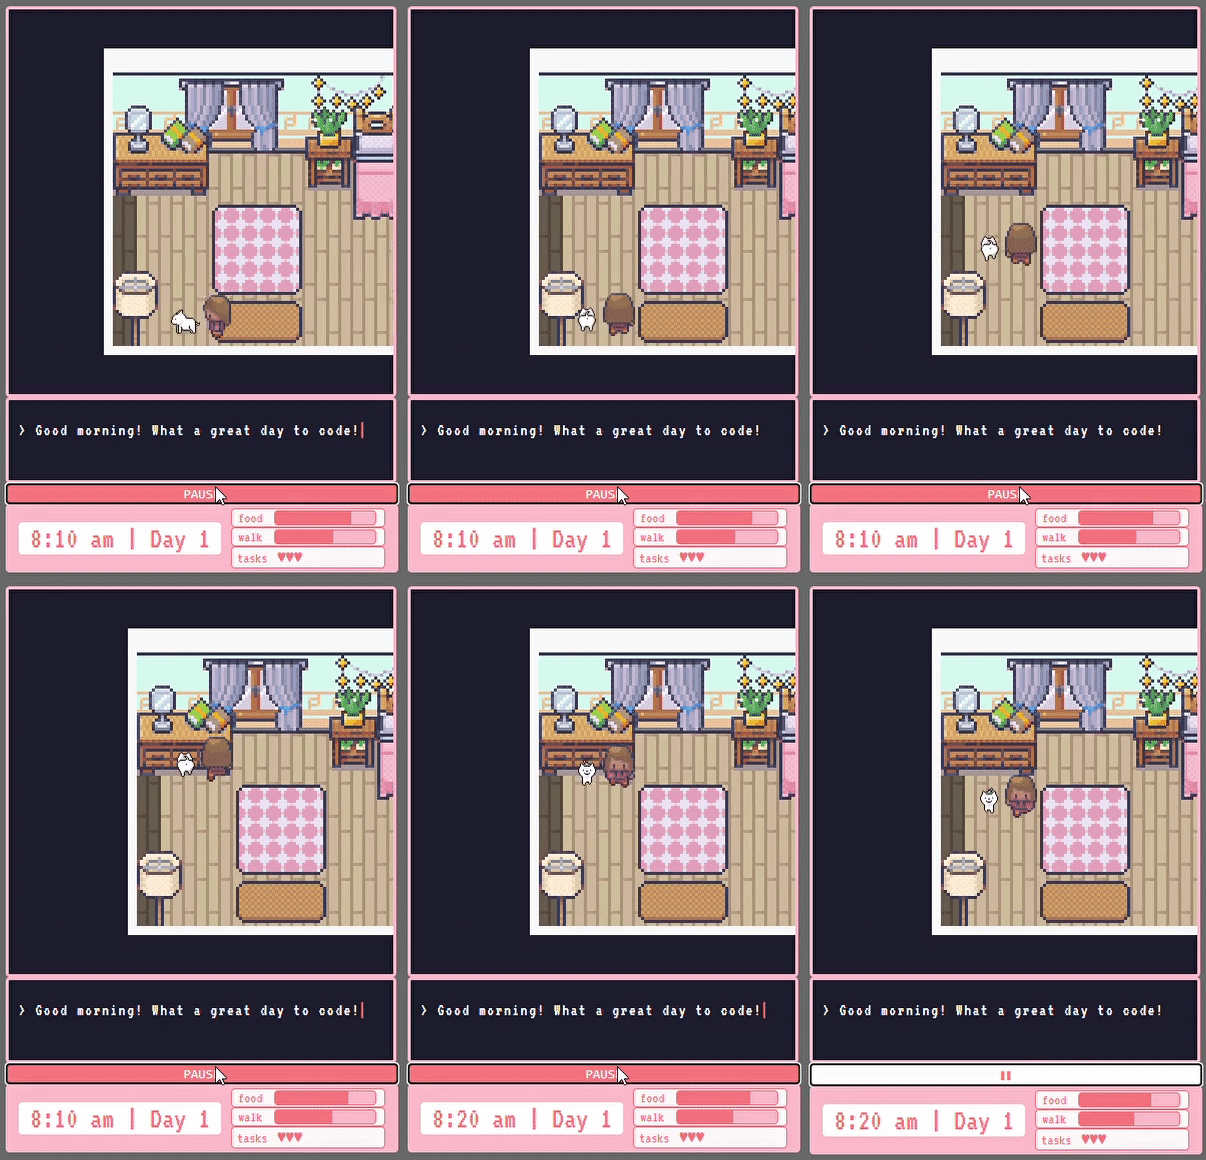
I recently deployed my first-ever React project, a mini-simulation game called CodeCamp Quest where you play as a student developer trying to balance her homework assignments with her needy (but adorable) dog.
Creating this project not only gave me a chance to deepen my understanding of React, but also to learn Redux and experience writing custom hooks. I faced a number of challenges along the way, one of which was how to handle creating map boundaries. I’ll get into how I solved it, but first...
When I told my instructor I was thinking of doing a game for my React project, I didn't fully understand what I was getting myself into. I knew I wanted to build a game that aligned with my love of games like The Sims and Stardew Valley. At a minimum, I wanted to be able to move a character on a plane and complete tasks.
I also knew I wanted the plot to reflect my recent experience learning React with two dogs who love to tell me what to do and when. Write what you know, so they say.
In conceptualizing the logic, I had a feeling it was possible to create a grid and to make the character's X and Y coordinates dynamic with keystrokes, but beyond that, I was essentially prepared to start guessing.
I googled 'React Game,' where I came across this video of Drew Conley giving a talk at React Rally in 2016 about the game his team built entirely in React, called Danger Crew. I also encountered Andrew Steinheiser's React RPG, a dungeon-crawler of which I wasted a good amount of research time playing.
These games proved to me that what I wanted was possible, I only needed to figure out how.
I started with the thing I was sure how to build: moving a character on a plane by dynamically changing their coordinates using keystrokes. I created a custom hook that stored the x-y coordinates in state and altered them according to the arrow key being pressed. The character could then move freely around the browser window, beholden to nothing, free of the restrictions of the walls and map edges like a roving specter...amazing, but not the game I was building.
I needed a way to efficiently store the bounds of the map. Different rooms have different walkable areas, so a simple range condition couldn't work, and eventually, I would also need to allow actions on certain game tiles.
So, I called my dad, a developer from whom I got my love of video games. He suggested that I look into using a two-dimensional array, a common solution for games that use a grid.
I built out my bedroom array, where each tile stored a boolean value for 'walk' and 'action' in an object:
const X = { walk: false, action: false,};
const O = { walk: true, action: false,};
const AO = { walk: true, action: true,};
const AX = { walk: false, action: true,};

const BEDROOM_MAP = [ //each elem in the nested array equals a tile on the x-axis
    [X, X, X, X, X, X, X, X, X, X, X, X], // y = 0
    [X, X, X, X, X, X, X, X, X, X, X, X], // y = 1
    [X, X, X, X, X, X, X, X, X, X, X, X], // y= 2
    [X, X, X, X, X, X, X, X, X, X, X, X], // y = 3
    [X, X, AX, AX, X, AO, AO, X, AO, AO, X, X], // y = 4
    [X, X, AO, AO, O, O, O, O, AO, AO, X, X], // y = 5
    [X, X, O, O, O, O, O, O, O, O, X, X], // y = 6
    [X, X, O, O, O, O, O, O, O, O, O, O], // y = 7
    [X, X, X, O, O, O, O, O, O, O, O, O], // y = 8
    [X, X, X, O, O, O, O, O, O, O, X, X], // y = 9
    [X, X, X, X, X, X, X, X, X, X, X, X], // y = 10
    [X, X, X, X, X, X, X, X, X, X, X, X], // y = 11
]
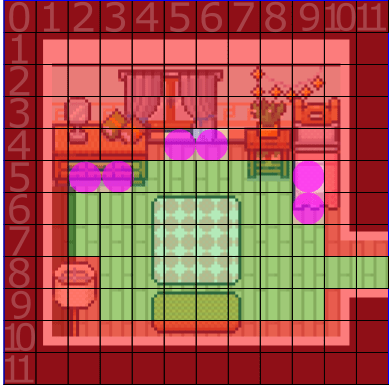
Compare this to the mock-up of the map grid I had created in an image editor, we can see it is mostly the same. (In testing, I discovered a need to have some action tiles that were not walkable, but did allow for actions):

To make the character abide by my new rules, I created a function that took in the current coordinates and the direction indicated in the keydown event.
The function then adjusted for what would be her next stride by adding or subtracting 2 (the length of her stride) from the current x or y (dependent on the direction moved).
function getNextTile(direction, position) {
    let newPos;
    let X;
    let Y;

    switch (direction) {
        case 'up':
            newPos = position.top - 2
            X = ((position.left + 192) - (position.left % 32)) / 32
            Y = (newPos - (newPos % 32)) / 32
            return MAP_TABLE[Y][X][key];
By dividing the coordinates held in position by 32 (the pixel size of my grid), and passing them as the indices to MAP_TABLE, which held the 2D arrays for each map area, we are able to return the boolean for 'walk' held on the next tile. The return of this boolean value determines if the reducer that moves the character runs or not, thus restricting her to my map.
You'll notice I had to subtract the remainder of the current position / 32 before dividing it to account for being in the middle of tiles, as the player steps by 2px at a time.

By the way, if you are curious why I am adding 192 in the X coordinate calculation: Like an old Pokémon game, CodeCamp Quest uses a viewport, allowing the entire map to be rendered behind the viewport container. When the player walks up or down, the character sprite moves, but when walking left or right, the sprite is stationary and the map image moves instead. 192px renders the character in the center of the viewport container on the x-axis. The getNextTile function needs to account for that fixed position.
18
