28
How To Add Google's Two Factor Authentication To A Laravel 8 Application.
Laravel provides an amazing authentication scaffold that handles registration, login, and all other authentication parts for users that are easy to use.
However, the traditional email and password are becoming less secure due to many cyber attacks like SQL injections, phishing scams and data breaches.
The concept of two-factor authentication(2FA) was created to overcome this shortcoming.
Two-factor authentication (2FA) strengthens access security by requiring two methods to verify users identities.
The traditional password is already one factor of authentication which is something only the user should have. Some extra form of security that a user should also have includes biometrics(fingerprint), voice pattern recognition, or iris scan which are quite expensive but awesome.
The second factor should be something that users don't readily have or aren't constant. One form of the second factor is One-Time Passwords(OTPs) which will be our focus here.
A one-time password (OTP) is an automatically generated set of characters used to authorize a user for a specific action. As the name implies, it can only be used once. It can either be counter-based or time-based.
After the correct password is provided in the login form, the user is prompted for an OTP depending on your application or preference. This can be implemented in so many ways such as:
We will be using this package to implement the Google Two-Factor Authentication on our Laravel Application.
Through this guide, I highlighted some issues, their solutions and modifications to help have a better experience with this packages.
To use the two-factor authentication, the user will have to install a Google Authenticator compatible app. Here are a few:
An advantage of using Google Authenticator is that after downloading the app to your smartphone, you can use it offline unlike other 2FA options which need to be connected to the internet to work which may be a disadvantage to users in a cut off location *for example, the basement of a building.
After the user logs in successfully, a prompt showing a QR code and alternatively a code(set of characters to manually input if the user may not be able to scan QR code).
Upon scanning or submitting the code, the server generates a secret key which is passed to the user.
The secret key is combined with the current Unix timestamp to generate a six-digit code using a message authentication code (HMAC) based algorithm.
The six-digit code is the OTP and it changes every 30 seconds.
Now let's get to coding!😎
Step 1: Create a Laravel application.
You can use the laravel command or via the Composer package manager as follows:
laravel new project_name

or

composer create-project laravel/laravel project_name
Step 2: Establish a database connection.
Step 3: Install Laravel/UI.
composer require laravel/uiStep 4: Install Bootstrap Auth Scaffolding.
The bootstrap authentication scaffold gives a UI and basic authentication for registration and login. You can install it with this
Artisan command:php artisan ui bootstrap --authStep 5: Install NPM Packages.
npm installStep 6: Run NPM environment.
npm run devStep 7: Run the application.
You can serve the laravel application with the following
Artisan Command:php artisan serveStep 8: Now hit this URL on your browser.
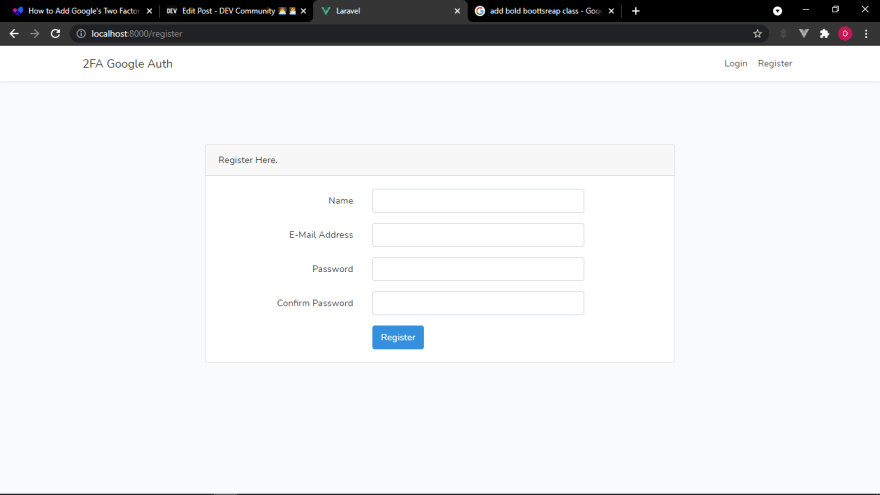
http://localhost:8000/registerYou should be able to view the register and login page like this:

P.S: We haven't run the migrations yet so submitting the forms will return an error message.
Let's pause and identify what we want to achieve:
P.S: The QR code is accessible ONLY once for maximum security and if the user needs to set up 2FA again, they will have to repeat the process and invalidate the old one.
Step 1: Install two packages.
The first is Google Authenticator package for PHP and the second package is a QR code generator which is BaconQrCode.
The first is Google Authenticator package for PHP and the second package is a QR code generator which is BaconQrCode.
composer require pragmarx/google2fa-laravel
composer require bacon/bacon-qr-code
Step 2: Publish the config file.
php artisan vendor:publish --provider="PragmaRX\Google2FALaravel\ServiceProvider"Step 3: Update
RegisterController with register() method.P.S: Include the Request class outside the controller class.
use Illuminate\Http\Request;public function register(Request $request)
{
//Validate the incoming request using the already included validator method
$this->validator($request->all())->validate();
// Initialise the 2FA class
$google2fa = app('pragmarx.google2fa');
// Save the registration data in an array
$registration_data = $request->all();
// Add the secret key to the registration data
$registration_data["google2fa_secret"] = $google2fa->generateSecretKey();
// Save the registration data to the user session for just the next request
$request->session()->flash('registration_data', $registration_data);
// Generate the QR image. This is the image the user will scan with their app
// to set up two factor authentication
$QR_Image = $google2fa->getQRCodeInline(
config('app.name'),
$registration_data['email'],
$registration_data['google2fa_secret']
);
// Pass the QR barcode image to our view
return view('google2fa.register', ['QR_Image' => $QR_Image, 'secret' => $registration_data['google2fa_secret']]);
}Step 4: Override the default
register() trait.Since we defined our own
register() method, we need to update the trait to avoid a clash with the default register() method from the authentication scaffold.Instead of
use RegistersUsers;use this:
use RegistersUsers {
         // We are doing this so the predefined register method does not clash with the one we just defined.
           register as registration;
       }
Step 5: Create the view to display the QR code.
Our
register() method already redirects to view(google2fa.register.blade.php). This means we will create agoogle2fa folder and a register.blade.php file in it. The full path will be resources/views/google2fa/register.blade.php.This will be the content of the file to display the QR code:
@extends('layouts.app')

@section('content')
<div class="container">
    <div class="row">
        <div class="col-md-8 col-md-offset-2">
            <div class="panel panel-default">
                <div class="panel-heading">Set up Google Authenticator</div>

                <div class="panel-body" style="text-align: center;">
                    <p>Set up your two factor authentication by scanning the barcode below. Alternatively, you can use the code {{ $secret }}</p>
                    <div>
                        <img src="{{ $QR_Image }}">
                    </div>
                    <p>You must set up your Google Authenticator app before continuing. You will be unable to login otherwise</p>
                    <div>
                        <a href="/complete-registration"><button class="btn-primary">Complete Registration</button></a>
                    </div>
                </div>
            </div>
        </div>
    </div>
</div>
@endsection
P.S: Now after submitting valid credentials at registration, the user is redirected to a page with a valid QR code and also the secret(if they cant scan the code). However, users can't complete registration yet because we are yet to set up the controllers and route to handle that.

Step 1 : Update User Migration.
Since we haven't run our migrations yet, we can add a column for Google two factor authentication secret. We will update the
Since we haven't run our migrations yet, we can add a column for Google two factor authentication secret. We will update the
up() method in database/migrations/2014_10_12_000000_create_users_table.php like this:public function up()
{
Schema::create('users', function (Blueprint $table) {
$table->id();
$table->string('name');
$table->string('email')->unique();
$table->timestamp('email_verified_at')->nullable();
$table->string('password');
$table->rememberToken();
$table->text('google2fa_secret');
$table->timestamps();
});
}Step 2: Run the migrations.
We can now run our migrations to the database with this
Artisan command:php artisan run migrateP.S: If you have run your migrations before now, Here is a guide I wrote about Adding and Removing columns from existing tables in database . (Fear not! I got you covered😎)
Step 3 : Update the
RegisterController with completeRegistration() method.public function completeRegistration(Request $request)
{
// add the session data back to the request input
$request->merge(session('registration_data'));
// Call the default laravel authentication
return $this->registration($request);
}Step 4: Update
User model and create() method in RegisterController with google2fa_secret field.User model as hidden and fillable property so that it can be included and also hidden if we cast it to an array or JSON.
protected $fillable = [
        'name',
        'email',
        'password',
        'google2fa_secret'
    ];

    /**
     * The attributes that should be hidden for arrays.
     *
     * @var array
     */
    protected $hidden = [
        'password',
        'remember_token',
        'google2fa_secret'
];create() method to accept the field like this:
protected function create(array $data)
    {
        return User::create([
            'name' => $data['name'],
            'email' => $data['email'],
            'password' => Hash::make($data['password']),
            'google2fa_secret' => $data['google2fa_secret'],
        ]);
    }
Step 5: Set up routes for
complete-registeration.This will be in our
routes/web.php file like this:Route::get('/complete-registration', [App\Http\Controllers\Auth\RegisterController::class, 'completeRegistration'])->name('complete-registration');Step 6 : Encrypt the
google2fa_secret.We are all set😍, however, let's take an extra step for security and encrypt the
google2fa_secret in the User model like this:public function setGoogle2faSecretAttribute($value)
{
$this->attributes['google2fa_secret'] = encrypt($value);
}
public function getGoogle2faSecretAttribute($value)
{
return decrypt($value);
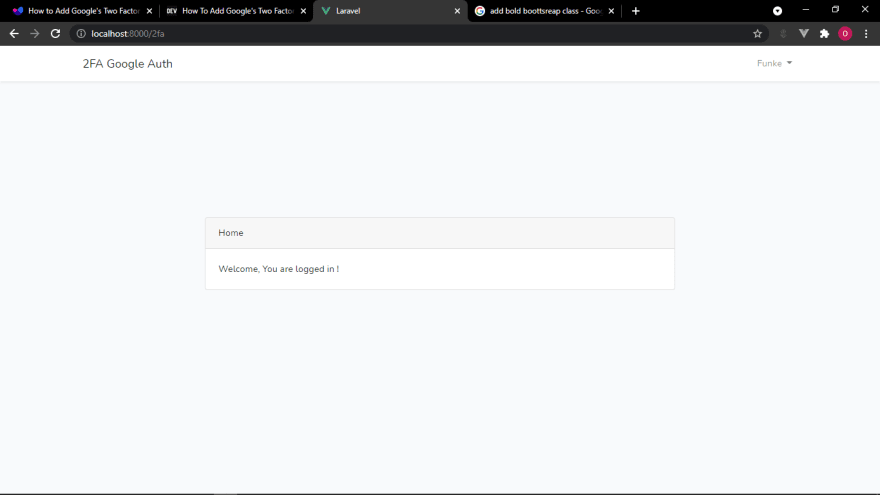
}Now a user that successfully registers with the correct OTP should see this:
HIGHLIGHT 1
Here is an issue you're likely to face at this point depending on your Laravel version and its compatibility with these packages.
Here is one solution I figured out🤗:
The Bacon-Qr-code package seems to be most stable on version 1.0.3 so you can downgrade it with the following composer command:
composer require bacon/bacon-qr-code:~1.0.3Now try to submit the form again, the registration should be successful!🎉👍
Now we can generate the QR code as well as the secret, thereafter successfully register a user.
But we want to prompt users for their OTP before granting them access to any part of the app.🤔
Step 1: Set up Route Middleware
The
pragmarx/google2fa-laravel package provides a middleware to prevent users from accessing the app unless OTP has been provided.First, we need to add this to the
routeMiddleware array in app/Http/Kernel.php before we can use it.protected $routeMiddleware = [
'2fa' => \PragmaRX\Google2FALaravel\Middleware::class,
];This will restrict any user that hasn't submitted a valid OTP from access to the home page. It will keep redirecting back to
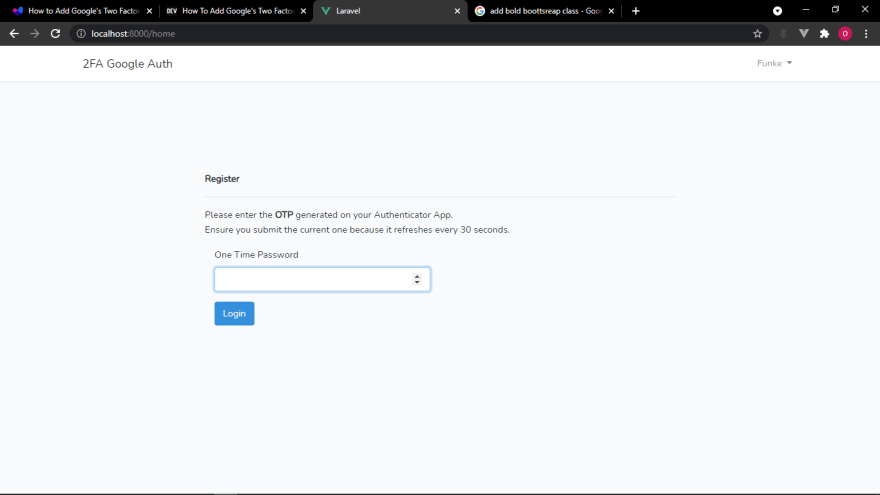
resources/views/google2fa/index.blade.php prompting for the OTP until a valid OTP is sent.After scanning the QR code or inputting Secret on the Google Authenticator app, it automatically generates an OTP on the Authenticator App.
Click on Complete Registration then the user is prompted for the OTP and if OTP submitted is valid(being careful that the OTP on the app refreshes every 30 seconds, so the user must input the current OTP) then, the user is redirected to home page else user will keep being prompted for the OTP until the submission is valid.
The OTP page which is
resources/views/google2fa/index.blade.php looks like this:

HIGHLIGHT 2
I realized that it wasn't user-friendly to keep redirecting users back to OTP page for a valid OTP if the submission was invalid. So I decided to return an error message when redirecting to inform users that the OTP entered was wrong.
Update the
resources/views/google2fa/index.blade.php like this:@extends('layouts.app')
@section('content')
<div class="container">
<div class="row justify-content-center align-items-center " style="height: 70vh;S">
<div class="col-md-8 col-md-offset-2">
<div class="panel panel-default">
<div class="panel-heading font-weight-bold">Register</div>
<hr>
@if($errors->any())
<b style="color: red">{{$errors->first()}}</b>
@endif
<div class="panel-body">
<form class="form-horizontal" method="POST" action="{{ route('2fa') }}">
{{ csrf_field() }}
<div class="form-group">
<p>Please enter the <strong>OTP</strong> generated on your Authenticator App. <br> Ensure you submit the current one because it refreshes every 30 seconds.</p>
<label for="one_time_password" class="col-md-4 control-label">One Time Password</label>
<div class="col-md-6">
<input id="one_time_password" type="number" class="form-control" name="one_time_password" required autofocus>
</div>
</div>
<div class="form-group">
<div class="col-md-6 col-md-offset-4">
<button type="submit" class="btn btn-primary">
Login
</button>
</div>
</div>
</form>
</div>
</div>
</div>
</div>
</div>
@endsectionHere is what the result will be if the submitted OTP is wrong:

Wow!🎉🤗 You have built an authentication system with Google's Two Factor Authentication💪💪.
Thanks for reading.🤝
28
