
28
Build a Splash Page with Next.js, Airtable and SyncInc
In the previous article of this series, we built a splash page using the
Airtable.js package to query our data from an Airtable base. We also took a deep dive into what Airtable actually is and how you can use it with Next.js to help generate static pages directly from your Airtable data.NOTE: The previous article is not a pre-requisite for following along in this article, but if you’ve never worked with Airtable before I highly recommend starting there to get a better idea of how we’re using Airtable.
In this article, we’ll take a step-by-step look at how to set up
SyncInc and use it to synchronize your Airtable base with a fully provisioned cloud-based Postgres instance. We’ll still be working with the same Airtable base, so in the end, you will once again, end up with the same splash page. In contrast, you’ll be able to see how SyncInc helps us simplify the logic required to achieve the same solution using the raw power of SQL to query your data from AirtableIf you followed along with the first article in this series, then you already know how cumbersome it can be to query Airtable directly. Even when using the
Airtable.js package, there’s a ton of boilerplate that is required just to get our data from Airtable. Using SyncInc we not only get a more scalable solution but also a more efficient and performant way to get data from Airtable to the front-end of our applications.SyncInc is a production-grade synchronization service used to create and synchronize a “follower” Postgres database with various third-party APIs.- Node.js 10.13 or later
- Either macOS, Windows (including WSL), or Linux
Before we get started, you’ll need
Resources section. You’ll also need your Airtable API key handy, which can be found here.☝️ Once again, you can refer to the
Airtable Setup section of the last article.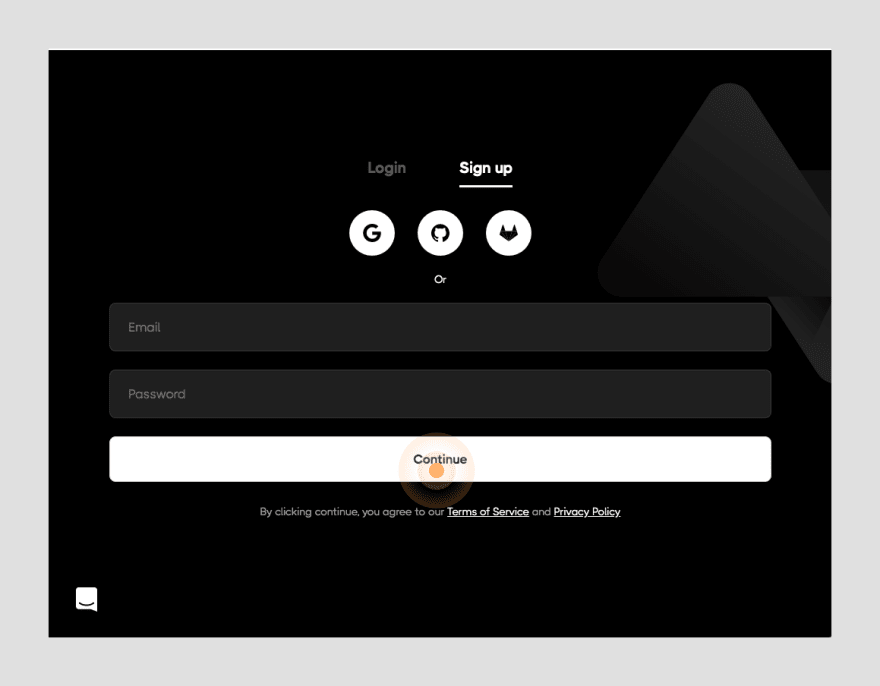
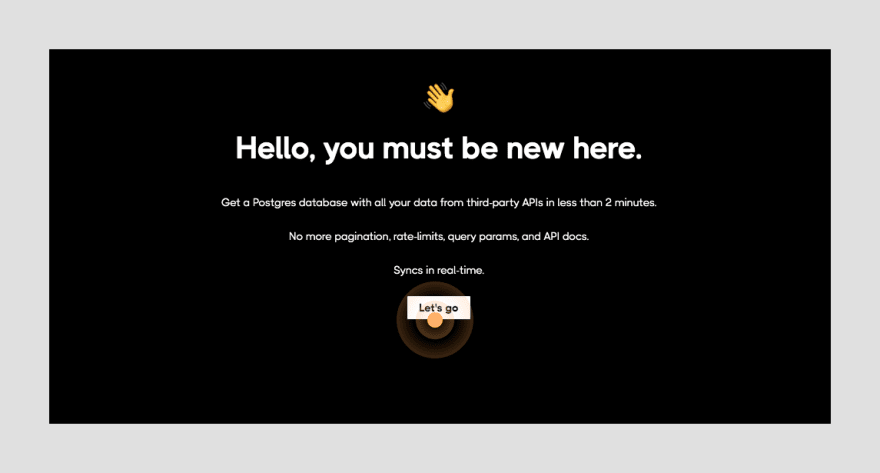
If this is your first time signing up then click the button labeled "Let's go" to continue, otherwise, you'll be redirected to your dashboard.
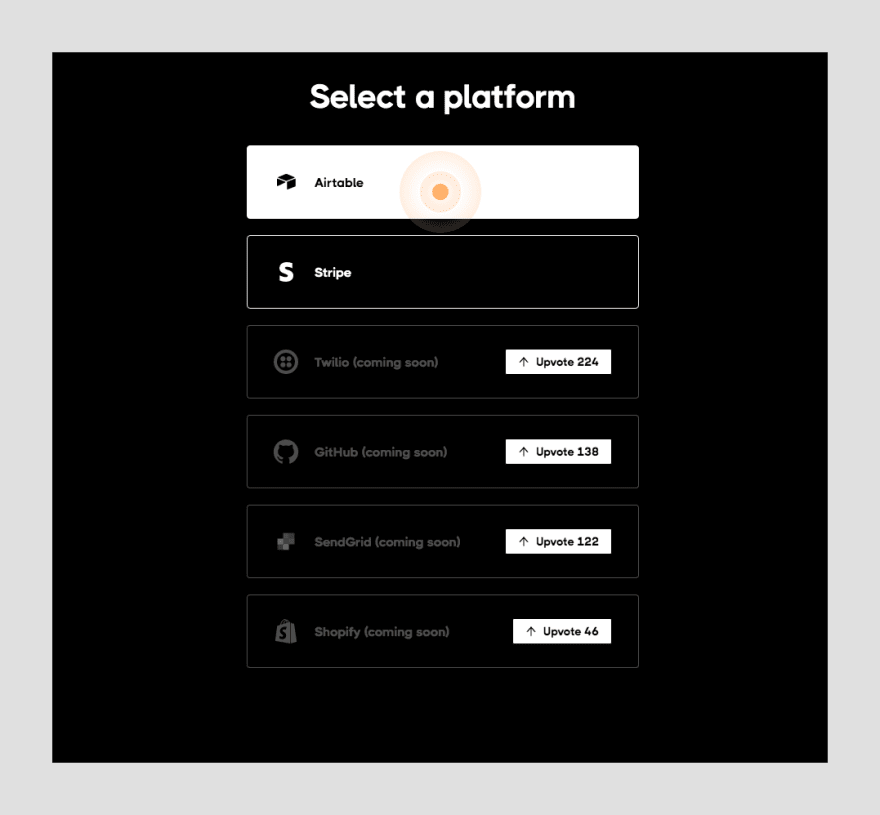
For the next step, you'll need your
Airtable API key from here. ☝️ If you haven't set up your Airtable account or haven't cloned the Airtable base used for this project - please complete the setup using the directions provided in the Airtable Setup section of the first article.

If you've successfully cloned the provided Airtable base, should see a base named "site" listed in your available bases.
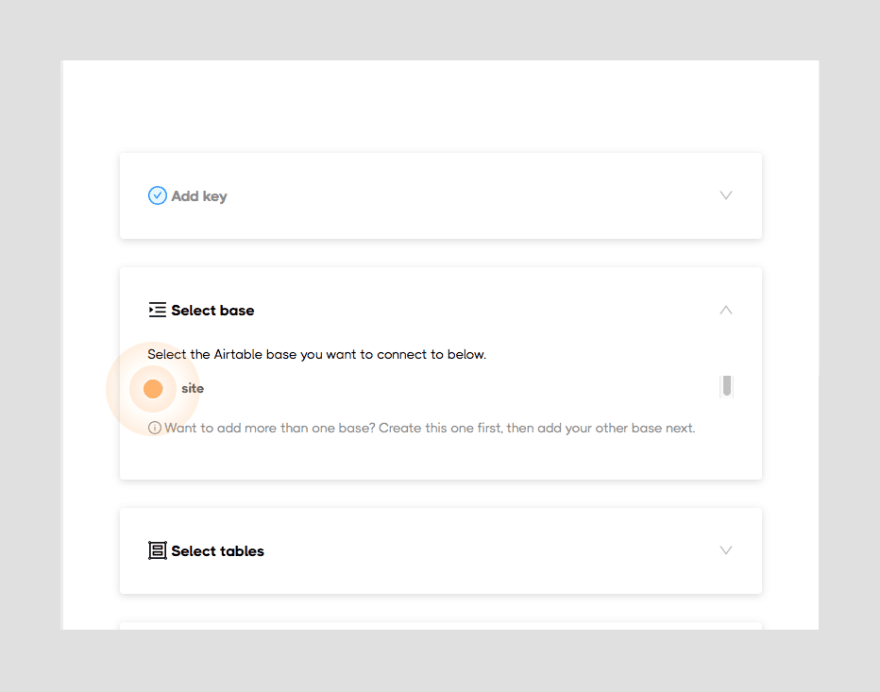
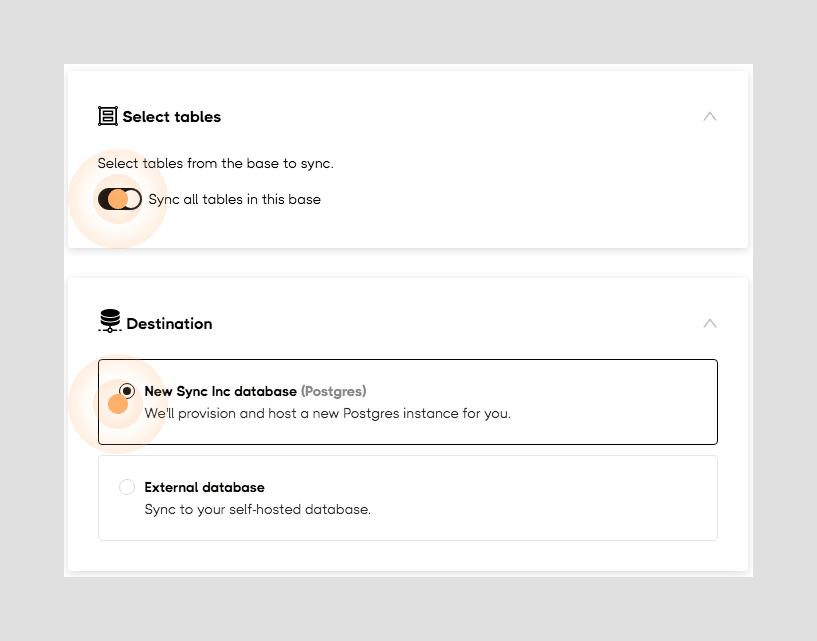
Make sure that you toggle "Sync all tables in this base" on and select "New Sync Inc database".
You'll be given a quick on-boarding questionnaire select the option that fits best for you or just click "Skip" to continue.
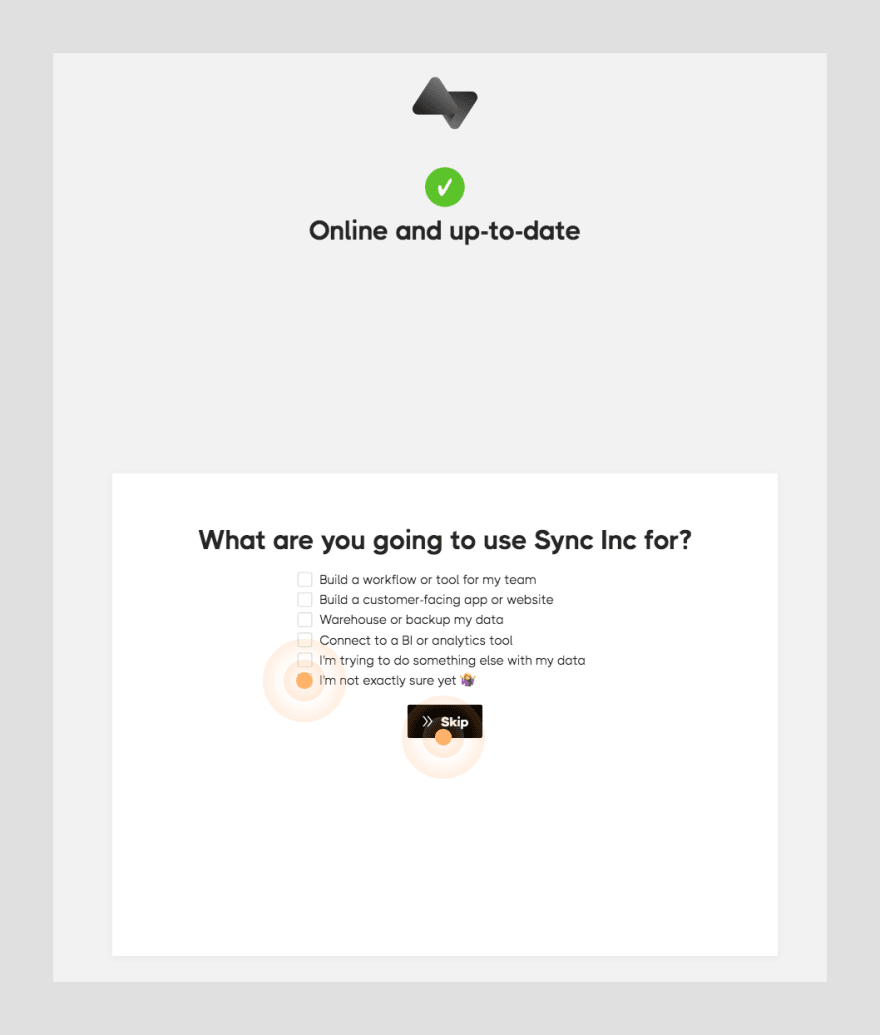
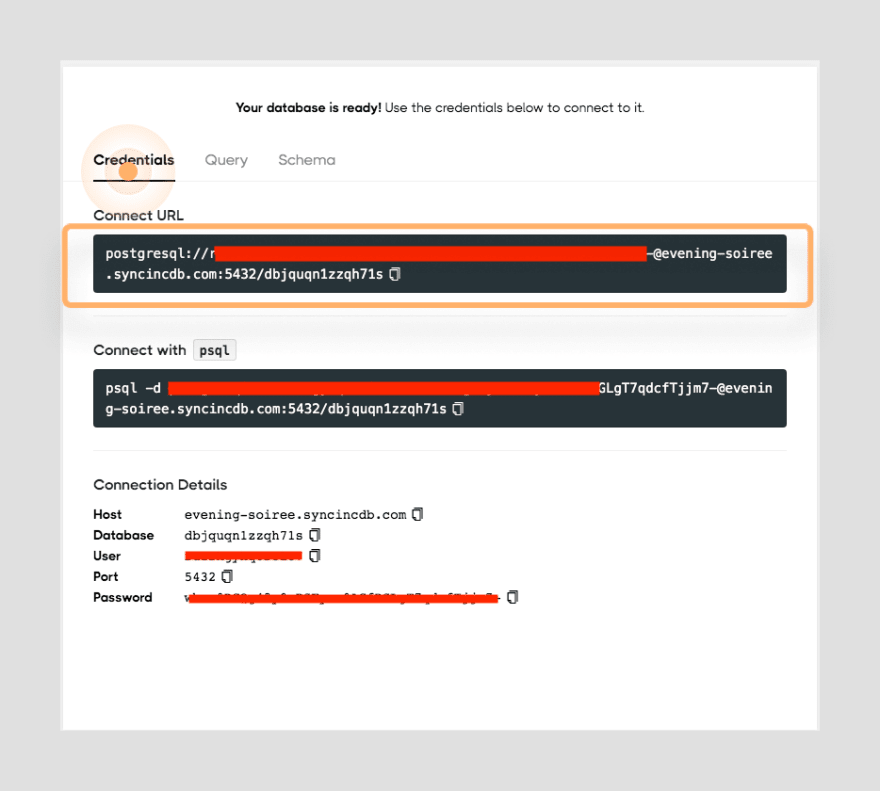
After a few moments, your new synchronized database will be fully provisioned. Once the setup completes you'll be provided with your credentials.

Once you have access to your
SyncInc credentials, you can turn your attention towards setting up the project locally.Clone the starter branch, by running the following command.
git clone -b post2-starter https://github.com/gaurangrshah/next-airtable-splash.gitNavigate to the project directory.
cd next-airtable-splashInstall project dependencies.
yarnOnce your packages have been installed. Go ahead and spin up your development server and ensure that the application is running properly.
yarn devIf all goes well you should see a page that looks similar to the one below.
Let's take a moment to familiarize yourself with this starter template. For the most part, this is a typical boilerplate
Next.js application..
├── README.md
├── components
│ ├── Containers.js
│ ├── Cta.js
│ ├── Hero.js
│ ├── List.js
│ └── Splash.js
├── lib
├── next.config.js
├── package.json
├── pages
│ ├── _app.js
│ ├── api
│ │ └── hello.js
│ └── index.js
├── public
│ ├── favicon.ico
│ └── vercel.svg
├── styles
│ ├── Containers.module.css
│ ├── Cta.module.css
│ ├── Hero.module.css
│ ├── Home.module.css
│ ├── List.module.css
│ └── globals.css
├── utils
│ └── data-helpers.js
└── yarn.lockYou'll find that the starter also includes all of the styles and each of the components you'll need for this project including a few helper functions that will make handling the data a bit simpler.
Next up we'll look at how to get our data into our application from Airtable. We'll start by using the pg package to connect with and query from our synchronized Postgres database that we generated with
Sync Inc. In the last article, we used the
Airtable.js package to help query our Airtable data, this time around we'll use the pg package to help do the same with our Postgres database. You should see a stark contrast in both the amount of boilerplate you no longer need and how we can simply all of the logic we implemented previously into a single SQL statement which will return all of the data we need. Let's start by adding
pg as a dependency by running the following command:yarn add pgpg allows us to interact with postgres databases from node.js environments using the full power of raw SQL queries. Alternatively, pg is often known as node-postgres
📒 More about pg
Next, you'll need to set up your environment variables to configure your
SyncInc database.From your

SyncInc dashboard click the "Connect" button.You'll need to fill in the corresponding values from the credentials tab of the
SyncInc dashboard.Create a new file called
env.local at the root of your project and copy the variables below:# .env.local
DB_USER=
DB_HOST=
DB_NAME=
DB_PW=
DB_PORT=— see
.env.sample file included with the starter for this project.— see more on environment variables in Next.js
With your environment variables defined, you can now set up your database client. Create a new file under the
/lib directory named pg.js.// lib/pg.js
const { Client } = require('pg');
// create client instance
const client = new Client({
user: process.env['DB_USER'],
host: process.env['DB_HOST'],
database: process.env['DB_NAME'],
password: process.env['DB_PW'],
port: process.env['DB_PORT']
});
module.exports = {
client
}Once you've instantiated the database client, the next step is to create the SQL query you'll need to grab all of your Airtable data that your application needs all at once.
☝️ Be forewarned, the query example below may seem a bit verbose, but that is really because we're not only querying for all of our data at once, but we're also explicitly renaming all of our fields at the same time.
SELECT /* Select and rename each field accordingly */
    p.id AS page_id,
    p.title AS page_title,
    p.path AS page_path,
    p.order_ AS page_order,
    p.sectionid As page_sections_id,
    p.seoid AS page_seo_id,
    s.id AS section_id,
    s.title AS section_title,
    s.order_ AS section_order,
    s.type AS section_type,
    s.filter AS section_filter,
    s.blockid AS section_block_id,
    s.pageid AS section_page_id,
    b.id AS block_id,
    b.title AS block_title,
    b.lead AS block_lead,
    b.excerpt AS block_excerpt,
    b.content AS block_content,
    b.mediaid AS block_media_id,
    b.sectionid AS block_section_id,
    m.id AS media_id,
    m.title AS media_title,
    m.url AS media_url,
    m.alt AS media_alt,
    m.blockid AS media_block_id,
    m.seoid AS media_seo_id,
    seo.id AS seo_id,
    seo.title AS seo_title,
    seo.description AS seo_description,
    seo.keywords AS seo_keywords,
    seo.sitename AS seo_sitename,
    seo.url AS seo_url,
    seo.mediaid AS seo_media_id,
    seo.pageid AS seo_page_id
FROM
    pages AS p /* target table */

        /* match data from different tables  data by id */
    LEFT JOIN seo ON seo.id = ANY (p.seoid)
    LEFT JOIN sections AS s ON s.id = ANY (p.sectionid)
    LEFT JOIN blocks AS b ON b.id = ANY (s.blockid)
    LEFT JOIN media AS m ON m.id = ANY (b.mediaid)
    ORDER BY p.id ASC, s.order_ ASC;
NOTE: You could just as easily rename the fields in your Airtable base, and reduce the bulk of the query logic. But it's important to understand how to coerce data into the shape required by your application since you may not always have control over how the data is provided.
TablePlus is an extremely powerful utility that you can use with almost any type of database, it's definitely a great tool to have in your repertoire.
But for our purposes we'll only be using it to test the query we wrote above against our database to ensure we're getting back the correct data.
Start by downloading TablePlus.
Once your download completes double click on the file and install the application.
The installer should guide you through the process with instructions relevant to your platform.
Once the installation completes open

TablePlus and click the "Create a new connection" link at the bottom of the window.Next click the "Import from URL" button.

Then inside the dialog enter your postgres connection URL and click the "Import" button
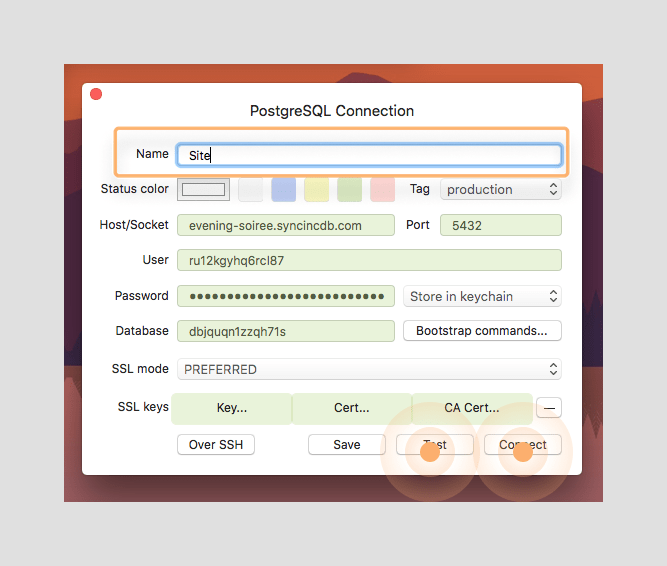
☝️NOTE: You can find the connection URL in your SyncInc dashboard as shown below:

Next you can name your new connection and then click the "TEST" button to test your connection. If successful you should see all of the fields from your connection configuration turn green.
Once your connection test passes, you can feel free to click the "Connect" button, this will open of the default application view.

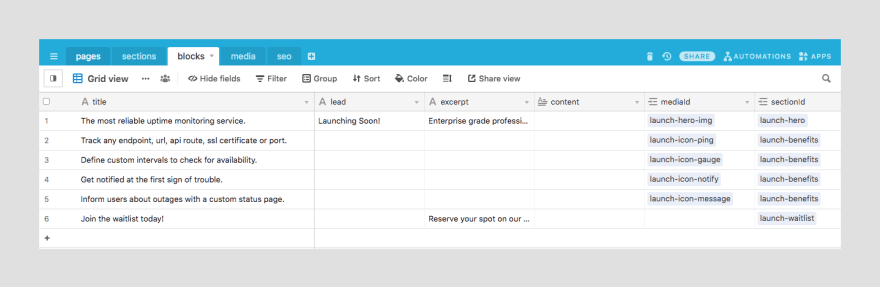
You should see all of your tables from your Airtable base listed in the left sidebar. You can click on any of them and browse through your data.
You should see all of your tables from your Airtable base listed in the left sidebar. You can click on any of them and browse through your data.
But for now we simply want to run a quick query against our data. To do that click the "Queries" tab at the top fo the left sidebar.

Then right-click to create a new folder called "syncinc".
Then right-click to create a new folder called "syncinc".
Then right -click on the new "syncinc" folder and create a new file. The new file will open in its own window.

Rename the file, and then paste in the SQL query we constructed.
Rename the file, and then paste in the SQL query we constructed.
You can the close the file and double-click on it from the sidebar. This will open the query in the editor.

Now you can simply click the button labeled "Run Current". You'll see the data returned almost instantly as shown above.
Now you can simply click the button labeled "Run Current". You'll see the data returned almost instantly as shown above.
NOTE: Because of how a LEFT JOIN works each row also has duplicated data regarding the page that it is related to. Since there is only a single page record in your Airtable base, the data is identical for each instance. This is the expected behavior and we'll deal with transforming this data further to fit our application's needs during the build step.
☝️ More about Postgres Left Joins
ALSO NOTE: If you look at the data closely you'll notice that your query returns one row for each
block in your Airtable base. Now that you know the query logic works let's take the query and create a reference to it so we can use it within our application.
Let's create a new file called
queries.js in lib/queries.jsand construct our query in this file.// lib/queries.js
export const SECTIONS_QUERY = `SELECT
p.id AS page_id,
p.title AS page_title,
p.path AS page_path,
p.order_ AS page_order,
p.sectionid As page_sections_id,
p.seoid AS page_seo_id,
s.id AS section_id,
s.title AS section_title,
s.order_ AS section_order,
s.type AS section_type,
s.filter AS section_filter,
s.blockid AS section_block_id,
s.pageid AS section_page_id,
b.id AS block_id,
b.title AS block_title,
b.lead AS block_lead,
b.excerpt AS block_excerpt,
b.content AS block_content,
b.mediaid AS block_media_id,
b.sectionid AS block_section_id,
m.id AS media_id,
m.title AS media_title,
m.url AS media_url,
m.alt AS media_alt,
m.blockid AS media_block_id,
m.seoid AS media_seo_id,
seo.id AS seo_id,
seo.title AS seo_title,
seo.description AS seo_description,
seo.keywords AS seo_keywords,
seo.sitename AS seo_sitename,
seo.url AS seo_url,
seo.mediaid AS seo_media_id,
seo.pageid AS seo_page_id
FROM
pages AS p
LEFT JOIN seo ON seo.id = ANY (p.seoid)
LEFT JOIN sections AS s ON s.id = ANY (p.sectionid)
LEFT JOIN blocks AS b ON b.id = ANY (s.blockid)
LEFT JOIN media AS m ON m.id = ANY (b.mediaid)
ORDER BY p.id ASC, s.order_ ASC
`;You can then import the query into the same file that you defined the database client in
/lib/pg.js and create a function called getSections() that you can use to query against your Postgres database directly from your application.// lib/pg.js
import { SECTIONS_QUERY } from "./queries";
/*
truncated...
*/
async function getSections() {
try {
await client.connect(); // connect to db
// query database for sections and all related data.
const res = await client.query(SECTIONS_QUERY);
// handle success
// console.log("res--", res);
await client.end(); // close connection to db
return res;
} catch (err) {
// handle errors
console.error(err);
}
}
module.exports = {
client,
getSections,
SECTIONS_QUERY,
};That's it. That's all the logic we need to query all of our data from Airtable. You might recall from the first article, that it took a lot more work to query the same data using
Airtable.js. This is the power of Postgres on full display with the help of SyncInc. As you can see we've significantly decreased the development time. And because we're dealing with Postgres we also have the full benefit of it's plugin eco-system and third-party utilities (like TablePlus).Next, let's put our logic to work in our application by ensuring that
getSections() is called asynchronously at build time using getStaticProps().☝️ You might recall from the last article, that getStaticProps() will get called once at build-time for each top-level page in your application. So any logic we have within it will be run once during the build process. That data is then cached and used to generate the content for each of the static pages in your application. In our case, we just have a single page.
// pages/index.js
import Head from "next/head";
import { removeNullValues } from "../utils/data-helpers";
import styles from "../styles/Home.module.css";
export default function Home({rows}) {
return (
<div className={styles.container}>
<Head>
<title>Create Next App</title>
<link rel='icon' href='/favicon.ico' />
</Head>
<main className={styles.main}>
<h1 className={styles.title}>
Welcome to <a href='https://nextjs.org'>Next.js!</a>
</h1>
<div style={{ maxWidth: "80%", margin: "0 auto" }}>
{JSON.stringify(rows, null, 2)}
</div>
</main>
</div>
);
}
export async function getStaticProps() {
// asynchronously import getSections to avoid any client side evaluation.
const { getSections } = await import("../lib/pg");
const response = await getSections();
// removes any fields with empty or undefined values to avoid any serialization errors
const rows = removeNullValues(response?.rows);
return {
props: {
rows, // return data as props.
},
};
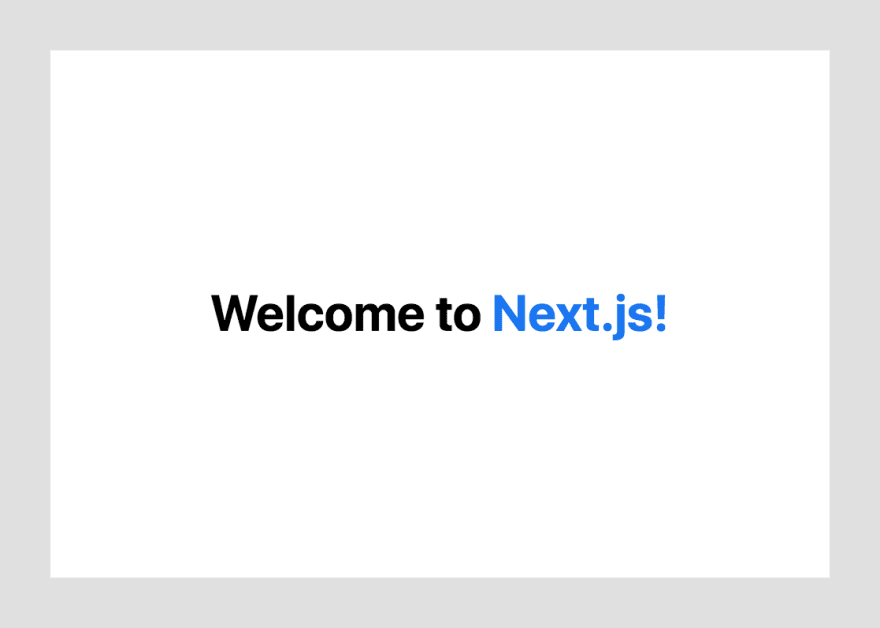
}With this in place, you should now be able to see something that matches the image below where you're simply dumping all of the data to the screen to make sure you're able to view the data on the front-end of the application.

You probably noticed that we used a function called
removeNullValues() in getStaticProps(). removeNullValues() is a helper function that was included in the starter. It actually uses another one of our helper functions isEmpty() to find and any empty, null, or undefined values from our data.// utils/data-helpers.js
export function removeNullValues(arr) {
return arr?.map((obj) => {
Object.keys(obj)?.forEach((key) => {
if (isEmpty(obj[key])) delete obj[key];
});
return obj;
});
}
export function isEmpty(value) {
return (
value === undefined ||
value === null ||
(typeof value === "object" && Object.keys(value).length === 0) ||
(typeof value === "string" && value.trim().length === 0)
);
}
export function groupBy(arr, key) {
return arr.reduce(function(rv, x) {
(.rv[x[key]] = rv[x[key]] || []).push(x);
return rv;
}, {});
};
export function Section(data) {
return {
id: data?.section_id || "",
title: data?.section_title || "",
order: data?.section_order || "",
type: data?.section_type || "",
filter: data?.section_filter || "",
block: {
id: data?.block_id || "",
lead: data?.block_lead || "",
title: data?.block_title || "",
excerpt: data?.block_excerpt || "",
content: data?.block_content || "",
media: {
id: data?.media_id || "",
title: data?.media_title || "",
alt: data?.media_alt || "",
url: data?.media_url || "",
},
},
};
}Now that you have your data and you're able to view it on the front-end, you can now use it to render the components that were provided with your project starter.
But before we render any of the components, you'll see that we are able to grab the SEO metadata we need for our page from our Airtable data. We use a reference to the first
row from our data in order to grab all of the fields we need. ☝️ Recall: each row has this same data available to it, we could've used any of the rows from our data and we'd get the same data because we are only rendering a single page.
// pages/index.js

import Head from "next/head";

import { Splash } from "../components/Splash";
import { removeNullValues } from "../utils/data-helpers";

import styles from "../styles/Home.module.css";

export default function Home({ rows }) {
  return (
    <div className={styles.pageWrapper}>
      <Head>
        <title>{rows[0]?.seo_title}</title>
        <meta name='viewport' content='initial-scale=1.0, width=device-width' />
        <meta name='description' content={rows[0]?.seo_description} />
        <meta property='og:title' content={rows[0]?.seo_title} />
        <meta property='og:site_name' content={rows[0]?.seo_sitename} />
        <meta property='og:url' content={rows[0]?.seo_url} />
        <meta property='og:description' content={rows[0]?.seo_description} />
        <meta property='og:image' content={rows[0]?.url} />
        <link rel='icon' href='/favicon.ico' />
        <link rel='cannonical' href={rows[0]?.url} />
      </Head>

      <main className={styles.main}>
        <Splash data={rows} />
      </main>
    </div>
  );
}

export async function getStaticProps() {
  const { getSections } = await import("../lib/pg");

  const response = await getSections();
  const rows = removeNullValues(response?.rows);

  return {
    props: {
      rows,
    },
  };
}
Then, let's take a closer look at the
Splash component that is responsible for rendering all of that data. You'll notice that we do some data wrangling here to create a new Section from the data using a Section() factory function that takes in our raw data and returns the data shaped exactly as our application expects. You can then render the
Hero section separately by destructuring it off of the new array of sections. And then you can group the remaining sections by their type so we can render them with the appropriate component for each, based on those types.// components/Splash.js
import { Container, Wrapper, Row } from "./Containers";
import { Hero } from "./Hero";
import { List } from "./List";
import { Cta } from "./Cta";
import { groupBy, Section } from "../utils/data-helpers";
// components to be used for rendering Airtable data
const components = {
list: List,
cta: Cta,
};
export const Splash = ({ data }) => {
if (!Array.isArray(data)) return null;
// transform Airatble data
const sections = data.map((section) => {
return new Section(section); // create section from queried data
});
const [hero, ...rest] = sections;
const restSections = rest?.length ? groupBy(rest, "type") : rest;
return (
<Wrapper>
<Container>
{hero && (
<Hero
key={hero?.block?.id}
data={hero?.block}
filter={hero?.filter}
/>
)}
<Row>
{Object.keys(restSections)?.map((key, i) => {
const Component = components[key]; // component to use for rendering
const section = restSections[key]; // section to be rendered
return (
<Component
key={`section-${section[i]?.block?.id}`}
data={section}
/>
);
})}
</Row>
</Container>
</Wrapper>
);
};With this in place, your template is complete, and all of our components for the
Splash page will render according to their data. We'll step through each one in a bit of detail, but this should be nothing new to anyone who's worked with React before.The
Hero component simply renders the headline and some additional copy as well as a large hero image.// components/Hero.js
import styles from "../styles/Hero.module.css";
import Image from "next/image";
export const Hero = ({ data }) => {
return (
<div className={styles.hero}>
<div className={styles.heroContent}>
<p className={styles.lead}>{data?.lead}</p>
<h1 className={styles.heading}>{data?.title}</h1>
<p className={styles.excerpt}>{data?.excerpt}</p>
</div>
{data?.media && (
<div className={styles.heroImage}>
<Image
layout='intrinsic'
src={data?.media?.url[0]}
alt={data?.media?.alt}
objectFit='fill'
width={600}
height={600}
/>
</div>
)}
</div>
);
};The
List component renders our features & benefits and uses a filter we defined in Airtable to render each with its corresponding icon.// components/Lists.js
import Image from "next/image";
import styles from "../styles/List.module.css";
export const List = ({ data }) => {
return (
<ul className={styles.list}>
{data?.map((section) => {
const { block } = section;
return (
<ListItem
key={block?.id}
className={styles.listItem}
img={block?.media}
data={data}
style={{ order: block }}
>
{block?.title}
</ListItem>
);
})}
</ul>
);
};
export const ListItem = ({ img, data, children }) => {
return (
<li className={styles.listItem}>
{data[0].filter[0] === "withIcons" && (
<span className={styles.icon}>
<Image
layout='intrinsic'
src={img?.url[0]}
alt={img?.alt}
width='28px'
height='28px'
/>
</span>
)}
{children}
</li>
);
};Lastly, we have the
Cta component that renders an email sign-up form. Once again we use the filter field to only include the form when the withForm value is present.// components/cta.js
import styles from "../styles/Cta.module.css";
export const Cta = ({ data }) => {
const handleSubmit = (e) => {
e.preventDefault();
const input = e.target.querySelector("input");
console.log(input.value);
};
return (
<div className={styles.cta}>
{data?.map(({ block }, i) => {
return (
<div key={block?.id}>
<h2>{block?.title}</h2>
<p>{block?.excerpt}</p>
{data[i]?.filter.includes("withForm") && (
<form onSubmit={handleSubmit}>
<div className={styles.inputGroup}>
<input
type='email'
placeholder='you@youremail.com'
required
className={styles.input}
/>
<div className={styles.inputRight}>
<button type='submit' className={styles.submit}>
Sign up now
</button>
</div>
</div>
</form>
)}
</div>
);
})}
</div>
);
};That's it, you've successfully created a splash page using data from your Airtable base, but by querying it from a synchronized Postgres database provided by
SyncInc.If all goes well, you should see something similar to the
CodeSandbox example:CodeSandbox PreviewIf you followed along with both articles so far then the differences between each approach should be pretty evident. But in case it's not let's take a look at some of the pros and cons of using
SyncInc to query your Postgres data.I can only think of one cons here and it's not much of a deal-breaker in my opinion. It has to do with the way follower databases work in general. Follower databases maintain uni-directional sync with a leader database. With Airtable that means our
SyncInc database will always stay in sync with Airtable, but if we add data via Postgres, then Airtable will have no record of that change. This is why in general all changes are usually made to the leader database (Airtable) directly and updates are then synced using SyncInc to your follower Postgres database.Although the great people over at
SyncInc have also anticipated this and provided a way of writing back to your Postgres database using a Proxy. So you can still use SQL to implement any CRUD functionality that your application will need. This allows you to write back to both your Airtable base and your Postgres database instantly using Airtable.js or even the built-in fetch API. For more on SyncInc Proxy writes
That's it for this article, I hope you'll check out the third and final installment in the Airtable as a CMS series, where we'll go one step further and take a look at how you can "Build a Landing Page with Airtable as a CMS".
And be sure to follow me on twitter: @soham_asmi to stay up to date with my latest projects and posts. Also, please feel free to reach out to me with any questions you may have along the way.
Until next the next one... 👋
Hey everyone, I'm Gaurang, a full-stack developer that is constantly learning and building in public. I love that I was able to change my career at such a late stage in life all by learning online with so many different resources. I generate content to reinforce what I'm learning and to help others like me in the future.
If you enjoyed my content, please feel free to connect with me wherever you spend your time online.
28