
37
Installing OpenCV on Windows for C++

C:\opencv\build\x64\vc15\bin 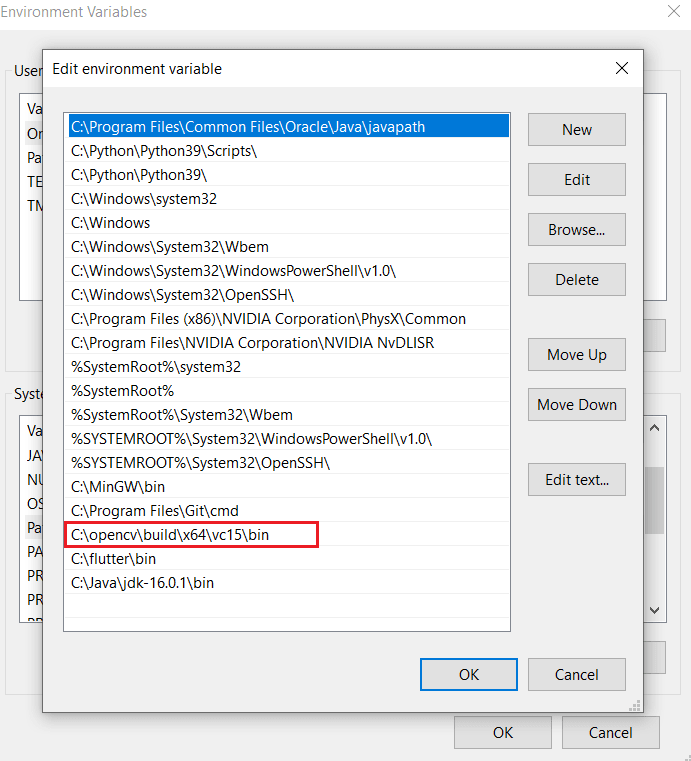
Create a New Visual Studio project C++ console.
Set the platform target to x64

Project->Properties->Configuration Properties-
VC++ Directories
1. Add Build Directories:
2. Add Library Directories:
1. Add Build Directories:
C:\opencv\build\include2. Add Library Directories:
C:\opencv\build\x64\vc15\lib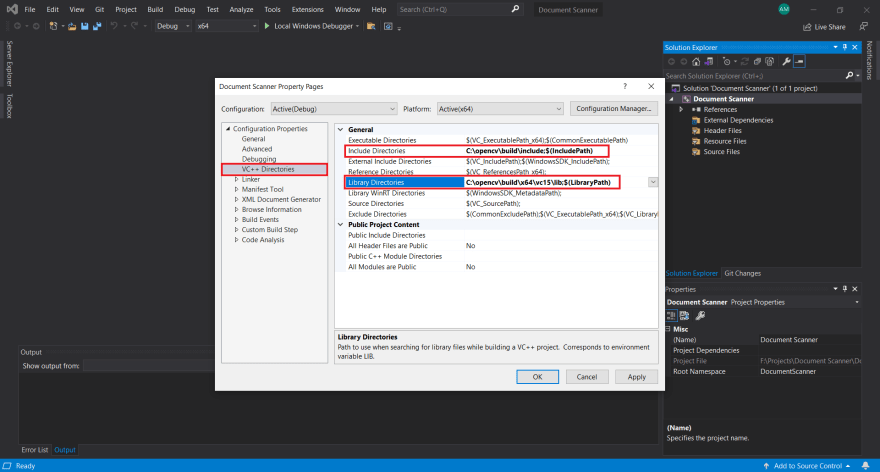
Linker Input
1. Add to Linker->Input:
on your OpenCV version)
1. Add to Linker->Input:
opencv_world452d.lib (452 depends on your OpenCV version)
d for debug, without d for release 
Select C++ File and rename it as
test.cpp.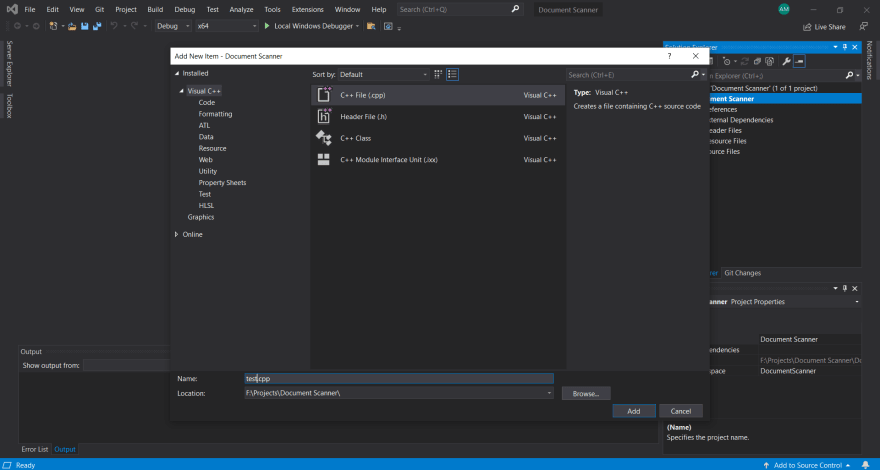
#include <opencv2/imgcodecs.hpp>
    #include <opencv2/highgui.hpp>
    #include <opencv2/imgproc.hpp>
    #include <iostream>

    using namespace std;
    using namespace cv;

    void main() {

        VideoCapture cap(0);
        Mat img;

        while (true) {

            cap.read(img);
            imshow("Image", img);
            waitKey(1);
        }
    }
And that’s all, you can now use OpenCV with ease. 😉
For more install information, visit the OpenCV official guide.
37