
28
How to Set Up ShinyProxy to Host Shiny Apps
By: Peter Solymos
Shiny Server is one of the most popular options to host unlimited Shiny web applications and interactive R markdown documents for free.
ShinyProxy comes with lots of free enterprise features, e.g. various
ways of authentication and authorization. It has no limits on
concurrent usage of the deployed applications. When a user runs an
application, ShinyProxy spins up a new container and serves the
application to the user.
ways of authentication and authorization. It has no limits on
concurrent usage of the deployed applications. When a user runs an
application, ShinyProxy spins up a new container and serves the
application to the user.
The Docker-based workflow comes with some advantages:
This post shows you how you can set up this versatile, robust, and
tested piece of technology to host your Shiny apps!
tested piece of technology to host your Shiny apps!
Provision a virtual machine with your favourite cloud provider. I use
Ubuntu Linux 20.04 in this tutorial. You will need root user access,
root user is usually
AWS). I will assume you have your
passwordless login. Include the internet protocol (IPv4) address of your
server as the
Ubuntu Linux 20.04 in this tutorial. You will need root user access,
root user is usually
root (e.g. on DigitalOcean) or ubuntu (e.g. onAWS). I will assume you have your
ssh keypair configured forpasswordless login. Include the internet protocol (IPv4) address of your
server as the
$HOST environment variable:export HOST="159.203.63.9"
ssh root@$HOSTUpdate the system, install the Java runtime, the Docker Engine CE
(community edition) and Docker Compose:
(community edition) and Docker Compose:
apt-get -y update
apt-get -y upgrade

apt-get -yq install \
    default-jre \
    default-jdk \
    docker \
    docker-compose
Check that all went according to plan,
something like this:
java -version should returnsomething like this:
openjdk version "11.0.11" 2021-04-20
OpenJDK Runtime Environment (build 11.0.11+9-Ubuntu-0ubuntu2.20.04)
OpenJDK 64-Bit Server VM (build 11.0.11+9-Ubuntu-0ubuntu2.20.04, mixed mode, sharing)
ShinyProxy needs to be able to connect to the Docker daemon to spin up
the containers for the apps. By default, ShinyProxy will do so on port
2375 of the Docker host. To allow for connections on port 2375, the
startup options need to be edited following the ShinyProxy
guide.
the containers for the apps. By default, ShinyProxy will do so on port
2375 of the Docker host. To allow for connections on port 2375, the
startup options need to be edited following the ShinyProxy
guide.
Create a file
/etc/systemd/system/docker.service.d/override.conf:mkdir /etc/systemd/system/docker.service.d
touch /etc/systemd/system/docker.service.d/override.confAdd the following content (use
nano or vim):[Service]
ExecStart=
ExecStart=/usr/bin/dockerd -H unix:// -D -H tcp://127.0.0.1:2375Reload the system daemon, then restart and enable Docker:
sudo systemctl daemon-reload
sudo systemctl restart docker
sudo systemctl enable docker
All this is to make sure that the Docker service starts when the system
boots and the system configurations stay the same so that ShinyProxy can
function properly.
boots and the system configurations stay the same so that ShinyProxy can
function properly.
To see if Docker is running properly, type
sudo service docker status:● docker.service - Docker Application Container Engine
Loaded: loaded (/lib/systemd/system/docker.service; enabled; vendor preset: enabled)
Drop-In: /etc/systemd/system/docker.service.d
└─override.conf
Active: active (running) since Wed 2021-07-21 03:55:26 UTC; 36s ago
TriggeredBy: ● docker.socket
Docs: https://docs.docker.com
Main PID: 18881 (dockerd)
Tasks: 9
Memory: 39.6M
CGroup: /system.slice/docker.service
└─18881 /usr/bin/dockerd -H unix:// -D -H tcp://127.0.0.1:2375We download and install version 2.5.0 of ShinyProxy. In case of a newer
version, just change the version variable accordingly, check for updates
on the downloads page:
version, just change the version variable accordingly, check for updates
on the downloads page:
export VERSION="2.5.0"

wget https://www.shinyproxy.io/downloads/shinyproxy_${VERSION}_amd64.deb
apt install ./shinyproxy_${VERSION}_amd64.deb
rm shinyproxy_${VERSION}_amd64.debShinyProxy looks for a
configuration
file called
create this file:
configuration
file called
application.yml in the /etc/shinyproxy directory. Let'screate this file:
touch /etc/shinyproxy/application.ymlCopy these configs using a command-line text editor:
proxy:
  title: ShinyProxy
#  logo-url: https://link/to/your/logo.png
  landing-page: /
  favicon-path: favicon.ico
  heartbeat-rate: 10000
  heartbeat-timeout: 60000
  port: 8080
  authentication: simple
  admin-groups: admins
  # Example: 'simple' authentication configuration
  users:
  - name: admin
    password: password
    groups: admins
  - name: user
    password: password
    groups: users
  # Docker configuration
  docker:
    cert-path: /home/none
    url: http://localhost:2375
    port-range-start: 20000
  specs:
  - id: 01_hello
    display-name: Hello Shiny App
    description: A simple reactive histogram
    container-cmd: ["R", "-e", "shiny::runApp('/home/app')"]
    container-image: registry.gitlab.com/analythium/shinyproxy-hello/hello:latest
    logo-url: https://github.com/analythium/shinyproxy-1-click/raw/master/digitalocean/images/app-hist.png
    access-groups: [admins, users]
  - id: 02_hello
    display-name: Demo Shiny App
    description: App with sliders and large file upload
    container-cmd: ["R", "-e", "shiny::runApp('/home/app')"]
    container-image: analythium/shinyproxy-demo:latest
    logo-url: https://github.com/analythium/shinyproxy-1-click/raw/master/digitalocean/images/app-dots.png
    access-groups: [admins]

logging:
  file:
    shinyproxy.log
Pull the two Docker images referenced in the configuration file:
docker pull registry.gitlab.com/analythium/shinyproxy-hello/hello:latest
docker pull analythium/shinyproxy-demo:latest
The first one is the familiar Hello
image.
The second one is another simple Shiny app (that you can find in this
GitHub repository) with
coloured random points and a file uploader that prints the size of the
uploaded file.
image.
The second one is another simple Shiny app (that you can find in this
GitHub repository) with
coloured random points and a file uploader that prints the size of the
uploaded file.
The last step is to restart the ShinyProxy service so that the new
configuration takes effect:
configuration takes effect:
service shinyproxy restartCheck the status with
service shinyproxy status:● shinyproxy.service - ShinyProxy
Loaded: loaded (/etc/systemd/system/shinyproxy.service; enabled; vendor preset: enabled)
Active: active (running) since Wed 2021-07-21 04:22:46 UTC; 10s ago
Main PID: 19552 (java)
Tasks: 12 (limit: 2344)
Memory: 118.9M
CGroup: /system.slice/shinyproxy.service
└─19552 /usr/bin/java -jar /opt/shinyproxy/shinyproxy.jarYou can access your ShinyProxy server at
address and log in using the username 'admin' and password 'password' as
defined in the configuration:
http://$HOST:8080. Visit thisaddress and log in using the username 'admin' and password 'password' as
defined in the configuration:
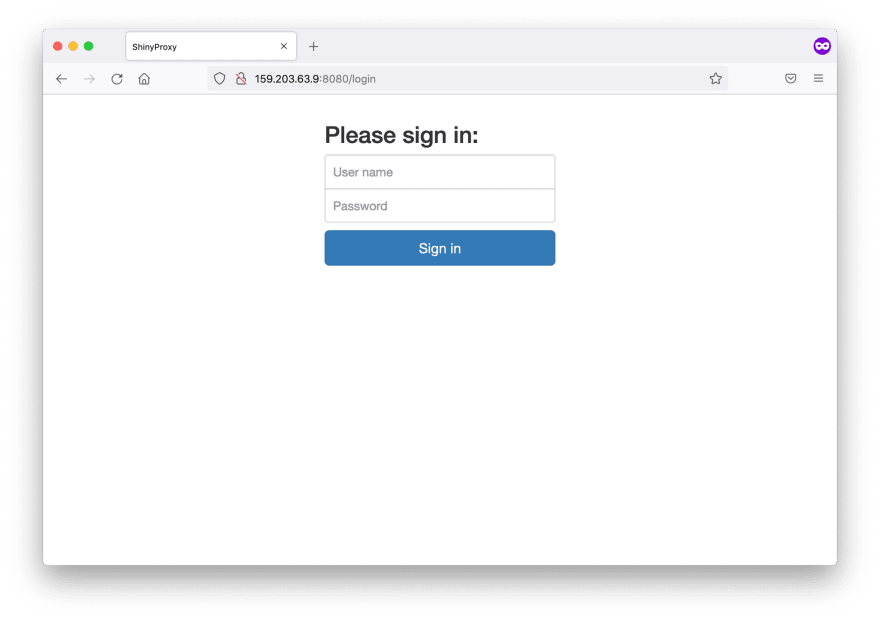
Note that the connection is not secure, this is something that can be
addressed later. Once inside, the admin view lists both apps with their
thumbnail images. Click on the links to spin up the apps. Clicking the
'Admin' button to see the active proxies listing the users, app names,
uptime, etc.
addressed later. Once inside, the admin view lists both apps with their
thumbnail images. Click on the links to spin up the apps. Clicking the
'Admin' button to see the active proxies listing the users, app names,
uptime, etc.

Now log out and try logging in with the 'user' / 'password' combination.
You can only find one of the apps listed. This is how we set up access
based on the user groups. This gives great flexibility for managing the
users' access at the application level.
You can only find one of the apps listed. This is how we set up access
based on the user groups. This gives great flexibility for managing the
users' access at the application level.

This is the basic setup of ShinyProxy with basic
authentication/authorization. Edit the configuration file, pull new
Docker images with your Shiny apps and enjoy. There is a lot more you
can do to secure the server and set up a custom domain. I will cover
these topics next.
authentication/authorization. Edit the configuration file, pull new
Docker images with your Shiny apps and enjoy. There is a lot more you
can do to secure the server and set up a custom domain. I will cover
these topics next.
28