
56
Learning Go by examples: part 2 - Create an HTTP REST API Server in Go
In the first article we setted up our environment. Now, we will create our first application: an HTTP REST API Server in Go.
First of all, we can create our repository in GitHub (in order to share and open-source it).
For that, I logged in GitHub website, clicked on the repositories link, click on "New" green button and then I created a new repository called “learning-go-by-example”.
Now, in your local computer, git clone this new repository where you want:
$ git clone https://github.com/scraly/learning-go-by-examples.git
$ cd learning-go-by-examples
As we will re-used this Git repository, we will create a folder
go-rest-api for our first application and go into it:$ mkdir go-rest-api
$ cd go-rest-apiNow, we have to initialize Go modules (dependency management):
$ go mod init github.com/scraly/learning-go-by-examples/go-rest-api
go: creating new go.mod: module github.com/scraly/learning-go-by-examples/go-rest-api
This will create a
go.mod file like this:module github.com/scraly/learning-go-by-examples/go-rest-api
go 1.16Before to start our awesome API, as good practices, we will create a simple code organization.
Create the following folders organization:
.
├── README.md
├── bin
├── doc
├── go.mod
├── internal
├── pkg
└── swaggerGo is a powerful language and it comes with a huge number of useful libraries in its ecosystem, like net/http that will interest us.
We will start to create a
main.go file in the internal/ folder:package main
import (
"fmt"
"html"
"log"
"net/http"
)
func main() {
http.HandleFunc("/", func(w http.ResponseWriter, r *http.Request) {
fmt.Fprintf(w, "Hello, %q", html.EscapeString(r.URL.Path))
})
log.Println("Listening on localhost:8080")
log.Fatal(http.ListenAndServe(":8080", nil))
}This simple example starts an HTTP server, listens on port 8080 incoming requests, serves on / and return "Hello" + the path.
Now, it’s time to run our app in order to test it:
$ go run internal/main.go

2021/07/12 22:10:47 Listening on localhost:8080
In order to test our HTTP server, we can curl on localhost:8080 or go to this endpoint in your browser:
$ curl localhost:8080

Hello, "/"%
So we just need to write some Go code in a
.go file and then run go run myfile.go in order to test it, awesome!Yes, it's great, but if we want, we can also generate an executable binary with our HTTP server:
$ go build -o bin/go-rest-api internal/main.goIt's cool to execute all of our commands in order to run our app, package it, test it, generate swagger doc... but what do you think if we can automate it?
In the past I used Makefile in order to define a set of tasks but now I used Taskfile, a Makefile alternative.
I recommend you the article by Sébastien Kurtzemann about Taskfile who explain what is Taskfile, how to install it and how to create your first tasks.
For our app, I created a
Taskfile.yml file with this content:version: "3"
tasks:
build:
desc: Build the app
cmds:
- GOFLAGS=-mod=mod go build -o bin/go-rest-api internal/main.go
run:
desc: Run the app
cmds:
- GOFLAGS=-mod=mod go run internal/main.go
swagger.gen:
desc: Generate Go code
cmds:
- GOFLAGS=-mod=mod go generate github.com/scraly/learning-go-by-examples/go-rest-api/internal github.com/scraly/learning-go-by-examples/go-rest-api/pkg/swagger
swagger.validate:
desc: Validate swagger
cmds:
- swagger validate pkg/swagger/swagger.yml
swagger.doc:
desc: Doc for swagger
cmds:
- docker run -i yousan/swagger-yaml-to-html < pkg/swagger/swagger.yml > doc/index.htmlIf you want, you can download its latest version in the GitHub repository.
Install
task in your local machine, in order to do that you can follow installation instructions or if you have a MacOS with homebrew, you can use brew install command:$ brew install go-task/tap/go-taskNow you can display the list of available tasks:
$ task --list
task: Available tasks for this project:
* build:        Build the app
* run:          Run the app
* swagger.doc:      Doc for swagger
* swagger.gen:      generate Go code
* swagger.validate:     Validate swagger
Cool, we learned another good practice!
Cool, we code an HTTP server, but Aurélie you talked about a REST API, isn't it?
It's true, we will now step up our HTTP server and use Swagger, which handles definitions of our HTTP endpoints.

Swagger allows you to provide standardized documentation of your APIs compliant to OpenAPI specifications.
With a swagger specification file in input, thanks to the Swagger application, you can generate the code and at the end, and you can provide users the API documentation in HTML.
If you want to build a public API, don't hesitate to use Swagger.
We will install
go-swagger tool, don't hesitate to follow installation page.If you have a Mac:
$ brew tap go-swagger/go-swagger
$ brew install go-swagger
And then, you can check the version of Swagger app in order to verify the tool is correctly installed in your system:
$ swagger version
version: v0.27.0
commit: 43c2774170504d87b104e3e4d68626aac2cd447d
Let's create our swagger specification in a new file called
pkg/swagger/swagger.yml:consumes:
- application/json
info:
description: HTTP server in Go with Swagger endpoints definition.
title: go-rest-api
version: 0.1.0
produces:
- application/json
schemes:
- http
swagger: "2.0"
paths:
/healthz:
get:
operationId: checkHealth
produces:
- text/plain
responses:
'200':
description: OK message.
schema:
type: string
enum:
- OK
/hello/{user}:
get:
description: Returns a greeting to the user!
parameters:
- name: user
in: path
type: string
required: true
description: The name of the user to greet.
responses:
200:
description: Returns the greeting.
schema:
type: string
400:
description: Invalid characters in "user" were provided.
/gopher/{name}:
get:
description: Return the Gopher Image.
produces:
- image/png
parameters:
- name: name
in: path
type: string
required: true
description: The name of the Gopher to display.
responses:
200:
description: Returns the Gopher.
schema:
type: fileAfter each modification of a swagger file, a good practice is to check the validity of the file:
$ task swagger.validate
task: [swagger.validate] swagger validate pkg/swagger/swagger.yml
2021/07/12 22:39:47
The swagger spec at "pkg/swagger/swagger.yml" is valid against swagger specification 2.0
Cool, our swagger file is valid.
We will now create our swagger definitions in an HTML doc.
For that, I use a docker image, which takes into consideration our swagger YAML definition and returns a pretty HTML page:
For that, I use a docker image, which takes into consideration our swagger YAML definition and returns a pretty HTML page:
$ task swagger.doc
task: [swagger.doc] docker run -i yousan/swagger-yaml-to-html < pkg/swagger/swagger.yml > doc/index.html
If you open the generated

doc/index.html page in a browser, you can view HTML endpoints definitions:The Swagger doc is human readable and perfect when you create and distribute an API.
Now we can generate Go code thanks to swagger specifications.
In order to do this, go in the package
pkg/swagger/ and now create a gen.go file with this content:package swagger
//go:generate rm -rf server
//go:generate mkdir -p server
//go:generate swagger generate server --quiet --target server --name hello-api --spec swagger.yml --exclude-mainLet's generate Go files accoring to Swagger specifications:
$ task swagger.gen
task: [swagger.gen] GOFLAGS=-mod=mod go generate github.com/scraly/learning-go-by-examples/go-rest-api/internal github.com/scraly/learning-go-by-examples/go-rest-api/pkg/swagger
The command will generate several useful files (containing handlers, struct, functions...):
pkg/swagger
├── gen.go
├── server
│   └── restapi
│       ├── configure_hello_api.go
│       ├── doc.go
│       ├── embedded_spec.go
│       ├── operations
│       │   ├── check_health.go
│       │   ├── check_health_parameters.go
│       │   ├── check_health_responses.go
│       │   ├── check_health_urlbuilder.go
│       │   ├── get_gopher_name.go
│       │   ├── get_gopher_name_parameters.go
│       │   ├── get_gopher_name_responses.go
│       │   ├── get_gopher_name_urlbuilder.go
│       │   ├── get_hello_user.go
│       │   ├── get_hello_user_parameters.go
│       │   ├── get_hello_user_responses.go
│       │   ├── get_hello_user_urlbuilder.go
│       │   └── hello_api_api.go
│       └── server.go
└── swagger.yml
It’s time-saving for our HTTP REST API server implementation.

Let’s edit our
main.go file with this new content:package main
import (
"fmt"
"log"
"net/http"
"github.com/go-openapi/loads"
"github.com/go-openapi/runtime/middleware"
"github.com/scraly/learning-go-by-examples/go-rest-api/pkg/swagger/server/restapi"
"github.com/scraly/learning-go-by-examples/go-rest-api/pkg/swagger/server/restapi/operations"
)
func main() {
// Initialize Swagger
swaggerSpec, err := loads.Analyzed(restapi.SwaggerJSON, "")
if err != nil {
log.Fatalln(err)
}
api := operations.NewHelloAPIAPI(swaggerSpec)
server := restapi.NewServer(api)
defer func() {
if err := server.Shutdown(); err != nil {
// error handle
log.Fatalln(err)
}
}()
server.Port = 8080
api.CheckHealthHandler = operations.CheckHealthHandlerFunc(Health)
api.GetHelloUserHandler = operations.GetHelloUserHandlerFunc(GetHelloUser)
api.GetGopherNameHandler = operations.GetGopherNameHandlerFunc(GetGopherByName)
// Start server which listening
if err := server.Serve(); err != nil {
log.Fatalln(err)
}
}
//Health route returns OK
func Health(operations.CheckHealthParams) middleware.Responder {
    return operations.NewCheckHealthOK().WithPayload("OK")
}
//GetHelloUser returns Hello + your name
func GetHelloUser(user operations.GetHelloUserParams) middleware.Responder {
return operations.NewGetHelloUserOK().WithPayload("Hello " + user.User + "!")
}
//GetGopherByName returns a gopher in png
func GetGopherByName(gopher operations.GetGopherNameParams) middleware.Responder {
var URL string
if gopher.Name != "" {
URL = "https://github.com/scraly/gophers/raw/main/" + gopher.Name + ".png"
} else {
//by default we return dr who gopher
URL = "https://github.com/scraly/gophers/raw/main/dr-who.png"
}
response, err := http.Get(URL)
if err != nil {
fmt.Println("error")
}
return operations.NewGetGopherNameOK().WithPayload(response.Body)
}We use several Go librairies, so you can execute
go get <my-lib> command with the dependancies you need or copy/paste the require dependencies block in your go.mod file:module github.com/scraly/learning-go-by-examples/go-rest-api
go 1.16
require (
github.com/go-openapi/errors v0.20.0
github.com/go-openapi/loads v0.20.2
github.com/go-openapi/runtime v0.19.29
github.com/go-openapi/spec v0.20.1
github.com/go-openapi/strfmt v0.20.0
github.com/go-openapi/swag v0.19.13
github.com/jessevdk/go-flags v1.5.0
golang.org/x/net v0.0.0-20210119194325-5f4716e94777
)As you can see, in our
main.go file, we initialize a REST API swagger server and we define 3 handlers (and their implementation:Let's dig into these 3 handlers implementation:
According to the following code:
//Health route returns OK
func Health(operations.CheckHealthParams) middleware.Responder {
return operations.NewCheckHealthOK().WithPayload("OK")
}When a user calls
/healthz route, we'll send them a response with OK as string.According to the following code:
//GetHelloUser returns Hello + user name
func GetHelloUser(user operations.GetHelloUserParams) middleware.Responder {
    return operations.NewGetHelloUserOK().WithPayload("Hello " + user.User + "!")
}
When a user calls
/hello/{user} route, we'll send them a response with "Hello" + {user} as string.According to the following code:
//GetGopherByName returns a gopher in png
func GetGopherByName(gopher operations.GetGopherNameParams) middleware.Responder {

    var URL string
    if gopher.Name != "" {
        URL = "https://github.com/scraly/gophers/raw/main/" + gopher.Name + ".png"
    } else {
        //by default we return dr who gopher
        URL = "https://github.com/scraly/gophers/raw/main/dr-who.png"
    }

    response, err := http.Get(URL)
    if err != nil {
        fmt.Println("error")
    }

    return operations.NewGetGopherNameOK().WithPayload(response.Body)
}
When a user calls
/gopher/{name} route, they get a cute gopher image and then send the image back to the user. If name is empty, we will return our Doctor Who gopher by default.In Go you can easily build an app in an executable binary file:
$ go build -o bin/go-rest-api internal/main.goThe command will generate the executable binary in
bin/ folder.Or you can execute the run task:
$ task build
task: [build] GOFLAGS=-mod=mod go build -o bin/go-rest-api internal/main.go
Now we can execute our binary file:
$ ./bin/go-rest-api
2021/07/13 20:21:34 Serving hello API at http://[::]:8080
Cool!
If you want to go more deeper, what I like in Go is that you can generate your app (an executable binary) for multiple environments, not only yours! In other words, you can cross compile Go apps for macOS, Windows, Linux... with
go build command.
For Windows:
# Windows 32 bits
$ GOOS=windows GOARCH=386 go build -o bin/go-rest-api-win-386 internal/main.go

# Windows 64 bits
$ GOOS=windows GOARCH=amd64 go build -o bin/go-rest-api-win-64 internal/main.go
For Linux:
# Linux 32 bits
$ GOOS=linux GOARCH=386 go build -o bin/go-rest-api-linux-386 internal/main.go

# Linux 64 bits
$ GOOS=linux GOARCH=amd64 go build -o bin/go-rest-api-linux-64 internal/main.go
And for MacOS:
# MacOS 32 bits
$ GOOS=darwin GOARCH=386 go build -o bin/go-rest-api-darwin-386 internal/main.go

# MacOS 64 bits
$ GOOS=darwin GOARCH=amd64 go build -o bin/go-rest-api-darwin-64 internal/main.go

# MacOS 64 bits for M1 chip
$ GOOS=darwin GOARCH=arm64 go build -o bin/go-rest-api-darwin-arm64 internal/main.go
Now you can share your awesome app to your friends :-).
Our app is running, so now we can test our routes with
curl command:$ curl localhost:8080
{"code":404,"message":"path / was not found"}%This path is not defined, we have a 404 error code, normal :-).
$ curl localhost:8080/healthz
OK

$ curl localhost:8080/hello/aurelie
"Hello aurelie!"

$ curl -O localhost:8080/gopher/dr-who
  % Total    % Received % Xferd  Average Speed   Time    Time     Time  Current
                                 Dload  Upload   Total   Spent    Left  Speed
100  992k    0  992k    0     0   955k      0 --:--:--  0:00:01 --:--:--  955k

$ file dr-who
dr-who: PNG image data, 1700 x 1460, 8-bit/color RGBA, non-interlaced
You can also go to
localhost:8080/gopher/dr-who in your browser to display our little Gopher :-).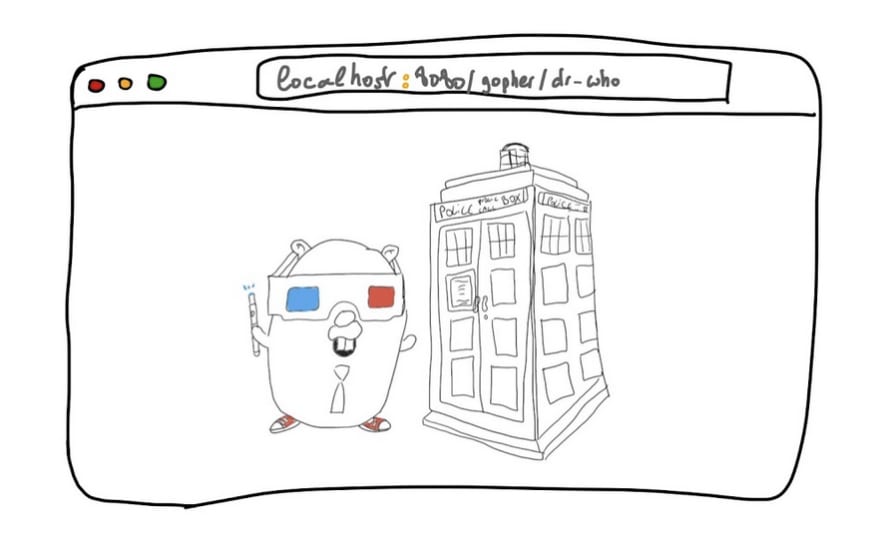
Perfect! :-)
As we have seen in this article, it's possible to create a simple HTTP server in several seconds and an HTTP REST API server in Go in minutes.
All the code is available in: https://github.com/scraly/learning-go-by-examples/tree/main/go-rest-api
In the following articles we will create others kind/types of applications in Go.
Hope you'll like it.
56