
39
Creating a CRUD App using Flask and SqlAlchemy
Flask is a python library that lets you create dynamic webapps using python.
Flask has great powers that we will be looking into in a minute.
In this tutorial we will be creating a simple Todo App using flask along with sqlite using our ORM i.e flask_sqlalchemy and jinja2 for using great powers inside of the html.
ORM means object relational mapping meaning that you get to interact with the database using your language of choice instead of using SQL queries .
ORM also comes helpful in a way that if you in the future would have to change your database for the app you do not have to write the whole schema for the database again .
you just have to change the database url and its done (easy -peasy).
OK , let's get started with the code.
First of all what you need to do is Create a folder with your app name
e.g FlaskTodoApp
e.g FlaskTodoApp
inside of the folder create a new folder called venv
We are going to create a virtual environment for the flask to run inside of.
open up your project in vscode and go the terminal
Type
open up your project in vscode and go the terminal
Type
python3 -m venv venvthen type for mac users
. venv/bin/active.fishFor windows users type
venv/bin/activeand your environment will be created .
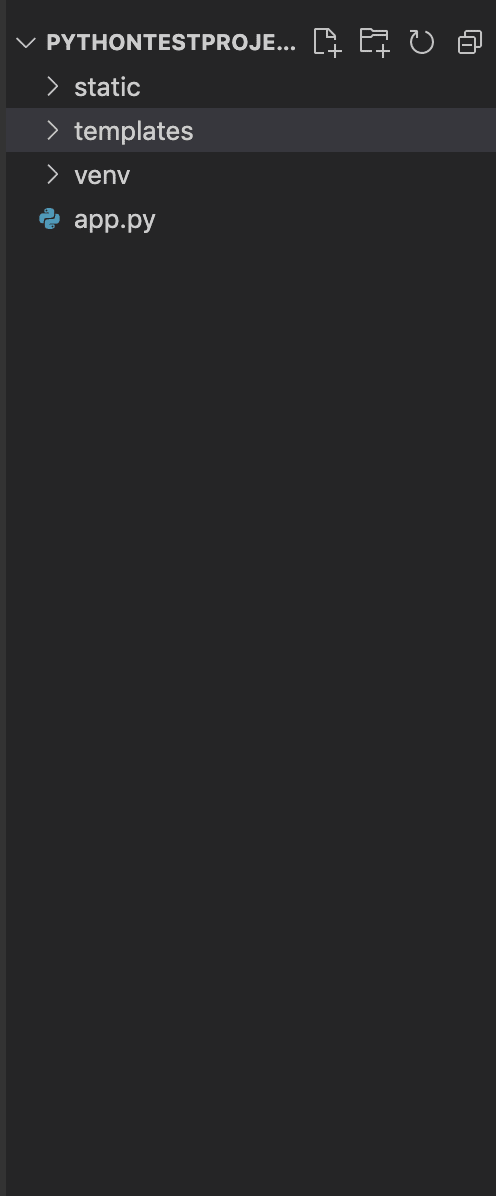
Now create two more folders inside of the project but outside of the venv folder namely templates and static
Now create two more folders inside of the project but outside of the venv folder namely templates and static
Template is where all the templates i.e html css files will be saved
and if you have any static file like an image or anything that will be saved inside of the static folder.
Your folder structure should look like this
now create a file namely app.py and type this code inside of that:-
and if you have any static file like an image or anything that will be saved inside of the static folder.
Your folder structure should look like this
now create a file namely app.py and type this code inside of that:-
from flask import Flask

app = Flask(__name__)

@app.route("/")
def hello_world():
    return "<p>Hello world from flask</p>"

if __name__ == "__main__":
    app.run(debug=True)
If you look closely there is a lot going on here
You can test this app by going to the terminal and typing
python app.pyand it will show you where it is running e.g http://127.0.0.1:5000/ is the default .
Head over to there and see magic 🥳.
Head over to there and see magic 🥳.
Great so we have just made a simple webpage which shows a p tag inside .
But what if we want to display a whole webpage with some cool images , text , headings and all that .
Thats where the built in
But what if we want to display a whole webpage with some cool images , text , headings and all that .
Thats where the built in
render_template of flask comes into play.from flask import Flask, render_template
app = Flask(__name__)
@app.route("/")
def hello_world():
return render_template('home.html')
if __name__ == "__main__":
app.run(debug=True)Now head over to the url again and refresh the page and see the magic happening
If your webpage is working properly thats amazing ,
Congratulations to you 🥳🥳.
First part of the app is done .
Now for the database part we will be using sqlite for the database and flasksqlalchemy as the ORM as already discussed and for the data to show to the user we will use Jinja2 for that.
Congratulations to you 🥳🥳.
First part of the app is done .
Now for the database part we will be using sqlite for the database and flasksqlalchemy as the ORM as already discussed and for the data to show to the user we will use Jinja2 for that.
So let's get started.
First install flask_sqlalchemy by
and it should be installed for you.
pip install flask_sqlalchemyand it should be installed for you.
Now the boiler plate for creating a database connection is as follows
from flask_sqlalchemy import SQLAlchemy
app = Flask(__name__)
app.config['SQLALCHEMY_DATABASE_URI'] = 'sqlite:///todo.db'
app.config['SQLALCHEMY_TRACK_MODIFICATIONS'] = False
db=SQLAlchemy(app)
type this code in the same app.py file of yours.
now for creating a table in the database we need to use classes in python to create a model like this
class Todo(db.Model):
    sno=db.Column(db.Integer,primary_key=True)
    title=db.Column(db.String(200),nullable=False)
    description = db.Column(db.String(200), nullable=False)
    def __repr__(self) :
        return "{} is the title and {} is the description".format(self.title,self.description)
Here you can see we are creating a class for the todo table that has 3 columns:-
Great , now let's create the database for the first time.
from app import db and hit enterdb.create_all() and hit enterGreat if everything works perfectly then congratulations, your database has now been created .
Your Database is created
Your table is created with the columns you wanted to have .
Perfect.
Your table is created with the columns you wanted to have .
Perfect.
Now lets create a form inside of your home.html to upload the data to the database.
<form action="/" id="formSubmission" method="POST">
    <span>Title</span>
    <input type="text"name="title" placeholder="enter your Title" id="name">
    <span>Description</span>
    <input type="text"name="description" placeholder="Enter your description" id="description">
    <button type="submit">Add Todo</button>
</form><ul id="data">
<li>Title</li>
<li>Time</li>
<li>Description</li>
</ul>We will be using jinja for loop here to show the data but first lets get the C(create) part working.
So lets create our end point for the creation of data in our database.
@app.route("/",methods=['POST'])
def main_page():
    if request.method=='POST':
        title=request.form['title']
        description=request.form['description']
        todo=Todo(title=title ,description=description)
        db.session.add(todo)
        db.session.commit()
    alltodos=Todo.query.all()
return render_template('index.html',todos=alltodos)db.session.add(your_data_object_here)
db.session.commit()
{% for user in todos %}
     <li>{{loop.index}}</li>
  <li>{{user.title}}</li>
     <li>{{user.description}}
         <div class="buttons">


      <button><a href="/delete/{{user.sno}}">Delete</a>
<button><a href="/update/{{user.sno}}">Delete</a></button>

              </div>
     </li>

{% endfor %}OK 👍 Most of the heavy lifting is done.
Lets look at some of the commands of sqlalchemy that we can use
we already saw
We also have
.first() in order to get only the first instance of it.Then we also have db.session.delete(todo_to_delete)
Ok ! so upto now if you run the code you should be able to view all the todos that are there and also save the new todos to the database.
Now Let's delete them.
For deleting any todo you need something thats unique to it only e.g here we have the sno thats a primary key and that will be unique to every todo.
Ok lets create the end point for deletion.
For deleting any todo you need something thats unique to it only e.g here we have the sno thats a primary key and that will be unique to every todo.
Ok lets create the end point for deletion.
@app.route("/delete/<int:sno>")
def delete(sno):
    deletetodo = Todo.query.filter_by(sno=sno).first()
    db.session.delete(deletetodo)
    db.session.commit()
    return redirect("/")
Easy , right
- Ok so here you can see that the end point needs a sno that would be an integer value and then we pass that to the function
- What we then do is query the database and then filter out the exact todo from the database
- Then pass that todo to the delete function
- Then we commit the changes
- Great ! Once all the changes would be saved we will be redirecting the user back to the index page using
redirectmodule imported from the flask
Sweet ! you now would be able to delete your todos as well .
Now we are able to
- Create the todo
- Delete the todo
- And View All the todos
Now in order to Update the todo , its very easy as well
Let me break it down to points for you
Let me break it down to points for you
POST request .Lets code it.
@app.route("/updatetodo/<int:sno>",methods=['POST'])
def update_todo(sno):

     if request.method == 'POST':
        updatetodo = Todo.query.filter_by(sno=sno).first()
        title = request.form['title']
        description = request.form['description']
        todo = Todo(title=title, description=description)
        updatetodo.title=title
        updatetodo.description=description
        db.session.commit()
        return redirect("/")
    updatetodo = Todo.query.filter_by(sno=sno).first()
    return render_template('update.html',
updatetodo=updatetodo)
ok so the end point is created.
<div class="container">
  <form action="/updatetodo/{{updatetodo.sno}}" id="formSubmission" method="POST">

    <span>Title</span>
    <input type="text"name="title" placeholder="enter your Title" id="name" value="{{updatetodo.title}}">
    <span>Description</span>
    <input type="text"name="description" placeholder="Enter your description" id="description" value="{{updatetodo.description}}">
    <button type="submit">Update</button>

  </form>
Ok , Great
** If you have made it to this point congratulation ✨✨✨.***
There is a lot that can be done afterwards but i will leave you guys to it.
I hope you guys find it useful .
Thankyou so much .
Keep coding
There is a lot that can be done afterwards but i will leave you guys to it.
I hope you guys find it useful .
Thankyou so much .
Keep coding
Want to encourage me to create posts like this more
Buy me a coffee
Buy me a coffee
39