
23
Django Easy Deployment On Heroku
In this post, We'll be settings up a Django project to deploy on Heroku. Heroku is an almost free platform for users to deploy their python, node js, and other framework-based applications.
1. First, I would recommend making a copy of your project or use a separate git branch.
2. Make sure the python virtual environment is activated.
3. You have to create a text file called
requirements.txt at the root of the project to add all dependencies with their versions.So to do that, you can manually type the dependency list and the versions you used for your Django project.
or
Try the
or
Try the
freeze command on your terminal at the project root directorypip freeze > requirements.txtIn my case, the example of the
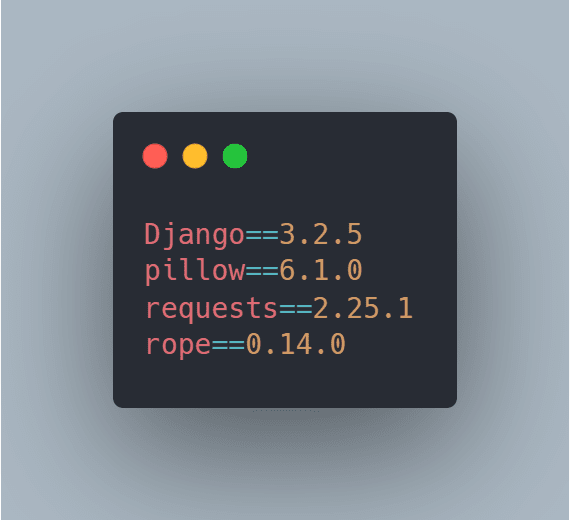
requirements.txt file.Sometimes, if you have installed huge python libraries on your computer, this might be a change. That means the
requirements.txt file will have every library that you installed on the computer. Also, mostly the Django project doesn't need those other libraries. So there's a way to fix this problem that I would recommend. You have to install a simple library called pipreqs.pip install pipreqsOkay, then open your terminal and run this command.
pipreqs <your-project-location>After the process, you can see it will output.
Successfully saved requirements file in <your-project-location>/requirements.txtOkay, In my case, now the

requirements.txt file contains I used dependencies in the project only. You will have your own dependency list.4. Add this code line in the
settings.py file.STATIC_ROOT = os.path.join(BASE_DIR, 'static')5. Next, if you don't have a Heroku account, create a new Heroku account.
6. Download and install Heroku CLI.
7. In this step, you have to configure Django-Heroku.
Make a file called
Procfile at the root of the project. (do not add any file extension like .txt .py). The file name must be only Procfile).This file is used to explicitly declare your application’s process types and entry points. It is located at the root of your project.
Write code line inside
Procfile.web: gunicorn <your-project-name>.wsgiFor more details, refer django-heroku documentation.
Okay, then you have to install two more libraries. This
Procfile requires Gunicorn, the production web server that Heroku recommend for Django applications.pip install gunicornpip install django-herokuIn the
settings.py import django_heroku top of the file.import django_herokuAlso, add this code line bottom of the
settings.py file to activate django-heroku.django_heroku.settings(locals())Then, you have to add those
(You can get those two dependencies versions by running the

gunicorn and django_heroku libraries in the requirements.txt file. In my case, the requirements.txt file.(You can get those two dependencies versions by running the
pip list command.)8. Finally, run those commands one by one in the terminal on the project root directory.
git init
git add .
git commit -m "first commit"

heroku login
heroku create <your-app-name>
git push heroku master
heroku open
You can see your project will open after the successful deployment. But if you used SQLite database on the project, it will show the missing database error . Run database migration to fix the issue.
heroku run python manage.py migrateNow your project is live on Heroku🎉
If this not working or getting some other errors, Close your terminal and re-open it. Then change these code lines in the
settings.py file.DEBUG = False
ALLOWED_HOSTS = ['<your-app-name>.herokuapp.com', 'localhost', '127.0.0.1']If you made those edits, then run these commands in the terminal
git add .
git commit -m "settingspy edited"
git push heroku master
Hope it will work!👏🎉
23