31
Your first Introduction to Django REST framework
A web developer worthy of the name must be able to create a REST API. This article will help you understand everything there is to know to build your first API using the Python language and the Django REST Framework.
To not miss anything, click Follow and/or follow me on Twitter: https://twitter.com/EricTheCoder_
API stands for Application Programming Interface, a software solution that allows two applications to communicate with each other.
In the case of web development, the application that runs in the browser called 'frontend' communicates/sends a request to the server called 'backend'
Suppose the frontend application wants the list of all the articles of a blog, it could send an HTTP request to the server.
GET https://www.myblog.com/postsThe Django server will process this request, read the database, and return the list of articles in JSON (structured text) format. This list could then be processed and displayed in the frontend app.
How can Django know how to handle this request? In fact, he cannot. It won't know what to do with the query. That's why we need to create an API. That is a server application that will determine how to respond to different requests about a specific resource. In this case the blog posts.
Note that all requests to the servers are made via HTTP actions.
The action you want to perform on the indicated resource. Although nouns are also encountered, these methods are often referred to as HTTP verbs.
GET:
The GET method requests a representation of the specified resource. GET requests should only be used to retrieve data.
POST:
The POST method is used to send an entity to the indicated resource. This usually results in a state change or side effects on the server.
PUT:
The PUT method replaces all current representations of the target resource with the content of the request.
PATCH:
The PATCH method is used to apply partial changes to a resource.
DELETE:
The DELETE method deletes the indicated resource.
The theory is fine, but it is much easier to understand a concept by putting it into practice.
We are therefore going in the following sections to create a REST API with Django.
The latest version of Python can be downloaded here: https://www.python.org/downloads/
Follow the instructions on this site according to your operating system (MAC, Windows or Linux)
To check if Python is correctly installed you can run this command from your terminal
python3 --version
# Python 3.9.6When working on a Python project, we have to work with several libraries such as Django and Django REST Framework.
According to the date of creation of the project. It is possible for example that the Django REST Framework library is not exactly at the same version number in all other projects.
How to allow each project to have its own version of Python and its own versions of libraries?
We will be using virtual environments.
Python provides you with a system that allows you to create virtual environments.
Once the environment has been created and activated, all the libraries installed can be used only in the environment to which they belong.
Normally we place a virtual environment in the project folder.
Create and access a folder for our project
mkdir myblog
cd myblog
From this folder, you can now create the virtual environment that will be attached to the project
python3 -m venv envHere we run python3 with the module option venv (-m venv). env is the name we give to our virtual environment.
Once created you can activate it
source env / bin / activateThat's it that's all! You now have a Python virtual environment created for your project. Normally the terminal will tell you that your environment is activated by displaying its name.
Note that to deactivate the virtual environment you must run
deactivateFrom the myblog project folder and with the virtual environment enabled run the following install command:
pip install djangoand
pip install djangorestframeworkIn fact from this point on, every time I ask you to execute a command in the terminal, I will assume that you are in the project folder 'myblog' and that the virtual environment is activated.
Django allows you to create a project configuration and then several applications associated with this project.
For example, the 'myblog' project could have an application for managing posts and another application for managing comments.
Each application shares the same project configuration.
There is a Django command to create a project configuration.
Run the following command:
django-admin startproject config.The 'startproject' command creates a project configuration with the name 'config'. Point '.' specifies that we want the project to be created in the current folder
It may seem strange to you that the name 'config' was chosen for the project. In fact, it makes sense, because it is about the configuration of the project.
The 'config' project is only the configuration part. To add functions to your project, you must create one or more applications.
To do this, run this command:
djangoadmin startapp postsThe 'startapp' command creates an application with the name 'posts'. It is in this application that we will create our API.
The 'config' project and the 'posts' application have been created with a folder structure and files.
Here is an example of the files created:

All of these folders and files might sound like a lot, but don't worry, they are there to simplify application development. I will explain them in due course.
Last little point, we need to add the following lines of code to the project configuration file 'config' settings.py
# config / settings / py

INSTALLED_APPS = [
    ...
    ...

    'rest_framework',
    'rest_framework.authtoken',
    'posts',
]
Here we indicate to the project that we want to use these three applications.
- rest_framework: will allow us to create our API
- rest_framework.authtoken: will allow us to add security to our API
- posts tell Django to use our posts app
The first step is to create the Django data model that will contain our blog posts
Open the 'models.py' file in the 'posts' application folder and enter the following code
# posts / models.py

from django.db import models
from django.contrib.auth import get_user_model

User = get_user_model()

class Post(models.Model):
    title = models.CharField(max_length = 255)
    body = models.TextField()
    created_on = models.DateTimeField(auto_now_add = True)
    user = models.ForeignKey(User, on_delete = models.CASCADE)
Note that with each Django project there is a User model and authentication libraries created automatically. The User model contains among others the fields: username, email, first_name, last_name, and password.
We use 'User = get_user_model()' in order to retrieve the reference to this model.
Finally, this 'models.py' file will serve as an instruction for Django to create a database that will contain a table and fields with the same definitions as in this file.
To create the database, you must create a migration file. The migration file is the plan, the "blueprint" of what the database must contain.
Django allows to automatically create this migration file with the following command
$ python manage.py makemigrationsOnce the migration file is created, we can run it and Django will create a database with the instructions contained in the migration.
The command to start the migration is as follows:
$ python manage.py migrateFinally, it is necessary to create our first user. Django provides us with a command to create a superuser
$ python manage.py createsuperuserThis command will ask you for the username, email, and password to then create the user
To use the Post model from the Django Admin Panel you need to add the following code
# posts / admin.py

from django.contrib import admin
from posts import models

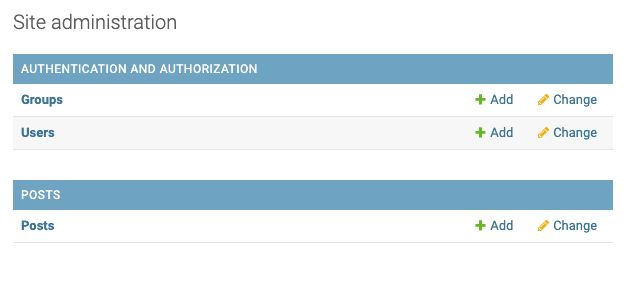
admin.site.register(models.Post)In order to make sure that everything we have done has worked, start the server and visit the Admin Panel
$ python manage.py runserverThe runserver command will launch a Django server
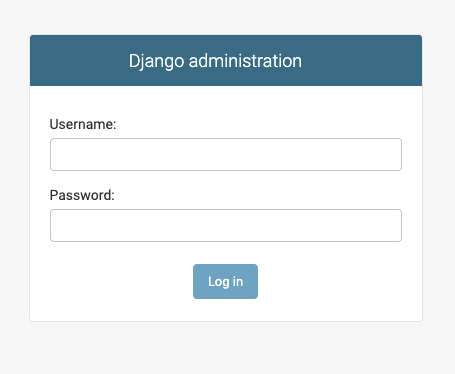
To access the Admin Panel, visit: http://127.0.0.1:8000/admin/
Django rest-framework provides you with libraries that allow you to create an API from A to Z. The rest-framework uses a certain logic that you will need to understand if you want to create an API
The API we want to create is in fact an interface to read, create and modify posts
Here are the 6 actions and URLs we want to create:
- Read the list of all our articles: GET api/posts
- Read a specific article: GET api/posts/1
- Create an article: POST api/posts
- Edit an article: PUT api/posts/1
- Partially modify an article: PATCH api/posts/1
- Delete an article: DELETE api/posts/1
The exchange of data between the backend and the frontend is done in structured text format in JSON format.
The rest-framework, therefore, provides a object for the conversion between the Django format and a JSON compatible format. This conversion uses the Serializer class.
The first step is therefore to create a serializer. To do this create a file named serializers.py under the application posts folder and add these lines of code:
# posts / serializers.py
from rest_framework import serializers
from .models import Post


class PostSerializer(serializers.ModelSerializer):
    class Meta:
        model = Post
        fields = '__all__'
There you have it, it’s no more complicated! In fact, most of the work is done by the rest-framework library. Here, we just have to mention which template and which fields we want to use for the API.
Note that instead of 'all' you could have specified the name of each desired fields
fields = ['title', 'body']Once the serializer is created, nothing prevents us from creating the API for the Post model
Django REST Framework allows you to create our API logic using two different techniques:
Using the ApiView class is the longest technique to create an API, but it allows for a great deal of customization. If you have special needs, the ApiView is your option of choice.
Using the ViewSet class is the fastest technique to create an API based on a Django model linked to a database. The ViewSet class will create for you the 7 actions most often used when creating an API: list, create, retrieve, update, partial_update, and destroy. It is therefore much faster than creating each action manually as with the APIView. On the other hand, if you have very specific needs, it will not be possible to customize your API as much as with the APIView
Since we are going to create an API based on a Django model and it will be without much customization, I chose to use ViewSets.
From the views.py file in the posts application folder. Enter the following code:
from rest_framework import viewsets

from .models import Post
from .serializers import PostSerializer


class PostViewSet(viewsets.ModelViewSet):
    serializer_class = PostSerializer
    queryset = Post.objects.all()
Again, you have a demonstration of the strength of rest-framework. Just create a view based on the 'ModelViewSet' and then specify which serializer is and where the data will come from.
With this simple code you will have access to 6 actions all inherited from ModelViewSets and its 6 equivalent methods: list, create, retrieve, update, partial_update, and destroy
Once the 6 views are available via PostViewSet, you must create a URL path for each of the 6 views.
We have the views now there is only one step left and that is to create a URL path to access these 6 actions.
Again, no need to create 6 routes manually, rest-framework provides us with the Router class.
Create a urls.py file under the posts app folder
# posts / urls.py

from django.urls import path, include
from rest_framework.routers import DefaultRouter
from .views import PostViewSet

router = DefaultRouter()
router.register('posts', PostViewSet, 'post')

urlpatterns = [
    path ('', include(router.urls)),
]
This code will create the following 6 URL path:
- GET / posts (display the list view)
- GET / posts/1 (display the post with id = 1)
- POST / posts (create)
- PUT / posts/1 (update)
- PATCH / posts/1 (partial update)
- DELETE / posts/1 (Destroy post with id = 1)
All you need is to connect these roads to your project. To do this, enter the following code in the urls.py file under the config project
from django.contrib import admin
from django.urls import path, include

urlpatterns = [
    path('admin /', admin.site.urls),
    path('api /', include('posts.urls')),
]
The routes created under posts / urls.py will all be used under the URL API /
Ex. Api / posts
Finally, it's time to test everything by launching the server
$ python manage.py runserverThen visit the address: http://127.0.0.1:8000/api

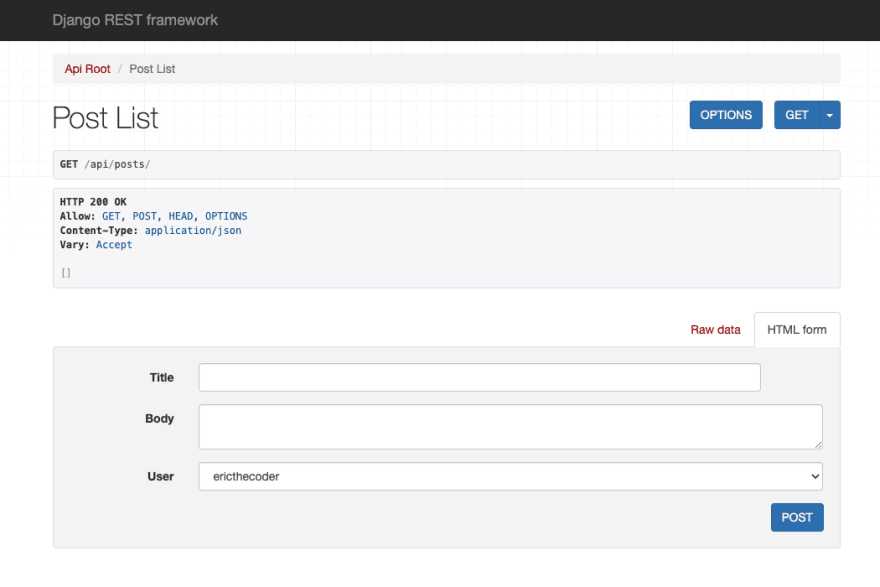
This page is created automatically by the rest-framework in order to allow you to test your API.
If you click on the API "posts". Another page will open with the list of all your posts
Once you have created a post, you can also read that specific post by adding the post number to the url (ex: api/posts/3)
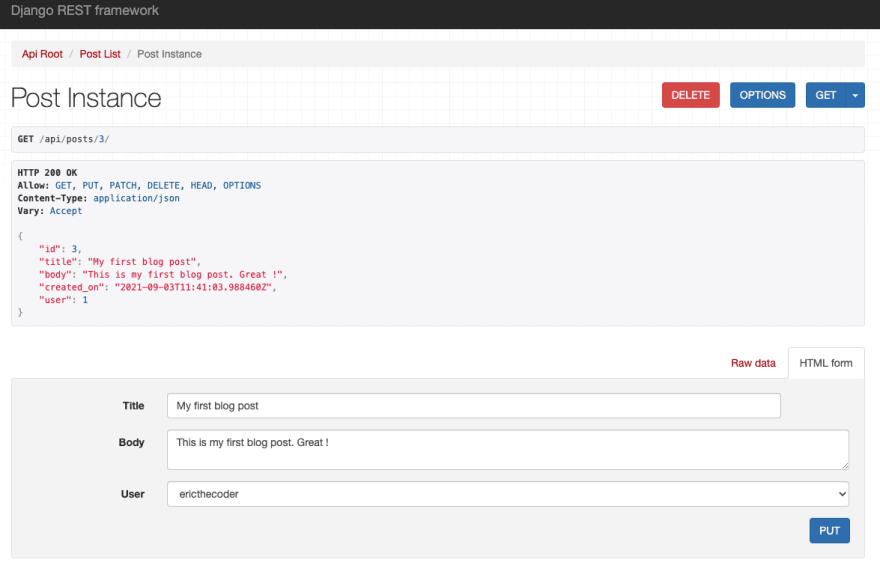
It is now possible to use this rest-framework interface to test the 6 actions and URLs paths that we created earlier.
Django REST-Framework makes it very easy to add search capabilities to our API.
The result will be an endpoint available to filter our posts
ex: GET api/posts/?search="python"
That endpoint will return a list of posts that contains the word "python"
In the posts application open views.py and add:
from rest_framework import filters

class PostViewSet(viewsets.ModelViewSet):
    serializer_class = PostSerializer
    authentication_classes = (TokenAuthentication,)
    permission_classes = (
        UpdateOwnProfile,
        IsAuthenticatedOrReadOnly,
    )
    queryset = Post.objects.all()
    filter_backends = (filters.SearchFilter,)
    search_fields = ('title','body')
The last 2 lines of the class PostViewSet are pretty self-descriptive. The filter is set and then we specify all the fields to lookup.
This new search filter can be tested with the REST-Framework testing page.
Run the server and go to api/posts
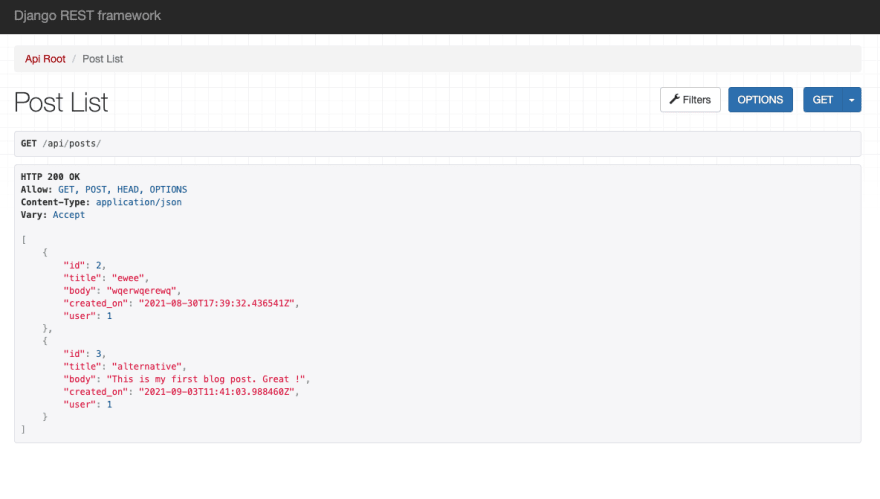
You should now see a Filter button (upper right). Click on the button and a search page will open

You can then enter your search text and click Search
That's all for today. In the next part, we will discuss authentication with tokens and the protection of certain actions / URLs
To not miss anything, click Follow and/or also follow me on Twitter: https://twitter.com/EricTheCoder_
31

