
27
Grocery Bag using Django (Part-1) - Introduction and Project Setup
Grocery Bag is a way to store grocery items for marketing. It will contain a homepage that will be showing all the list of items to buy and already bought. Users will be able to add items and update items, and can even delete them.
Screenshots
Below given some screenshots will give you an idea of what we're building.
Add new item
Update an item

Before you start with the project setup, make sure you have Python installed in your system. You can verify it with the following command:
$ python
Python 3.9.7 (tags/v3.9.7:1016ef3, Aug 30 2021, 20:19:38) [MSC v.1929 64 bit (AMD64)] on win32
Type "help", "copyright", "credits" or "license" for more information.
>>>
If you get the above output, you have Python installed. If not, you can download it from this page.
We'll be using a virtual environment
env for our project. Let's create the environment:$ python -m venv envNote: You can use
python3 in place of python as per your requirement.To activate the environment, use the command:
$ env\Scripts\activate.bat$ source env/Scripts/activateNow that we have virtual environment activated, we can install the required libraries using the command below:
$ pip install DjangoThe above command will install Django in our virtual environment. Now we are ready to create our Django project called
GroceryBag. Run the following command to create the project in the current directory:$ django-admin startproject GroceryBag .Now, as per the requirements, we need two apps -
bagto handle the CRUD operations on the Grocery bag, and accounts to handle the authentication. Let's create these apps one by one.$ python manage.py startapp bag
$ python manage.py startapp accountsAfter the two apps have been created, create separate
urls.py file in both of the apps directory, and add the following content in both files.from django.urls import path
urlpatterns = [
]Then we need to register these two apps in our project. So, open the
settings.py in the GroceryBag directory and add the two apps in the INSTALLED_APPS list.INSTALLED_APPS = [
'django.contrib.admin',
'django.contrib.auth',
'django.contrib.contenttypes',
'django.contrib.sessions',
'django.contrib.messages',
'django.contrib.staticfiles',
# Your apps below
'accounts',
'bag',
]At the later stage of the project, we'll be deploying it on a free cloud platform. So, we need to setup environment variables. Let's install python-decouple to help us with them:
$ pip install python-decoupleOnce installed, create a file
.env in the current directory and add the following content inside it.SECRET_KEY=django-insecure-6wx#%@2ift=4@1(*eiw5n&rh!5t!bytp6=#8viz^$ola#p5nsm
DEBUG=TrueNow, we need to make few changes in the
settings.py file. Let's make them:"""
Django settings for GroceryBag project.
Generated by 'django-admin startproject' using Django 3.2.9.
For more information on this file, see
https://docs.djangoproject.com/en/3.2/topics/settings/
For the full list of settings and their values, see
https://docs.djangoproject.com/en/3.2/ref/settings/
"""
from pathlib import Path
from decouple import config
# Build paths inside the project like this: BASE_DIR / 'subdir'.
BASE_DIR = Path( __file__ ).resolve().parent.parent
# Quick-start development settings - unsuitable for production
# See https://docs.djangoproject.com/en/3.2/howto/deployment/checklist/
# SECURITY WARNING: keep the secret key used in production secret!
SECRET_KEY = config('SECRET_KEY') # Get value from environment variables
# SECURITY WARNING: don't run with debug turned on in production!
DEBUG = config('DEBUG') # Get value from environment variables
ALLOWED_HOSTS = ['127.0.0.1', 'localhost'] # Add these two for now
# Application definition
INSTALLED_APPS = [
    'django.contrib.admin',
    'django.contrib.auth',
    'django.contrib.contenttypes',
    'django.contrib.sessions',
    'django.contrib.messages',
    'django.contrib.staticfiles',
    # Your apps below
    'accounts',
    'bag',
]
MIDDLEWARE = [
'django.middleware.security.SecurityMiddleware',
'django.contrib.sessions.middleware.SessionMiddleware',
'django.middleware.common.CommonMiddleware',
'django.middleware.csrf.CsrfViewMiddleware',
'django.contrib.auth.middleware.AuthenticationMiddleware',
'django.contrib.messages.middleware.MessageMiddleware',
'django.middleware.clickjacking.XFrameOptionsMiddleware',
]
ROOT_URLCONF = 'GroceryBag.urls'
TEMPLATES = [
{
'BACKEND': 'django.template.backends.django.DjangoTemplates',
'DIRS': [BASE_DIR / 'templates'], # Add the templates directory
'APP_DIRS': True,
'OPTIONS': {
'context_processors': [
'django.template.context_processors.debug',
'django.template.context_processors.request',
'django.contrib.auth.context_processors.auth',
'django.contrib.messages.context_processors.messages',
],
},
},
]
WSGI_APPLICATION = 'GroceryBag.wsgi.application'
# Database
# https://docs.djangoproject.com/en/3.2/ref/settings/#databases
DATABASES = {
'default': {
'ENGINE': 'django.db.backends.sqlite3',
'NAME': BASE_DIR / 'db.sqlite3',
}
}
# Password validation
# https://docs.djangoproject.com/en/3.2/ref/settings/#auth-password-validators
AUTH_PASSWORD_VALIDATORS = [
{
'NAME': 'django.contrib.auth.password_validation.UserAttributeSimilarityValidator',
},
{
'NAME': 'django.contrib.auth.password_validation.MinimumLengthValidator',
},
{
'NAME': 'django.contrib.auth.password_validation.CommonPasswordValidator',
},
{
'NAME': 'django.contrib.auth.password_validation.NumericPasswordValidator',
},
]
# Internationalization
# https://docs.djangoproject.com/en/3.2/topics/i18n/
LANGUAGE_CODE = 'en-us'
TIME_ZONE = 'UTC'
USE_I18N = True
USE_L10N = True
USE_TZ = True
# Static files (CSS, JavaScript, Images)
# https://docs.djangoproject.com/en/3.2/howto/static-files/
STATIC_URL = '/static/'
STATIC_ROOT = BASE_DIR / 'staticfiles'
STATICFILES_DIRS = [
BASE_DIR / "static",
]
# Default primary key field type
# https://docs.djangoproject.com/en/3.2/ref/settings/#default-auto-field
DEFAULT_AUTO_FIELD = 'django.db.models.BigAutoField'In the above file, we have made important changes related to templates and static directories.
After this, create a
templates directory and a static directory in the current directory for HTML files and static files(CSS, JavaScript, Images) respectively. Inside the static folder, create another folder called css where all the CSS files will be stored.Download the HTML templates and CSS file from here and add them in their respective directories.
Now, open the
GroceryBag/urls.py file and modify it as below:from django.contrib import admin
from django.urls import path, include
from django.conf import settings
from django.conf.urls.static import static
urlpatterns = [
path('admin/', admin.site.urls),
path('', include('bag.urls')),
path('accounts/', include('accounts.urls')),
]
if settings.DEBUG:
urlpatterns += static(settings.STATIC_URL,
document_root=settings.STATIC_ROOT)In the above script, we have included the URLs from the
bag and accounts apps. Also, we have created URL pattern for the static files we are going to serve.The next thing we need to do it to migrate the database using the following command:
$ python manage.py migrateWhen you run the command, you'll see some output. After it has completed, you'll see a
db.sqlite3 file in the current directory. This shows that our database has been migrated successfully.Now, we can run the server as:
$ python manage.py runserverWhen you run the server, you'll get a URL in the console. Open that in your favorite browser and you'll see a similar output.
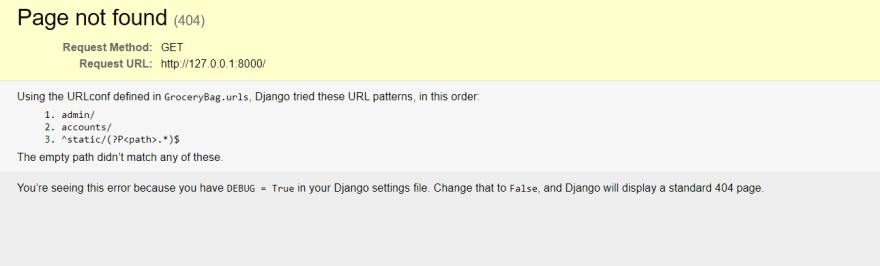
Don't worry about this error for now. It just tells us that, it's not able to find the
/ route. We'll resolve this in the next blog. With this, we have completed the setup of the project. You can match the directory structure until now:.
├── GroceryBag
│ ├── __init__.py
│ ├── asgi.py
│ ├── settings.py
│ ├── urls.py
│ └── wsgi.py
├── accounts
│ ├── __init__.py
│ ├── admin.py
│ ├── apps.py
│ ├── migrations
│ │ └── __init__.py
│ ├── models.py
│ ├── tests.py
│ ├── urls.py
│ └── views.py
├── bag
│ ├── __init__.py
│ ├── admin.py
│ ├── apps.py
│ ├── migrations
│ │ └── __init__.py
│ ├── models.py
│ ├── tests.py
│ ├── urls.py
│ └── views.py
├── db.sqlite3
├── manage.py
├── static
│ └── css
│ └── style.css
└── templates
├── add.html
├── index.html
└── update.htmlIn this blog, we have understood what we are going to build in this project. We have also setup our project. In the next blog, we'll start working on the project. Stay tuned!
Code till now: https://github.com/ashutoshkrris/Grocery-Bag/tree/blog1
27