18
How to create a Flask app in Python
Let's create a Flask app from scratch, using Python 3.9 or newer.
Note: We are not deploying the app, we're just getting started. If you want to deploy a Flask app to Heroku, check out this article.
We'll also get started with a basic templating system. Nothing drastic, but something to add custom information to your templates.
There are LOTS of ways to do this, but the simplest way is to use a venv.
mkdir yourproject
cd yourproject/
python -m venv .venv/
source .venv/bin/activate/Once you are inside your virtual env (the last line from the code above will get you "inside" your venv), you can simply run:
pip install flask
pip freeze > requirements.txt
This will install Flask in your virtual environment, and create a requirements.txt file for other people to use when installing your project.
Your main file is where your initial code will live. Go ahead and create main.py and add this to it:
from flask import Flask
app = Flask(__name__)


@app.route('/')
def index():
  return "<h1>Hello world</h1>"
Now, this won't actually do anything yet. We need to run this code. We'll do that in the next step.
First, let's set a couple environment variables. This will help tell Flask what to do while we're developing our app.
In your command line (while inside of your virtual environment) run:
export FLASK_ENV=development
export FLASK_APP=main
Next, we can run:
flask runAnd you should see something like this in your terminal:
* Serving Flask app 'main' (lazy loading)
 * Environment: development
 * Debug mode: on
 * Running on http://127.0.0.1:5000/ (Press CTRL+C to quit)
 * Restarting with stat
 * Debugger is active!
 * Debugger PIN: 814-739-543
Head on over to http://127.0.0.1:5000/ in a new tab in your browser, and you should see Hello World in big bold letters.
Templates make life easier. You can write a basic .html file with some Jinja templating in it for dynamic content. But let's start with a simple template.
Open your main.py file and change it to look like this:
# main.py
from flask import Flask, render_template
app = Flask(__name__, template_folder='templates')


@app.route('/')
def index():
  return render_template('home.html')
This tells Flask to use the templates/ folder as the main folder for templates, and to use home.html as the main page. You can rename home.html to anything you like.
Note: There's A LOT to know when it comes to templating in Jinja, but we aren't going to cover very much right now so we can keep this simple.
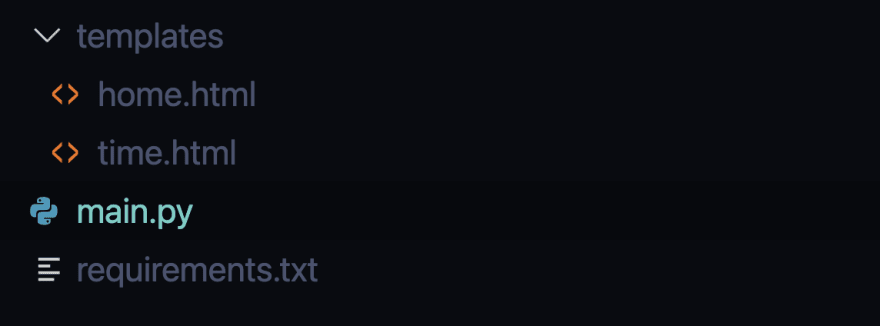
Now create a new folder beside your main.py file called templates/ and add a child file called home.html.
Your file structure should look like this now:

And your home.html file should have this in it:
<h3>Hello from home.html</h3>In your main.py file, let's create a second "view". This is the route (sometimes called path) to another page.
This time we'll add something dynamic to the template.
At the top of main.py add this import:
import datetime  # <- Add this line
from flask import Flask, render_template
....
And at the bottom for main.py add these lines:
@app.route('/time')
def timetest():
    now = datetime.datetime.now()
    return render_template('time.html', now=now)
Lastly, add templates/time.html to your project, and inside of time.html add:
<h3>The time is {{ now }}</h3>Now navigate to http://127.0.0.1:5000/time and it should show your time. And it will update every time the page is refreshed.
Note: If the time doesn't match your exact time right now, it's because your Flask server thinks it's on a different timezone.
What we did was:
- Create a variable called
nowwith the current date/time. - Added
, now=nowto therender_template()function. This adds "context" to your template. - In your template, you can access
{{ now }}as a dynamic value.
And all the files I wrote can be found on GitHub here: https://github.com/KalobTaulien/flask-tutorial
18

