20
Creating an online budget tool 4/5
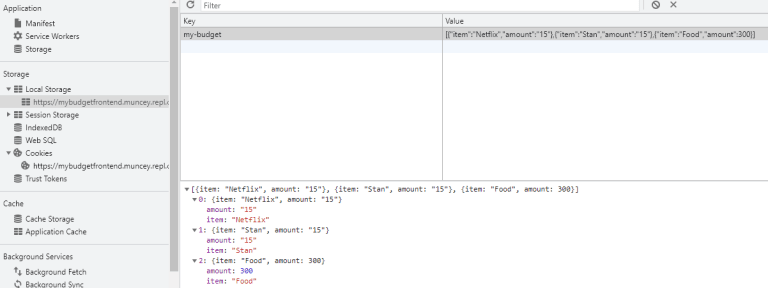
The next step in creating an online budget tool is to add the ability to save data between sessions. In this case I am using local storage in the browser. It is not the most secure solution but it will demonstrates the techniques that you need to use to create a form that will save your budget.
The key to being able to make is to create a global click handler for the budgetTable table which will map buttons to actions based on the className of each buttons.
document.getElementById('budgetTable').addEventListener('click', function($ev) {
  const idx = $ev.target.dataset.idx;
  if ($ev.target.className.indexOf('edit-button') > -1) {
    editBudgetItem(idx);
  } else if ($ev.target.className.indexOf('delete-button') > -1) {
    deleteItem(idx);
  } else if ($ev.target.className.indexOf('save-button') > -1) {
    save(idx);
  } else if ($ev.target.className.indexOf('cancel-button') > -1) {
    cancelEdit();
  }
});
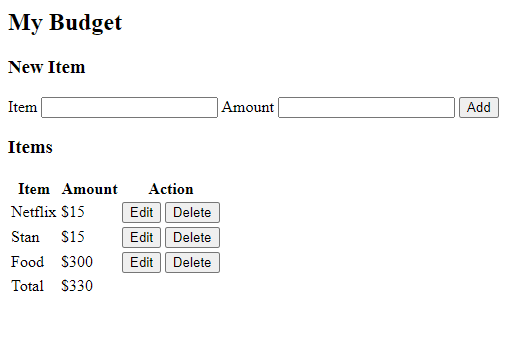
The end goal of this is a form that looks like this:

It is obviously not styled as yet but it demonstrates the ability to add items, edit and delete items. The data is held for now in localStorage and in future I will look at setting up a back end so that the data can be held securely in a database but for now localStorage will do.

The lower level code to save and load the budget makes use of the window.localStorage object to get and set items. Items in local storage are held using name/value pairs and you will typically use JSON.stringify to prepare items for saving and JSON.parse to read items back. The logic is that if there is no my-budget in local storage I will create a default budget with sample data.
let budgetItems = [{
  item: 'Car',
  amount: 1.00
}]

const loadBudget = (storageKey) => {
  const budget = window.localStorage.getItem(storageKey);
  if (budget) {
    budgetItems = JSON.parse(budget);
  }
}

const saveBudget = (storageKey) => {
  const budget = JSON.stringify(budgetItems);
  window.localStorage.setItem(storageKey, budget);
}
I have added two new functions renderActions and renderEditRow. The renderActions will render the edit and delete button and the renderEditRow will render a budget item row as a form with a save and cancel button. Note the use of a specific class on both which will be used in the table click handler.
const renderActions = (idx) => {
  return `
  <button type="button" class="edit-button" data-idx="${idx}">Edit</button>
  <button type="button" class="delete-button" data-idx="${idx}">Delete</button>`
}


const renderEditRow = (data, idx) => {

  return `<tr>
            <td><input type="text" id="editItem" value="${data.item}"></td>
            <td><input type="number" id="editAmount" value="${parseFloat(data.amount)}"></td>
            <td>
              <button type="button" class="save-button" data-idx="${idx}">Save</button>
              <button type="button" class="cancel-button" data-idx="${idx}">Cancel</button>
            </td>
          </tr>`
}
I have made a small change to renderRow to add an additional column for actions (edit/delete). Because the renderRow is also used for the totals row I also configure the function to only renderActions when idx is not null.
const renderRow = (data, idx) => {
  return `<tr>
            <td>${data.item}</td>
            <td>$${data.amount}</td>
            <td>${idx != null ? renderActions(idx) : '' }</td>
          </tr>`
};
The renderRows function becomes a bit more complicated:
const renderRows = (data, idx) => {
  const html = [];
  for (let i=0; i<data.length; i++) {
    if (idx != null && idx == i) {
      html.push(renderEditRow(data[i], i));
    } else if (idx != null && idx != i) {
      html.push(renderRow(data[i]));
    } else {
      html.push(renderRow(data[i], i));
    }
  }
  return html.join('');
}
This change is to render an edit row if the user wants to edit a certain row.
Next I add some utility functions to edit, save, delete and cancel.
const addBudgetItem = () => {
  const budgetItem = {
    item: document.getElementById('newItem').value,
    amount: document.getElementById('newAmount').value
  }
  budgetItems.push(budgetItem);
  document.getElementById('newItem').value = null;
  document.getElementById('newAmount').value = null;
}

const editBudgetItem = (idx) => {
  id = 'budgetTable';

  document.getElementById('newItem').setAttribute('disabled', true);
  document.getElementById('newAmount').setAttribute('disabled', true);
  document.getElementById('addButton').setAttribute('disabled', true);

  document.getElementById(id).tBodies[0].innerHTML = renderRows(budgetItems, idx);
}

const cancelEdit = () => {
  id = 'budgetTable';

  document.getElementById('newItem').setAttribute('disabled', false);
  document.getElementById('newAmount').setAttribute('disabled', false);
  document.getElementById('addButton').setAttribute('disabled', false);

  document.getElementById(id).tBodies[0].innerHTML = renderRows(budgetItems);
}

const save = (idx) => {

  budgetItems[idx].item = document.getElementById('editItem').value;
  budgetItems[idx].amount = parseFloat(document.getElementById('editAmount').value);

  saveBudget('my-budget');
  renderPage('budgetTable');

  document.getElementById('newItem').setAttribute('disabled', false);
  document.getElementById('newAmount').setAttribute('disabled', false);
  document.getElementById('addButton').setAttribute('disabled', false);
}

const deleteItem = (idx) => {
  const temp = [];
  for (let i=0; i < budgetItems.length; i++) {
    if (i != idx) {
      temp.push(budgetItems[i]);
    }
  }
  budgetItems = temp;

  saveBudget('my-budget');
  renderPage('budgetTable');
}
At the end of each function if I change data in budgetItems I call saveBudget followed by renderPage.
So this gives me a functional form which can be used for personal use. In my next article I am planning to discuss how to style the form so that it looks great and is ready for dropping into a CMS (WordPress, Wix, Joomla) of your choice.
I have saved changes into a local-storage branch.
20
