26
How to Create an AWS EC2 VM
In this post, you will learn how easy it is to create a virtual machine with AWS EC2. You will learn the basics and as an example, you will deploy and run a basic Spring Boot application. Enjoy!
As a prerequisite for following this blog yourself, you will need to create an AWS account. You can create a Free Tier AWS account, which will allow you to experiment with most of the AWS services for free. See a previous blog how to setup the free account.
The sources used in this blog are available at GitHub.
Login to the AWS Management Console and search for the EC2 service. This will bring you to the EC2 Dashboard. In the screenshots, the New EC2 Experience is enabled, so it might look a bit different on your side when you did not enable this new layout.

In the left menu, click on Instances and in order to start creating your first EC2 instance, click the Launch Instances button at the top right corner.

A wizard is started which will guide you through the creation process. In step 1, you need to select an AMI. You choose the Amazon Linux 2 AMI which is available in the Free Tier by clicking the Select button.

In step 2, you need to choose the Instance Type dependent on your needs concerning CPU, memory, storage and networking capacity. Being in the Free Tier, the choice is easy because there is only one Instance Type available. Choose the t2.micro and click the Next: Configure Instance Details button.

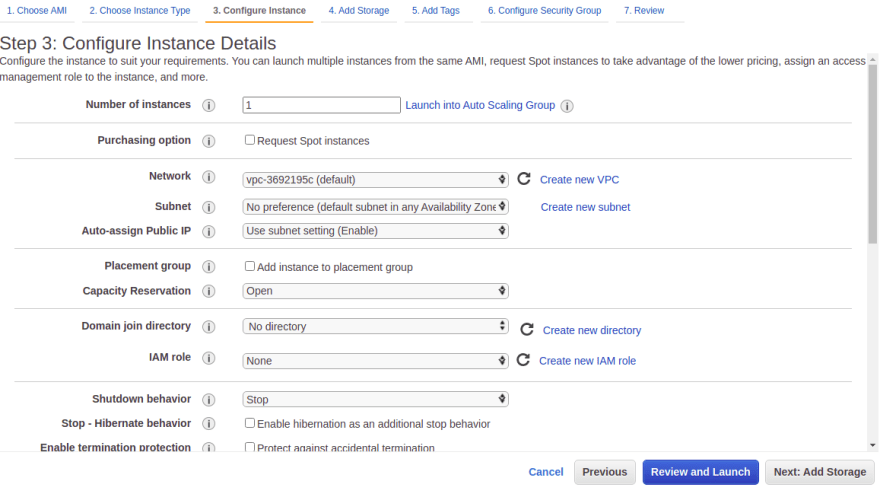
In step 3, you have the possibility to configure more items for your instance, e.g. the number of instances you want to create. Leave the defaults and click the Next: Add Storage button.
In step 4, you can configure the storage for your EC2 instance. Leave the defaults and click the Next: Add Tags button.

In step 5, you can add tags. You can add for example a Name tag by clicking the click to add a Name tag link.
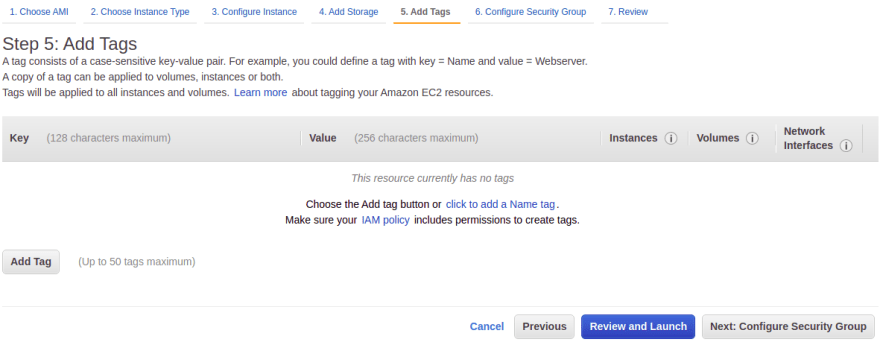
Name it MyFirstEC2Instance and click the Next: Configure Security Group button.

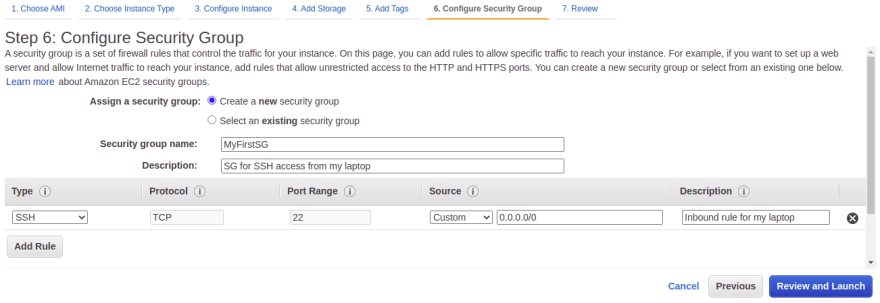
In step 6, you need to select or configure a Security Group. A Security Group is like a firewall in front of your EC2 instance. You have several options here, it is advised to only allow the traffic which is absolutely necessary. In this case, you will create a new Security Group MyFirstSG for SSH access from your machine. Go to WhatIsMyIP.com and fill the IPv4 address followed with /32 as a source instead of 0.0.0.0/0. Click the Review and Launch button.
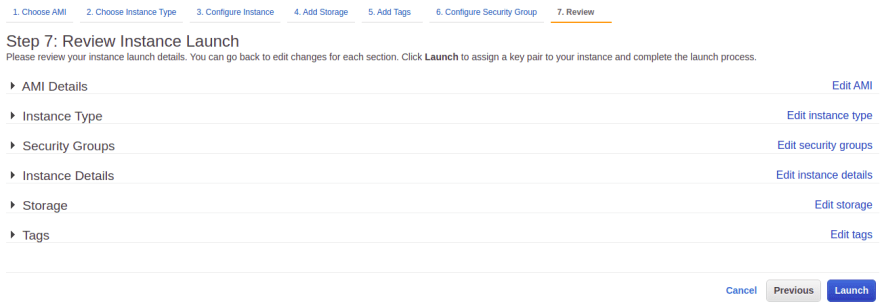
Finally, in step 7, you can review everything and when this is ok, you click the Launch button.
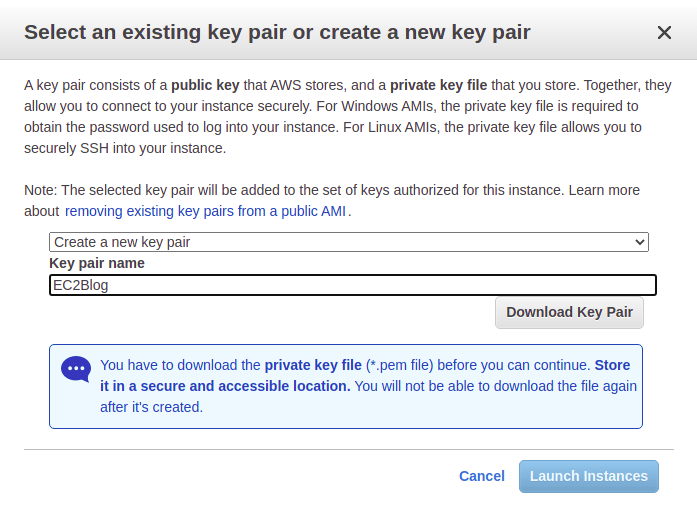
Before being launched, a popup window is show where we need to select an existing key pair or create a new one. This is necessary for accessing the instance by means of a SSH key. Create a new key pair EC2Blog and download the key pair. A EC2Blog.pem file is downloaded to your machine. Finally, click the Launch Instances button.
A Launch Status page is displayed, click the View Instances button.
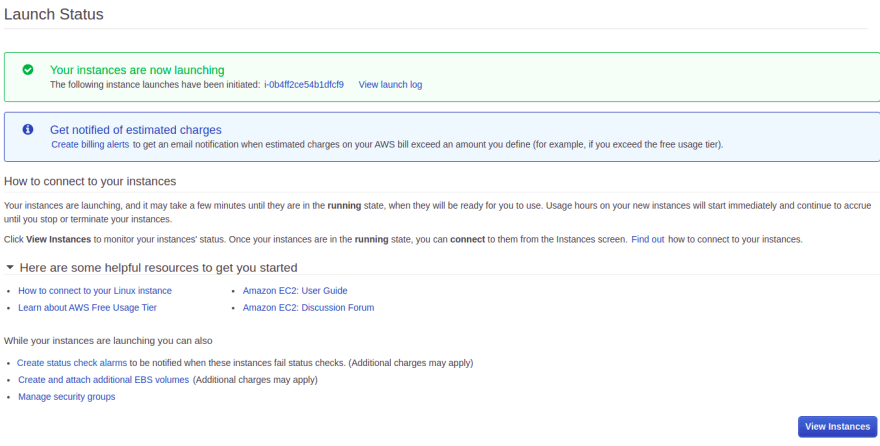
If everything went OK, you first EC2 instance is running now.

Now that the EC2 instance is running, you can actually do something with it. Let’s see if you can SSH to the EC2 instance from your machine (note: the instructions are written for Linux). Open a terminal window from the directory where you saved the key pair .pem file. In the EC2 AWS console, you need the Public IPv4 address of your instance which is located at the right top corner of the Details page.

In the terminal, you enter the following command with your public IP of course.
$ ssh -i EC2Blog.pem ec2-user@3.66.155.101
The authenticity of host '3.66.155.101 (3.66.155.101)' can't be established.
ECDSA key fingerprint is SHA256:/5EorRulTwyFKUJLfTvNPmUlHS9Mt1eTffPD4+9tcwU.
Are you sure you want to continue connecting (yes/no/[fingerprint])? yes
Warning: Permanently added '3.66.155.101' (ECDSA) to the list of known hosts.
@@@@@@@@@@@@@@@@@@@@@@@@@@@@@@@@@@@@@@@@@@@@@@@@@@@@@@@@@@@
@         WARNING: UNPROTECTED PRIVATE KEY FILE!          @
@@@@@@@@@@@@@@@@@@@@@@@@@@@@@@@@@@@@@@@@@@@@@@@@@@@@@@@@@@@
Permissions 0664 for 'EC2Blog.pem' are too open.
It is required that your private key files are NOT accessible by others.
This private key will be ignored.
Load key "EC2Blog.pem": bad permissions
ec2-user@3.66.155.101: Permission denied (publickey,gssapi-keyex,gssapi-with-mic).
OK, it seems that something is wrong with the permissions of the .pem file. Let’s check the file permissions.
$ ll EC2Blog.pem
-rw-rw-r-- EC2Blog.pem
The permissions are indeed a bit too open, so let’s first fix this issue.
$ chmod 400 EC2Blog.pem
$ ll EC2Blog.pem
-r-------- EC2Blog.pem
Retry the SSH command and now it is successful and you can enter commands at your EC2 instance.
$ ssh -i EC2Blog.pem ec2-user@3.66.155.101

       __|  __|_  )
       _|  (     /   Amazon Linux 2 AMI
      ___|\___|___|

https://aws.amazon.com/amazon-linux-2/
[ec2-user@ip-172-31-44-246 ~]$
Another way to connect via SSH is via the EC2 console. Select the instance and click the Connect button.

Leave the defaults and click the Connect button.

You will, however, not be able to connect because you restricted SSH access to the IP address of your machine only. Therefore, you need to allow the IP address where Instance Connect will connect from. Go to the page where the Amazon IP ranges are defined and search for EC2_INSTANCE_CONNECT for the region you are in. The IP below is for the eu-central-1 (Frankfurt) region.
{
  "ip_prefix": "3.120.181.40/29",
  "region": "eu-central-1",
  "service": "EC2_INSTANCE_CONNECT",
  "network_border_group": "eu-central-1"
}
Navigate to the Security Group section (left menu), select the Security Group, the Inbound rules tab and click the Edit inbound rules button.

Add a SSH inbound rule for the IP address and click the Save rules button.

Retry connecting via Connect Instance and you will have access to your EC2 instance.

The goal is to install a Java Spring Boot application to the EC2 instance. First thing to do, is to install Java. The installation instructions can be found at the Amazon website. Execute the following command in the SSH terminal.
$ sudo yum install java-11-amazon-corretto-headlessVerify whether Java is available.
$ java --version
openjdk 11.0.11 2021-04-20 LTS
OpenJDK Runtime Environment Corretto-11.0.11.9.1 (build 11.0.11+9-LTS)
OpenJDK 64-Bit Server VM Corretto-11.0.11.9.1 (build 11.0.11+9-LTS, mixed mode)
Problem now is that when you want to launch similar instances (right-click the instance Image and template – Launch more like this), you will need to install Java for each new instance. This can be solved by adding user data during the instance creation.
Exit the terminal and terminate the EC2 (select the instance, right-click and choose Terminate instance).
Create the instance again, just like you did before. In step 3, however, you scroll down to the bottom of the page and add User data with installation of java in the Advanced Details section. The User data will be executed as root, therefore there is no need to add sudo before the command. Also, add the argument -y to the yum command, otherwise the installation will fail because the user will be prompted to continue the installation.

In step 6, you can select the existing Security Group MyFirstSG. There is also no need to create a new key pair, just choose the existing one EC2Blog.
When the instance has been started, connect via SSH to the instance. Beware that the public IP has changed!
Verify whether Java is installed. When something went wrong, checkout the file cloud-init-output.log. This will give you more information about any errors occurred during startup.
$ sudo cat /var/log/cloud-init-output.logAs Spring Boot Application, you can use one with a simple Hello World endpoint.
@RestController
public class HelloController {

    @GetMapping("/hello")
    public String hello() {
        String message = "Hello AWS!";
        try {
            InetAddress ip = InetAddress.getLocalHost();
            message += " From host: " + ip;
        } catch (UnknownHostException e) {
            e.printStackTrace();
        }
        return message;
    }

}
Run the following command in order to generate the jar file.
$ mvn clean verifyRun the application locally.
$ java -jar MyAWSPlanet-0.0.1-SNAPSHOT.jarVerify whether you can access the URL.
$ curl http://localhost:8080/hello
Hello AWS! From host: <computer name>/127.0.1.1
Copy the jar file to the remote EC2 instance.
$ scp -i EC2Blog.pem MyAWSPlanet-0.0.1-SNAPSHOT.jar ec2-user@18.194.164.14:Via the SSH connection, start the Spring Boot application.
The URL will not be accessible yet, therefore you need to add an extra inbound rule to the Security Group. Since the application is running at port 8080, you create a custom TCP rule for port 8080 which can be accessed from anywhere.

Verify whether you can access the URL. You need to use the public IP address of your EC2 instance.
$ curl http://18.194.164.14:8080/hello
Hello AWS! From host: ip-172-31-36-30.eu-central-1.compute.internal/172.31.36.30
Success! Do not forget to terminate the EC2 instance after you are done experimenting with it and to delete the Security Group if you do not need it anymore.
In this post, you learned how to create and configure an EC2 instance at Amazon. This is amazingly easy to do. You also learned how to access the remote instance from your laptop and how to install Java on it. Finally, you successfully started a Spring Boot application and accessed it from your machine. All of this has been executed in the Free Tier, so it did not cost you anything!
26
