43
Using Custom Fonts In Tailwind CSS
Custom fonts allow you to use a beautiful combination of different fonts on your website to improve typography and user experience.
In this article, I will walk you through how you can conveniently use your favourite fonts in your web applications with tailwindcss.
Before you begin this tutorial you'll need the following:
- Code Editor installed
- Tailwindcss set up
If you are getting your fonts from CDN like google fonts or even adobe fonts then font format should really not be your concern.
If you are mostly targeting users with modern browsers, you can use WOFF and WOFF2 formats. These offer the best compression and allow you to deal with fewer files in your code. And if a user’s machine is so old that it doesn’t support either of these formats, it may be better to just serve them a system font as a fallback for performance reasons, anyway.
If you want to expand support as wide as possible, then add EOT and TTF files to the mix.
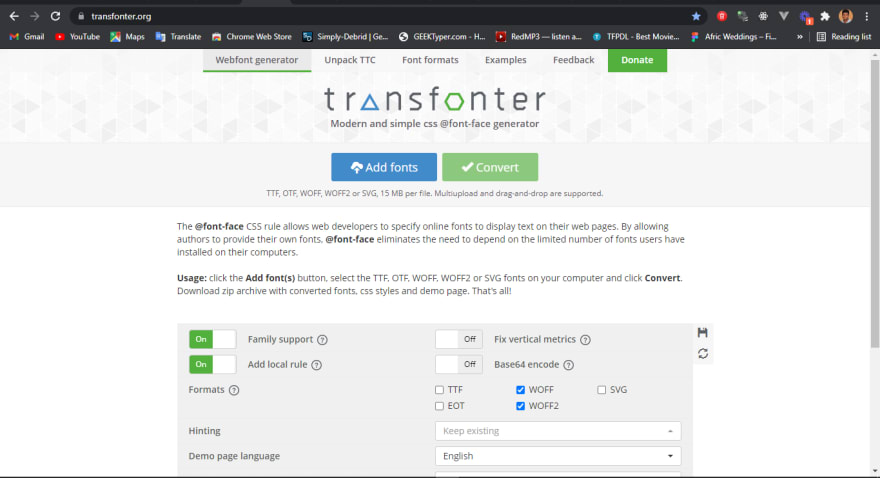
This tutorial will use the Transfonter, a modern and simple css @font-face generator.
Before you proceed, make sure you have your fonts ready.

Create a new project with your preferred framework. I will be using Next.js
#npm
npm install -D tailwindcss@latest postcss@latest autoprefixer@latest

#yarn
yarn add -D tailwindcss@latest postcss@latest autoprefixer@latestnpx tailwindcss init -pThis will create a minimal tailwind.config.js file at the root of your project and It will also create a
postcss.config.js file that includes tailwindcss and autoprefixer already configured.
In your globals.css file inside the styles directory at the root of your project. Replace the content with the following:
@tailwind base;
@tailwind components;
@tailwind utilities;If you are not using fonts from a CDN like google fonts.
Go to transfonter.org, click on the ADD FONTS button to import your already downloaded fonts.


Click on the CONVERT button afterwards
Extract the downloaded zip file from Transfonter, Move all the files into the /public/fonts folder in your project directory.
There should be a stylesheet.css file in the fonts folder in your public directory of your project
@import url('/fonts/stylesheet.css');

@tailwind base;
@tailwind components;
@tailwind utilities;
If you are using CDN, simply use the import rule like this
@import url('https://fonts.googleapis.com/css2?family=Jomhuria&family=Roboto:wght@300;400&display=swap');

@tailwind base;
@tailwind components;
@tailwind utilities;
Finally, extend the fontFamily in the theme in your tailwind.config.js to use the new imported font family, in our case BR Firma,
module.exports = {
    purge: [
        './pages/**/*.{js,ts,jsx,tsx}',
        './components/**/*.{js,ts,jsx,tsx}',
    ],
    darkMode: false, // or 'media' or 'class'
    theme: {
        extend: {
            fontFamily: {
                sans: ['BR Firma', 'sans-serif'],
            },
        },
    },
    variants: {
        extend: {},
    },
    plugins: [],
};
Viola! 😁 We have our custom fonts loaded
Check out the following resource for in-depth understanding.
43
