48
🤖 Creating your own discord bot using JS 🤖
Hey everyone, I have been developing my first discord bot from couple of days and I am finally here to share with you how you can create your bot very easily.
In this blog I am going to tell you how can you make a bot which replies 'Pong' when you say !ping. Again this can be constructed into anything you want. Like you say Hey and bot will say 'Hola' you get the idea right.
I have used Discord Js to build this bot. Yes you can build this in python as well using Discord py.
You can invite my bot here
- Computer (of-course)
- Text editor(Using sublime in this tutorial)
- Discord account and a discord server where you have admin access (You can create new one to test the bot out)
- A bit of node js and express knowledge. If not refer this
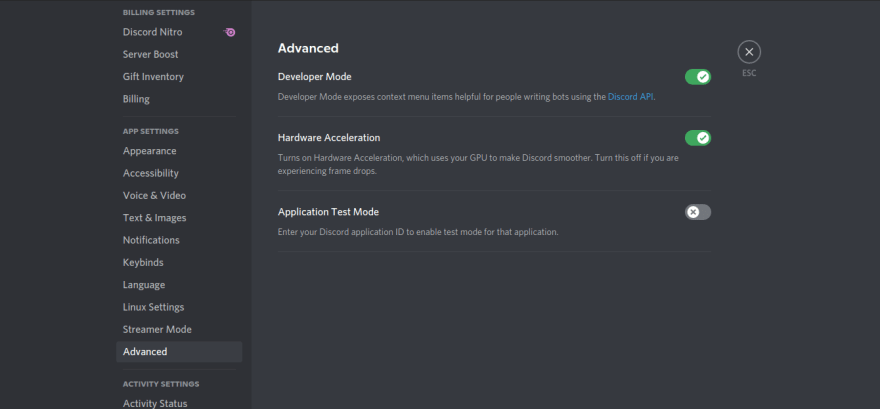
Before you do anything make sure you have developer mode enable in your discord. We won't be needing it for this tutorial but you will eventually need it so why not enable it now :)
- Okay so now you will have to visit https://discord.com/developers/applications/ website.
- Login with your discord account and you should see interface like this. (Ignore my previous applications, you may find this blank and that's alright)
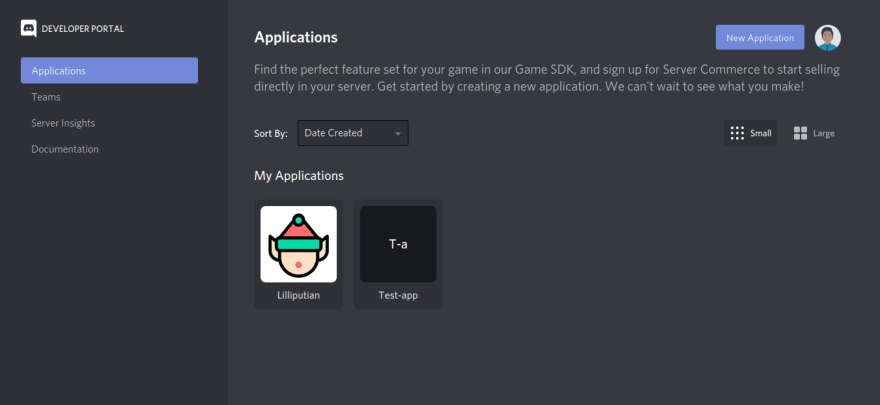
- Now head over to
New Applicationbutton.
- Now name your application (You can change it afterwards). I have named it
Tutorial-Botand hitCreate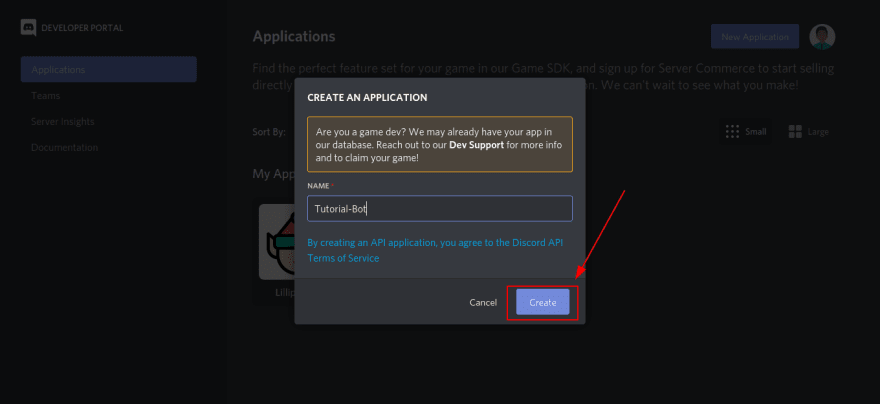
- Now you are on your application dashboard. You can add description, image and all to make it beautiful and explore other options.
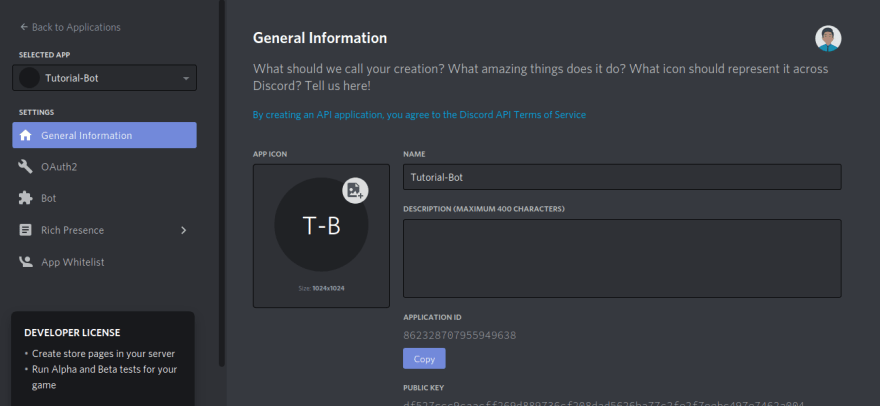
- Now as you have successfully created application account and now it's time to create bot instance. Head over to
Botand click onAdd Bot.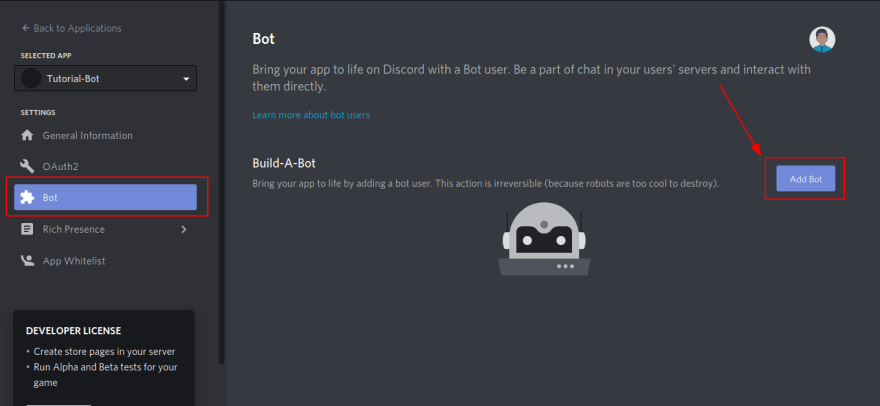
- After this you will be prompted with a message. Click on
Yes, do it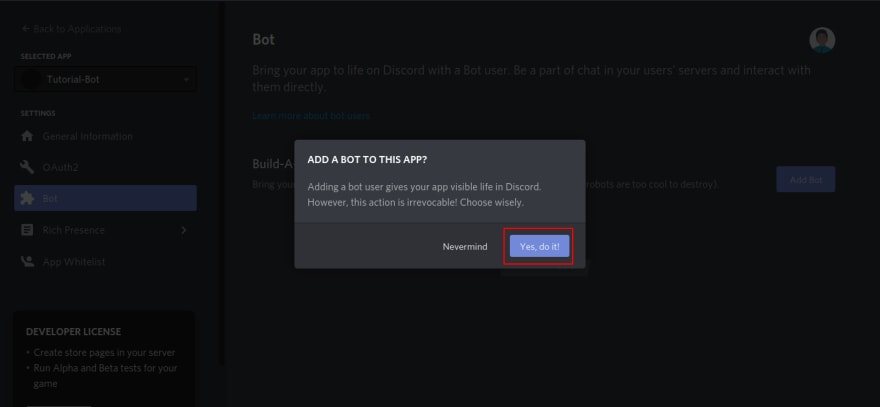
- Awesome now you may see something like below. (You can customize image, description as you want before moving ahead)
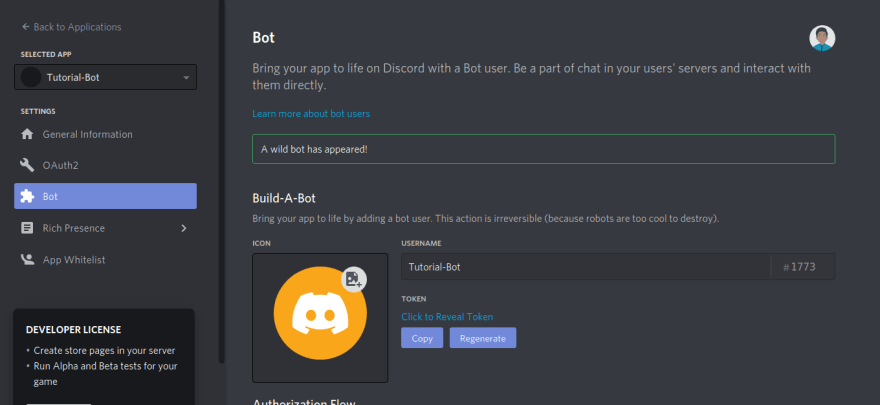
- Now head over to
OAuth2section and copyApplication Id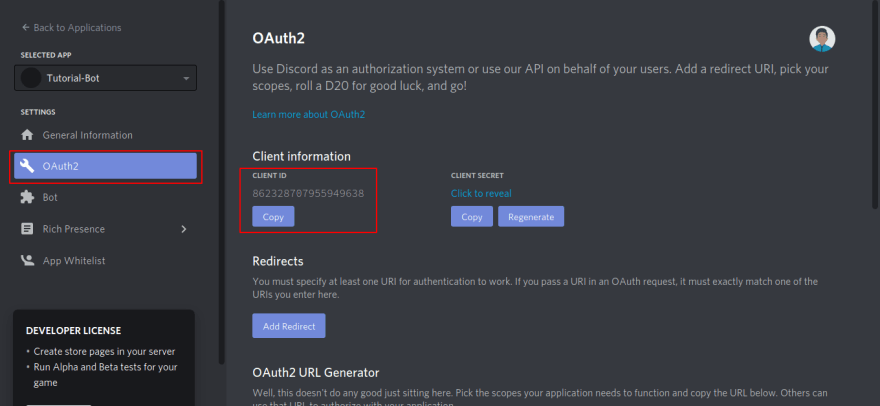
- Now we will generate the bot invite link. There are many ways to do that. I will be telling you easiest way. Just replace
<app-id>with theapplication idyou copied into the following link :
Caution! This would give admin access to the bot.
https://discord.com/api/oauth2/authorize?client_id=<app-id>&permissions=8&scope=bot- Paste this edited link into the browser search-box and you should see something like below.
--:-> You will land here
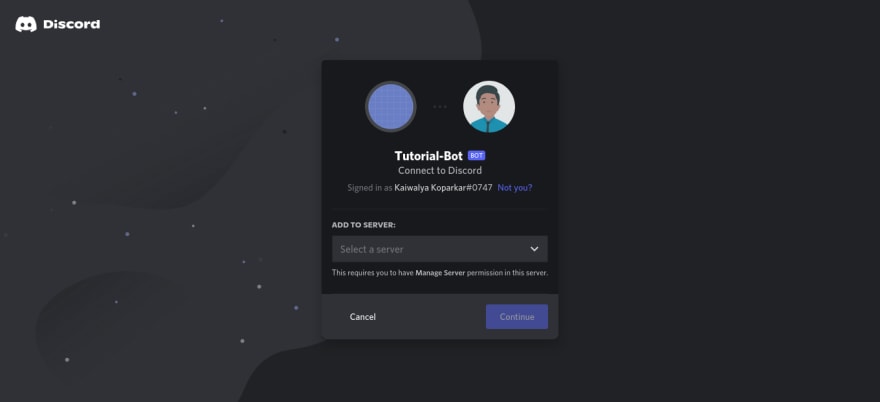
--:-> Select the server
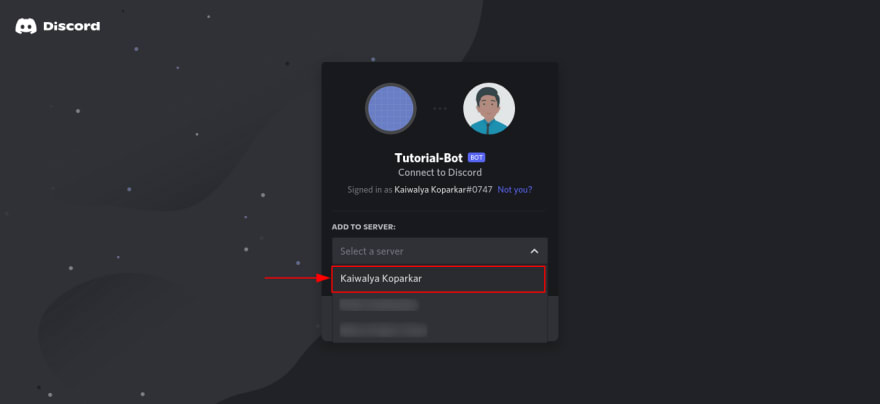
--:-> Click on Continue and Authorize (Authorize would be on next window after clicking on continue)

--:-> If you did everything correctly then you should see something like this

- Now you can see your bot on right hand side of your discord (Where all the participants are shown)

- Create a folder with your bot name (Or anything where you will store the code potentially).
- Open that folder with any text editor (I will be doing that in sublime text)
- Now Also open a cmd (on windows) or terminal (on linux/mac) in that folder and type
npm init -yAgain here you can remove the -y flag to customize it. But I will keep it for now to make it a bit easy. After running command you might see something like this or similar

- Now type in command
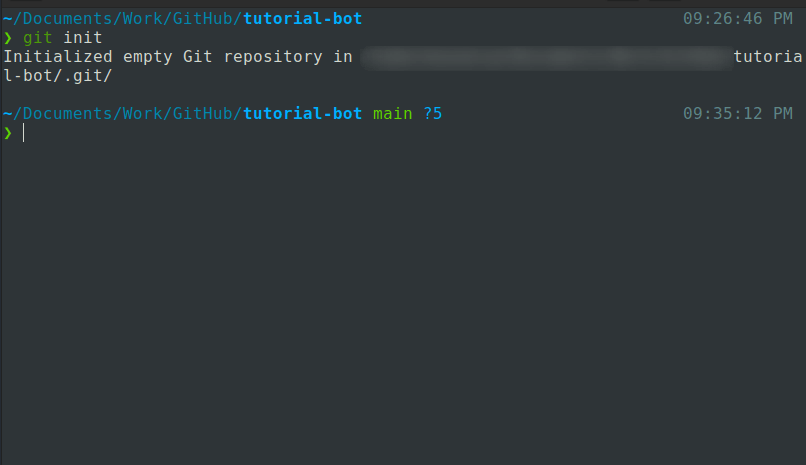
git init- Now create 4 files
index.js,config.json,.env,.gitignore Now create a folder
Commandsand addpong.js&command.jsfile in it. Now your file/folder structure should look something like this (onlypong.jsandcommand.jsare inCommandsfolder)

-
Now add the code to the respective files as heading
In index.js :-
Add the following code
const Discord = require('discord.js');
const client = new Discord.Client();
const env = require('dotenv').config();

const command = require('./Commands/command.js');
const pong = require('./Commands/pong.js');

console.log('Yay your bot is live');

client.on('ready', () => {
    console.log(`Bot is currently running on version v${require('./package.json').version}`);

    command(client,'ping', message => {
        pong(message);
    });
});

client.login(process.env.BOTTOKEN);const {prefix} = require('../config.json');
module.exports = (client, aliases, callback) => {
if(typeof aliases === 'string'){
aliases = [aliases];
}
client.on('message', message => {
const {content} = message;
aliases.forEach(alias => {
const command = `${prefix}${alias}`
if(content.startsWith(`${command}`) || content === command){
console.log(`Running the command ${command}`)
callback(message);
}
});
});
};module.exports = async function (message) {
message.channel.send('Pong!');
}{
"prefix": "!"
}/node_modules/
.env- First go to the developer portal from where you created the bot application.
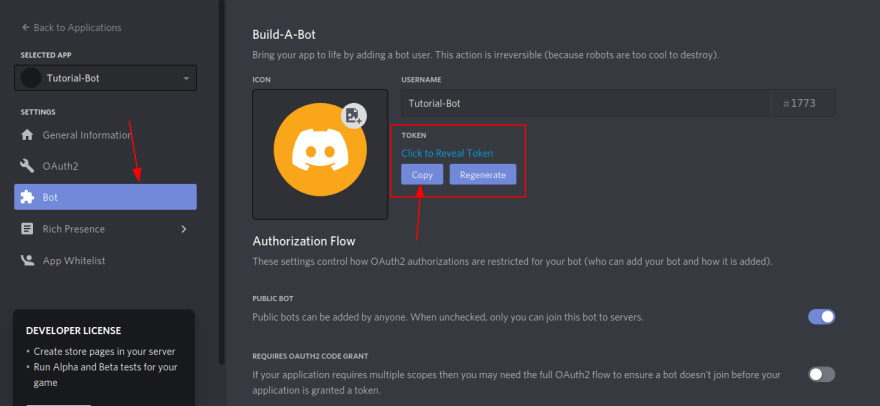
- Then go to
Botand then copy the token as shown in the below image
- Now add it to your env file (replace XXXXX with your secret key don't add any spaces or something just add as it is.
BOTTOKEN=XXXXXXXXXXnpm install discord.js-
npm install dotenv- Okay so now you are done with coding and it's time for checking it out.
- Run command
node index.js- Now go to your discord where this bot was invited.
and send command
!pingyou should receive pong in response like below.
I will try to explain it in most simple way possible. We created index.js which will be the entry point point of the application/bot. then we authenticatied it using client.login('process.env.BOTTOKEN') and we checked if your application was online.
Our bot will monitor each and every message being posted on the server while it is online and it will check if the posted message was a valid command using command.js if it was then we will run the operation present in pong.js file.
Next what? If you followed through then you have created somewhat scalable bot structure. Now everytime you have to add the command then you have to just make a file of the command. Import it to index.js and write at what keyword would you like it to get triggered. and that's it.
Okay so now we have set up our project and you can do lot more with discord bots . Look at the references below to increase the commands and power of your bot.
If you would like me to tell you how to host your bot for free then please let me know in the comments below.
🌏 Like | Follow | Share 🌏
My Socials: Twitter | LinkedIn | GitHub | Discord Server
48

