35
How to Replace Strapi's Default WYSIWYG Editor with TinyMCE Editor
In this guide, you will learn how to replace the default WYSIWYG editor (Draftjs) in Strapi with the TinyMCE editor.
This tutorial is heavily based on this guide from the Strapi documentation. The idea here is to create a new field that will be modified to use TinyMCE as its editor, but before we start, there are a few things that we should know:
- Tinymce is NOT a Markdown editor, it's an HTML editor.
This means that the value taken from the field could contain HTML tags like: <p>Text</p>, <img src="..." /> and even <table>...</table>. Therefore you should be aware of the potential security issues and how to overcome them.
For TinyMCE to work, you will need to obtain an API Key by creating an account at Tinymce (the core editor is free 😍 )
If you are new to Strapi, make sure to take a look at this Quick Start Guide.
Now that we are ready, let's get our hands dirty.
First, we will create a new project, I will call it my-app you can call it whatever you like.
The --quickstart option will tell Strapi to create a basic project with default configurations and without templates, this is just to make the process easier and to avoid any complications.
yarn create strapi-app my-app --quickstart
    #or
    npx create-strapi-app my-app --quickstart
After running the command, a new browser tab will open for you to create a new administrator account. If it didn't, head to http://localhost:1337/admin and fill in all the necessary information.

Now we want to generate a new Strapi plugin, but let's first stop Strapi by pressing Ctrl+C or Command+C and cd into the project directory.
Make sure to replace "my-app" with your project name
cd my-appWe will call our plugin wysiwyg so we should run:
yarn strapi generate:plugin wysiwyg
    #or
    npm run strapi generate:plugin wysiwyg
    #or
strapi generate:plugin wysiwygTo be able to use TinyMCE, we will need to install its library, and because Strapi is using React, we will install the TinyMCE library for React @tinymce/tinymce-react.
But first, let's cd into the newly created plugin and only then install it there:
cd plugins/wysiwygAnd then,
yarn add @tinymce/tinymce-react
    #or
npm install @tinymce/tinymce-reactIn step 2, we generated the necessary files for any plugin. Now we need to make it ours by creating a few files to tell Strapi what to do with this plugin. So first, we will create the necessary directories and files (React Components), then we will write into them.
To create the directories and files (make sure you are inside the plugin directory (.../<your app name>/plugins/wysiwyg):
cd admin/src/

    #The following will create .../MediaLib/index.js
    mkdir -p components/MediaLib/; touch components/MediaLib/index.js

    #The following will create .../Wysiwyg/index.js
    mkdir -p components/Wysiwyg/; touch components/Wysiwyg/index.js

    #The following will create .../Tinymce/index.js
mkdir -p components/Tinymce/; touch components/Tinymce/index.jsThis file will handle the insertion of media i.e. insert media (images, video...etc) to TinyMCE editor.
It's important to notice here that we are using Strapi Media Library to handle the media instead of letting Tinymce handle it, and that's perfect because we don't want to let the user (The person who is using the Editor insert media from somewhere else, so make sure NOT to allow such insertion in Tinymce settings (More on that later).
Now using your favorite editor (I am using nano), open the file:
nano ./components/MediaLib/index.jsAnd paste the following code then save:
import React, { useEffect, useState } from "react";
    import { useStrapi, prefixFileUrlWithBackendUrl } from "strapi-helper-plugin";
    import PropTypes from "prop-types";
    const MediaLib = ({ isOpen, onChange, onToggle }) => {
      const {
        strapi: {
          componentApi: { getComponent },
        },
      } = useStrapi();
      const [data, setData] = useState(null);
      const [isDisplayed, setIsDisplayed] = useState(false);
      const Component = getComponent("media-library").Component;
      const handleInputChange = (data) => {
        if (data) {
          const { url } = data;
          setData({ ...data, url: prefixFileUrlWithBackendUrl(url) });
        }
      };
      const handleClosed = () => {
        if (data) {
          onChange(data);
        }
        setData(null);
        setIsDisplayed(false);
      };
      useEffect(() => {
        if (isOpen) {
          setIsDisplayed(true);
        }
      }, [isOpen]);
      if (Component && isDisplayed) {
        return (
          <Component
            allowedTypes={["images", "videos", "files"]}
            isOpen={isOpen}
            multiple={false}
            noNavigation
            onClosed={handleClosed}
            onInputMediaChange={handleInputChange}
            onToggle={onToggle}
          />
        );
      }
      return null;
    };
    MediaLib.defaultProps = {
      isOpen: false,
      onChange: () => {},
      onToggle: () => {},
    };
    MediaLib.propTypes = {
      isOpen: PropTypes.bool,
      onChange: PropTypes.func,
      onToggle: PropTypes.func,
    };
export default MediaLib;This file will be the wrapper of Tinymce editor, it will display the labels and handle the error messages as well as inserting media. An important thing to notice here is that this code is only handling images, further steps are required to handle videos and other media.
Again, using your favorite editor, open the file:
nano ./components/Wysiwyg/index.jsAnd paste the following code:
Note: If you get file not found error around the import TinyEditor... Ignore it for now as we will create it in the next step.
import React, { useState } from "react";
    import PropTypes from "prop-types";
    import { isEmpty } from "lodash";
    import { Button } from "@buffetjs/core";
    import { Label, InputDescription, InputErrors } from "strapi-helper-plugin";
    import MediaLib from "../MediaLib";
    import TinyEditor from "../Tinymce";
    const Wysiwyg = ({
      inputDescription,
      errors,
      label,
      name,
      noErrorsDescription,
      onChange,
      value,
    }) => {
      const [isOpen, setIsOpen] = useState(false);
      let spacer = !isEmpty(inputDescription) ? (
        <div style={{ height: ".4rem" }} />
      ) : (
        <div />
      );
      if (!noErrorsDescription && !isEmpty(errors)) {
        spacer = <div />;
      }
      const handleChange = (data) => {
        if (data.mime.includes("image")) {
          const imgTag = `<p><img src="${data.url}" caption="${data.caption}" alt="${data.alternativeText}"></img></p>`;
          const newValue = value ? `${value}${imgTag}` : imgTag;
          onChange({ target: { name, value: newValue } });
        }
        // Handle videos and other type of files by adding some code
      };
      const handleToggle = () => setIsOpen((prev) => !prev);
      return (
        <div
          style={{
            marginBottom: "1.6rem",
            fontSize: "1.3rem",
            fontFamily: "Lato",
          }}
        >
          <Label htmlFor={name} message={label} style={{ marginBottom: 10 }} />
          <div style={{ position: "absolute", right: "15px", top: "-10px" }}>
            <Button color="primary" onClick={handleToggle}>
              MediaLib
            </Button>
          </div>
          <TinyEditor name={name} onChange={onChange} value={value} />
          <InputDescription
            message={inputDescription}
            style={!isEmpty(inputDescription) ? { marginTop: "1.4rem" } : {}}
          />
          <InputErrors
            errors={(!noErrorsDescription && errors) || []}
            name={name}
          />
          {spacer}
          <MediaLib
            onToggle={handleToggle}
            isOpen={isOpen}
            onChange={handleChange}
          />
        </div>
      );
    };
    Wysiwyg.defaultProps = {
      errors: [],
      inputDescription: null,
      label: "",
      noErrorsDescription: false,
      value: "",
    };
    Wysiwyg.propTypes = {
      errors: PropTypes.array,
      inputDescription: PropTypes.oneOfType([
        PropTypes.string,
        PropTypes.func,
        PropTypes.shape({
          id: PropTypes.string,
          params: PropTypes.object,
        }),
      ]),
      label: PropTypes.oneOfType([
        PropTypes.string,
        PropTypes.func,
        PropTypes.shape({
          id: PropTypes.string,
          params: PropTypes.object,
        }),
      ]),
      name: PropTypes.string.isRequired,
      noErrorsDescription: PropTypes.bool,
      onChange: PropTypes.func.isRequired,
      value: PropTypes.string,
    };
export default Wysiwyg;This is where all the work is done, it's the file that will implement the editor
Note: mark this file as we will visit it again to configure TinyMCE.
One more time, using your favorite editor, open the file:
nano ./components/Tinymce/index.jsAnd paste the following code:
Note: Make sure to replace API_KEY with the actual key that you obtained from Tinymce.
import React from "react";
    import PropTypes from "prop-types";
    import { Editor } from "@tinymce/tinymce-react";
    const TinyEditor = ({ onChange, name, value }) => {
      return (
        <Editor
          apiKey="API KEY"
          value={value}
          tagName={name}
          onEditorChange={(editorContent) => {
            onChange({ target: { name, value: editorContent } });
          }}
          outputFormat="text"
          init={{}}
        />
      );
    };
    TinyEditor.propTypes = {
      onChange: PropTypes.func.isRequired,
      name: PropTypes.string.isRequired,
      value: PropTypes.string,
    };
export default TinyEditor;Our plugin is ready and waiting, but Strapi doesn't know about it yet! So we need to register it with Strapi and give it some information about it.
To do so, we will edit one last file (The file is already there, we will just change the code inside it).
Last time, using your favorite editor, open the file:
Note: Make sure you are still inside the plugin folder .../<your app name>/plugins/wysiwyg
nano index.jsDelete the existing code and add the following:
import pluginPkg from "../../package.json";
    import pluginId from "./pluginId";
    import Wysiwyg from "./components/Wysiwyg";
    export default (strapi) => {
      const pluginDescription =
        pluginPkg.strapi.description || pluginPkg.description;
      const icon = pluginPkg.strapi.icon;
      const name = pluginPkg.strapi.name;
      const plugin = {
        blockerComponent: null,
        blockerComponentProps: {},
        description: pluginDescription,
        icon,
        id: pluginId,
        injectedComponents: [],
        isReady: true,
        isRequired: pluginPkg.strapi.required || false,
        mainComponent: null,
        name,
        preventComponentRendering: false,
        trads: {},
      };
      strapi.registerField({ type: "wysiwyg", Component: Wysiwyg });
      return strapi.registerPlugin(plugin);
};That was boring, wasn't it? Now let's have fun and see some results! Let's run Strapi 😆
- First, let's get back to the project folder:
cd ../../../../

    # After running this command I will be at .../my-app
# Make sure you are in .../<your-project-name>- Re-build Strapi from scratch:
yarn build --clean
    #or
    npm run build --clean
    #or
strapi build --clean- Finally, Start Strapi with the front-end development mode
--watch-admin:
yarn develop --watch-admin
    #or
    npm run develop -- --watch-admin
    #or
    strapi develop --watch-admin
When you run the last command, it will open a new tab in the browser (if it didn't, head to localhost:8000/admin and log in with the administrator account you created earlier.

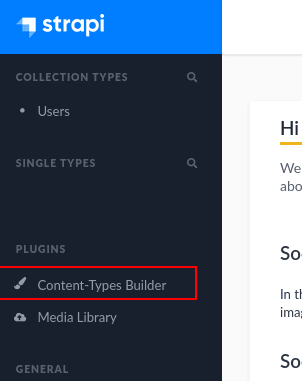
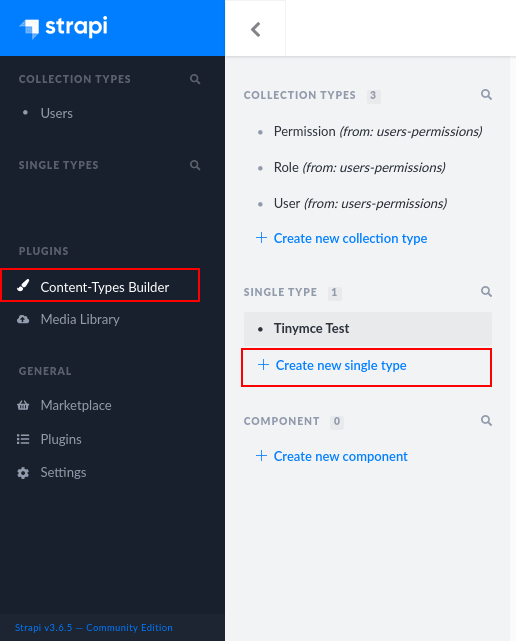
From the menu on the left go to Content-Types Builder so we can create new content for testing.

Choose: Create new single type

Enter display name something like Tinymce Test.

Chose Rich Text.

Give it a name like Test and hit Finish.

From the top right corner hit Save, and wait for the server to restart


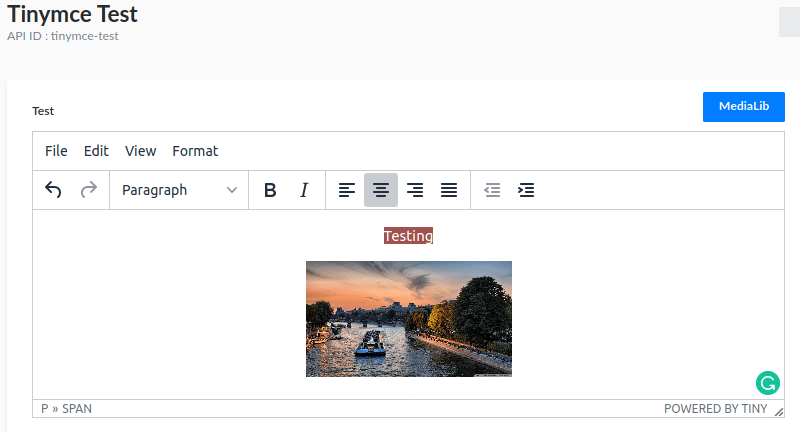
OK, the moment of truth. In the left menu, you will find the newly created content Tinymce Test, press it to edit it. And hop!, there you go, Tinymce is working! Yaaay 😍.

Hmm 😕 , something isn't quite right yet! You are probably not able to insert a new line or do pretty much anything useful!
Don’t stop Strapi just yet! Since we started Strapi with --watch-admin mode, we don’t need to stop it, and we will still be able to see the changes we will make do as we are doing them (Cool ha? 😎).
OK, Let's see what we can do about this.
Remember The file we marked? In that file, we need to configure TinyMCE to work for us as we expect it to do. we need to tell Tinymce three important things.
From the project directory, open the file using your favorite editor:
nano plugins/wysiwyg/admin/src/components/Tinymce/index.jsAnd do the following changes:
- outputFormat:
To make full use of TinyMCE, we will tell it to deal with the input as an HTML and give the output as an HTML too,
Change: outputFormat='text' To: outputFormat='html'
- selector:
inside init={{}} add: selector: 'textarea',
this is to tell Strapi that we are using <textarea></textarea> tags for input.
- plugins & toolbar:
This is where all the fun is. again, inside init={{}} and after the previously added selector, add two things:
-
plugins: '',Here we will add all the features and functionalities that we want Tinymce to have. -
toolbar: '',It's also for adding features, but those who are added here will appear directly in the top toolbar of Tinymce, while the ones we added earlier will appear in a drop-down menu.
Note: Add all the plugins you want between the single quotes ' HERE ' and separate them with single spaces, A full list can be found here, Remember not to add any plugin that allows users to upload the media directly to the editor.
When you are done picking from the Tinymce plugins, the final version of the file will look something like this:
#PATH: <your-project-name>/plugins/wysiwyg/admin/src/components/Tinymce/index.js
import React from "react";
    import PropTypes from "prop-types";
    import { Editor } from "@tinymce/tinymce-react";
    const TinyEditor = ({ onChange, name, value }) => {
      return (
        <Editor
          apiKey="API KEY"
          value={value}
          tagName={name}
          onEditorChange={(editorContent) => {
            onChange({ target: { name, value: editorContent } });
          }}
          outputFormat='html'
          init={{
            selector: 'textarea',
            plugins: 'fullscreen insertdatetime .... MORE PLUGINS',
            toolbar: 'code numlist bullist .... MORE PLUGINS',
          }}
        />
      );
    };

    TinyEditor.propTypes = {
      onChange: PropTypes.func.isRequired,
      name: PropTypes.string.isRequired,
      value: PropTypes.string,
    };
    export default TinyEditor;
Because Strapi is still running, we can add some plugins and try it out, then add some more and so on… and when we are all set and ready to see it in action, we can now stop Strapi and start it fresh again. Press Ctrl+C or Command+C to stop Strapi.
Now Let’s run it without --watch-admin, but after we build it clean:
yarn build --clean
    yarn develop
    #OR
    npm run build --clean
    npm run develop
    #OR
    strapi build --clean
    strapi develop
After running the commands, a new browser tab should open. If it didn't, head to localhost:1337/admin.
Now go back to our Tinymce Test and give it another try, everything should be working fine 😆.

You did it! Congratulations 🥳🥳
Now we have a special Strapi field that is using TinyMCE as its editor. This will open the creativity doors for your users 😁, but remember “With Great Power Comes Greater Responsibility”.
We have talked about this earlier, but let’s emphasize it even more. It’s important to spend some time making sure that you only get the plugins that you need from TinyMCE. You should also know that even if you disabled some plugins from the editor, users will still be able to copy-paste some “Formatted Text” from other places (Formatted text is a cooler name for “text with Style appended to it (CSS and possibly JavaScript in our case)”). That means even if you think your users are trustworthy, their innocence might open the door for nightmares, XSS to name one.
But hey! that shouldn’t stop you from using TinyMCE. In fact, they claim to be “The world's #1 JavaScript library for rich text editing”, and indeed they have millions of users. So go ahead! Enjoy the Intelligence and Power of Strapi combined with the Flexibility of TinyMCE … just be careful, OK? 😊
35
