44
Make notes sharing app with React and Firebase
Hello 👋

- Basic understanding of React JS
- Node JS
$ npx create-react-app@latest mynoteapp<textarea id="txt" cols="30" rows="10" placeholder="Enter some text!" value={text} onChange={e => setText(e.target.value)} onKeyDown={keySound}></textarea>*Styling *🌈
*{
  margin: 0;
  padding: 0;
  box-sizing: border-box;
}
body{
  height: 100%;
  overflow: hidden;
}
textarea{
  width: 100%;
  height: 100vh;
  resize: none;
  margin: 5px;
  font-size: 25px;
  outline: none;
  border: none;
}
So, now the Textarea is covered the whole page without outlines and borders
- Install
data.guiusing,
$ npm i dat.gui- Import it to
Textarea.js
import * as dat from 'dat.gui';- Initialize
dat.gui
const gui = await new dat.GUI({hideable: false});- Create objects
const obj = {
            fontSize : 25,
            fontFamily : 'monospace',
            saveFile: () => {
                const btn = document.querySelector('#saveBtn')
                btn.click()
            }
}- Add options 1) Font size
gui.add(obj, 'fontSize').min(8).max(60).step(1).onChange(e => {
            document.querySelector('textarea').style.fontSize = `${e}px`
        })
2) Font family
gui.add(obj, 'fontFamily', {
            'Monospace': 'monospace',
            'Roboto': 'Roboto',
            'Poppins': 'Poppins',
            'Cursive': 'Cursive',
        }).onChange(e => {
            document.querySelector('textarea').style.fontFamily = e
        })
3) Save button
gui.add(obj, 'saveFile')This will create a GUI panel on the top-right corner of the page

- Go to Google Firebase Console
- Create a new project, give it a name as you wish
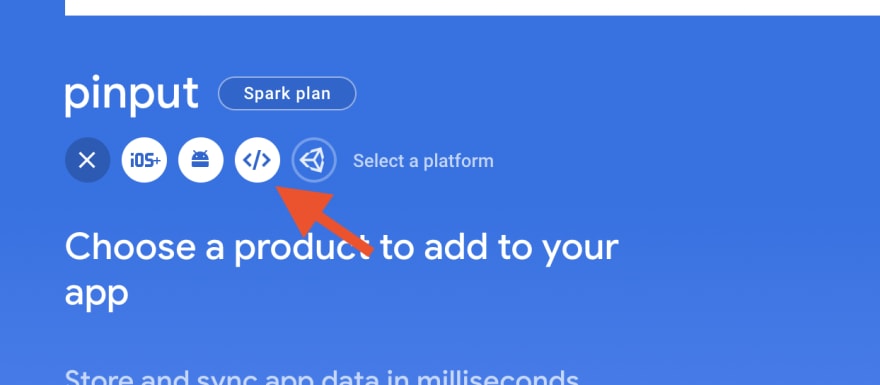
- Create a new web application

- Install firebase to your react application
$ npm install firebase- Copy your credentials and create
fireabse.jsin thesrcdirectory of your React application
firebase.js
import firebase from "firebase/compat/app"
import "firebase/compat/firestore"

const firebaseConfig = {
    apiKey: "YOUR_API_KEY",
    authDomain: "YOUR_AUTH_DOMAIN",
    projectId: "YOUR_PROJECT_ID",
    storageBucket: "YOUR_STORAGE_BUCKET",
    messagingSenderId: "YOUR_MESSAGING_ID",
    appId: "YOUR_APP_ID"
  };


const app = firebase.initializeApp(firebaseConfig);

const db = app.firestore();


export default db- Now go back again to your Firebase project
- Go to
Firestore Database
- Create a database
- And choose production mode
- Choose any location you want
- After creating the database, go to the rules tab of the dashboard

- Paste the following code to the rules playground and publish it
rules_version = '2';
service cloud.firestore {
  match /databases/{database}/documents {
    match /{document=**} {
      allow read, write: if true;
    }
  }
}
Now go back to your React project
Go to
Textarea.jsand importdatabase
import db from '../firebase'- Create a
save function
const handleSave = async () => {
        let slug = tinyid.unique()
        keySound()
        let today = new Date();
        const dd = String(today.getDate()).padStart(2, '0');
        const mm = String(today.getMonth() + 1).padStart(2, '0'); //January is 0!
        const yyyy = today.getFullYear();
        today =  dd + '/' + mm + '/' + yyyy
        await db.collection('notes').doc(slug).set({
            text: text,
            date: today,
        })
        navigate(`/${slug}`)
    }
To generate slug, you can use tiny-unique-id
- Loading created notes
useEffect(() => {
        const handleLoad = async () => {
            const doc = await db.collection('notes').doc(slug).get()
            setText(doc.data().text)
        }
        handleLoad()
    }, [slug])
Check out the full source code: https://github.com/codewithsnowbit/notes-share-react
Thank you for reading
- Follow me on Twitter - @codewithsnowbit
- Subscribe me on YouTube - Code With SnowBit
44
