24
Understanding Git a little better.
I see that a lot of people are confused and even scared of git, especially the beginners. To me, git is an awesome and powerful tool. I will try to explain the common use cases of git. I will not be telling about the commands, but the concepts, so that it will be easier for everyone even if you are using a GUI tool to work with git.
Let's start by explaining a common word used across git, repository
A repository or a repo (as it is commonly called) is a folder containing all your source code, the build scripts, dependency information, unit tests, environment variables, etc. Basically, when you say you are working in an app, everything for that app will be under a single repository (although not necessary).

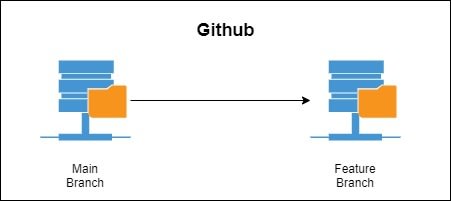
This is probably the most basic use case of a version control system. When you have an app running in production, typically you would not want to change its code as it might impact your live app. So, if you want to make any changes, first you need to create a copy of the original repo, and then work on it. Git allows us to easily create this copy by using Branches. The original repo is usually called the main branch or master branch. The copied branch can be named anything, feature, beta, v1.0, v2, depending on the naming scheme of your team. From here onwards, I will just call it the feature branch for simplicity's
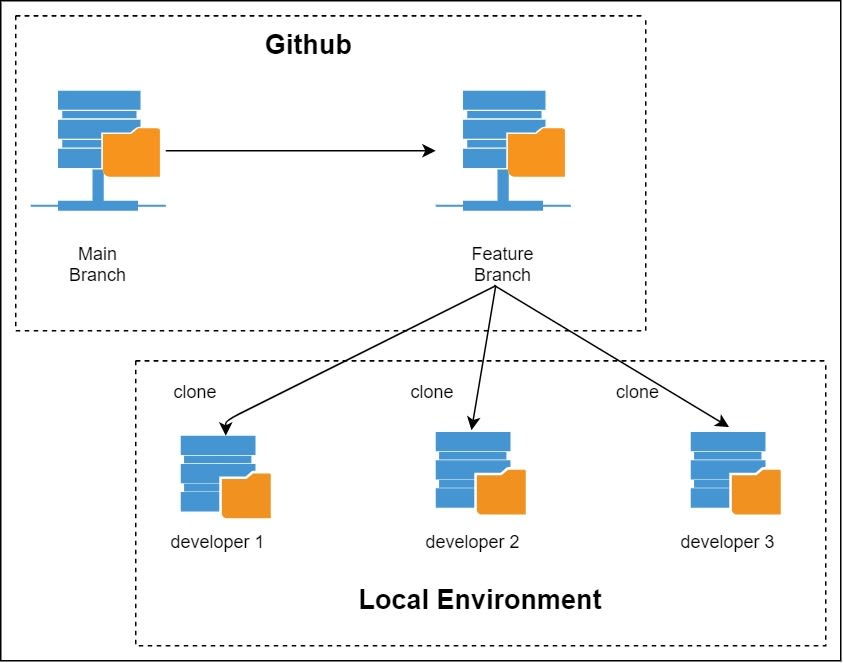
It's not a good idea to keep your code only in your local machine. If something happens to your computer, you will lose all your code. To prevent this from happening, we normally host our repos in servers like Github, Bitbucket, Codecommit, etc (Github being the most popular one). If your fellow developer wants to work on the code, they will need to download a copy of your code into their local machine. This process of downloading the code into our local machine from a server is called cloning.
You have made some changes for your feature. Now you need to save your changes into your git repository. We can do this by using commit. But commit not only saves the files but also creates a copy or snapshot of the original file and saves the file every time you perform commit. Commit is one of the core features of git. Git does not take any changes that we make into consideration unless we explicitly mark the change for commiting. This process of marking the change for commiting is called staging in git. After you stage a file, you will need to give some message on what the change is. This will be useful in case you ever want to come back to this commit. So it is always advised to give a proper and meaningful commit message. Each time we commit a change, git tracks it and adds a unique id for that commit. You can get the full information on all the commits by using git log or any nice GUI tool that shows the git graph.
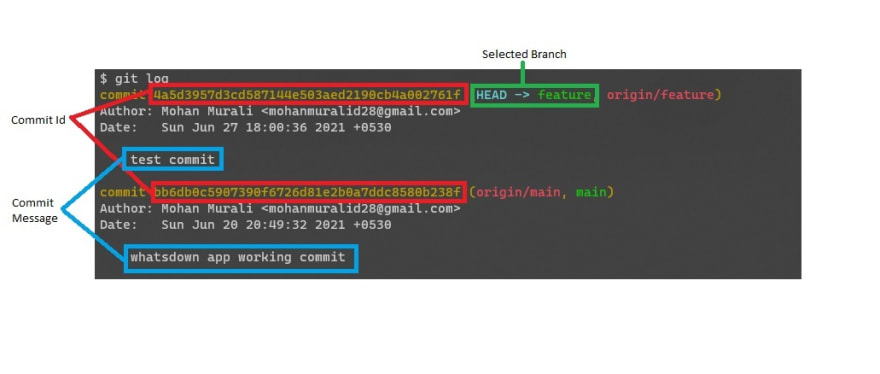
Log will show you where your current code is usually by marking them as head. It also shows other information's such as the commit message, author information, the date and time of the commit, etc. If you are using a GUI tool, it might show the information in a different way. If you are using VS code, I would recommend installing the git graph extension. It shows the information in a really nice way as below.
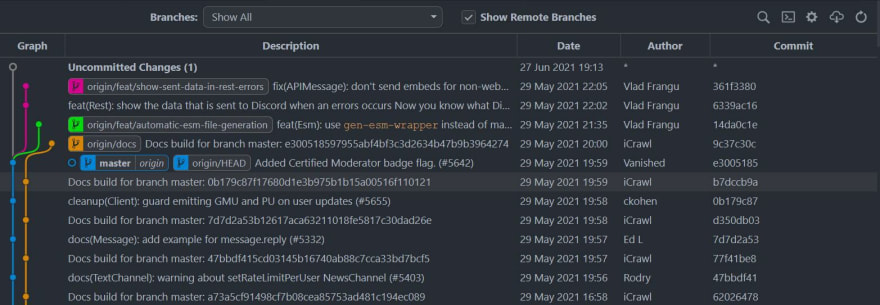
As you see the data is shown in a table here. The columns denote the commit messages, Date, author and commit ids. each row is actually a git commit. "origin/Head" shows at which commit the code is in our local, which in this case happens to be at "origin/master". "origin/docs", "origin/feat/automatic-esm-file-generation" and "origin/feat/show-sent-data-in-rest-errors" are the other branches in this repo (as you see in the graph column, they are also denoted with a different color). Here we can see that "origin/feat/automatic-esm-file-generation" and "origin/feat/show-sent-data-in-rest-errors" are branches with changes that are not there in the master branch as they start from the master branch.
When we make a change and commit the code, the change is only saved in our local machine. To share this change with other team members you will need to upload these changes into your git repository on your server. To do this we need to perform push. It's like we are pushing the code from our local machine back to the server.
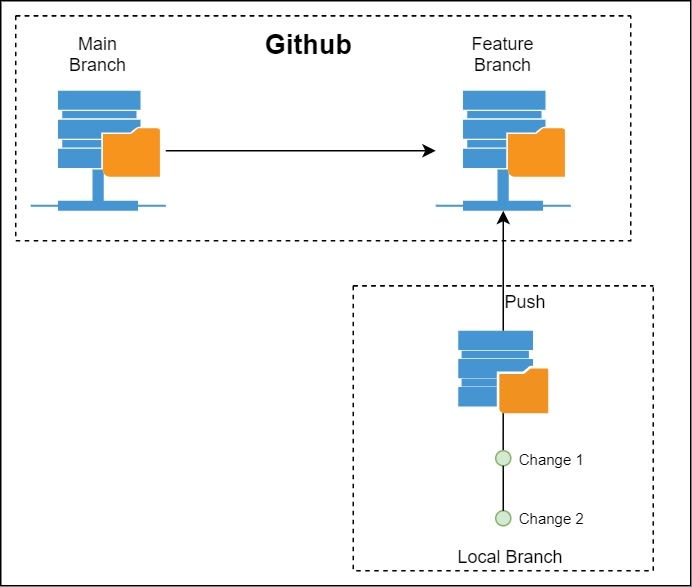
In a team, there will be more than one developer working on the code. The code in the server constantly keeps getting updated. But these changes will not be automatically downloaded into your local machine. To get the code into your local machine you need to pull. Pull will get the latest code of your selected branch into your local machine.
Pull will get the latest changes from the server into your local machine and update it in your branch. If you just want to get the latest changes of the branch, then you need to fetch. If you want all the latest changes from the server to your local, you have to perform Fetch All.
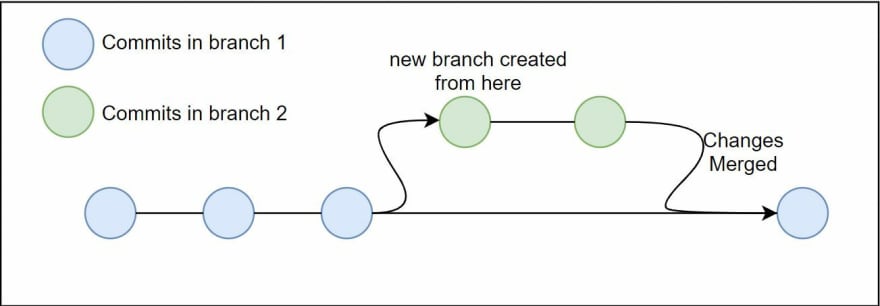
If you want to get the latest changes from another branch into your branch, then you will have to merge the other branch into the branch. If you are working on a file that was also changed in the other branch, then you will be shown conflicts while merging. You need to resolve these conflicts before you can proceed with the merge.
24
