37
Walk through – Using vRA to deploy vSphere with Tanzu Namespaces & Guest Clusters
This walk through will detail the technical configurations for using vRA Code Stream to deploy vSphere with Tanzu supervisor namespaces and guest clusters.
For a recent customer proof-of-concept, we wanted to show the full automation capabilities and combine this with the consumption of vSphere with Tanzu.
The end goal was to use Cloud Assembly and Code Stream to cover several automation tasks, and then offer them as self-service capability via a catalog item for an end-user to consume.
To achieve our requirements, we’ll be configuring the following:
- Cloud Assembly
- VCF SDDC Manager Integration
- Kubernetes Cloud Zone – Tanzu Supervisor Cluster
- Cloud Template to deploy a new Tanzu Supervisor Namespace
- Code Stream
- Tasks to provision a new Supervisor Namespace using the Cloud Assembly Template
- Tasks to provision a new Tanzu Guest Cluster inside of the Supervisor namespace using CI Tasks and the kubectl command line tool
- Tasks to create a service account inside of the Tanzu Guest Cluster
- Tasks to create Kubernetes endpoint for the new Tanzu Guest Cluster in both Cloud Assembly and Code Stream
- Service Broker
- Catalog Item to allow End-Users to provision a brand new Tanzu Guest Cluster in its own Supervisor Namespace
In my Lab environment I have the following deployed:
- VMware Cloud Foundation 4.2
- With Workload Management enabled (vSphere with Tanzu)
- vRealize Automation 8.3
- A Docker host to be used by Code Stream
For the various bits of code, I have placed them in my GitHub repository here.
This configuration is detailed in this blog post, I’ll just cover the high-level configuration below.
- Configure an integration for SDDC manager under Infrastructure Tab > Integrations
- Enter the details of your environment
- Now click into your new account and select the Workload Domains tab
- Select your Workload domain name and Click Add Cloud Account

- Provide the infrastructure account details for vCenter and NSX
- Or let the system provision new dedicated service accounts for you.

Now we need to configure the Kubernetes configurations of the vSphere with Tanzu cluster so that I can be consumed by vRA Cloud Assembly.
So next I’ll walk through the following steps:
- Create a Kubernetes Zone and add in your Workload Management enabled cluster on the Cluster Tab
- Provide a tag to the cluster
In the same Cloud Assembly Infrastructure UI view:
- Go to Kubernetes Zones > New Kubernetes Zone
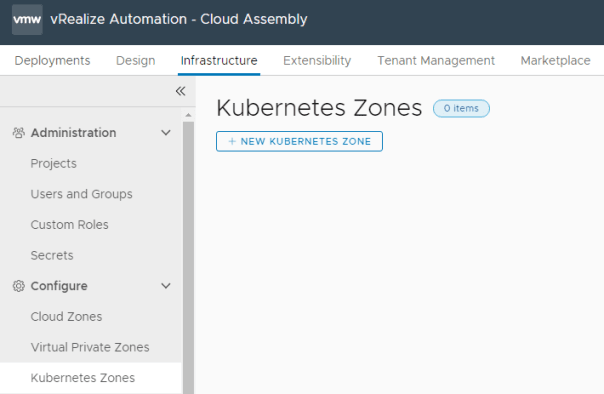
- Select your SDDC account
- Provide a name for your Kubernetes Zone
- Add a tag
- For my example files I used the tag “vwt-supc1”

- Click the Provisioning Tab
- Click add compute

- Select your cluster
- Click add

- Click save on the various dialog boxes to save your configuration.
Next, we need to link this Kubernetes Zone to our project.
- On your Project, select the Kubernetes Provisioning tab
- Click Add Zone
- Add the zone you’ve just configured

Now we have the infrastructure side of things configured, we will configure a Cloud Template to deploy our supervisor namespace.
Create your cloud template with the name “Deploy vSphere K8s Cluster in Namespace” and version of 1. This will mean importing the pipelines will be more seamless.
formatVersion: 1
inputs:
  ns-name:
    type: string
    title: Enter Supervisor Name
    description: Enter Supervisor Name
resources:
  Cloud_SV_Namespace_1:
    type: Cloud.SV.Namespace
    properties:
      name: ${input.ns-name}
    contraints:
      - tags: 'vwt:supc1'
- Create a version of this cloud template and release it, so we can consume it in Code Stream.
I recommend running a quick test to make sure a Supervisor Namespace is created successfully before you continue.
First, we will create several variables in the system, however as you see how these are used in the Code Stream pipeline, you could also specify them as User Inputs if you wanted.
- Create as regular variables
- vraUser
- vraFQDN
- vcf-vc
- vcf-username
- Create as secrets
- vraUserPassword
- vcf-password

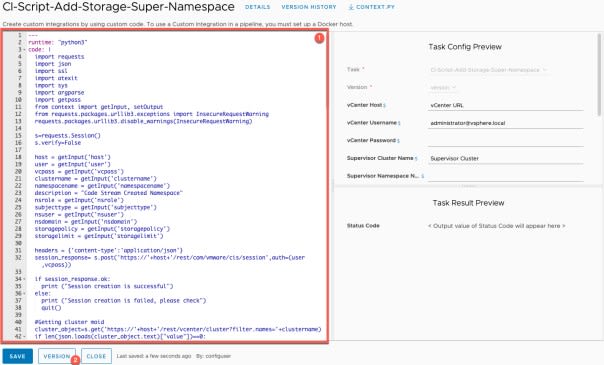
vRA currently does not support this configuration item as part of the Cloud Assembly template, so we will use a Code Stream custom integration to run a python script to do this for us. You can grab the code from here. (Backup link)
- Go to Custom Integrations > New Custom Integration
- Set the Name as “CI-Script-Add-Storage-Super-Namespace”
- This will mean the pipelines pick everything up fully.
- Runtime as “Python3” and click Create.

- Copy and paste in the code into the pane
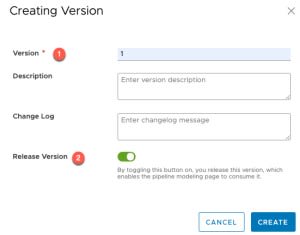
- Click to create a version
- Set a version number and enable the Release Version slider
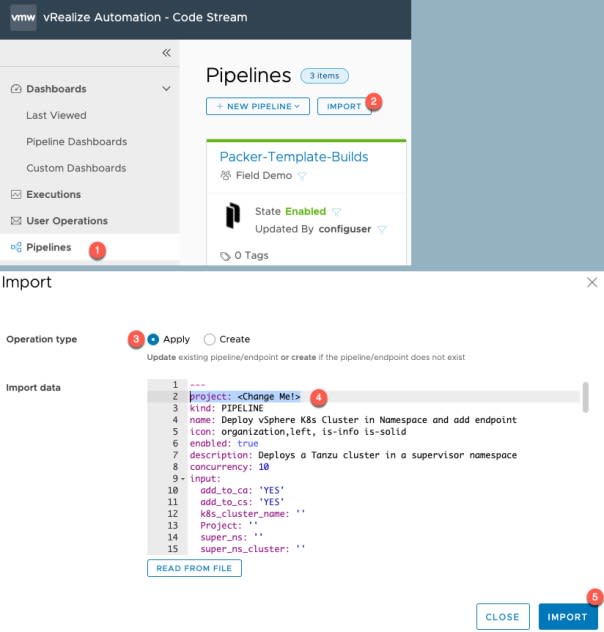
The first Code Stream pipeline to create (import) is for deleting a deployment. We will use this as a rollback option if our main pipeline fails, passing through the deployment name used to create the Supervisor Namespace. Therefore, if a task fails such as create a Tanzu Guest Cluster, the pipeline will clean up the namespace and delete any lingering objects.
- Go to Pipelines View > Click Import
- Apply the pipeline code from this file
- Change the Project name on line 2 to map to your correct project.
- Click import

- Enable the Pipeline

If you open the pipeline, you can see it’s a simple task using the “Type: VMware Cloud Template”, with the action to delete the deployment, with an input of the deployment name, which will be passed through from our main pipeline, if the rollback criteria are met (failed task within the stage).

Now we will import the main pipeline and the core of the functionality we are creating.
- Perform the same actions as the last pipeline import
- Using this file
Click to open the pipeline so we can make some changes for your environment.

When we open the pipeline, we’ll see the Model view, and all our Stages (Red Box) and Tasks (Purple Box). I’m going to high level cover off what each part of the pipeline does.
- Stage: Get vRA API
- This authenticates to our vRA cluster and gets a refresh token we can use in the later stages where we configure the Kubernetes Endpoints
- Stage: Create Supervisor Namespace
- Task: Create Supervisor Namespace from Blueprint
- Creates a deployment using the Cloud Template we configured earlier
- Runs our custom integration, using mainly the variables we created earlier.
- Uses a Storage policy called “Management Storage policy – Thin” which is a default policy. You can change this to another policy name or even have the user specify on deployment if you wish.
In the below screenshot, I’ve also highlighted when you can see a rollback is configured on the stage.

- Stage: Create Tanzu K8s Cluster
- Task: Create Login Script to Supervisor Cluster
- Inside of our container, we run a number of commands to create a login script to be used by Expect, where we can securely pass our password to login to the supervisor namespace.
- Task: Create Tanzu Cluster
- Login to the Supervisor namespace we created earlier.
- Create a YAML file with our Tanzu Guest Cluster deployment configuration
- Use kubectl to apply this configuration to our environment, which triggers the Tanzu supervisor namespace to build the cluster.
- Task: Checking for Cluster Completion
- A simple loop waiting for the Tanzu Guest Cluster status to change to “Running”.
- Stage: Configure Tanzu Cluster
- Task: Create Login Script to Tanzu Cluster
- Create a login script for use with expect to login to the context of our new Tanzu Guest Cluster
- Task: Create Cluster Service Account
- Creating a Service Account to be used by vRA for the Kubernetes Endpoints
- Task: Role Binding Service Account
- Create a role binding for the service account
- Stage: Integration-to-vRA
- Task: Collect-Cluster-Information
- Collect all the information we need to be able to configure the vRA Kubernetes endpoints
- Task: Create Code Stream K8s Endpoint
- API call to vRA to create the endpoint
- Task: Create Cloud Assembly K8s Endpoint
- API call to vRA to create the endpoint

We need to make a few changes to ensure that our pipeline can run successfully.
First, we need to set our docker host.
- Click the Workspace tab
- Select the appropriate docker host
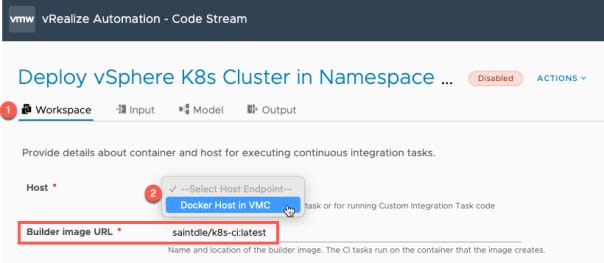
For this pipeline, we will be using my[K8s-ci container image](https://hub.docker.com/r/saintdle/k8s-ci) which is hosted in DockerHub. If your Docker host does not have internet access, then pull the image and host centrally via an image registry, or locally on the docker host.

Alternatively, you can build your own image, you will need installed:

- Python3 with the relevant modules used in the custom integration code
- kubectl
- yq

My container was built upon one provided by Chris McClanahan. Click [here](https://github.com/mcclanc/CodeStream-K8s-Blog/blob/master/DockerFile/Dockerfile) to get the Dockerfile/code to build the container. You can find the original container on DockerHub  [here](https://hub.docker.com/repository/docker/vmwarecmbu/k8s-ci-container).
On the Input tab, we have a few inputs configured, some which have defaults set already some which do not and will need to be provided by the user.
Each input has a clear description. The first two are used as conditional values determining if the tasks should run to create the Kubernetes Endpoints in Code Stream and Cloud Assembly

Under the Model view.
- Click Task: Create Supervisor Namespace from Blueprint
Ensure the correct template is selected. For deployment name in vRA, you can change the inputs, as needed, but make sure it makes the rollback action input.

To check the rollback actions, click the Stage then the rollback tab.

- Click Task: Update Supervisor Namespace
- Check that the right Custom Integration task has been selected with the right input values provided. See the above note for the Storage Policy in the explanation of pipeline section.

- Click Task: Create Tanzu Cluster
- I haven’t set an input for the version of Kubernetes you can deploy, you can change this, or manually set it to a version available within WCP.
- You can also set the number of Control-Plane and Compute-Plane nodes as well.

- Click Task: Create Code Stream K8s Endpoint AND/OR Create Cloud Assembly K8s Endpoint
Here I just wanted to highlight where we use the Input value “Add_to_CS/CA” as a precondition to running this part of the pipeline.

- Save and then enable your pipeline

- Run your Pipeline from the Pipeline screen or from within the Pipeline editing view itself.
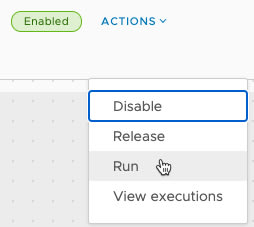
- Provide values for the necessary inputs.

To view the execution for the pipeline, click within your Pipeline edit view (you’ll have a screen banner at the top), or click Executions on the left-hand navigation pane.

As you pipeline runs, you can refresh and see the progress. You can click each stage name and task name to find out more information, see the inputs passed through from each task for example, and the outputs as you can see below.
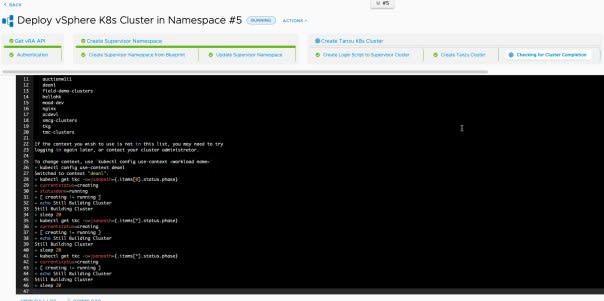
Eventually you should end up with a successful run below.


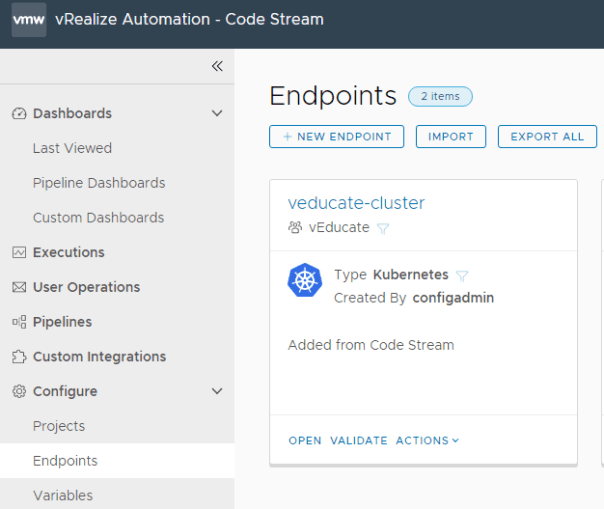

Release the pipeline for use by Service Broker.

You will see the below.

Move into Service Broker. Create a content source of “type: Code Stream Pipelines”

- Set a name for the content source
- Select the project which your pipelines are attached
- Validate, you should see a green return status box
- Save and Import

Click the Content Sharing Tab on the left-hand navigation pane. Select your project the pipeline is attached to. Then click add items.
Select the Code Stream Pipelines and save.

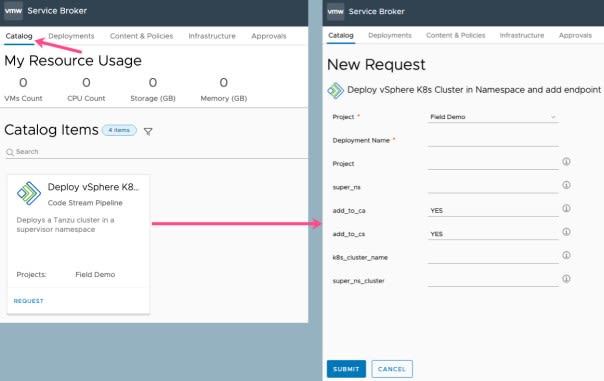
Finally, if we click on the Catalog tab along the top row. We can see our catalog item, and the requested inputs when we request the item.
This was quite a lengthy blog post; however we used all the areas of vRealize Automation to its full potential, and hopefully along the way you also seen how you may implement other automation workflows using vRA as well.
This solution is a means to an end, to provide a catalog item which can be used by an end user to easily request and deploy a Tanzu Guest cluster inside of its own supervisor namespace. From here we could be more dynamic and add in the ability to select from either a new or existing supervisor namespace, change the YAML file inputs used for the cluster sizing, and even use Service Broker to set governance policies on controlling the requests from users.
Below are several resources I used to create this automation and content; you’ll see my Pipeline is very similar but not quite the same as the below. Each blog post including this one, does something slightly different, uses a different product or the outcome is different.
Thanks to the CMBU Tech Marketing team members at VMware as well who helped me along the way with this as well.
Regards
The post Walk through – Using vRA to deploy vSphere with Tanzu Namespaces & Guest Clusters appeared first on vEducate.co.uk.
37
