26
Automating Building Images with Packer in Digitalocean
Packer is an open-source tool for creating machine images. Packer works with various cloud providers. This blog post will discuss how DigitalOcean and packer work together, what you need to get started, and show an example of how it can be used. This tutorial works for Ubuntu environment.
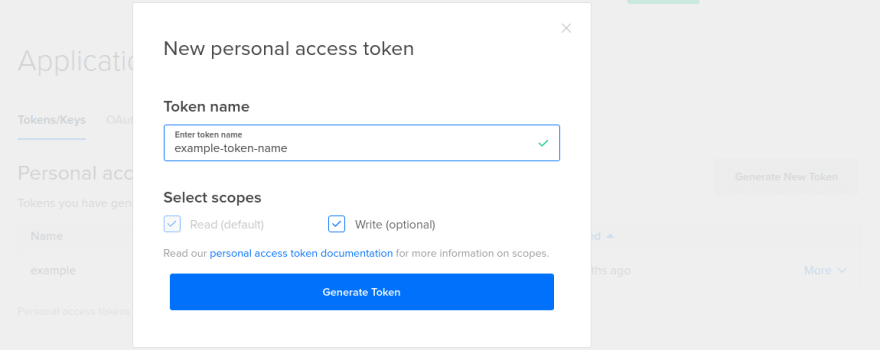
If you don't have an access token for your DigitalOcean account, make sure to generate it first.
Login to DigitalOcean account, on the left sidebar choose API and click on Generate New Token.
Login to DigitalOcean account, on the left sidebar choose API and click on Generate New Token.

In your Ubuntu machine, create an environment variable for DIGITALOCEAN_TOKEN
export DIGITALOCEAN_TOKEN="MY_TOKEN"Don't forget to replace MY_TOKEN with the actual token
Packer has 2 main elements, provisioners and builders.
This is how the packer file should look like.
Builders let you create images on various platforms like AWS EC2 and DigitalOcean, while provisioners let you run commands and manipulate the VM before creating the image.This is how the packer file should look like.
{
    "variables": {
      "version": "VERSION-OF-YOUR-APP",
      "do_token": "{{env `DIGITALOCEAN_TOKEN`}}"
    },
    "builders": [{
      "type": "digitalocean",
      "api_token": "{{user `do_token`}}",
      "image": "ubuntu-20-04-x64",
      "region": "nyc3",
      "size": "s-4vcpu-8gb",
      "ssh_username": "root",
      "droplet_name": "myapp-{{user `version`}}",
      "snapshot_name": "myapp-{{user `version`}}-{{timestamp}}"
    }],
    "provisioners": [{
      "type": "file",
      "source": "files/one-click-image",
      "destination": "/etc/update-motd.d/one-click-image"
    }, {
      "type": "shell",
      "scripts": [
        "scripts/my-script.sh"
      ]
    },{
      "type": "shell",
      "inline": [
        COMMANDS HERE
        .
        .
        .
      ]
    }]
  }
As you see in builders section you define cloud provider information, server characteristics and also image and server name.
In provisioners section you can use file, inline shell script and script file to run on your server before creating the final image.
In provisioners section you can use file, inline shell script and script file to run on your server before creating the final image.
Now Imaging you are using Rocket.Chat in your company for Communications and your tech lead asked you to create one click installer of the latest version of it in DigitalOcean.
create a folder called
do-rocketchat and create a file called builder.json in it. The file should like following{
"variables": {
"version": "latest",
"do_token": "{{env `DIGITALOCEAN_TOKEN`}}"
},
"builders": [{
"type": "digitalocean",
"api_token": "{{user `do_token`}}",
"image": "ubuntu-20-04-x64",
"region": "nyc3",
"size": "s-1vcpu-1gb",
"ssh_username": "root",
"droplet_name": "rocketchat-{{user `version`}}",
"snapshot_name": "rocketchat-{{user `version`}}-{{timestamp}}"
}],
"provisioners": [ {
"type": "shell",
"inline": [
"sleep 20",
"sudo apt-get update -y",
"sudo apt-get upgrade -y",
"sudo snap install rocketchat-server"
]
}
]
}curl -fsSL https://apt.releases.hashicorp.com/gpg | sudo apt-key add -
sudo apt-add-repository "deb [arch=amd64] https://apt.releases.hashicorp.com $(lsb_release -cs) main"
sudo apt-get update && sudo apt-get install packerIn do-rocketchat folder where you have builder.json file run the following
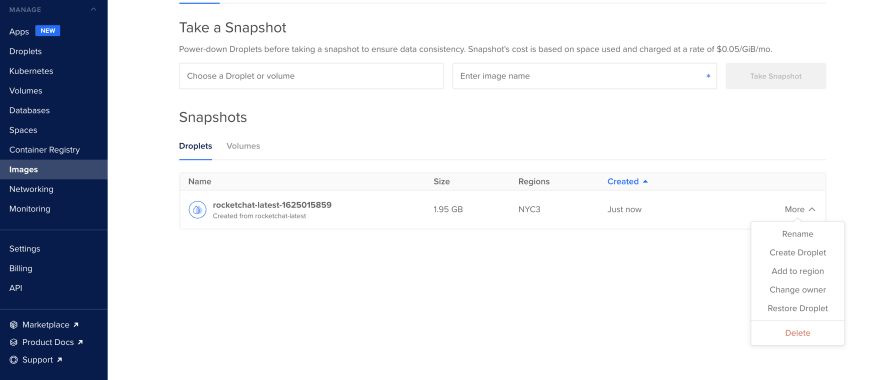
packer build builder.jsonBy going to images and choosing the image you just built, you can create a droplet based on that, and you can visit http://publicIP:3000, and you will see the RokcetChat UI.
This example was pretty simple but with provisioners you have a full power of running scripts, inline commands in the server to install multiple applications and prepare the server based on your need.
26

