
63
Creating adaptive layouts with Flutter
In this tutorial you'll learn how to easily make a UI layout for your flutter app that adapts to different screen sizes with the
adaptive_layout package.The next few sections show how to build a simple UI that displays a list of movie posters and titles and allows the user to see more details of the movie when they tap an item in the list.
On small, phone-sized, screens when the user taps an item they will navigate to a different screen with the details.
On large screens, when the user taps a list item the details are displayed on the right side of the list and there is no navigation.

Even better than an image, see a live demo of what we'll be building.
We'll take care of the behavior expected for small screens first, then adapt our implementation for larger screens. These are the steps:
adaptive_layout packageGo ahead and
create a new flutter app.flutter create adaptive_layout_exampleWe'll be using a hard-coded data set, so we can focus our efforts on the UI layout.
lib folder, create a folder called data with a file named data.dart.Create a
Movie class with a static function that parses the data into a list of Movies and returns the list.lib folder, create a folder called model with a file movie.dart.import '../data/data.dart';
class Movie {
final int id;
final String title;
final String overview;
final String posterPath;
Movie({
required this.id,
required this.title,
required this.overview,
required this.posterPath,
});
static List<Movie> getList() => data
.map(
(element) => Movie(
id: element['id'],
title: element['title'],
overview: element['overview'],
posterPath: element['poster_path'],
),
)
.toList();
}
const String LARGE_POSTER_BASE_URL = "https://image.tmdb.org/t/p/w300";
const String SMALL_POSTER_BASE_URL = "https://image.tmdb.org/t/p/w92";Now let's create a page that will display the list of movies:
lib called pages. pages folder create a file named movie_list_page.dart.movie_list_page.dart create two StatelessWidgets: one called MovieListPage and another called MovieListView, with this content.
class MovieListPage extends StatelessWidget {
const MovieListPage({Key? key}) : super(key: key);
Widget build(BuildContext context) {
final movies = Movie.getList();
return Scaffold(
appBar: AppBar(
title: Text('Movies'),
),
body: MovieListView(
movies: movies,
onTapItem: (Movie movie) {
// TODO: Navigate to detail screen
},
),
);
}
}
class MovieListView extends StatelessWidget {
final List<Movie> movies;
final Function(Movie) onTapItem;
const MovieListView({
Key? key,
required this.movies,
required this.onTapItem,
}) : super(key: key);
Widget build(BuildContext context) {
return ListView.builder(
itemCount: movies.length,
itemBuilder: (context, index) {
final movie = movies[index];
return ListTile(
key: Key('list_item_$index'),
leading: Image.network(SMALL_POSTER_BASE_URL + movie.posterPath),
title: Text('${movie.title}'),
contentPadding: EdgeInsets.all(12.0),
onTap: () {
onTapItem.call(movie);
},
);
},
);
}
}Observe that
MovieListPage is a container widget for the presentational MovieListView widget.Now, remove the framework generated
MyHomePage and _MyHomePageState classes from lib/main.dart and use MovieListPage() as the home widget for the MaterialApp. The lib/main.dart file should now look like this:void main() {
runApp(MyApp());
}
class MyApp extends StatelessWidget {
Widget build(BuildContext context) {
return MaterialApp(
title: 'Adaptive Layout Tutorial',
theme: ThemeData(
primarySwatch: Colors.blue,
),
// Use `MovieListPage()` as the `home` widget
home: MovieListPage(),
);
}
}The list page should now be displayed when the app starts:

Now let's create a page that will display more details of a given movie:
pages folder create a file named movie_detail_page.dart.movie_detail_page.dart create two StatelessWidgets: a container widget called MovieDetailPage and a presentational MovieDetailView widget, with this content:
class MovieDetailPage extends StatelessWidget {
final Movie movie;
const MovieDetailPage(
this.movie, {
Key? key,
}) : super(key: key);
Widget build(BuildContext context) {
return Scaffold(
appBar: AppBar(),
body: MovieDetailView(movie),
);
}
}
class MovieDetailView extends StatelessWidget {
final Movie movie;
const MovieDetailView(
this.movie, {
Key? key,
}) : super(key: key);
Widget build(BuildContext context) {
return SingleChildScrollView(
padding: EdgeInsets.all(24.0),
child: Column(
crossAxisAlignment: CrossAxisAlignment.center,
children: [
ClipRRect(
borderRadius: BorderRadius.circular(10.0),
child: Image.network(LARGE_POSTER_BASE_URL + movie.posterPath),
),
SizedBox(height: 24.0),
Text(
movie.title,
style: Theme.of(context).textTheme.headline4,
textAlign: TextAlign.center,
),
SizedBox(height: 24.0),
Text(
movie.overview,
style: Theme.of(context).textTheme.subtitle1,
textAlign: TextAlign.center,
),
],
),
);
}
}For simplicity, we are just displaying the poster image, title and overview of the movie in the detail view.
Update the
onTapItem() callback of the MovieListView in the MovieListPage widget, so we can navigate to the detail screen and back.// Within the `MovieListPage` widget
onTapItem: (Movie movie) {
Navigator.push(
context,
MaterialPageRoute(builder: (context) => MovieDetailPage(movie)),
);
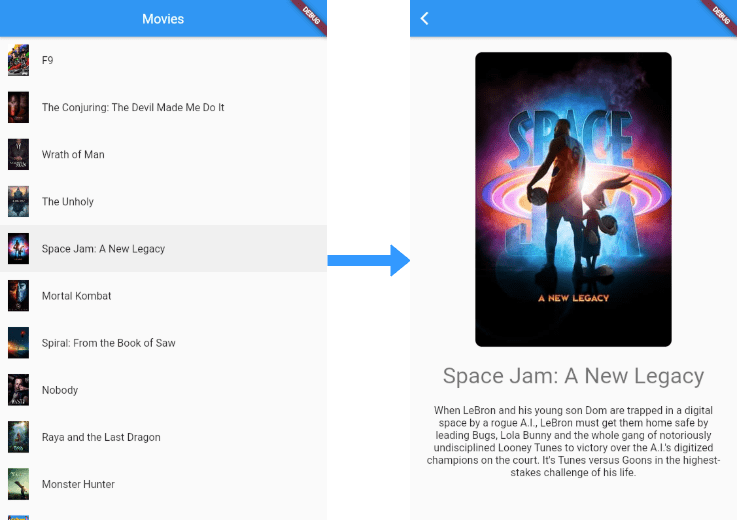
},With that, our small screen UI is done! You should now be able to navigate to the detail screen and back:
As a first step to making our layout adaptive to different screen sizes:
MovieListPage to a StatefulWidget. (In VS Code place the cursor on StatelessWidget, press CTRL/CMD + . and select "Convert to StatefulWidget".)HomePage and the file to home_page.dart. On small screens the
HomePage widget will contain only the MovieListView. On large screens the HomePage widget will contain the MovieListView and the MovieDetailView side by side. You'll understand why we converted the widget to a StatefulWidget in just a bit.To help us implement us display different layouts on different screen sizes we'll use the
adaptive_layout package.$ flutter pub add adaptive_layoutThis will add a line like this to your package's pubspec.yaml (and run an implicit dart pub get).
dependencies:
adaptive_layout: ^0.1.3home_page.dart, import the package:
import 'package:adaptive_layout/adaptive_layout.dart';body of the Scaffold of HomePage to be an AdaptiveLayout with a smallLayout and a largeLayout like so:
class HomePage extends StatefulWidget {
const HomePage({Key? key}) : super(key: key);
_HomePageState createState() => _HomePageState();
}
class _HomePageState extends State<HomePage> {
Widget build(BuildContext context) {
final movies = Movie.getList();
return Scaffold(
appBar: AppBar(
title: Text('Movies'),
),
// Now using an `AdaptiveLayout` as the `body`
body: AdaptiveLayout(
// Provide `MovieListView` as the `smallLayout`
smallLayout: MovieListView(
movies: movies,
onTapItem: (Movie movie) {
Navigator.push(
context,
MaterialPageRoute(builder: (context) => MovieDetailPage(movie)),
);
},
),
// Provide a `Row` as the `largeLayout`
largeLayout: Row(
children: [
Expanded(
child: MovieListView(
movies: movies,
onTapItem: (Movie movie) {
// TODO: Update detail view to the right
},
),
),
Expanded(
child: Container(
child: Center(
child: Text(
'Select a movie from the list on the left to see the details here.',
),
),
),
)
],
),
),
);
}
}The
smallLayout is just our MovieListView and the largeLayout is a 2-column Row with the MovieListView in the first Expanded column.At this point, on small screens the app should have the same behavior as before of navigating to the detail page when a list item is tapped. On large screens we should now see the list on the left-hand side of the screen and the message "Select a movie from the list on the left to see the details here" in the center of the right-hand side of the screen:

However, nothing happens when we tap a list item on large screens. Let's tackle that next.
With a few new lines of code in the
home_page.dart file we can display the detail view on the right hand side when an item is tapped on large screens._HomePageState of type Movie? named _selectedMovie.
class _HomePageState extends State<HomePage> {
  Movie? _selectedMovie;

...onTapItem() callback of the MovieListView in the largeLayout of the AdaptiveLayout widget to update the _selectedMovie property with setState. This is why we converted the widget to a StatefulWidget a few steps ago.
// Within the `largeLayout`
onTapItem: (Movie movie) {
  setState(() {
    _selectedMovie = movie;
  });
},Expandable of the Row to display the message if _selectedMovie is null and the MovieDetailView otherwise.
Expanded(
  child: Container(
    child: _selectedMovie == null
        ? Center(
            child: Text(
              'Select a movie from the list on the left to see the details here.',
            ),
          )
        : MovieDetailView(
            _selectedMovie!,
          ),
  ),
)
And... we're done! 🎉
On small, phone-sized, screens when the user taps an item they will navigate to a different screen with the details and on larger screens the details are displayed on the right side of the list and there is no navigation.

To make our app look a little better, let's leave the selected list item highlighted and put a divider line between the list view and the detail view with a few new lines of code in the
home_page.dart file.selectedId attribute to MovieListView, so it knows which item a selected.
class MovieListView extends StatelessWidget {
  final List<Movie> movies;
  final Function(Movie) onTapItem;
  final int? selectedId;

  const MovieListView({
    Key? key,
    required this.movies,
    required this.onTapItem,
    this.selectedId,
  }) : super(key: key);

...itemBuilder of the ListView.builder to wrap the ListTile in a Container and give the Container color if the ListTile's movie is the selected one.
itemBuilder: (context, index) {
  final movie = movies[index];

  final color = movie.id == selectedId
      ? Theme.of(context).primaryColor.withOpacity(0.25)
      : Colors.transparent;

  return Container(
    color: color,
    child: ListTile(
      key: Key('list_item_$index'),
      leading: Image.network(SMALL_POSTER_BASE_URL + movie.posterPath),
      title: Text('${movie.title}'),
      contentPadding: EdgeInsets.all(12.0),
      onTap: () {
        onTapItem.call(movie);
      },
    ),
  );
},Expandable of the Row in the largeLayout of the AdaptiveLayout to provide the selected movie's id to the MovieListView.
Expanded(
  child: MovieListView(
    movies: movies,
    onTapItem: (Movie movie) {
      setState(() {
        _selectedMovie = movie;
      });
    },
    selectedId: _selectedMovie?.id,
  ),
),Container with some BoxDecoration.
Expanded(
  child: Container(
    decoration: BoxDecoration(
      border: Border(
        left: BorderSide(
          color: Colors.grey[300]!,
          width: 1.0,
        ),
      ),
    ),
    child: _selectedMovie == null
        ? Center(
            child: Text(
              'Select a movie from the list on the left to see the details here.',
            ),
          )
        : MovieDetailView(
            _selectedMovie!,
          ),
  ),
)
Of course the sky's the limit with the design, but I think our app is minimally presentable now:
I chose not to TDD this so we could focus on the layout, but you can find the tests here in the source code.
Note in the tests that I use
WidgetTester to specify a small screen size in a setUp function like this:setUp(() {
binding.window.physicalSizeTestValue = Size(
AdaptiveLayout.getBreakpoints().mediumScreenMinWidth - 10,
500,
);
binding.window.devicePixelRatioTestValue = 1.0;
});and to specify a large screen size like this:
setUp(() {
  binding.window.physicalSizeTestValue = Size(
    AdaptiveLayout.getBreakpoints().largeScreenMinWidth + 10,
    500,
  );

  binding.window.devicePixelRatioTestValue = 1.0;
});
Head over the the Github repo to see the complete source code with a separate commit for each step 😉.
Congrats on making it to the end and thanks for following along! 👏 ❤️ ⭐ 🦄 🔖
63