
27
AWS Lambda 101: Setting Up a Recurring AWS Lambda Function Using AWS EventBridge
There are many ways for triggering a Lambda function. You could manually run it. You can have it run automatically when a new object is added to an s3 bucket. You can have it run when someone accesses a specific endpoint.
One common need is to have the Lambda function run on a recurring schedule. We can achieve this using AWS's EventBridge.
Before we set up our schedule, let's quickly create our Lambda function. If you've never set up one before, check out my "How To Create Your First Python AWS Lambda Function" article.
For this example, I will use a very basic Lambda function that simply prints out the time the event triggered the Lambda function. When EventBridge triggers a Lambda function, it will pass a variety of data to the event object including a time value.
def handler(event, context):
    '''Gets called by the Lambda environment.'''
    print(event['time'])
Now, I'll create my Lambda function and copy in this code as shown in the screenshot below.
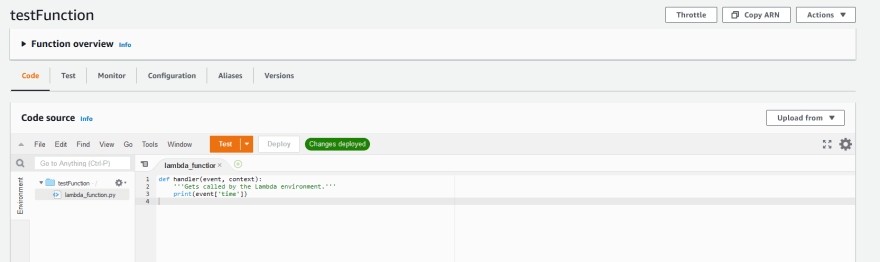
If you are copying in that same sample code, remember to update the "handler" setting in the runtime settings. Then, click the "Deploy" button.
Now that I have the sample function in place, let's go to AWS's EventBridge.
To get started, you will need to sign in to your AWS account.
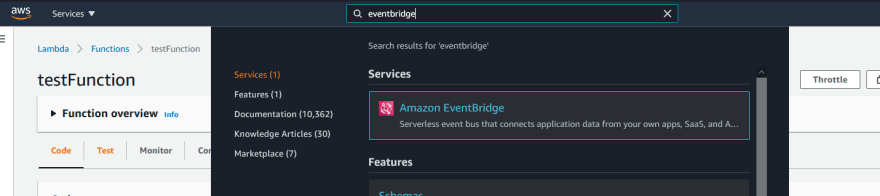
Once in your AWS console, you can either click on "Services" to go to "Application Integration"->"Amazon EventBridge" or use their search bar to search for Amazon EventBridge.
On the EventBridge page, you will see some navigation along the left. Click on "Rules".
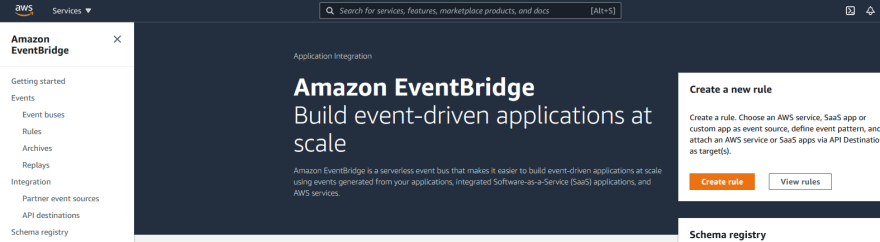
On the rules page, click the orange "Create rule" button along the right.

On the rule creation page, you will need to fill in a few fields. First, enter in a name. I recommend something that includes what it does and how often. For example, something such as "cleanTweetDataHourly". Next, fill in a description.
In the "Define pattern" section, click on "Schedule". Now, you will have two options. First, you can enter a fixed rate, such as every 1 hour. Or, you can use a cron expression.
To demonstrate the Lambda working, I am going to go with a fixed rate of once every 1 minute. If you are following along, I strongly recommend another rate or making sure you disable this so you don't encounter a large bill at the end of the month.

You can skip the event bus section for scheduled rules. If you were using rules for something beyond scheduled Lambda functions, you can set up different event buses to act as different event pipelines. Since that isn't supported on scheduled rules, we can skip it.
In the "Select targets" section, select "Lambda function" for the target and then select your Lamdba function in the "Function" dropdown. For most functions, you will keep the default settings for the function here.

If you have a lot of rules, you can set up some tags to organize them. I'll skip that here.
Lastly, click the "Create" button.
Great job! Your Lambda is now set on a recurring schedule. We can verify this by going back to our Lambda function and clicking the "Monitor" tab.

Here, we can see when the function was invoked, how long it ran, and other metrics. We see our function being invoked on a recurring schedule. We can also click the "Logs" tab to view logs from our function. If we click into one, we will be able to see where it printed out the time from the event sent by EventBridge.

If you are following along and are finished testing your rule, you can disable or delete the rule by going back to the "Rules" page. If you select your rule, you can click the "Disable" button to stop the function from running or the "Delete" button to remove the rule entirely.

Now that you have set up a Lambda function and set it up on a recurring schedule, there is so much you can do such as having a Twitter bot tweet on a recurring schedule or having a script to clean your data that gets run every hour. In future articles, I'll look at safely passing credentials to it and add other Python libraries to it.
Be sure to follow to get notified when my next article is published!
27