
29
Deploy your Deep Learning model with Flask, on AWS EC2 Instance
Amazon Elastic Compute Cloud (Amazon EC2) is a web service that provides secure, resizable compute capacity in the cloud. It is designed to make web-scale cloud computing easier for developers. AWS Free Tier provides 750 hours per month of Linux, RHEL, SLES t2.micro or t3.micro instances and 750 hours per month of Windows t2.micro or t3.micro instances.
Any individual can Sign Up and use these services for free for 12 months. Your services will be activated after 24 hours of signing up.
In this blog, I have demonstrated deployment of trained deep learning models with your Flask app, on AWS EC2 instances.
I deployed a trained TensorFlow Deep Learning Flask API step by step, from scratch, along with setting up all the necessary resources and packages.
The model is based on Transformer Neural Networks and was trained in Google Colab’s GPU runtime.
So let’s get started!
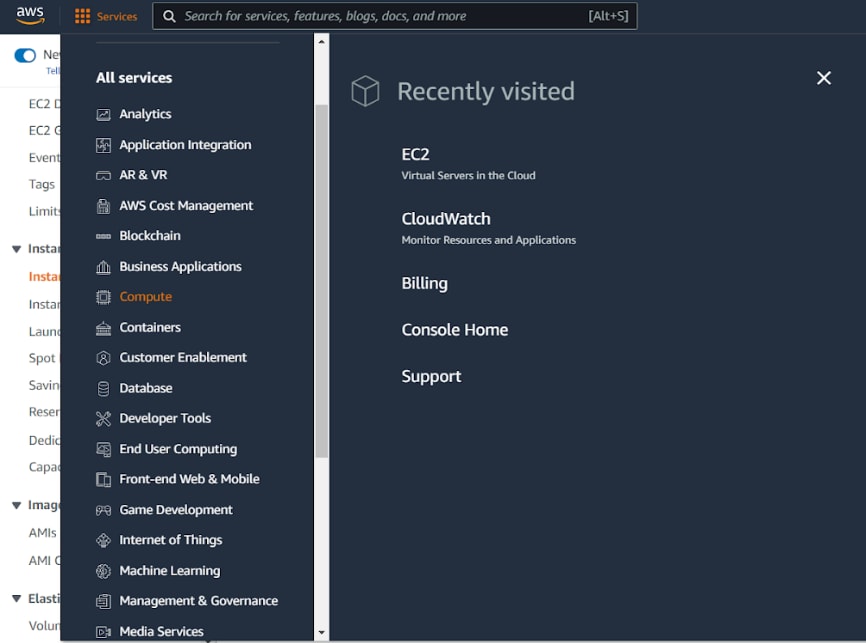
In the services dropdown, click “Compute”. This opens another right panel, as shown in the above pic. Click on the EC2 option.

You will see all your ec2 type instances running. Click “Launch Instances” to launch a new instance.
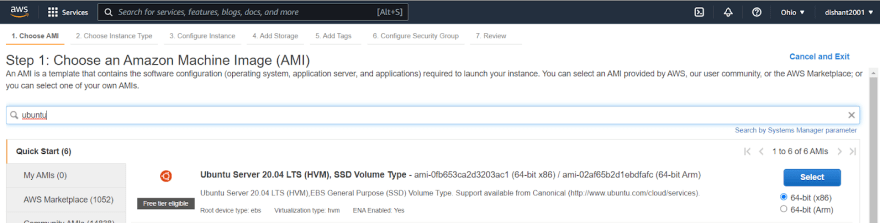
Choose your Ubuntu machine, here I have chosen Ubuntu Server 20.04 LTS, SSD Volume Type ,64-bit (x86).
Choose your instance type as t2.micro. Obviously, this is the only choice available for Free Tier. We’ll be modifying the memory partitions according to us, and increasing the internal storage.
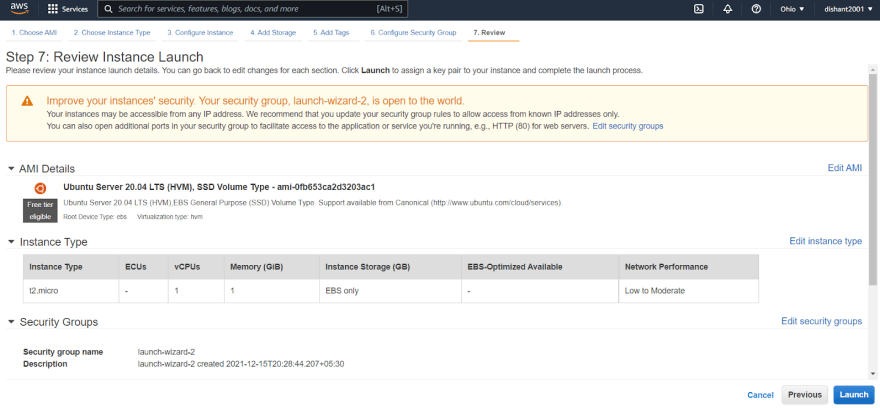
“Review and Launch” the instance.

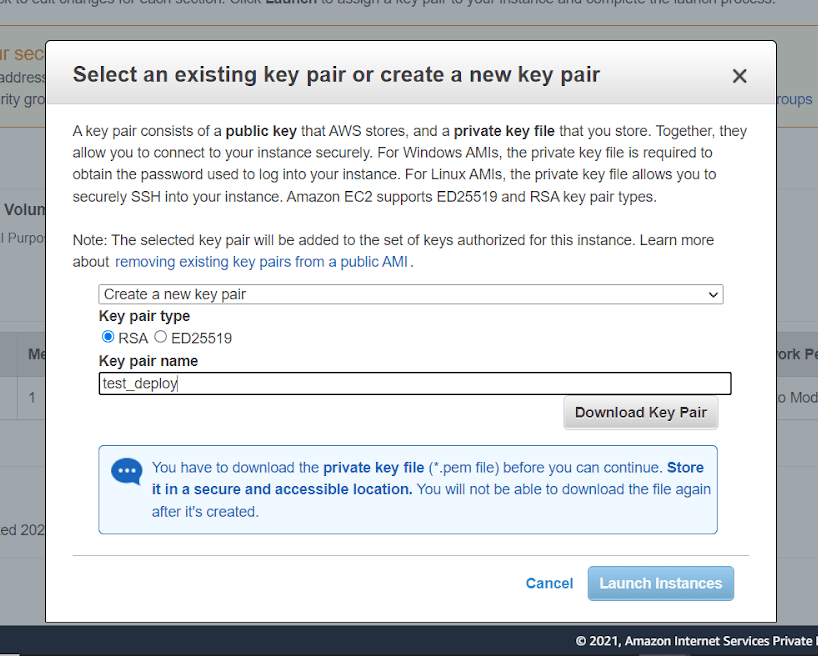
“Create a new key pair” to connect to your instance securely and remotely with SSH protocol. Name it and download it to the same folder with your Flask app.
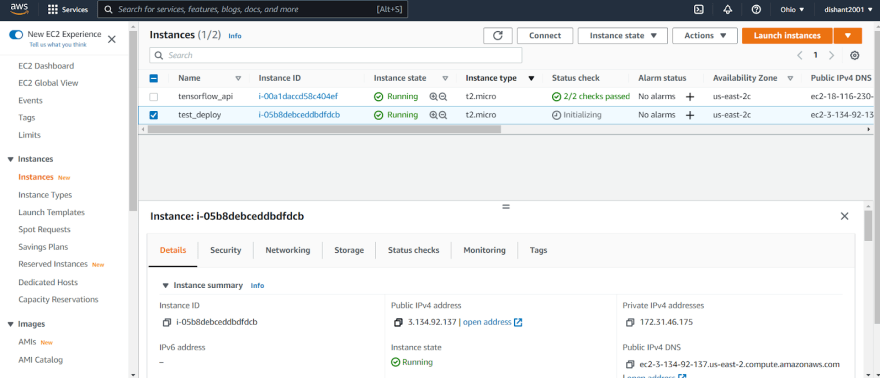
You’ll see your instance up and running. You can rename it as you want. I renamed it as “test_deploy”.

Now, we’ll be creating a security group for our instance.
A security group acts as a virtual firewall for your instance to control inbound and outbound traffic. Here, in the instances, scroll right and you will see the current default security groups for your instance.
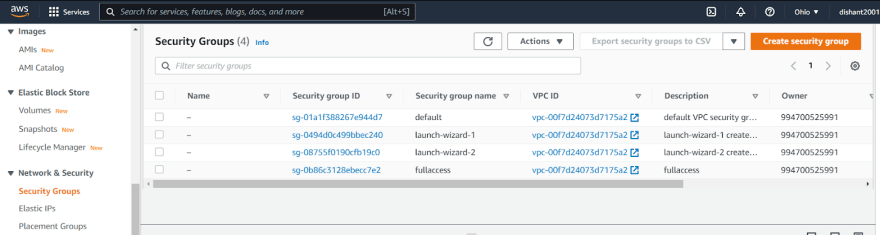
Go to the Security Groups from the left panel, you see all the currently available Security Groups.
“Create security group”. Give it a name, a description and click on “Add rule” to add your inbound rule.
In my instance, I have set the type to “All Traffic” to allow access to all the available ports, and Source to “Anywhere with IPv4” which sets the Classless IP as 0.0.0.0/0 to allow any address. You can set these according to your requirements and what ports you want to expose.

Going back to the instances,
right-click on your instance → Security → Change Security Groups.

Click on the search bar, you would see your created security group. Click on your security group, click on “Add Security Group”, and finally click “Save”.
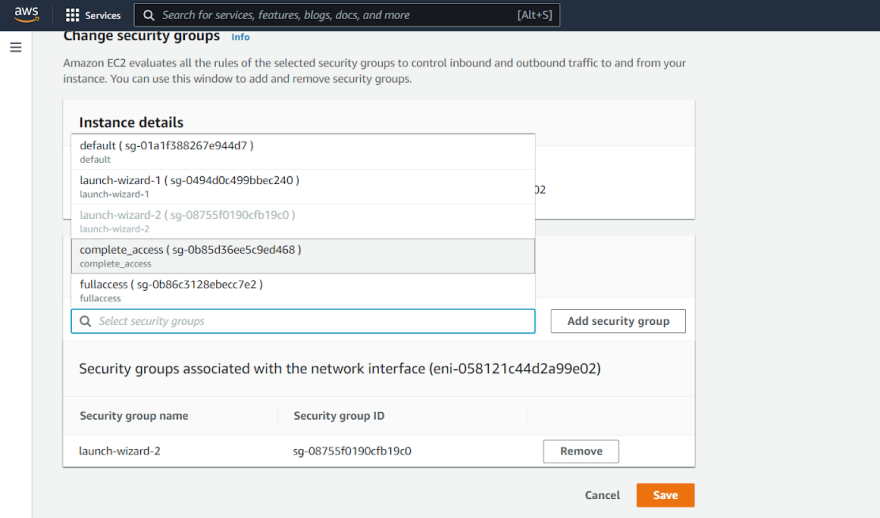
Again, going back to the Instances, you will see your security group applied to your instance.
We’ll not be typing each command in the terminal, instead we will be using light software like PuTTY, PuTTYgen (for PEM to PPK conversion), and WinSCP to establish SSH (Secure Shell) remote control.
Download Links:
PuTTYgen: https://the.earth.li/~sgtatham/putty/0.76/w64/puttygen.exe
PuTTY: https://the.earth.li/~sgtatham/putty/0.76/w64/putty.exe
WinSCP: https://winscp.net/download/WinSCP-5.19.5-Setup.exe
Start the puttygen.exe and load the .pem file from your directory.
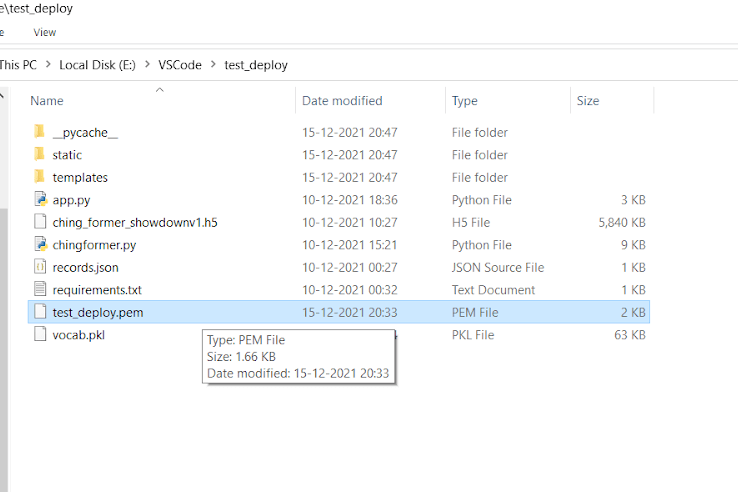

Provide the generated .ppk (putty private key) file with a name and save it in the same directory.

Now, start WinSCP to establish SSH remote control.
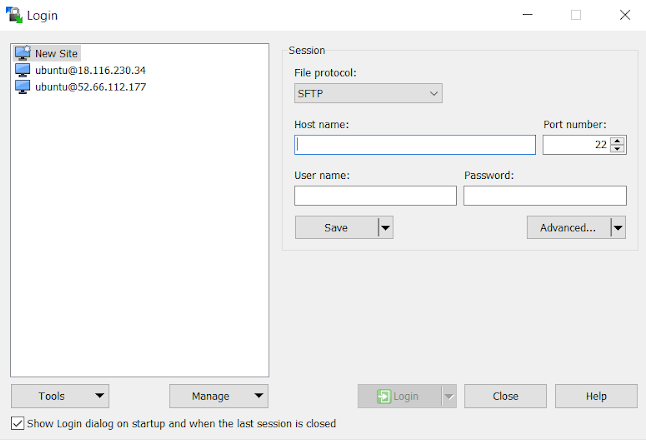
Copy the Public IP address for your instance and paste it in the “Host Name” field. Click the “Advanced” option, select Authentication beneath SSH and load the previously generated .ppk file.
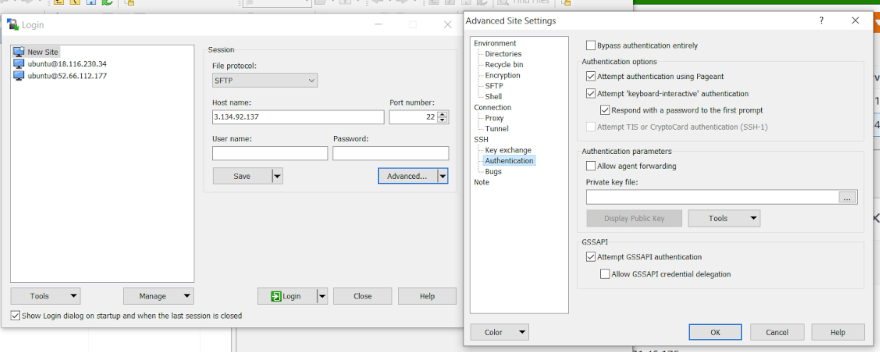
Enter User Name as “ubuntu”, click save, and then click login.
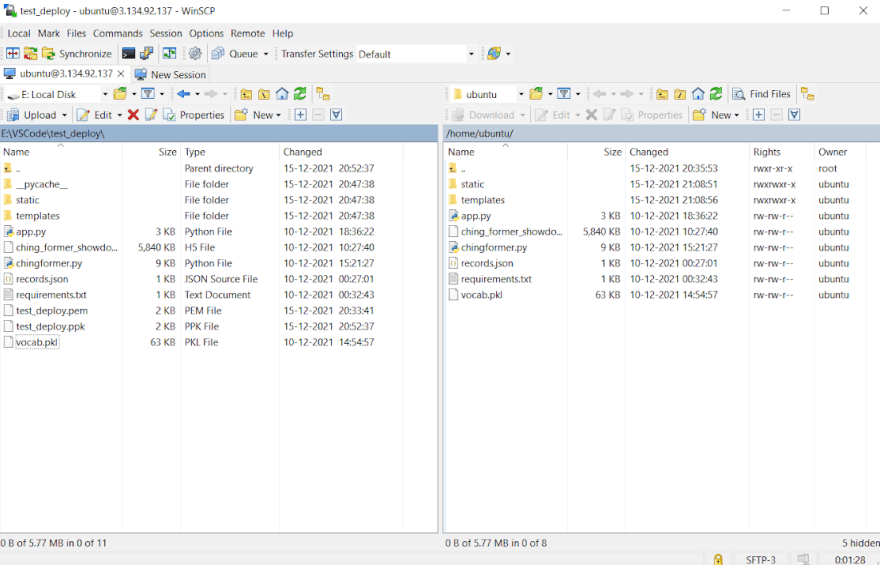
Congo!! Now you have successfully remote controlled your AWS EC2 instance.
The left panel now shows your local directory, and the right panel shows the ubuntu remote directory.
Transfer your program files just by dragging and dropping them into the right panel.
Now, it’s time to start the remote machine’s terminal. Start putty.exe.
Paste your instance public IP in the “Host Name” field.

Go to SSH → Auth in the left panel, and load the .ppk file again.
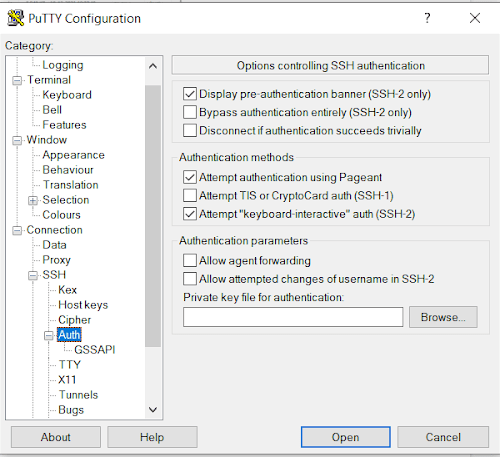
Click the “Session” option in the left panel to come back, enter a name for your session and click “Save”.
I entered the name as “test_deploy”
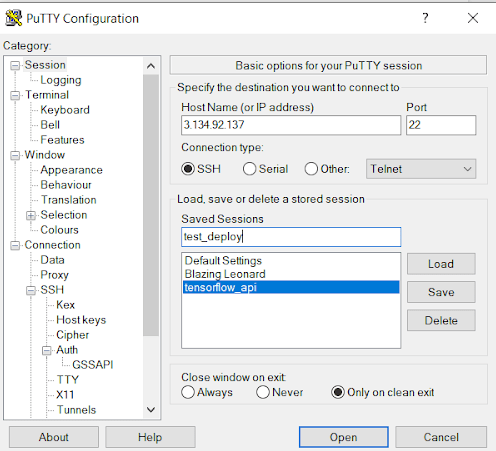
Double-click the name or click “Open” to start the terminal.
Login as “ubuntu”

To view the files, and directories present in the root directory
ls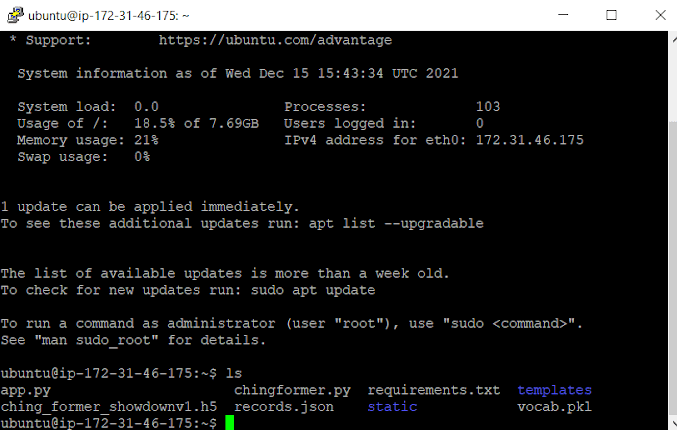
There are no dependencies already installed in the instance. Hence, we’ll be getting all the necessary updates followed by installation of python3.
sudo apt-get update && sudo apt-get install python3-pipA prompt asks for “Do you want to continue? (Y/n)”, press ‘y’ and continue.

I had prepared a requirements.txt file with all the dependencies and packages my application required.
To install those, simply run:
sudo pip3 install -r requirements.txtAfter the installation of various libraries, we might not be left with enough space, needed for those heavy deep-learning models, or any other files.
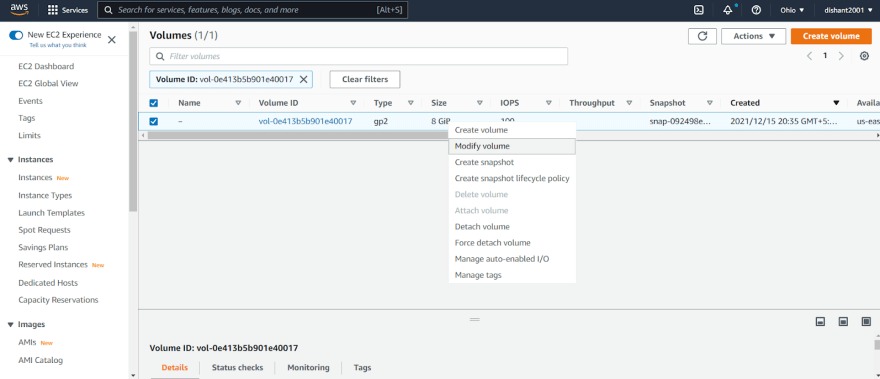
We go back to our AWS Management Console,
click checkbox near your instance → Storage tab → Click on volume id

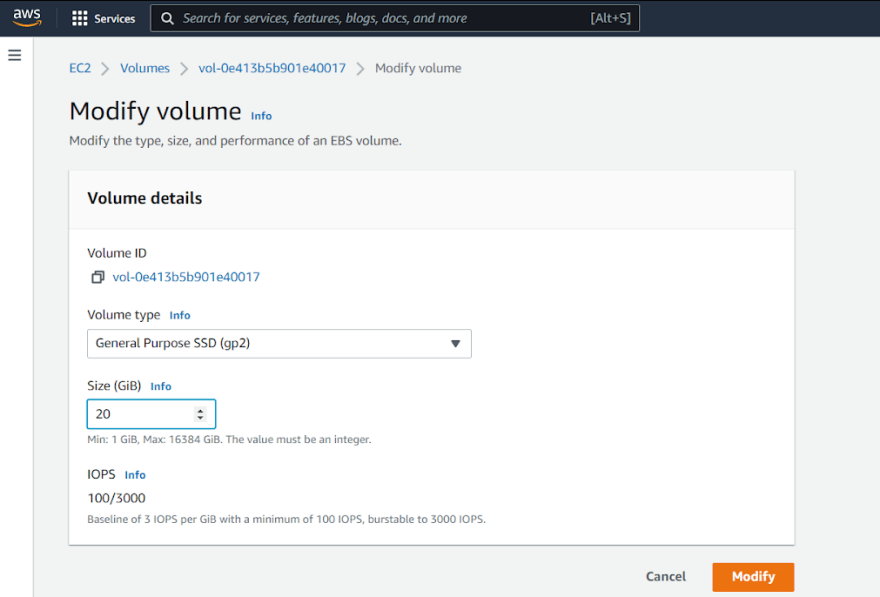
Right click on volume → Modify Volume
Change the volume as per your requirements. Here, I changed it to 20GB, maximum being 30GB.
Click “Modify”.
Congratulations!
But wait, the partition hasn’t been extended. Let’s get back to the terminal…
To check whether the volume has a partition that must be extended, use the lsblk command.
lsblk
Here, notice that dsk space is 20GB but our instance is still utilizing the 8GB partition.
Check Space usage:
df -h
To extend the partition :
sudo growpart /dev/xvda 1Check again using lsblk
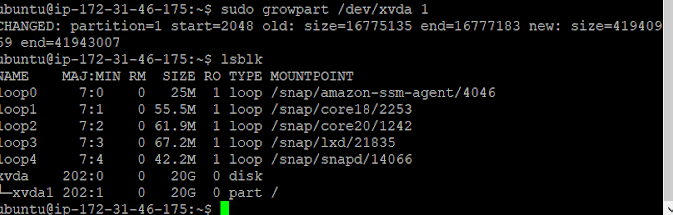
Now the memory storage has been increased successfully!
I had to install Tensorflow, but the “grpcio” package was causing some issues during Tensorflow's installation, so I installed “grpcio” independently.
First update pip3:
sudo pip3 install -U pipInstalling grpcio==1.36.1
sudo pip3 install grpcio==1.36.1
Now installing Tensorflow:
sudo pip3 install tensorflow
Ohh crap! Process killed!
Possible reasons: might have to disable cache due to less space on the hard drive. Still?!!
Thanks to StackOverflow! Execute:
sudo pip3 install tensorflow --no-cache-dirIn your app, modify the app.run() as follows.
if __name__=="__main__":
    app.run(host='0.0.0.0', port=80)
Here, host=’0.0.0.0’ means, any address would work, no such specification.
And, port=80 (HTTP), anything works, 22 (SSH), 443 (HTTPS)...
Remember how we modified the Inbound Rules for “All Traffic” while creating a security group. This is how it works!
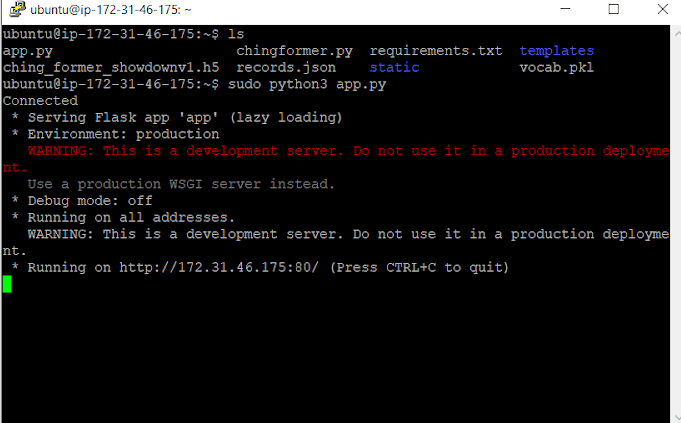
Run your app:
sudo python3 app.pyNow, you have your Standalone server running your API
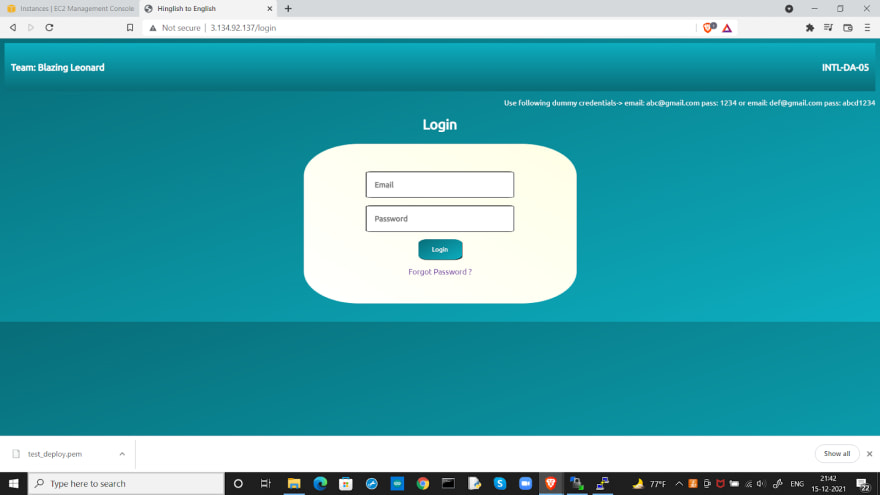
Visit the Instance IP appended with the port number:
Eg: 3.134.92.137:80
My instance IP
Now, we’ll implement terminal multiplexing, in simple words, to keep the current session running even after we close our terminal.
Stop your currently running app: Ctrl+C
Again, execute:
tmux
sudo python3 app.py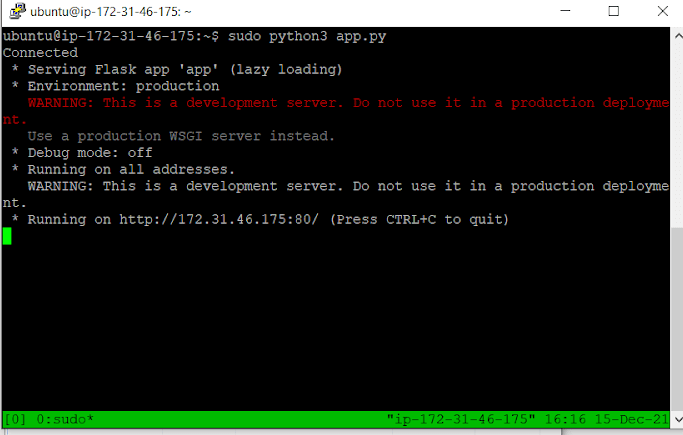
All done! Close your terminal, let your PC rest, and still flex your deployed Flask API from any device, any location.
Remember this is a development server for testing/demonstration, and not a production deployment. You can use gunicorn for the same. Gunicorn is a Python WSGI HTTP server that many developers use to deploy their Python applications. This WSGI (Web Server Gateway Interface) is necessary because traditional web servers do not understand how to run Python applications.
To end the terminal multiplexing, come back to your saved machine, using PuTTY.
Run:
tmux attachOnce inside the session:
Stop the app and run:
tmux detachTerminal multiplexing has ended. Now you will not be able to run your app after closing the current session.
Kudos!! A Deep Learning Flask API deployed on your AWS EC2 instance!
That’s all for this lengthy blog.
I hope you found this insightful!
Inputs, thoughts, improvements, suggestions are most welcomed!
.
.
.
.
.
.
.
Cover Image: https://www.google.co.in/url?sa=i&url=https%3A%2F%2Fwww.brainvire.com%2Famazon-web-service%2F&psig=AOvVaw2xnyUGPMUMrb_mWlSXQzn5&ust=1639846510264000&source=images&cd=vfe&ved=0CAsQjRxqFwoTCICUsamm6_QCFQAAAAAdAAAAABAV
29