
29
How to authorize requests for a private API behind a Netlify app
Long story short, Netlify makes it easy to get a lot of functionality for a website without dealing with many of the hurdles that developers had to deal with in the past.
However, one thing Netlify does not have an obvious solution for is authorizing requests for private APIs (unless you're on the business plan, in which case, just get your JWT and decode it as middleware on the API). For instance, I wrote an API that requires caching requests. Obviously, with a serverless framework, I cannot count on a Redis instance being available across multiple invocations of a function. Perhaps you saw my previous article in which I propose a way to handle this situation (in not the most secure way—I was desperate). Now, I have four ways to handle this situation. There is also a video in which I explain the concepts, if you would prefer that.
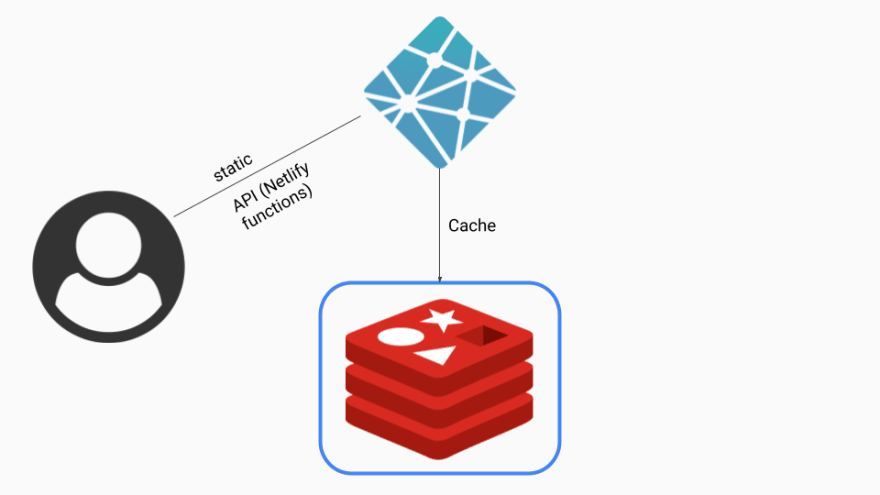
This method was my naive first choice when I started development of TickerTab. It is bad for a couple of reasons:
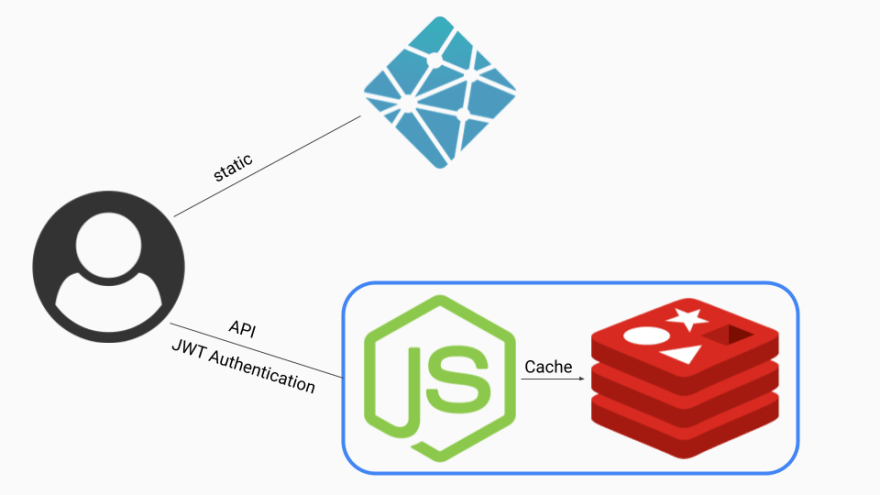
This is the method I described in my previous article. It is bad because Redis is super fast, so a brute force attack is possible. Use a long password if you do not want to be hacked, or use a better method.

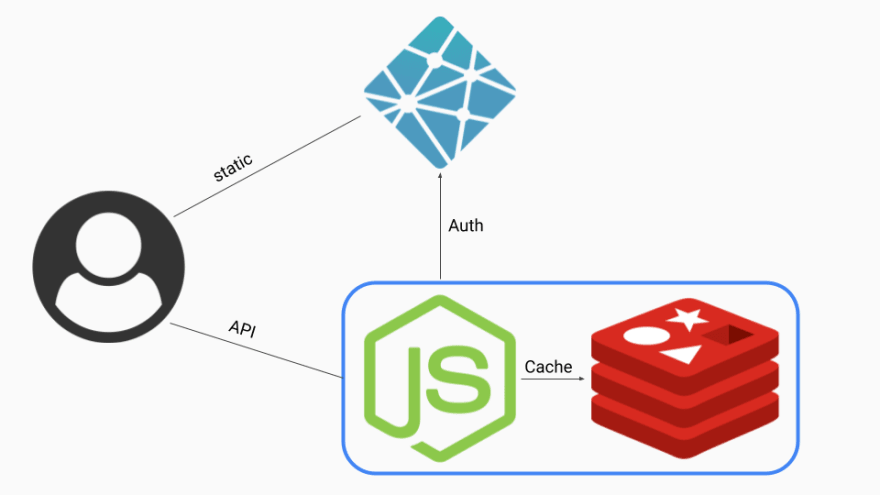
This is the best solution I have if you want to stay on the free plan. It is essentially the same strategy you would use to authenticate requests to a third-party API, and you can do caching (or any other fancy things that require a true server) on a persistant machine.
Since Netlify Identity uses JWTs, the best solution is to get your secret key and decode the JWTs on your server. This option, however, requires the business plan, so it is fairly expensive. If you are just starting, I would suggest you use method 3, and once you can afford the more expensive plan, switch to method 4. You might have noticed that they are structually quite similar, and switching should require only a minimal amount of refactoring.
29