24
Introducing Angular Mini Blog Series - Part 1
In this series of blog posts, we are going to learn about Angular from beginning. I will try to keep the blogs very short, crisp and easy to understand.
Go to Angular's official website if you want to learn basic stuff like:
- What Angular is
- How to create a basic application
- Generate Components
- Start Angular Live Server
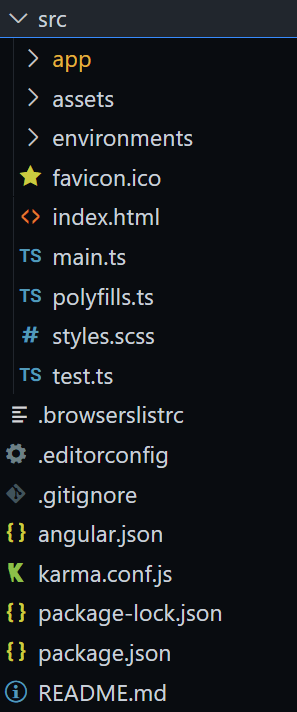
- Basic Directory Structure
Here, we will get started with:
- Components
- Modules
- How Angular Apps loads
- AppModule
You know about <html>, <head> and <body> tags and so on right? These are native HTML elements that are provided to us. But what if we could create our own HTML elements?

Yes, this is where components come in! Components are typically custom built HTML elements, and each of these elements can instantiate only one component.
The best part is - they are reusable, which means that one you create a component, you can utilize it multiple times in your application! Also, if you need to modify it, simply change one file and those changes will be reflected wherever you have used this component! Some popular examples of components are Navigation Bar, Footer, Side Menu etc.

Angular is not present as one monolithic code base. Instead, it is divided into modules which are present in different locations and their utility is independent of each other. Modules provide the highest level of abstraction available within the Angular framework. Everything in your app is ultimately structured around modules. This is powerful! It means that you can easily encapsulate code within a module and share or reuse it throughout your app.
We use @NgModule decorator to declare a class as module.
@NgModule decorator contains below properties:
- declarations: It includes component, directives, pipes that belongs to this module.
- exports: It include component, directives, pipes which can be accessible to other NgModule.
- imports: Contains Modules whose exported classes needed by this module.
- providers: Contains the services generated by this module. bootstrap: Initialize root component
@NgModule({
  declarations: [
    AppComponent
  ],
  imports: [
    BrowserModule,
    AppRoutingModule,
    FormsModule,
    CoreModule
  ],
  providers: [],
  bootstrap: [AppComponent]
})
export class AppModule { }
Do you see this index.html? This is the page that's mainly rendered by Angular. It consists of only 1 component - <app-root>. This <app-root> is the root component which encapsulates all the child components, i.e the components you create and bootstraps them to render everything inside it on index.html.
<head>
  <meta charset="utf-8">
  <title>Demo Angular App</title>
  <base href="/">
  <meta name="viewport" content="width=device-width, initial-scale=1">
</head>
<body>
  <app-root></app-root> //only this component will be present
</body>
</html>When looking at the Angular module system, all things must begin with the app module. The root app module is a necessary portion of every Angular app. By default, this module is named AppModule, although it is possible to rename this module. The AppModule is the entry point to your app.
A newly generated AppModule would look like
import { BrowserModule } from '@angular/platform-browser';
import { NgModule } from '@angular/core';

import { AppComponent } from './app.component';

@NgModule({
  declarations: [
    AppComponent
  ],
  imports: [
    BrowserModule
  ],
  providers: [],
  bootstrap: [AppComponent]
})
export class AppModule { }
It is a good practice to keep this file as minimal as possible. This can be done by importing only those modules that are absolutely necessary for your app to load initially. Or only declare Angular components, directives, or pipes that you want globally available.
If you enjoyed this article, I recommend you to stay tuned to my Twitter.
This is my first time on Dev.to so I would really appreciate if you would like my blog or share constructive feedback!💖
In the next blog, we will cover data binding and it's various types so stay tuned! ✨
24
