29
Learn SQL: Microsoft SQL Server - Episode 1: Introduction

"Over the last decade, the amount of data that systems and devices generate has increased significantly. Because of this increase, new technologies, roles, and approaches to working with data are affecting data professionals" -
Microsoft
SQL is one of the most sought after skills, for one simple reason; Data is everywhere!
Organisations are collecting tons of data, about their customers and employees interactions with various channels whether it is online, offline, in-store sales, purchase data, employee data, employee interaction data, financial data and tons of third-party data.
All this information ends up in a database or databases, where companies will analyse the data, to make sense of it and ultimately make critical business decisions.

Organisations who are not using data are being left behind, that's the reason why many organisations understand the value of data and the advantages of data analysis. To provide analysis you need SQL skills.
Whether you are trying to become a financial analyst, marketing analyst, digital analyst or data scientist. Having solid SQL skills are a must and empowers you.
We will be using Microsoft SQL Server 2017 Express Edition, this version is free, whatever you will learn in this version applies to other versions as well.
You can download it by using the link below:
SQL Server 2017 Express Edition
Alternatively you can browse to find it by searching for sql server express 2017 in your favourite browser.
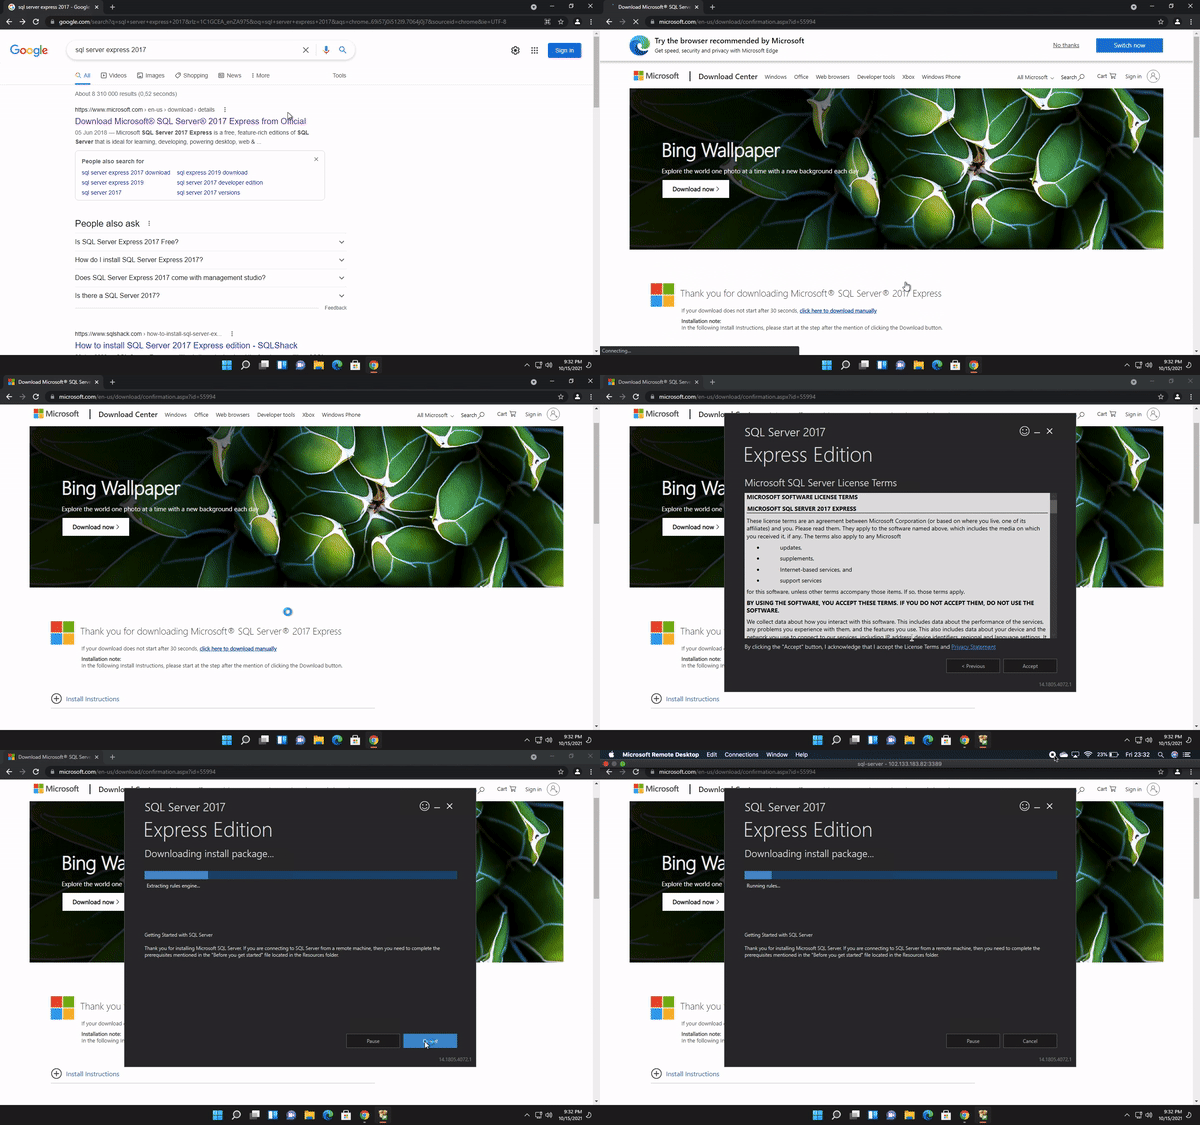
Once you have downloaded and started installing, it will take a while before the installation is complete.
After the installation has completed successfully, you will see a bunch of information that shows you exactly in which directories the files are in case you need them.
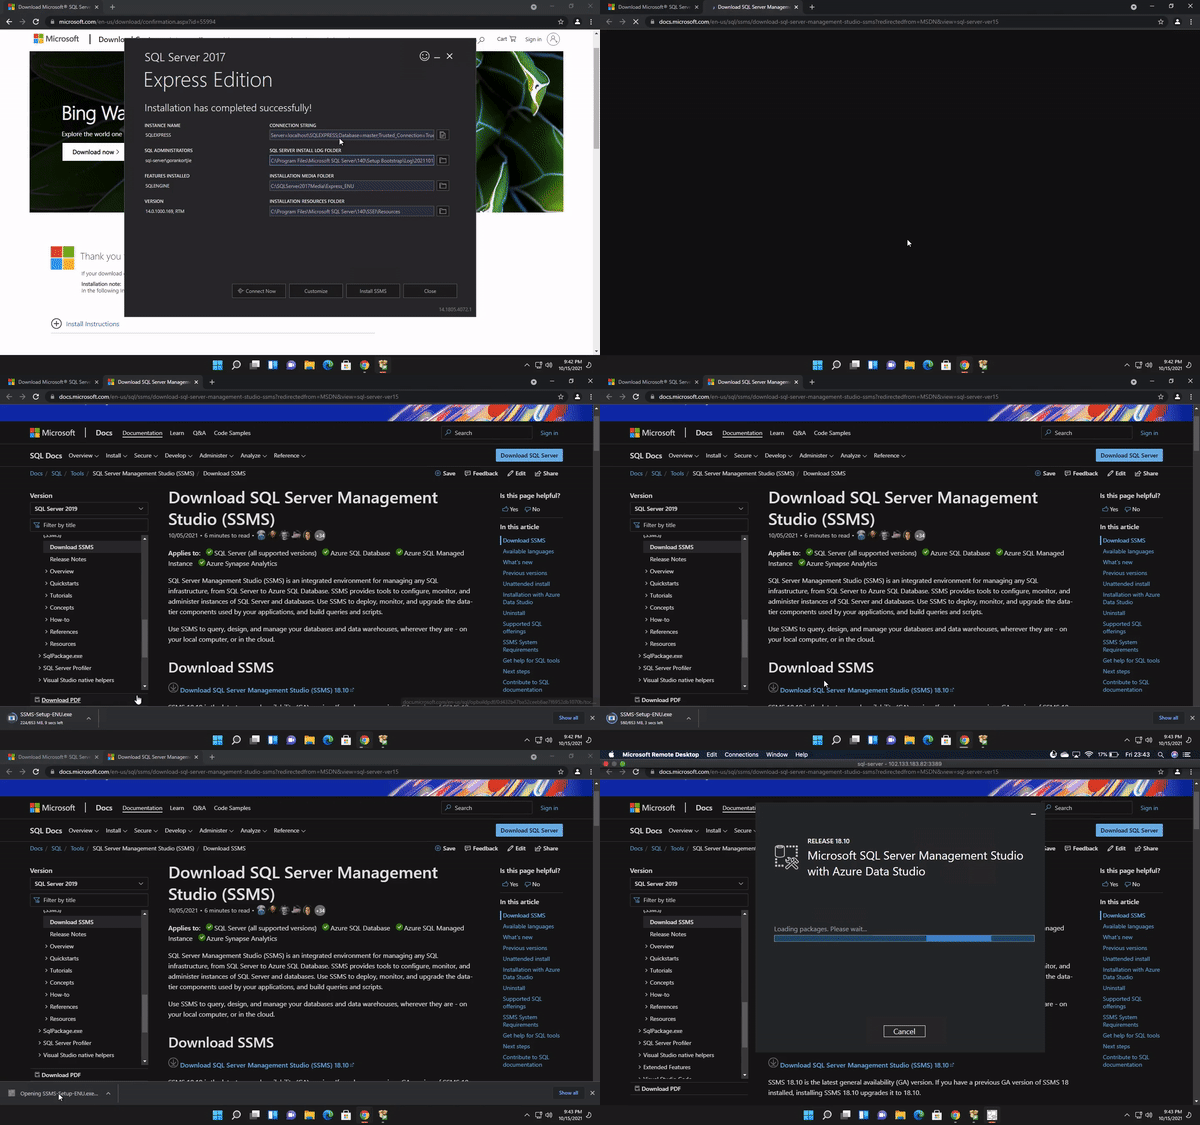
Below we will see a button that reads Install SSMS this is the SQL Server Management Studio. It is where we will be writing our sql queries and all the manipulation.

What we have been doing up until now is installing the database which is in the backend and SSMS is the frontend we will be using to manipulate our data and interact with the database.
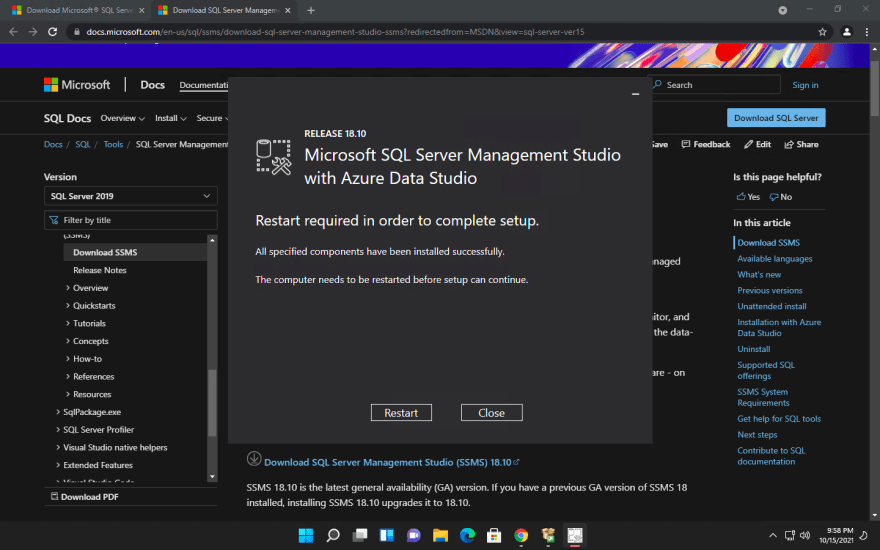
After the SSMS is installed, we need to restart the computer. Make sure to save and close all the important programs, then restart.

Once we restarted and are back on our desktop, we can find the SSMS by searching for it. Open it up and we will be prompted to enter the server name and authentication, just leave it as is, since it is your default connectivity if we are connecting to the server that we just installed.
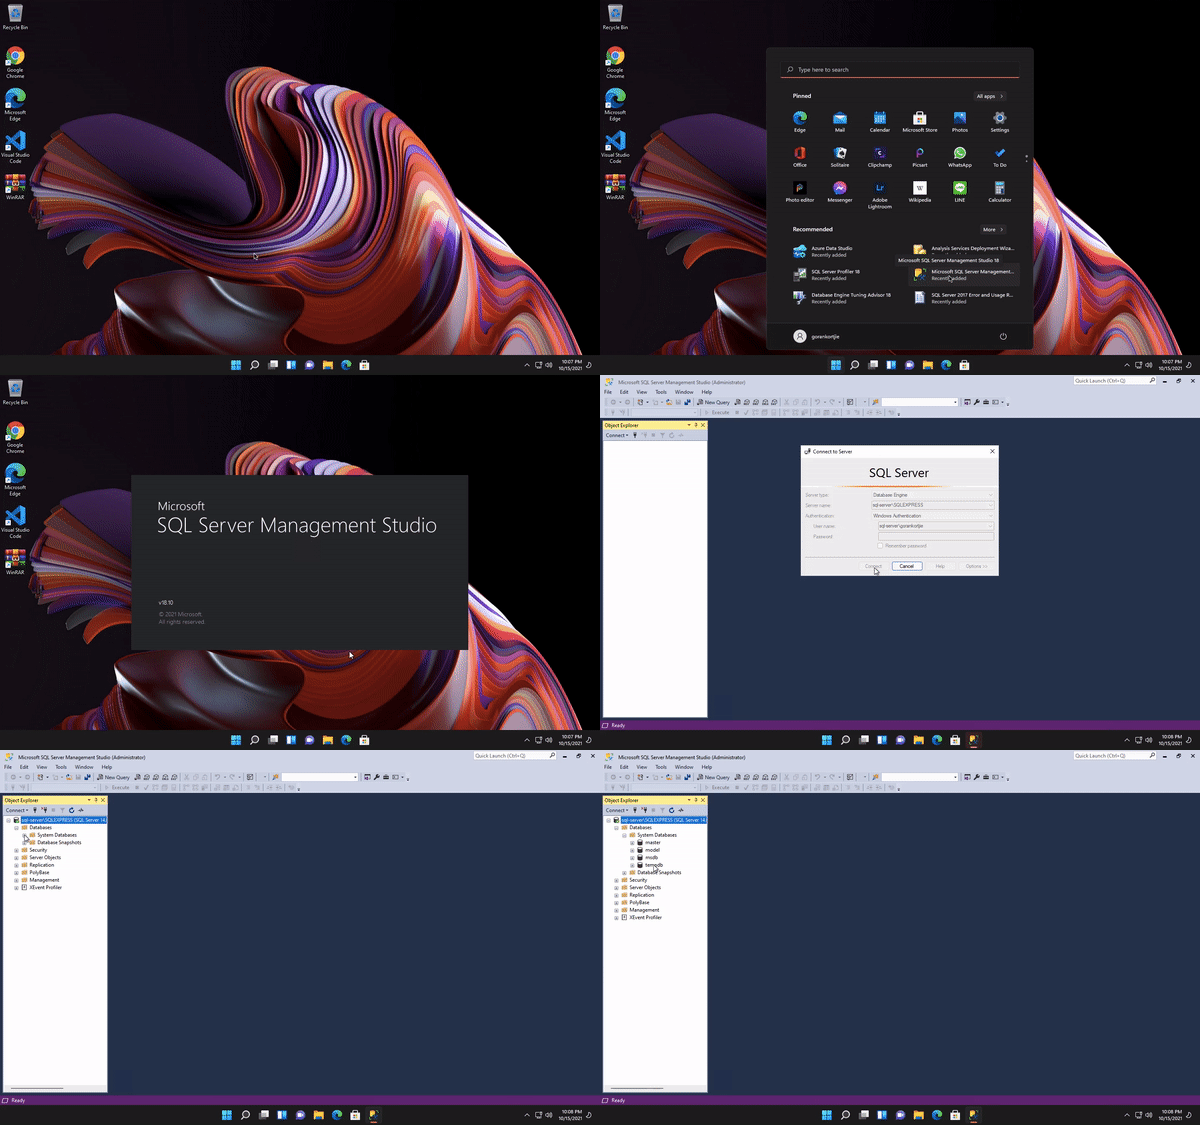
If you have credentials to another server, then you will enter it here.

Before proceeding to write SQL queries, let's first look at how SQL Server is structured.
In SQL, up on top we have a server, think of it as a physical machine we are connecting to.

Under each server we can have multiple databases. Databases are entities containing all the data structured in various tables.
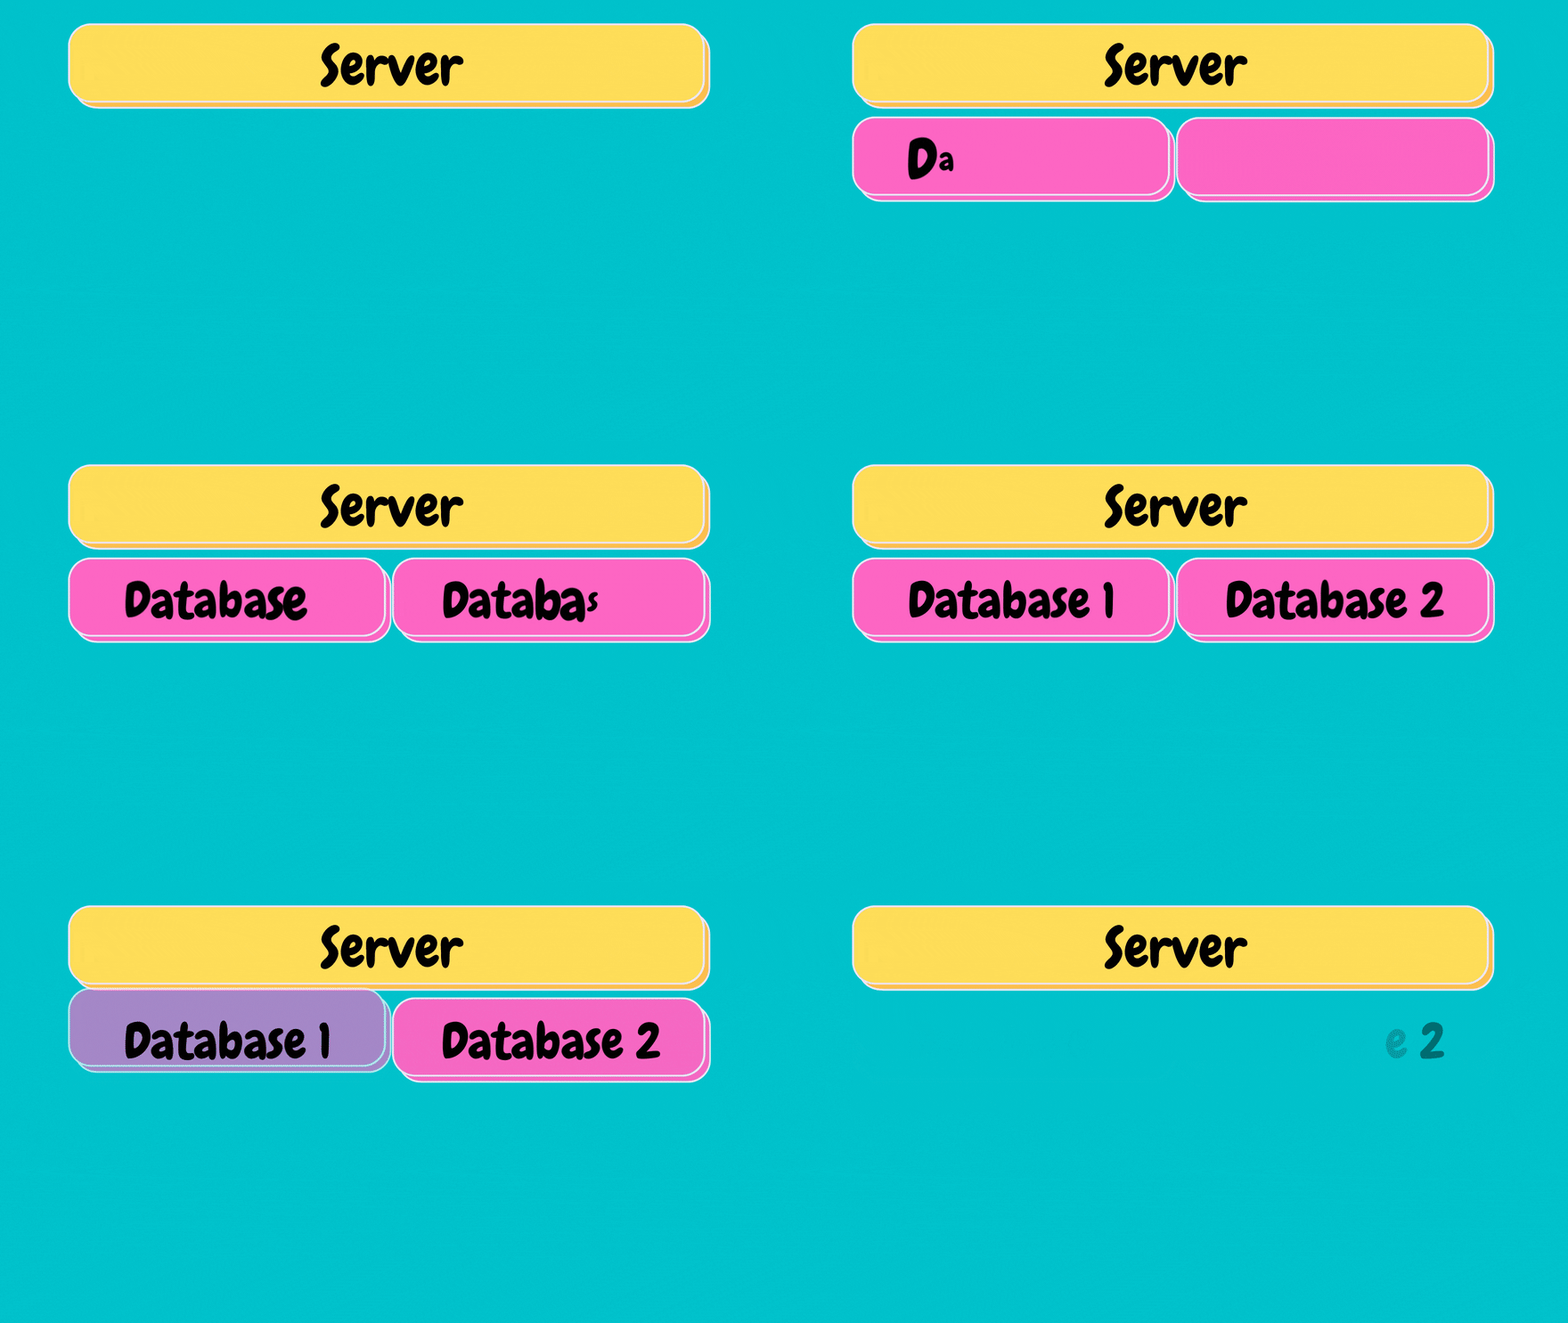
Under each database we have schema's, think of schema's as the ownership structure. Essentially meaning within each database we can have different owners. For instance, sales team that owns their own schema and objects underneath and another schema that belongs to customer service.
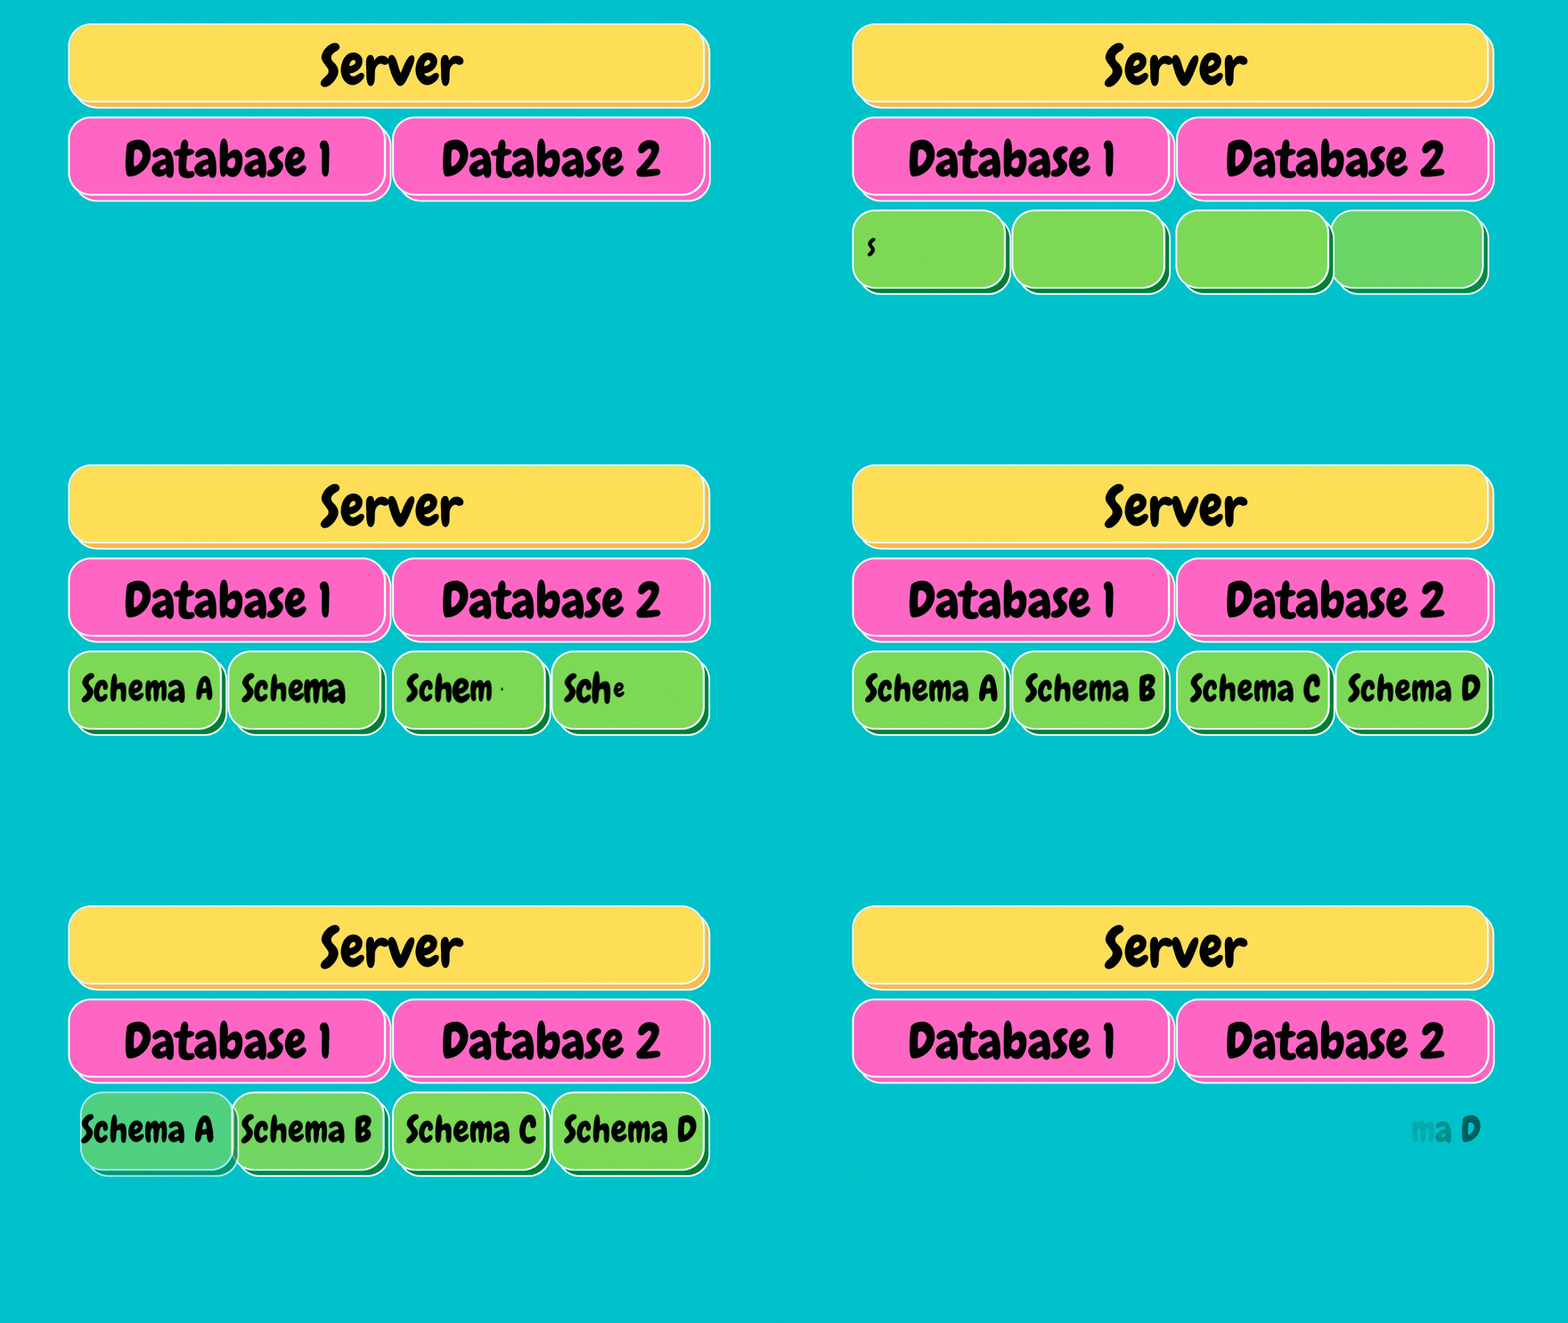
Under each schema we have what are called objects. Objects are entities such as tables, stored procedures, views etc...
We will discuss this more in detail in comming chapters.
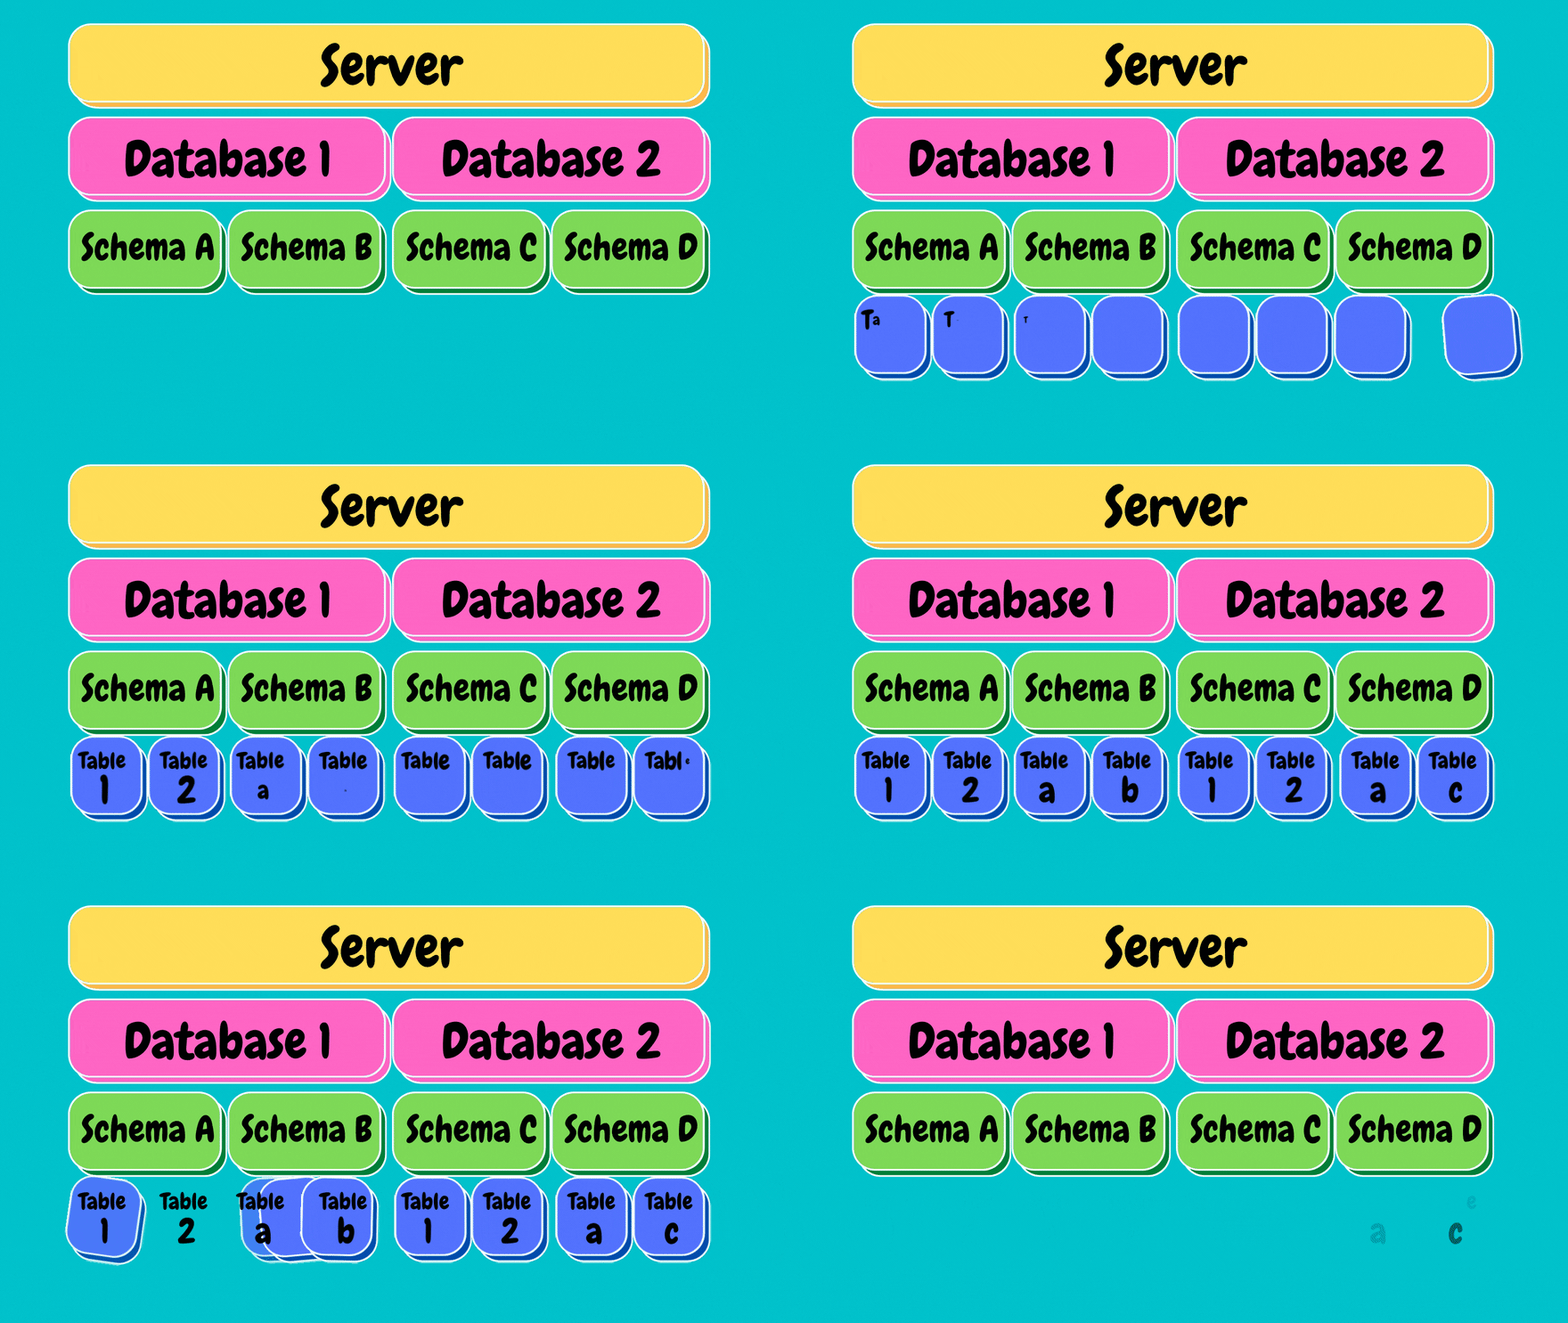
Our main focus will be on tables.
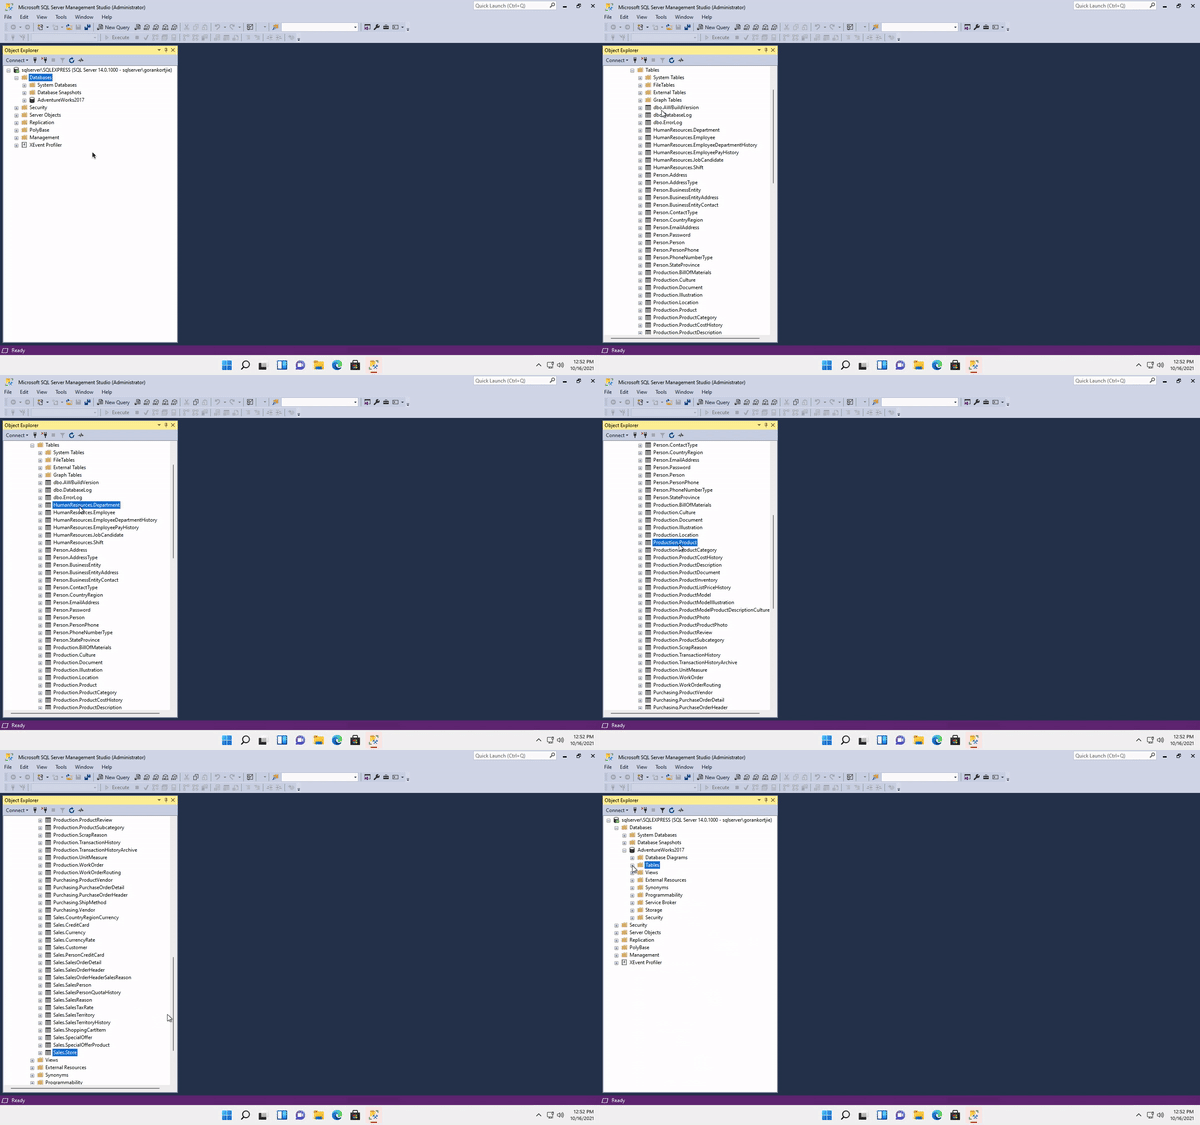
Let's see how this structure looks inside of SSMS
As you can see, we are already connected to a server, as shown right above. We are able to connect to many servers in this interface and all of them will appear underneath each other.
We can connect to another server by clicking on file, at the top left, and choosing the Connect Object Explorer option. This will open a window, which requires us fill in the details of the second server to access that particular database. We can click cancel since we are not connecting to another database.

Expand the server, underneath the server we will see the Databases, if we expand it we will most likely not see any databases, because we haven't created any databases yet.

We will be using a demo database in order to get familiar with
SSMS. This demo database is called AdventureWorks. You can download it by following the link below.
Remember!!! choose the OLTP, AdventureWorks2017.bak file
Once downloaded, we store it somewhere easy to find, since we need to locate it from SSMS to restore AdventureWorks on our newly created database.
Store the .bak file in your C:Drive/Program Files/Windows SQL Server, for convienience.
Back on SSMS, right-click the databases folder and choose Restore Database, a window will open.

We need to choose the device option and then click on the ellipsis on the right-end of the window, they look like three dots **...**
A window called select backup devices will open, click on the add button on the middle-right of the window. We need to find the .bak file we downloaded earlier. Once we find it, we need to add it and click OK. Then click OK again to add it to the databases folder.

When we click on the AdventureWorks database, it will show us another set of folders, this is how a database organises objects underneath it.

We will be looking at Tables, this is where all the data gets stored, here we can see all the list of tables. Table are prefixed with the schemaName. The schemaName defines who owns the schema.
If things are not completely clear, do not fret. Things will become more digestible as we continue on this journey together.
On the SSMS menu options above. When we click on New Query it will open a window which is where we will write all our SQL queries. On the left of the menu you will see a dropdown, it will indicate which database we are currently connecting to.
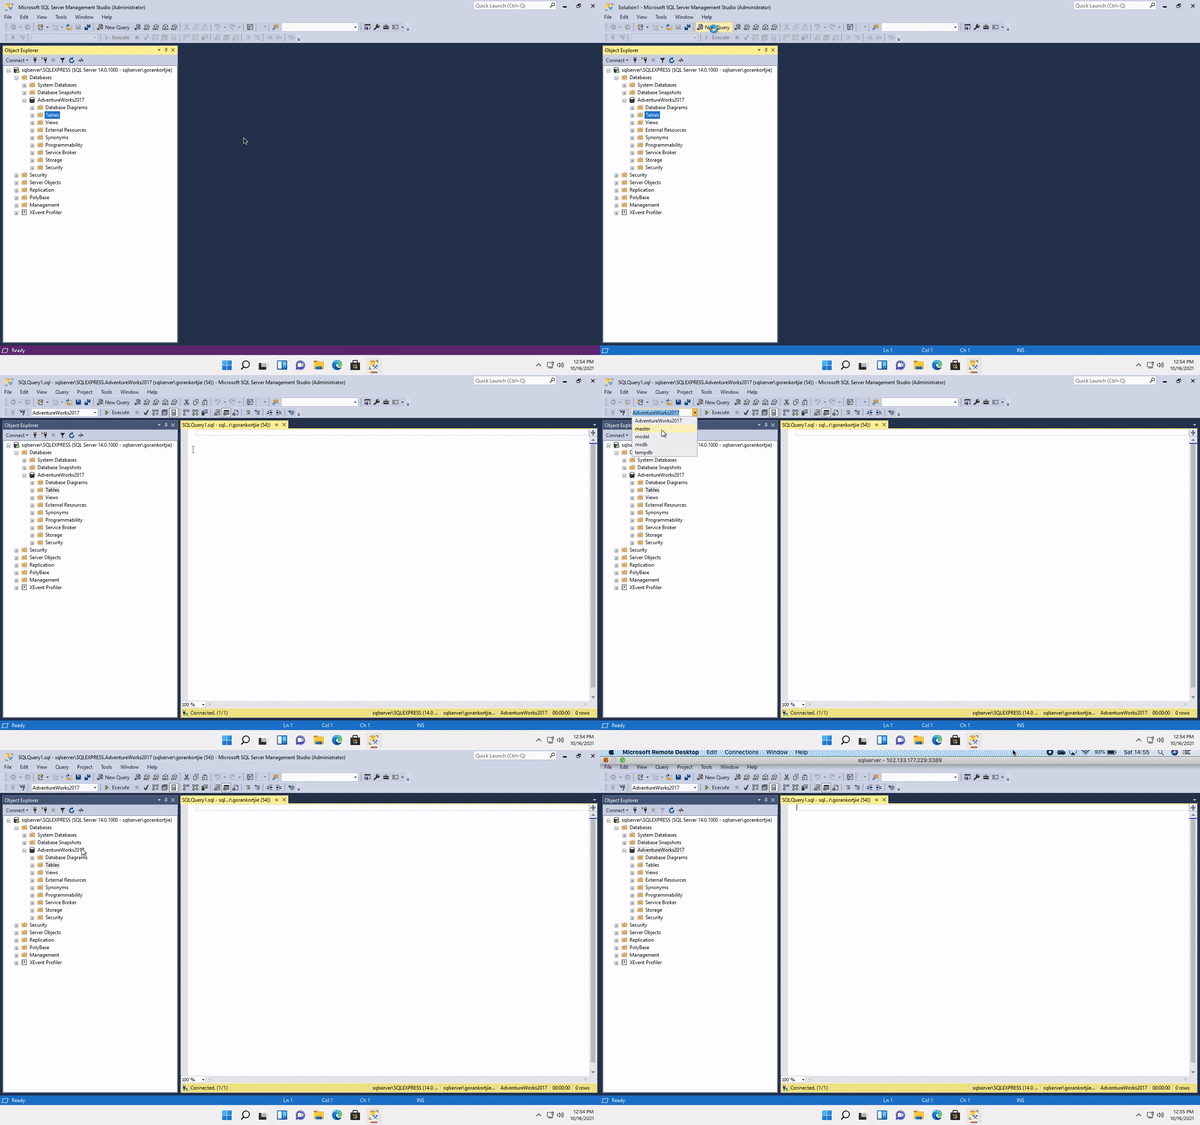
When you first click on
New Query, it might connect to the master database, Remember if you want to run a query correctly, you need to be in the correct database. We won't be using the master database because it is used by SQL internally.

Most of the data that is organised in SQL Server is organised in a normalised way.
Normalization is the process of breaking up data into smaller chunks that are less redundant. It allows us to insert, delete and update tuples/rows without introducing database inconsistencies.
It stores data in a way, that prevents us from changing a data point in multiple places. This means when we change a data point, the change is reflected everywhere.

This is also meant to remove inconsistent dependency, which means to store data in a way, that makes logical sense.
Let's say you have a table about employee's, in that table you would only store information about the employee's and not every single detail about a department that the employee belongs to. The department information will reside in a department table.
We can use a table visually understand the concept of normalisation. In the example below, we have a customer table that contains information about all the customers. Each row represents a different customer.
| Customer ID | FirstName | Lastname | Company | State | Main Store |
|---|---|---|---|---|---|
| 1 | James | Butt | Microsoft | Dallas | Mall |
| 2 | Josephine | Dimson | Dell | Washington | Strip mall |
| 3 | Rib | Collar | Dallas | Mall | |
| 4 | Barry | White | Microsoft | California | Square |
| 5 | Ian | Sims | New York | Square | |
| 6 | Michelle | Niel | Asus | Texas | Mall |
| 7 | Greg | Lawson | Dell | Washington | Strip mall |
This is an example of denormalised data.
Notice how we have inserted the same company name for different customers. If for instance, Microsoft decided to change its name to Tfosorcim. Then we would need to change the company name in multiple rows and this could result in errors or inconsistencies. The same applies to the State and Main Store columns.

We can find all the data we need for a single customer or multiple customers from this approach since it's all stored in one table.
A disadvantage of this way of storing data is how it cost us storage to have the same data point inserted at multiple times. This is where creating a normalised database can benefit us. Instead of creating one giant table, we create multiple tables.
| Customer ID | FirstName | Lastname | Company | State | Main Store |
|---|---|---|---|---|---|
| 1 | James | Butt | 1 | DA | 1 |
| 2 | Josephine | Dimson | 2 | WA | 3 |
| 3 | Rib | Collar | 4 | DA | 1 |
| 4 | Barry | White | 1 | CA | 2 |
| 5 | Ian | Sims | 4 | NY | 2 |
| 6 | Michelle | Niel | 3 | TX | 1 |
| 7 | Greg | Lawson | 2 | WA | 3 |
| Store ID | Store |
|---|---|
| 1 | Mall |
| 2 | Square |
| 3 | Strip mall |
| State ID | State |
|---|---|
| DA | Dallas |
| CA | California |
| WA | Washington |
| NY | New York |
| TX | Texas |
| Company ID | Company |
|---|---|
| 1 | Microsoft |
| 2 | Dell |
| 3 | Asus |
| 4 |
This is an example of a normalised database structure.
As you can see, we still have one customer table with all the columns, But we have added additional tables called Store, State and Company. These additional tables have ID's associated with their different data points.
Instead of added the company name in each row for a customer, we add the ID of a related table that points to that data. So now for example ID number 1 means Microsoft.

If for instance, Microsoft were to change its name, we would no longer need to change the name in multiple places, all we need to do is change it in one location and all tables that use the data point will reflect that change.
We get the advantage of less storage since we are not repeating ourselves by adding in the complete data point but rather the ID.
The downside of this approach is we need to look into multiple tables to find the data that we need.
That concludes the introduction to Windows SQL Server, SSMS and SQL Data Structures, Now that we have setup our database, next up will be quering a database. We still have a long way to go so stay awesome and stay zen.

29
